


Description
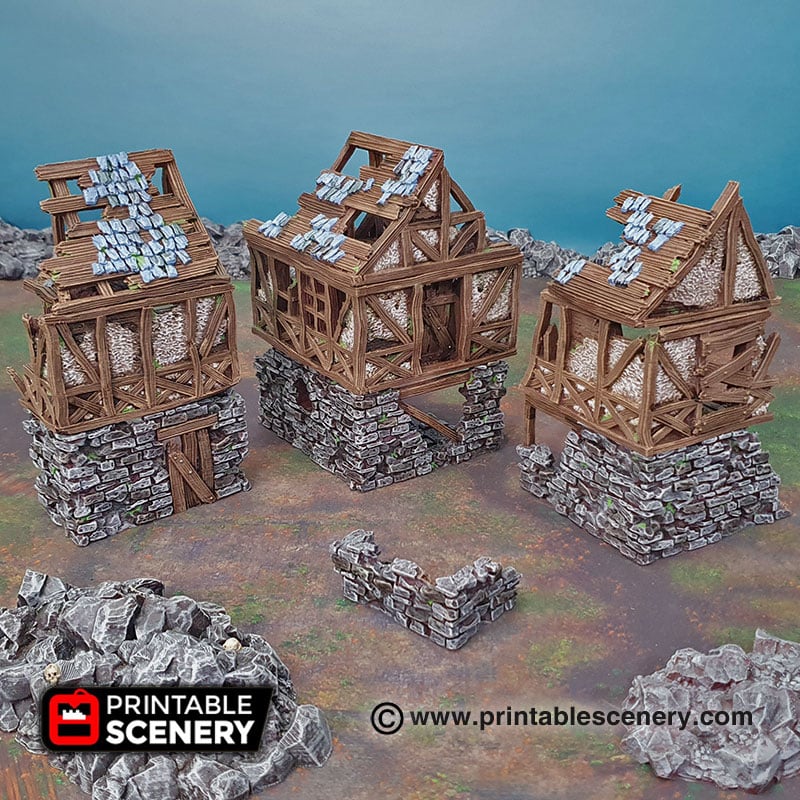
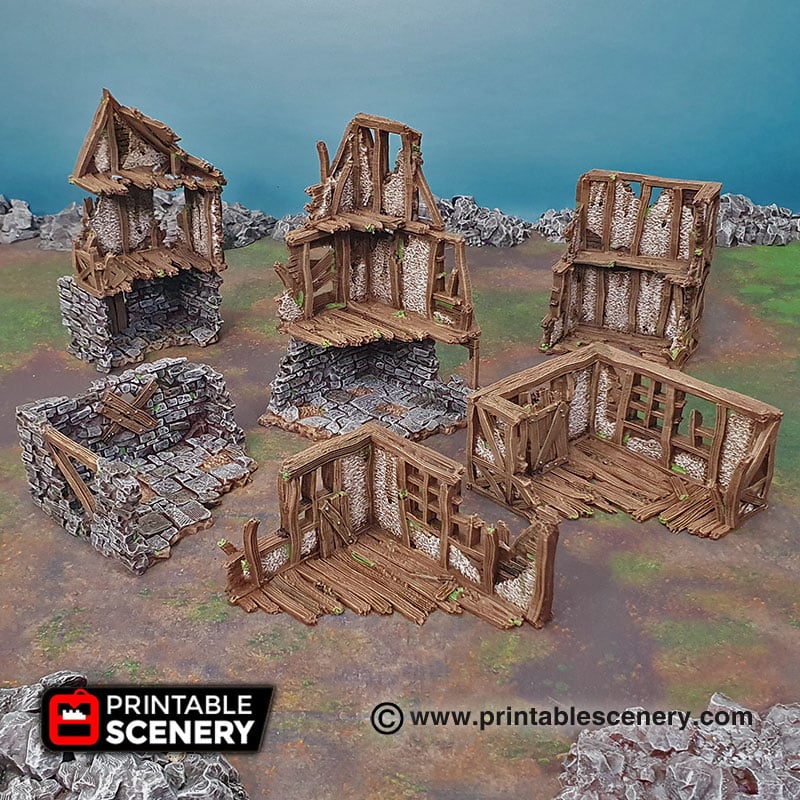
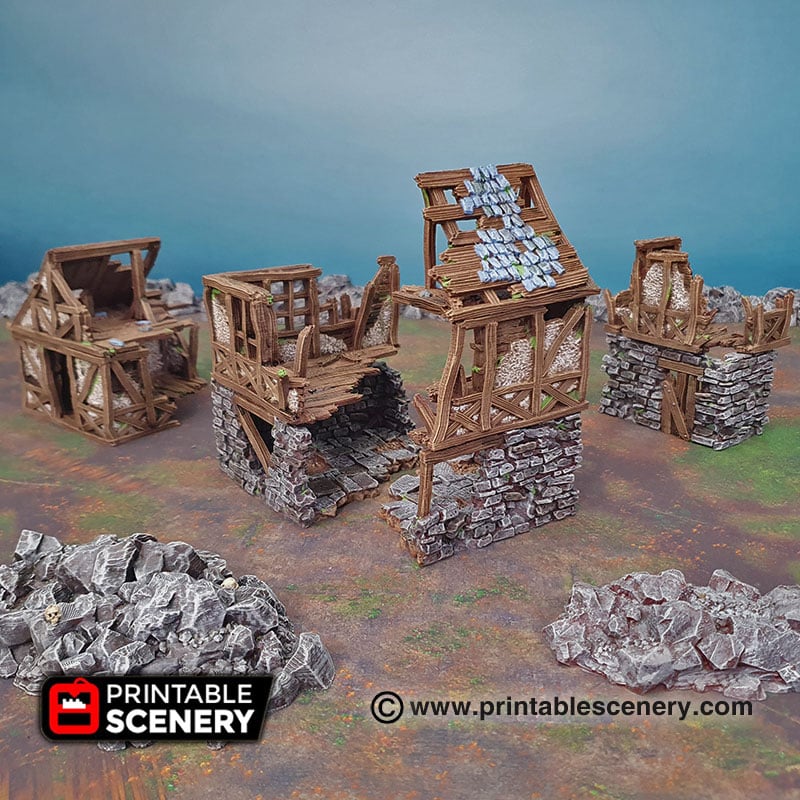
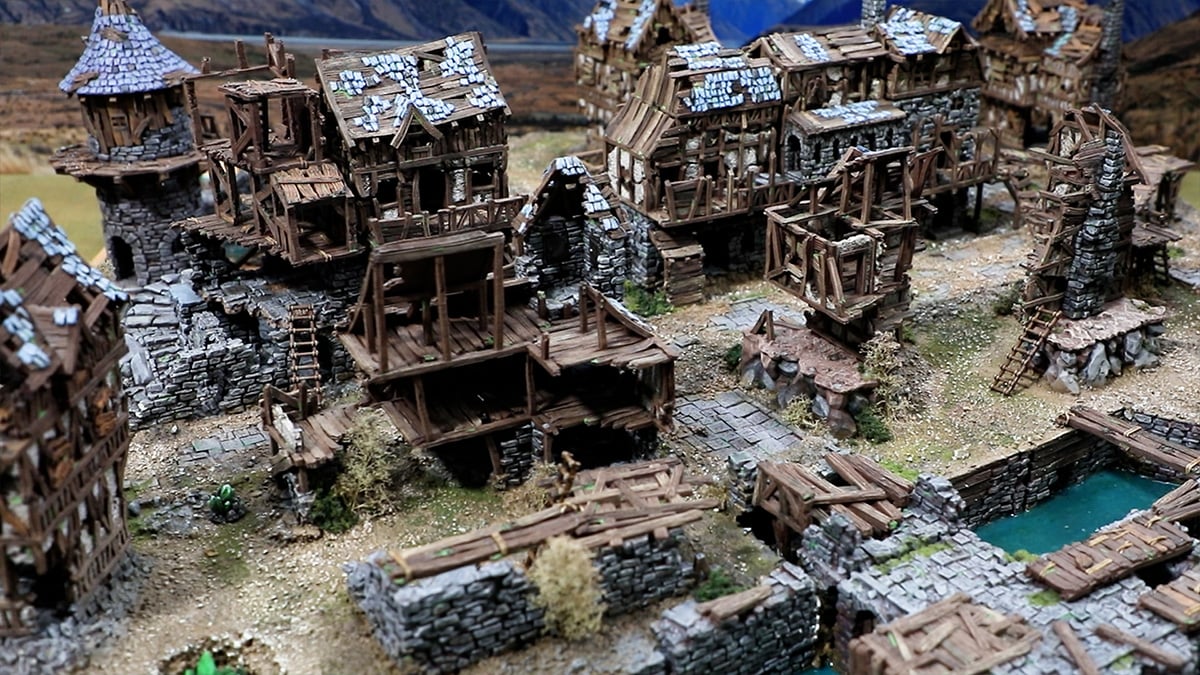
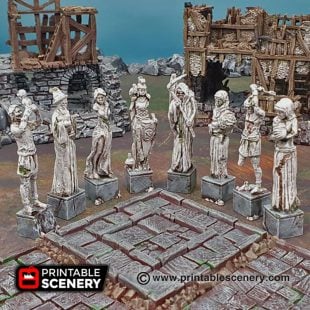
They had been lost for days in the winding streets of the ruins. All the corners had started to look the same, or maybe that was them going round and round in circles…
Notes:
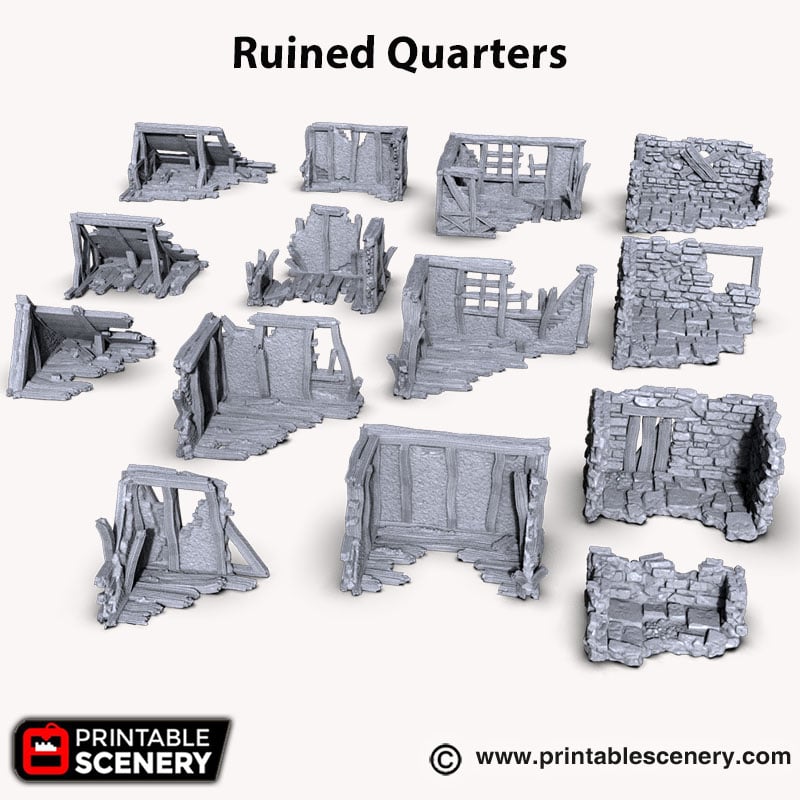
- Right-click on the image below and “Save As” to download the reference sheet for this pack.
- Product measurements can be found in the image gallery.
- First Published version 1.1


epic –
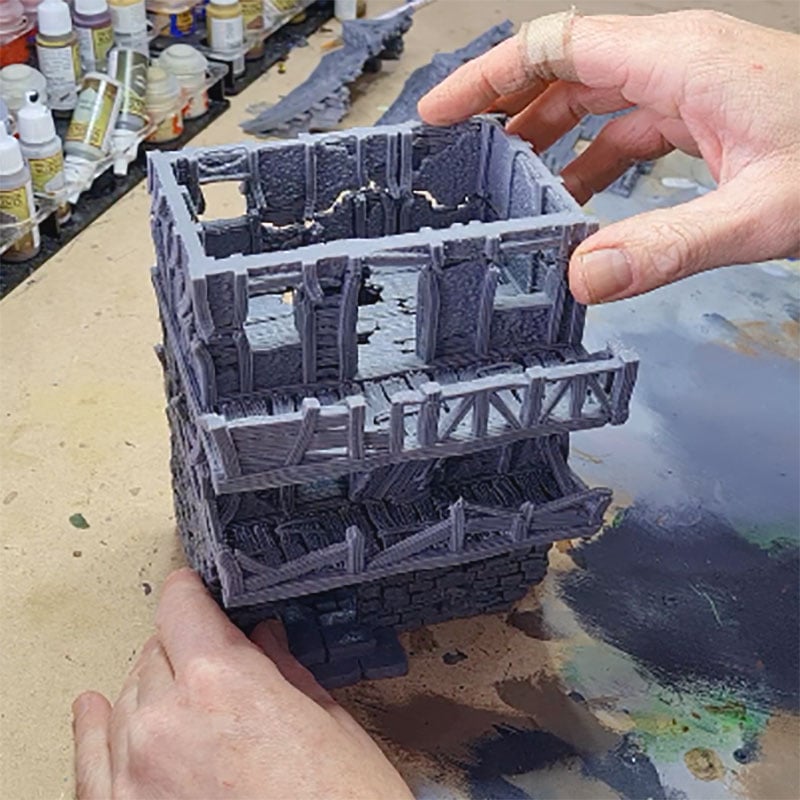
What is the biggest size (cm or inch) of these parts?
Nicholas Jebson (verified owner) –
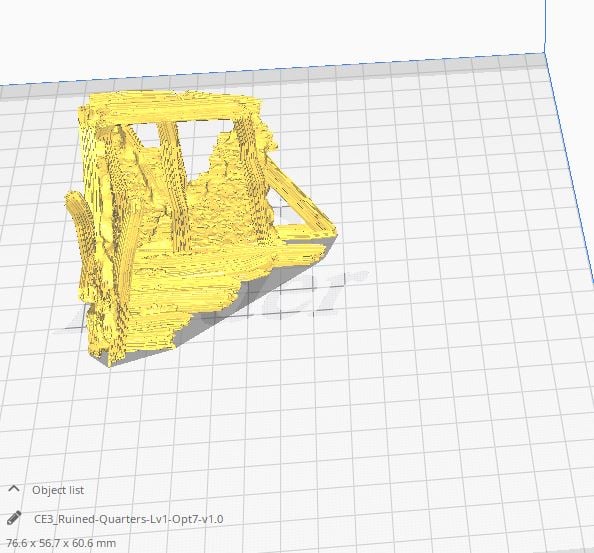
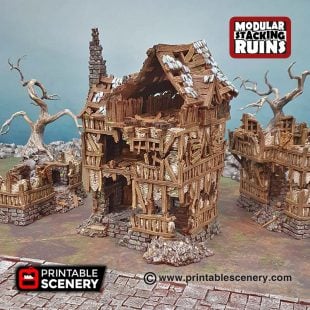
The largest section of the ruined quarters is 13.42cm x 6cem x 11.38cm.
epic –
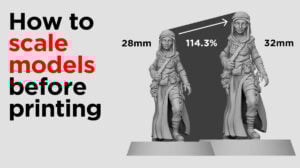
What size have these files if I print them for 28mm? Dunno if they are too big for my printer.
Nicholas Jebson (verified owner) –
They are pre-scaled with 28mm miniature wargaming in mind, so no additional scaling is necessary
Richard Baker (verified owner) –
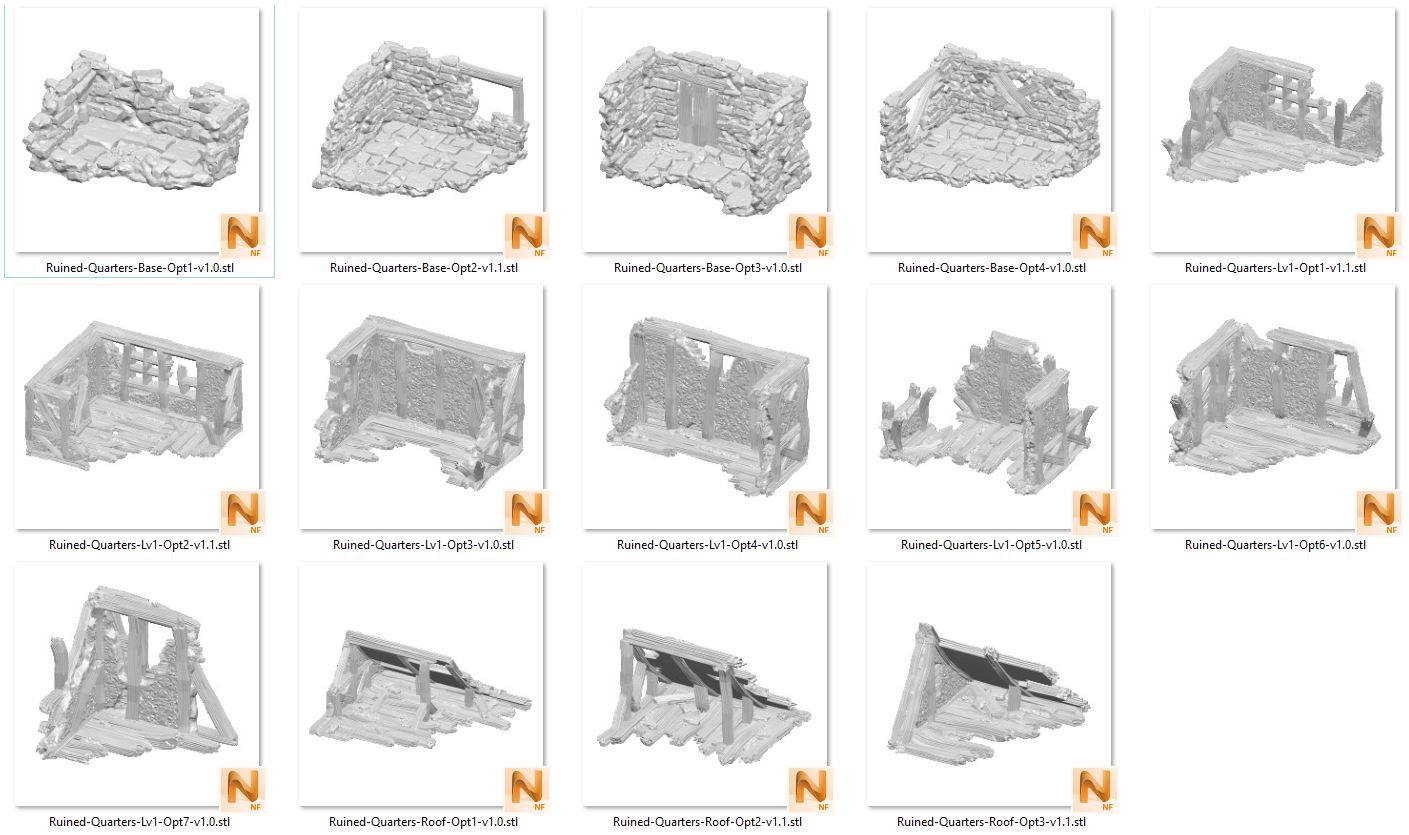
I’m printing Ruined-Quarters-Base-Opt2-v1.1 and Ruined-Quarters-Base-Opt4-v1.0 and they seem to have straight horizontal spans for the wooden beams. How are these going to print without supports on an FDM printer?
Nicholas Jebson (verified owner) –
As they are a flat traverse, most slicers now have a bridging setting that allows them to print a flat line in the open air between 2 anchor points. The extruder keeps tension on the filament as it is extruded to stop its sagging. For instance, in Cura you can activate bridging by going to: Preferences- configure cura- settings and scrolling down to the Bridging settings under ‘experimental’ (though it has been so well proven now it should just be a function in its own right).
Richard Baker (verified owner) –
Thanks Nicholas! I actually found this setting last night after hours of head scratching!
Nicholas Jebson (verified owner) –
No problem, happy to help.
Pedro Baltazar (verified owner) –
I’m having difficulties successfully printing base options 2, 3 and 4. Due to the high amount of random shapes and detail on the floor part of the bases, my printer has to jump a lot from one point to another. This in turn means the filament gets retracted a bunch of times in a short time frame, which at some point during the print results in enough damage to the filament string to make it impossible to pull through gear rotation.
I have already tried messing with the gear tightness to try to prevent this from happening, but no matter how light the pressure is set up to, the constant retractions always manage to tear through the filament.
Mike –
Hi Pedro,
Do you have z hop and retraction enabled? From what you’re describing it might be worth trying to print with them turned off and see if that helps. Or if you don’t have Z hop enabled give that a try aswell although that’s usually due to fix the extractor hitting parts of the model as it moves about.
ken long (verified owner) –
Will these resin print without supports?
Jo Boorer –
I would recommend using supports when printing in resin
jakewhebbe (verified owner) –
Hello,
Got this set and close to completing a good portion of the prints. i noticed this set does not have notches for ease of modular stacking and unpainted the levels seem to slide around alot i am concerned that they may fall while playing with the set. at this point i am contemplating glueing them. ( not a huge deal ) but wonder if you have a solution for prints of this nature.
i am still new to 3d printing and this could a result of a variant in the PLA i chose.
Jo Boorer –
Thanks for pointing this out. I we add this to our model updates list.
emanuelelambiase –
Hello,
the external layers of models on your site are quite smooth and without the usual “lines” that are present on last layer of a models after the 3D print.
Which is the method you can suggest to reach such external smooth layer?
Thank you in advance.
Jo Boorer –
For our tips and tricks we have an article at this link. https://www.printablescenery.com/2023/05/27/tips-for-painting-3d-printed-models/
icristian.hrimiuc (verified owner) –
Could you please add a version with alignment pins? They slide too easily when stacking which makes them hard to present and carry 🙁
Matt Barker –
This model designed to be glued together in different combinations, the alignment pins would be visible if you only wanted to use the bottom levels. However we could make a set with alignment pins and add it in a separate folder.
icristian.hrimiuc (verified owner) –
Hi, thank you for your answer 🙂 Gluing the model together indeed solves the sliding problem, but it forces the user to print, paint, and store each piece too many times. The initial design is awesome, I do not wish to change that, having stackable pieces that can be arranged and combined at any point allows for easier storage, transport, and overall usage. I just wish they had some sort of alignment pin system that helps them stay vertical without restricting the initial recombination design, something similar to the Hagglethorn Hollowor system. I’m writing here as a suggestion, if you have time for it, as I am sure others will agree this would be an improvement to the models.
imgnomish1 (verified owner) –
Having serious issues with the Bambu slicer erroring out on the Roof opt1, and roof opt2 and opt3 have need of support.
Matt Barker –
Hi could you please email [email protected] with a photo of the issue and we can check it out for you
igougogamer (verified owner) –
Hi there, would these ruins need rescaling for the modern size of the Age of Sigmar/Warcry miniatures?
Thank you
Joanne Boorer –
Hi, the Shadowfey range buildings were made for 28mm minis but the boarded up doorway of this building is high enough for 32mm minis.