Building a Legion Desert Table
Taking your 3D printed terrain and creating an awesome-looking wargaming table is really easy. This article will focus on building the Sci-Fi Settlement terrain into a futuristic desert wargaming table for use in Star Wars Legion scenarios and any other sci-fi wargames or RPGs.
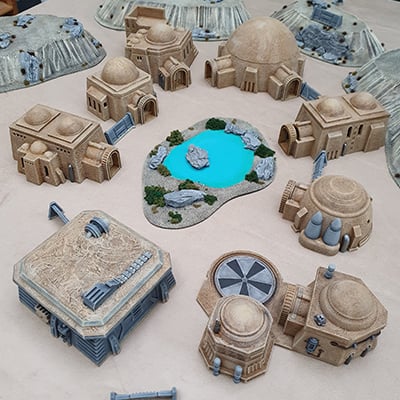
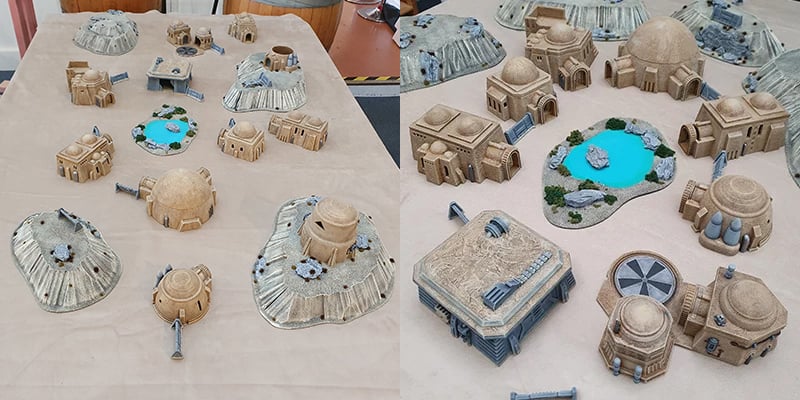
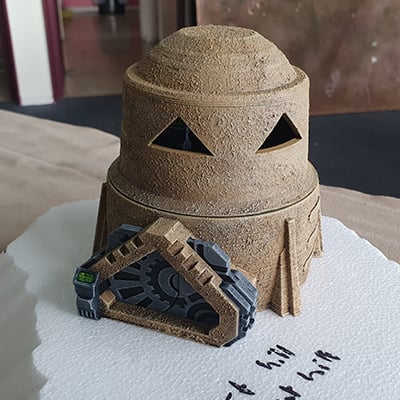
We used the Droid Yard, House and Grain Silo, Watch Tower, Storm Bunker, and the Adobe Hut A, Hut B, Hut C, and Hut D to create a diverse desert village. Once we had the buildings, we built hills and an oasis to fill out the table.
You will need
List of paints used:
- Army Painter Desert Yellow Spray
- Army Painter Matte Black
- Army Painter Desert Yellow
- Games Workshop Agrax Earthshade Wash
- Army Painter Arid Earth
- Army Painter Jungle Green
- Army Painter Gun Metal
- Games Workshop Nuln Oil
- Army Painter Troglodyte Blue
- Army Painter Royal Cloak
- Army Painter Greenskin
Tools needed
- Woodland Scenic’s Hot Wire Foam Cutter
- Medium through to large brushes
- Polyfilla
- A Jigsaw
- A powered sander
- PVA glue
And the following basing materials:
- Polystyrene sheets
- Bark
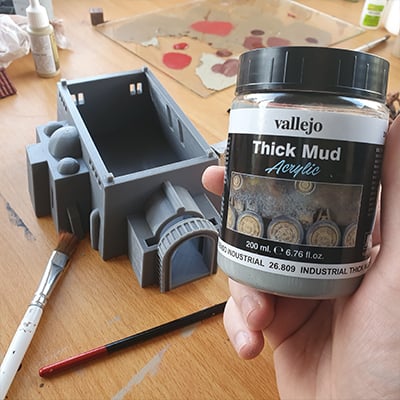
- Vallejo thick mud
- Woodland Scenic Fine Ballast sand
- Woodland Scenic Medium Green Clump Foliage
- Woodland Scenic Realistic Water Effects
- Army Painter Battlefields Wasteland Tufts
- Army Painter Battlefields Scorched Tufts
- 5mm MDF board
The Build
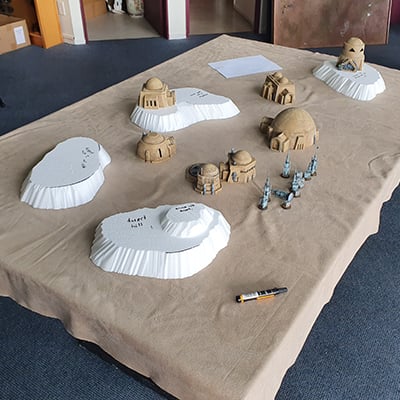
Cut the polystyrene sheets into rough ovals and kidney shapes, then proceed to cut chunks out of them until you have a ragged, tapered hillside.
Place the cut hills onto the MDF and mark out a base slightly wider than the hill itself. Cut it out with the jigsaw and sand down the edges. Glue the hill to the MDF with the PVA glue. While you are using the jigsaw, mark, cut, and sand a similar-sized section of the MDF to be the base of the oasis.
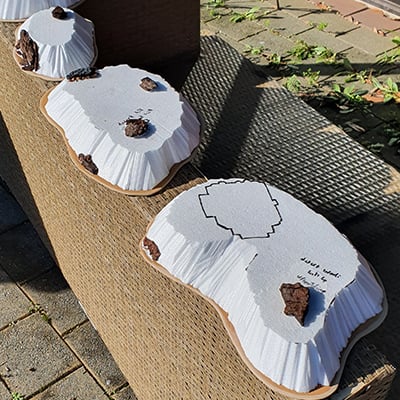
Glue some bark to the sides of the hill to make rocky cliffs, as well as to the top for rocky outcroppings. Do the same for the oasis after marking out a section near the center for the water. Fill in any gaps between the polystyrene and bark with the polyfilla.
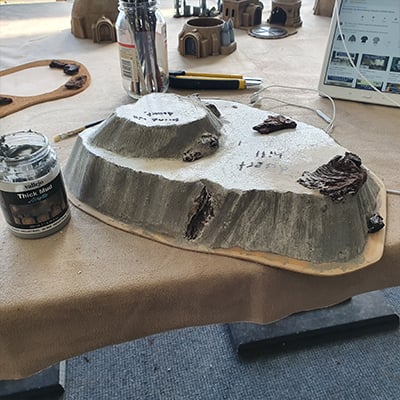
Glue the fine ballast sand to the top of the hills, and the edges of the bases, as well as outside the area marked for water on the oasis base. Using a large old brush, dab the Vallejo thick mud to the sides of the hills and onto the rocks until the polystyrene is fully covered and the rocks are blended in.
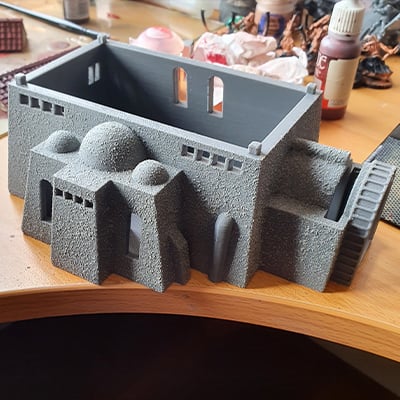
Use the same dubbing method as the hills for the walls of the adobe buildings, watchtower, house and grain silo’s and the droid yard to add texture to the 3D prints. Dab the Vallejo thick mud around just the base of the storm bunker, and layer it onto the roof to represent piled sand.
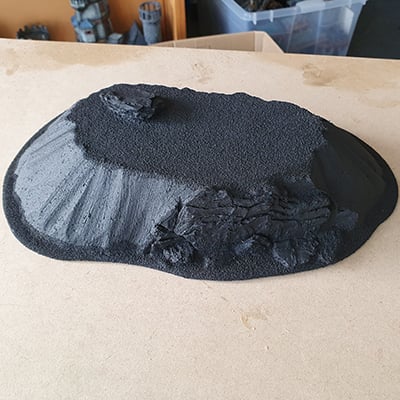
Base-coat the hills, oasis, and storm bunker with black and the adobe buildings, watchtower, and droid workshop with the desert yellow spray.
Below are the steps for painting the various sections, buildings, and terrain.
Adobe building walls, watchtower walls, droid workshop walls, and sand on the storm bunker
- Wash the Desert Yellow base coat with Agrax Earthshade.
- Heavy drybrush with Desert Yellow.
- Light drybrush with Skeleton Bone.
Storm bunker walls, building doors, silos, pipes, watchtower internals, and rocks
- Heavy drybrush Dungeon Grey over the black base coat.
- Light drybrush with Ash Grey.
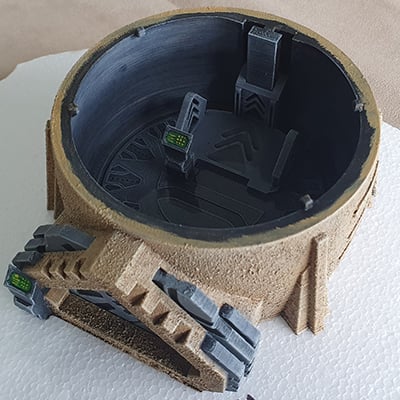
Computers
- Paint the computer screen with greenskin.
- Dot the computer screen with jungle green to make a touchscreen pad.
Droid workshop accessories and storm bunker floors
- Base coat with Gun Metal.
- Wash the base coat with Nuln Oil.
- Heavy drybrush with Gun Metal.

Hills and sand
- Heavy drybrush Khaki over the matte black basecoat.
- Light drybrush with Arid Earth.

Oasis Water
- Base coat the water with several coats of Troglodyte Blue.
- Wet-blend Royal Cloak over 40% of the water area, focused around the borders of the oasis.
- Wet-blend Greenskin around the margins of the oasis, where it meets the sand.
- Once dry, apply a thin layer of water effects to all the water areas.
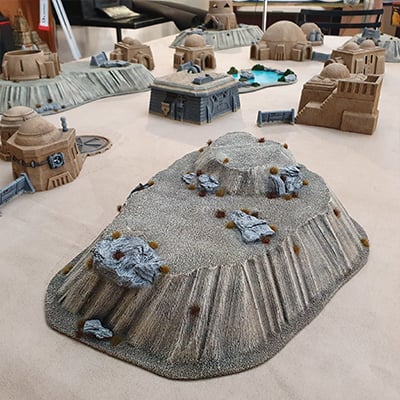
Once painted, glue the battlefield tufts in small clusters around the hills. Glue the clump foliage around the Oasis base.
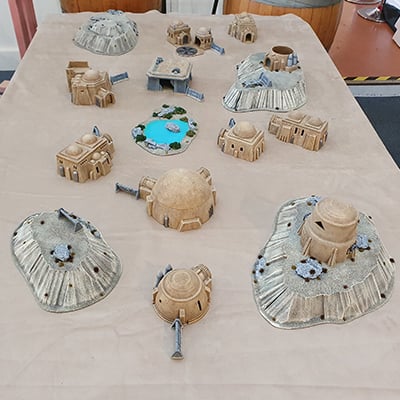
Add in some of the barriers from the Star Wars Legion starter sets, and you have a great board reminiscent of Tatooine, with plenty of cover for your troopers, an open area in the center for a firefight, and avenues for vehicles to move through.
Even on a basic beige mat, it looks great, though we recommend placing it on a Deepcut Studio Badlands or Desert mat. Star Wars Legion uses a 6′ by 3′ board, so we recommend getting a 6′ by 4′ mat, as it can then be used for larger games.
nice
super neat build, although Legion is played on 6×3 for a normal game currently.
Love the paint on the buildings thank you!
We use 6×4 tables as standard as that’s the largest games we design for. We just generally mark off for games for smaller field sizes using masking tape.
I had the display set up 6″ in on each side for that very reason.
Ahh but i can see that i made a typo when i wrote 5′ by 3′, have updated that now cheers.