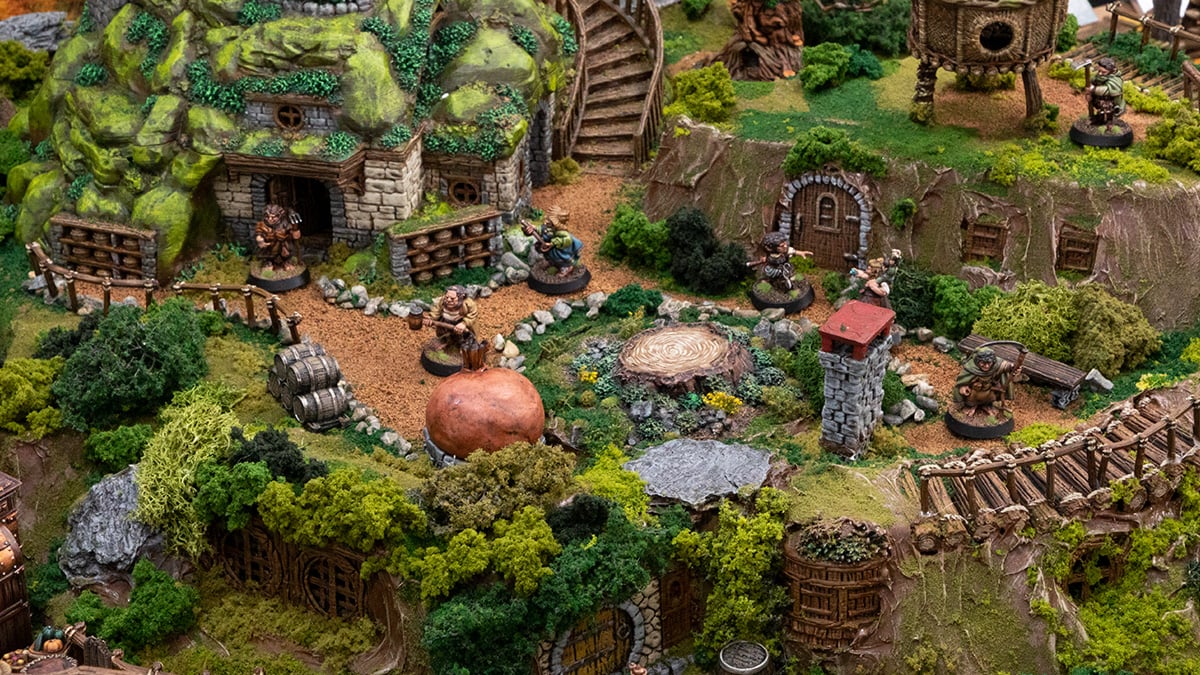
Creating Halfling Homesteads with the Hillside Builders Kit
The Hillside Builders Kit from the Rise of the Halflings comes with over 40 different individual pieces you can use scratch build your own Halfling Homesteads. There are a myriad of different ways you could do this, so we thought we would share how we created our Halfling village, providing some tips you can try out when creating yours. At the bottom of this article you’ll find an equipment list to help you prepare.
Remember to have fun and get creative! You could use the Hillside Builders Kit to stick doors to the sides of trees or rocky hillsides, dig pieces into massive excavations or place on purposely shaped hills, its up to you!
Step 1: Planning and shaping hills
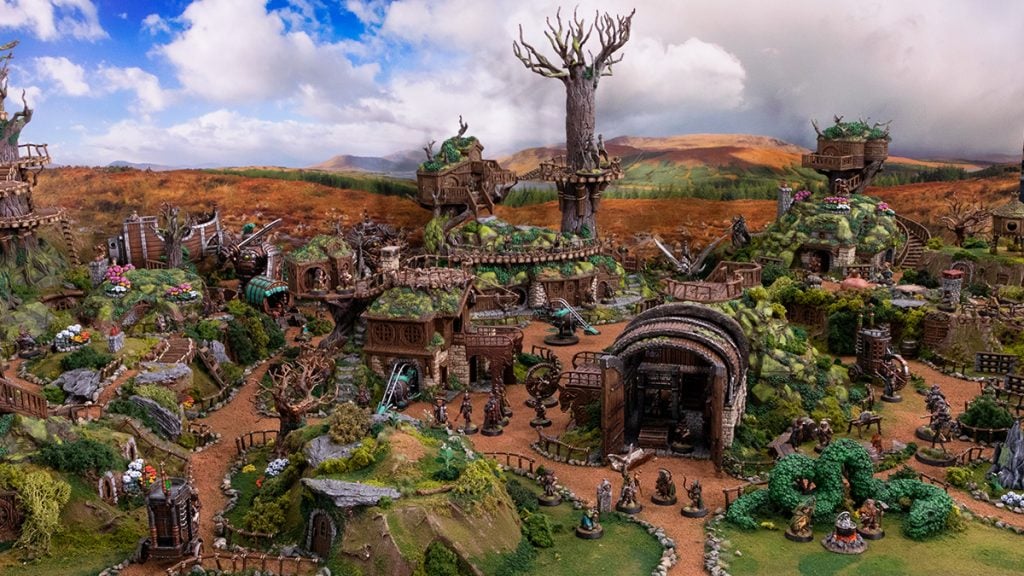
For our hills, we wanted to create a full 6x4ft gaming table and purchased some sheets of 70mm thick, high-density foam to use as the basis. Using a marker we drew the shapes onto the block before cutting them out with a hot wire cutter. If you wanted, you could use a sharp box-cutter instead.
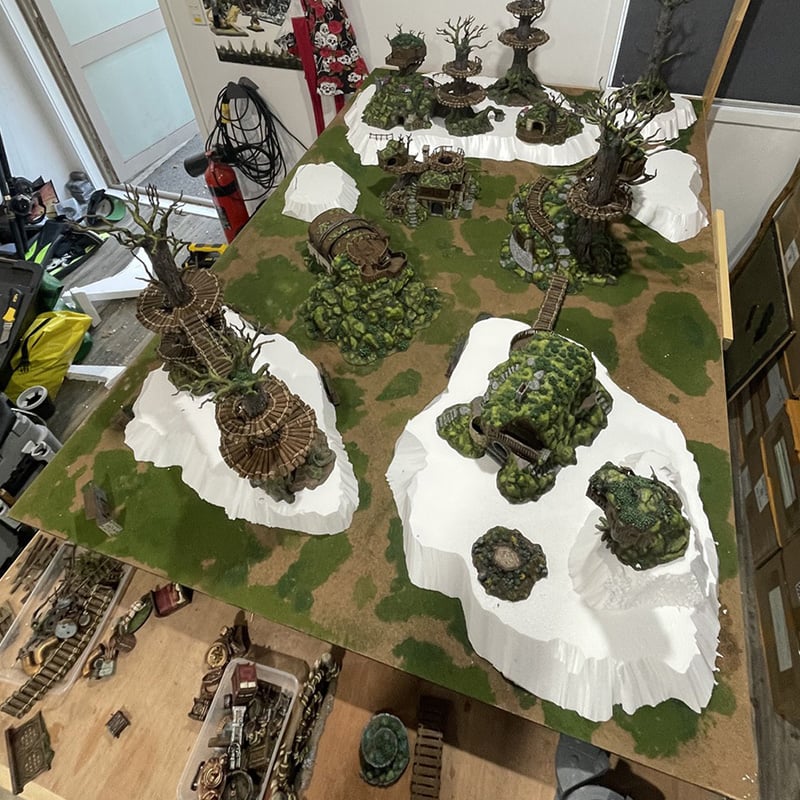
When shaping your hills, organic shapes work best, loose kidney-shapes and ovals will look more natural than perfect circles or rectangles. It also means you can be a bit more free-form when cutting the shapes, just remember to add a slope by cutting at an angle.
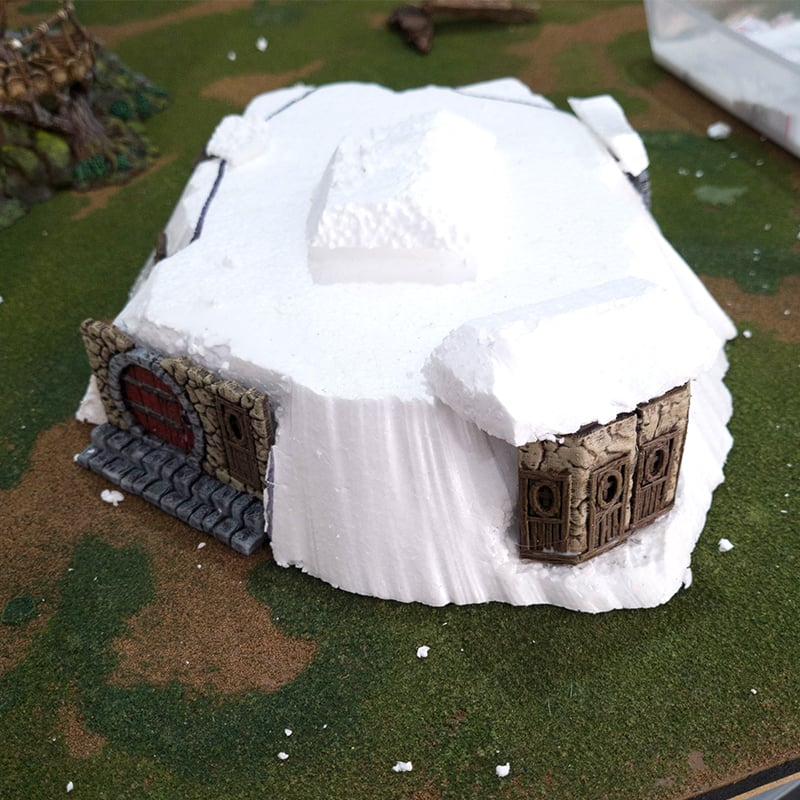
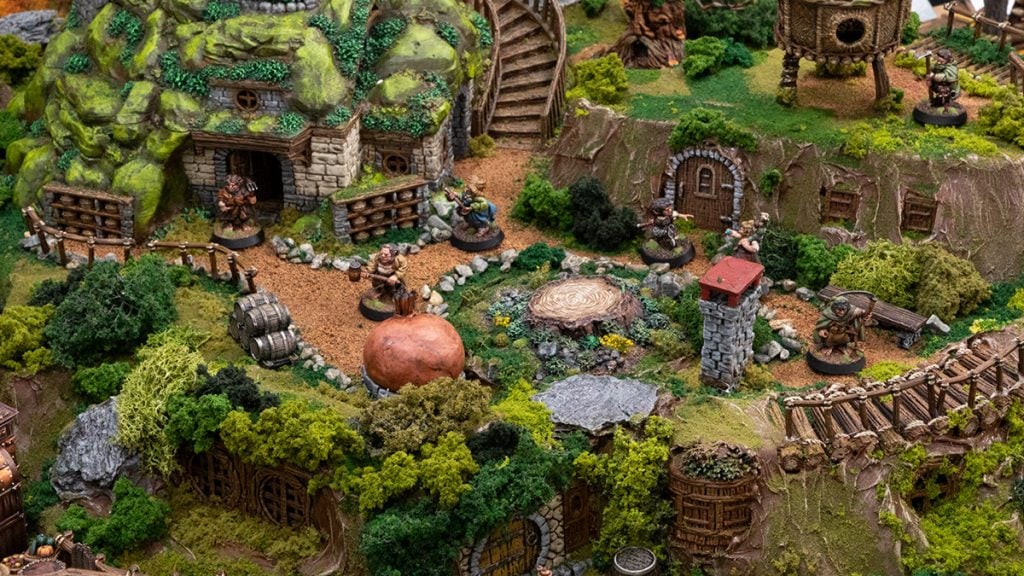
Have a rough think about where you want doorways and how models will access the top of the hills. You may also want to make a double-storey hill. You can see for our hills we incorporated some of the complete buildings from the Rise of the Halflings.
We also used off-cuts in places to add small heights to the tops of the hills so they weren’t completely flat. You can always add or subtract from the hills as you add the windows and doors, which is why it is good to use a material like foam that can easily be cut and re-shaped.
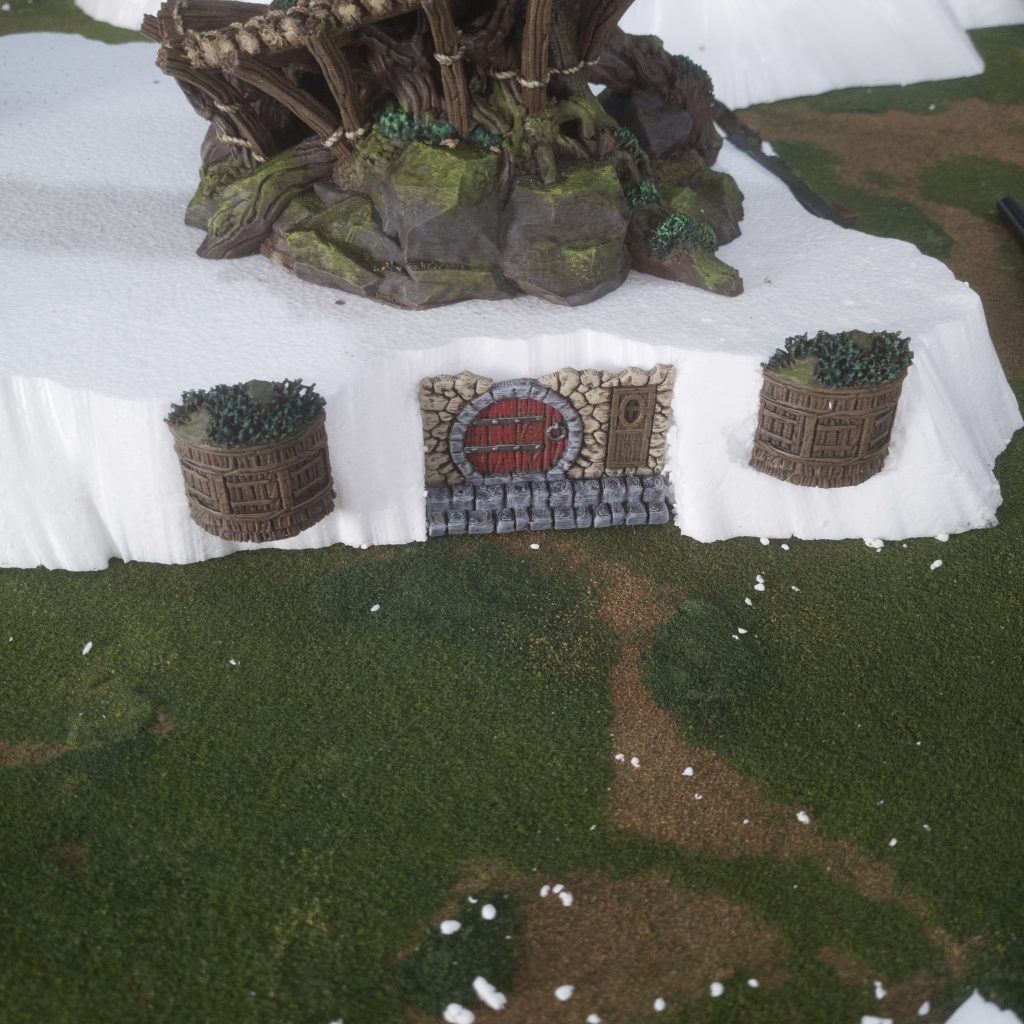
Step 2: Making a hill a home
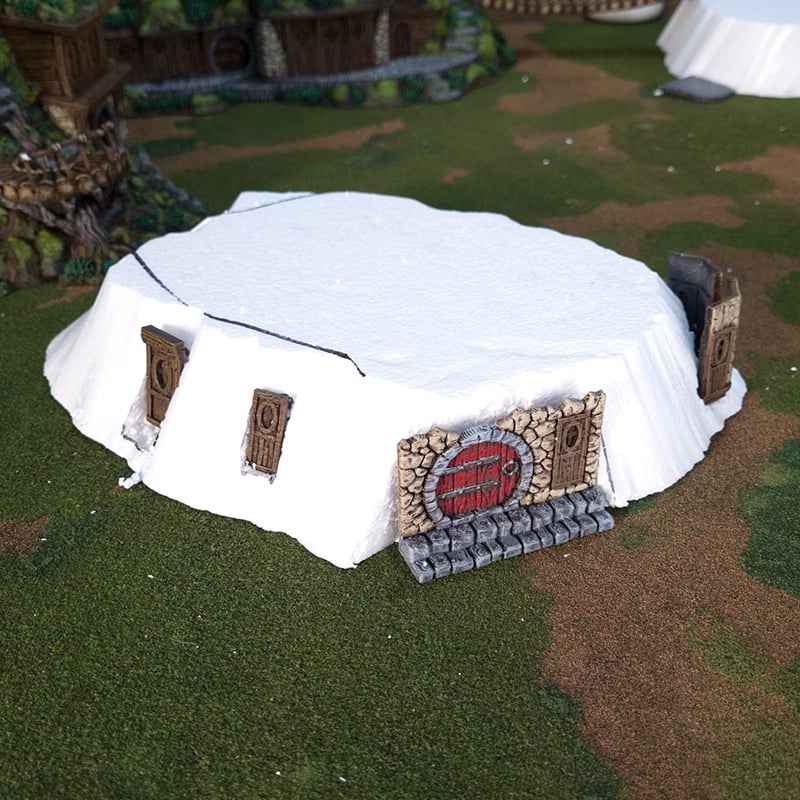
With the hills shaped it’s time to turn them into homes by adding various pieces from the Hillside Builders Kit. We printed off a variety of the pieces, gave them a quick paint job (though this isn’t necessary, you could wait until you’re painting the hills), and went through each hill adding details as we saw fit. You could plan it out further, deciding which windows, doors, stairs, and features you want for each hillside. Planning or not, it’s a good idea to print off a few extra pieces to allow for some creativity once you’re assembling the hills.
As a rule, you want to make sure each home has at least two doorways, some windows, a way up to the top of its hill, and one or two other interesting details. How much you add is up to you, just try to ensure that the positions of the windows and doors are level and make sense.
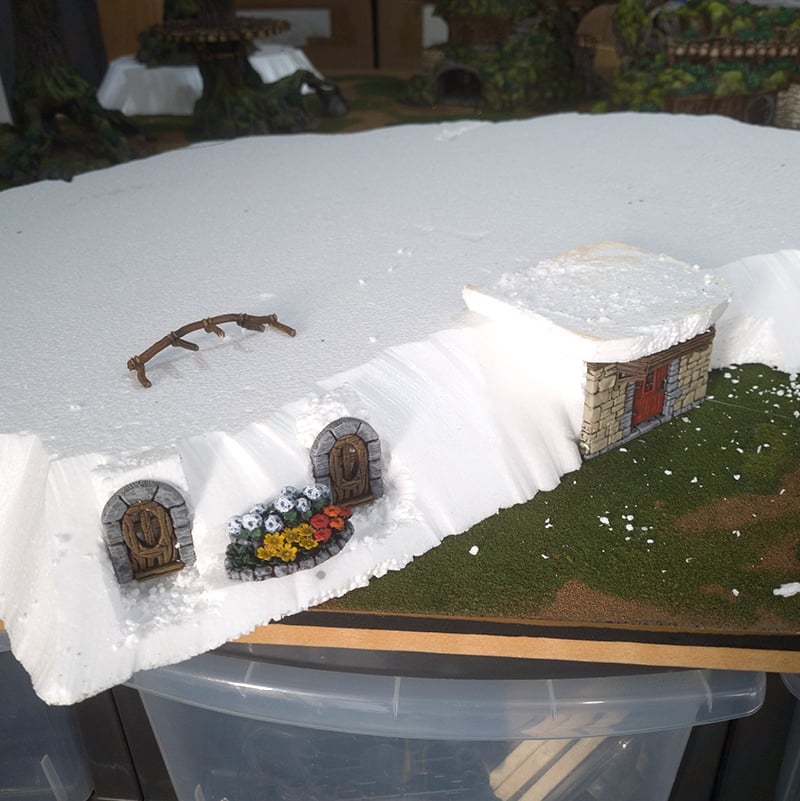
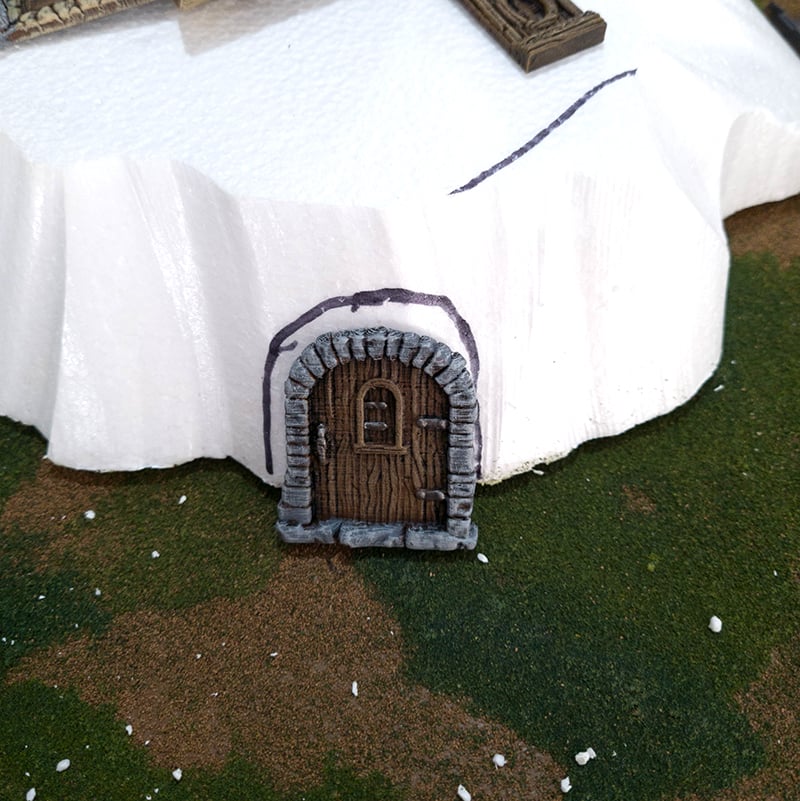
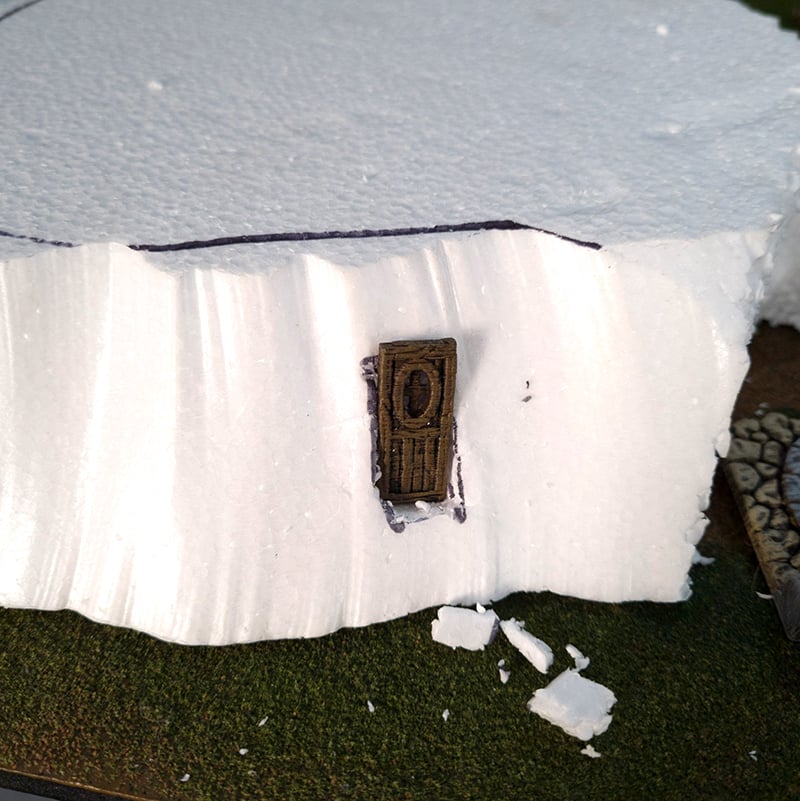
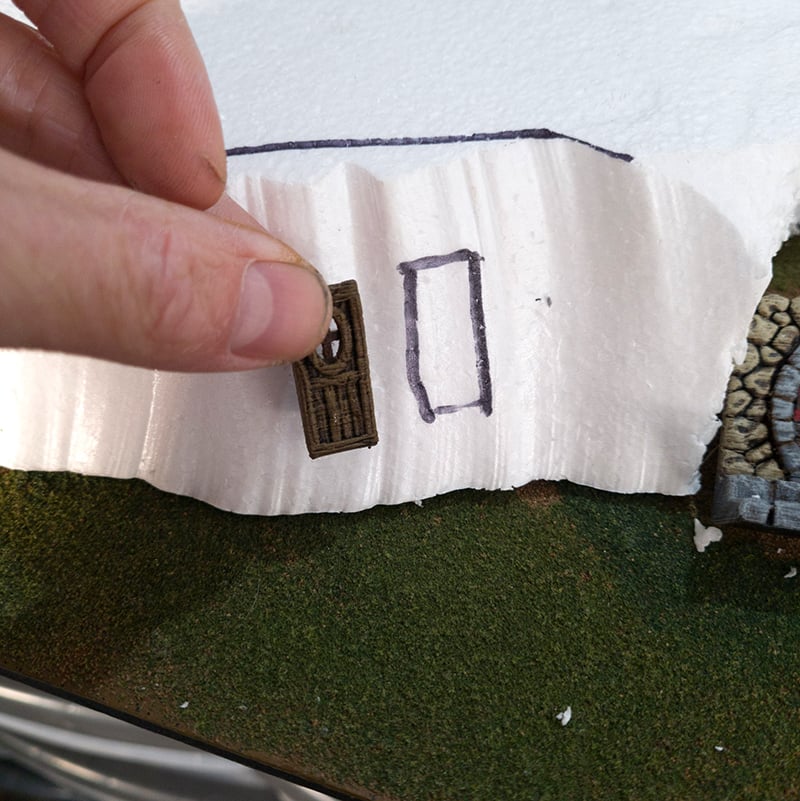
To position windows and doors, trace the outside of the piece onto the hill then carefully cut out a space for it to sit using a box-cutter or craft knife. The printed details will look much better if they’re sunken into the hill slightly, as if they have been there for a while and the hill is slowly growing back over them.
Ensure that the piece is correctly aligned and at the approximate height that you want it to sit. Sometimes you will need to add extra foam around a piece to blend it into the hill. Simply use PVA glue to secure any extra bits of foam. Keep in mind the size of your miniatures when positioning stairs, windows, and other features, models need to be able to reach them!
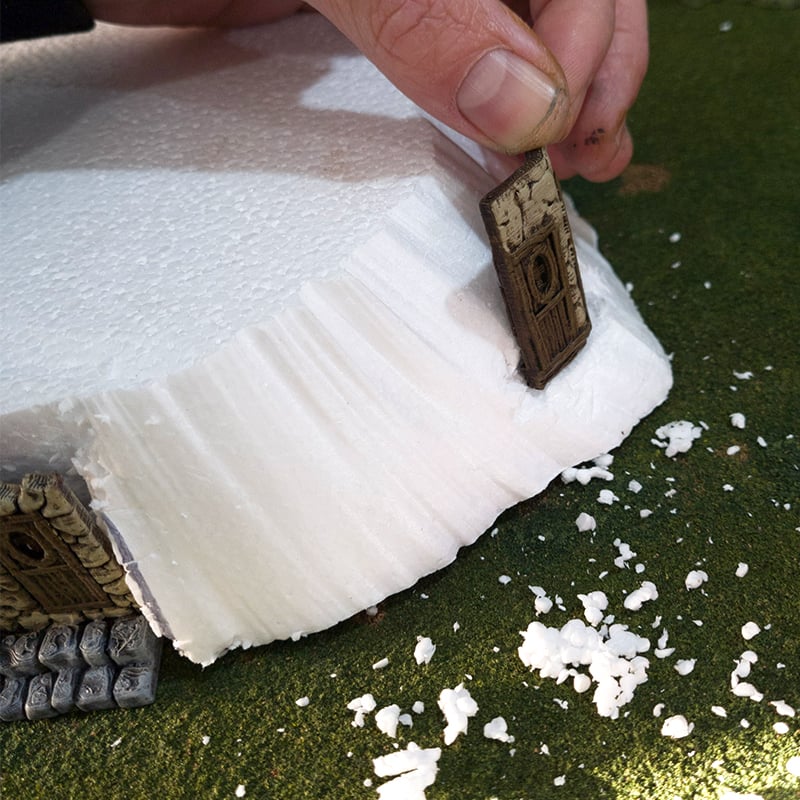
We used a hot glue gun to secure the features to the hill once the positions had been decided, as it has a short drying time. If you do this, be careful not to burn yourself or melt away the foam. Don’t worry if there are some gaps around doorways and frames, as these will be filled in soon.
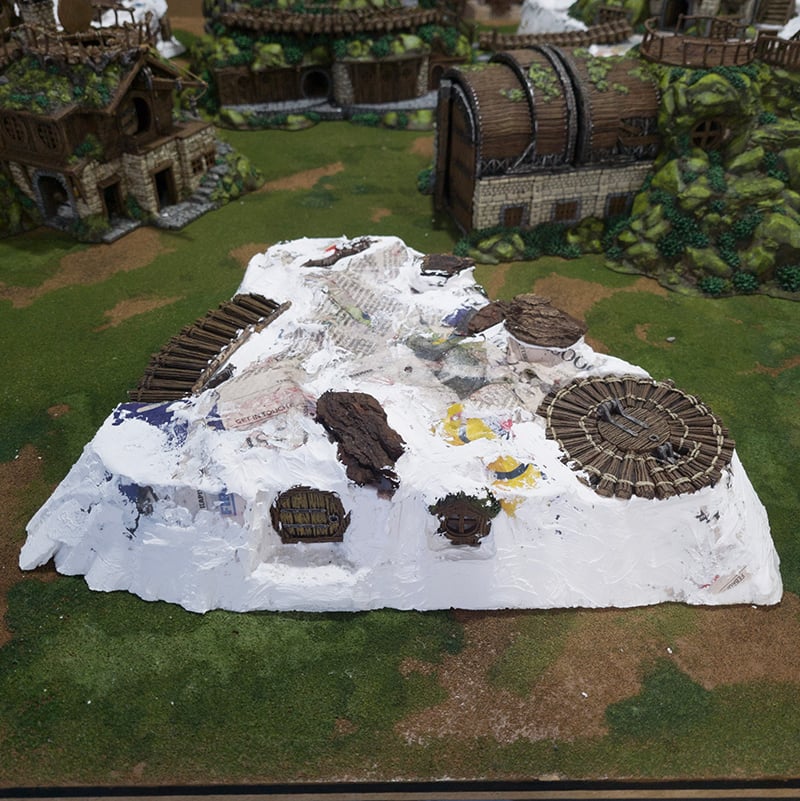
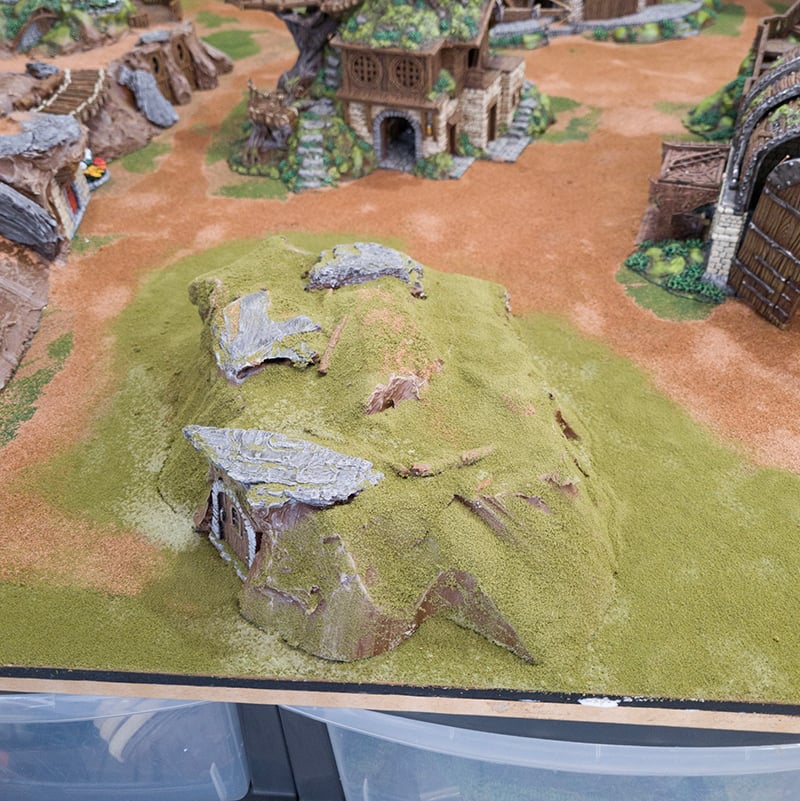
Step 3: Texturing Hills
The next step is to blend the hill and features to look like a coherent structure. We used two techniques for this: paper Mache for the hillside shapes and gap filler for the details.
For the paper mache, we made up a mix of 50/50 water to PVA glue in the tub and tore up newspaper strips. We applied a thin coat of the glue mix to the hill surface before dunking the paper strips in the mix and applying them across the model.
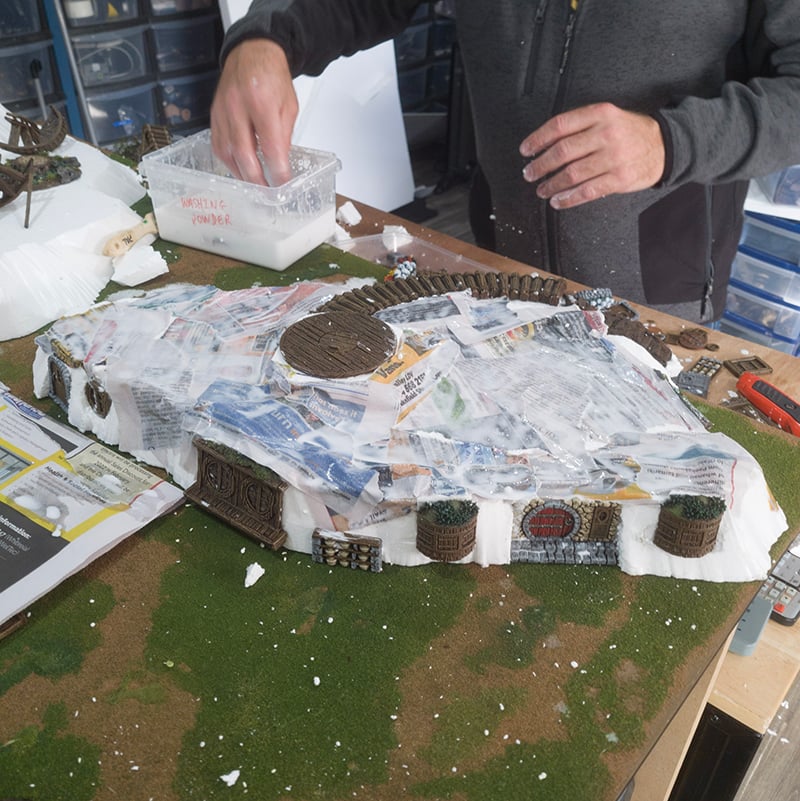
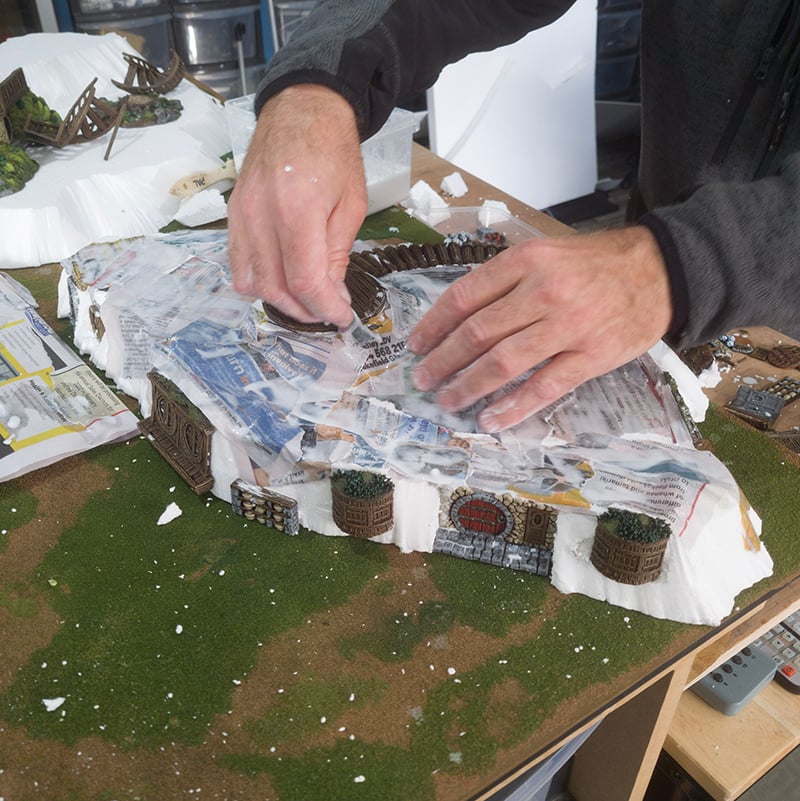
Next, we concentrated on the hilltops, using the paper mache to blend any small mounds and connections between pieces of foam. Slightly creasing the paper was used to give a slightly rough, rocky texture to our hillsides.
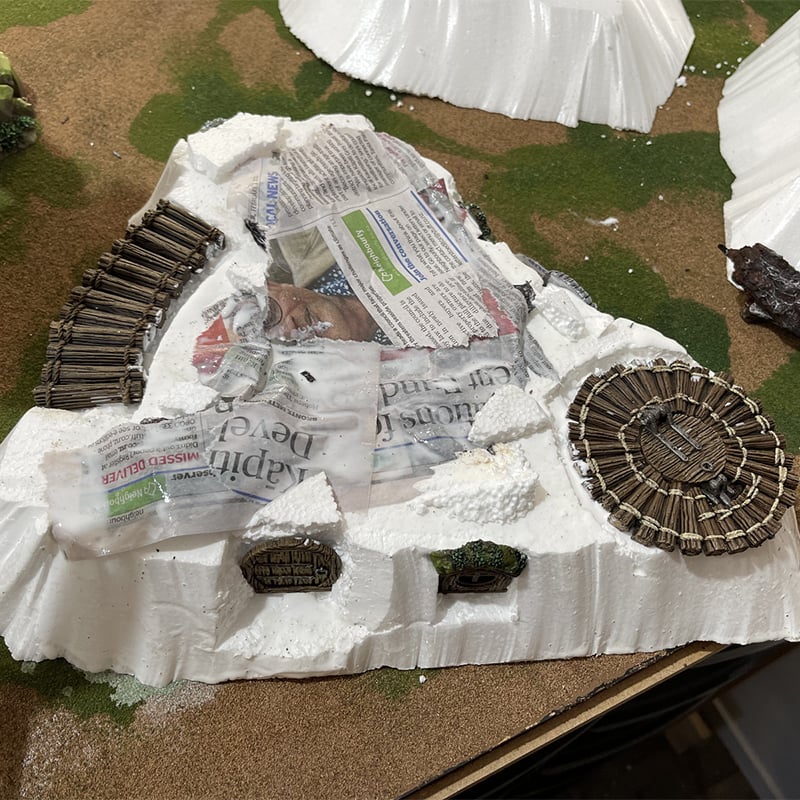
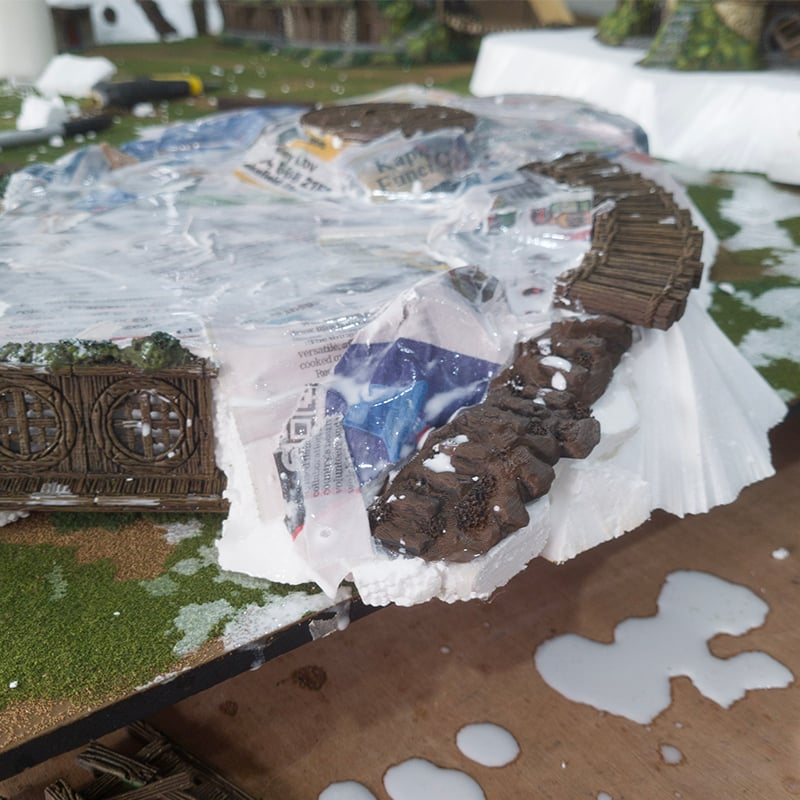
We applied paper mache to any areas that needed extra strengthening or needed to be blended. With glue so watery be careful of any drips, though it will dry clear against the 3D printed details. Once dry it will also add an extra layer of protection to the foam bases for the hills.
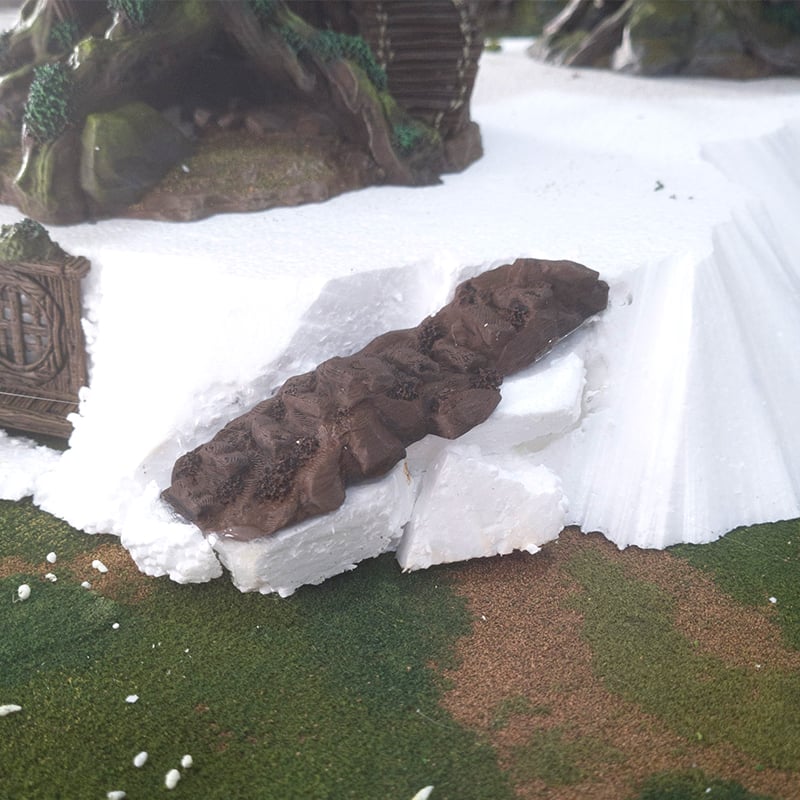
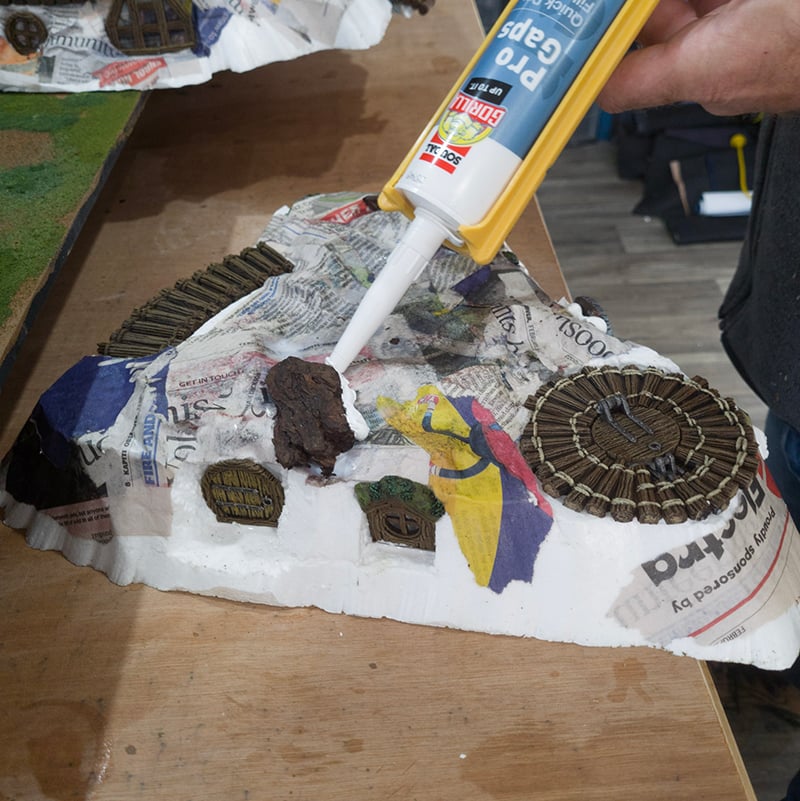
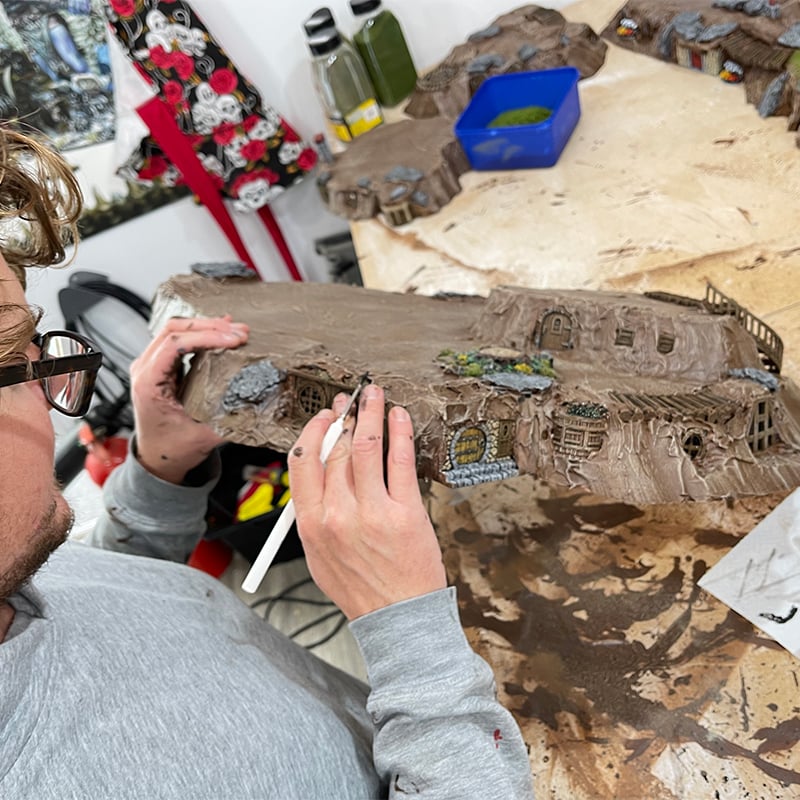
Next, we used gap filler to fill in any areas between the printed details and the hillside, smoothing it over with a small spatula ensuring any gaps were covered and blended. We also took this opportunity to stick down some thick pieces of tree bark (pine in this case) as large stones, and some twigs as logs. Filling in around the bark with gap filler makes it appear like the stone is sunk into the hill and will secure it well.
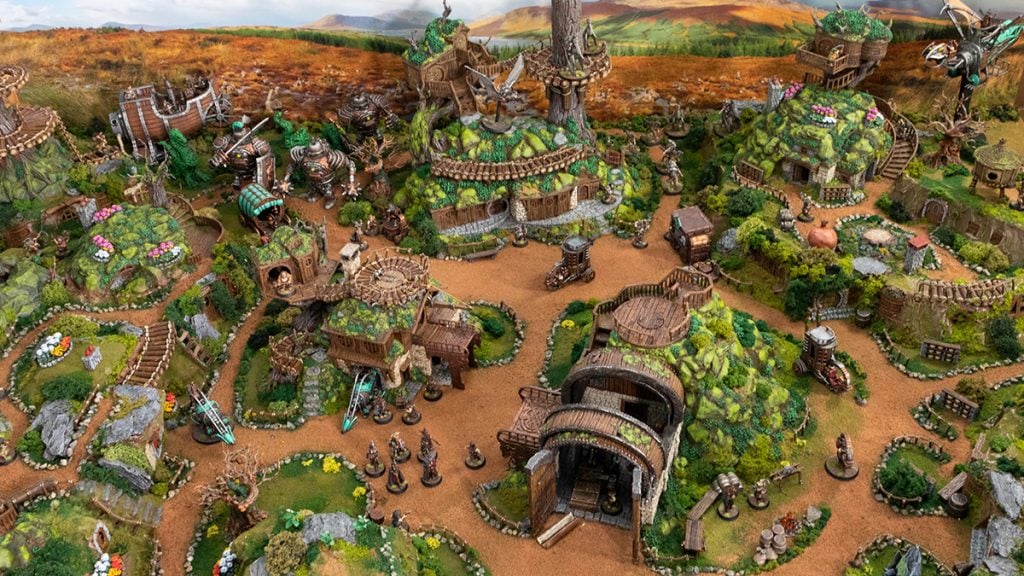
With the details blended in and hills shaped, they’re ready to be painted!
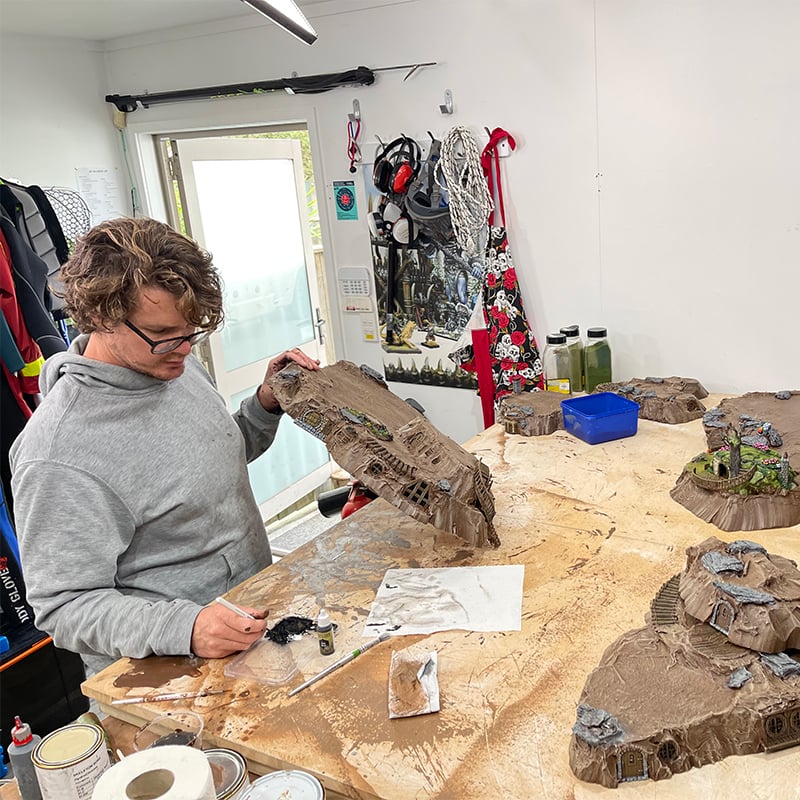
Step 4: Painting
To paint our hills we used matte interior acrylic house paint. Using regular model paints will see you go through a lot of resources and can end up being rather expensive. We took samples of the colors we wanted to the local paint store and had them color-matched, saving money and ensuring consistency.
The hillsides received a basecoat of Army Painter Oak Brown, before being dry brushed with Leather Brown and finally Skeleton Bone. Any stones were heavily dry brushed with Dungeon Grey and then Ash Grey.
The hillsides don’t need to be painted perfectly, as they’ll be mostly covered with flock and turf. Going back with a normal brush and touching up the hillside details (or painting them in if you haven’t already) is worthwhile. We chose bright reds and yellows for the doorways and pale, cream-colored bricks to make them stand out against the hillsides.
Step 5: Texturing
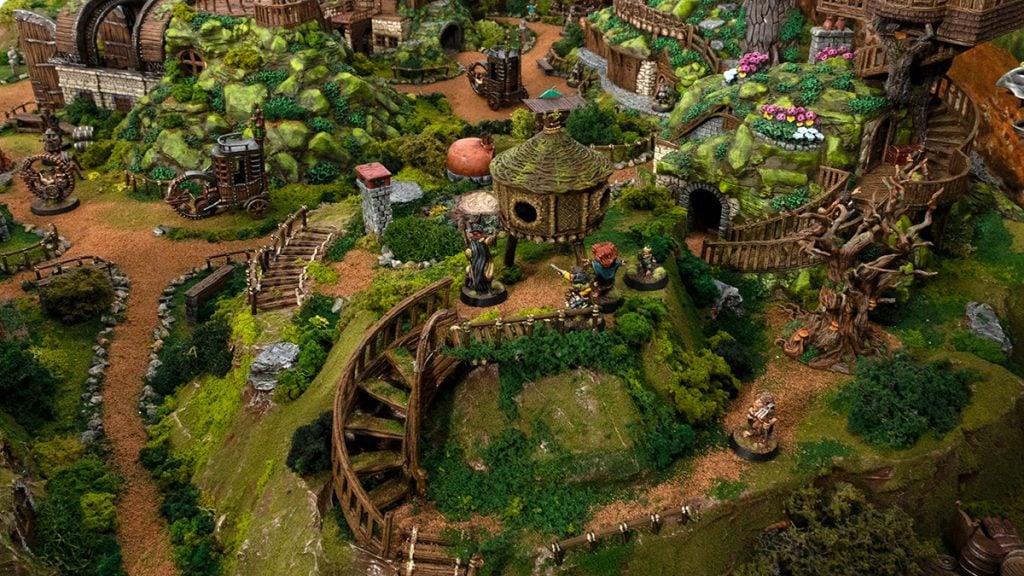
We began texturing by using some fine ballast (though any kind of modeling sand will do) to put down where pathways and open areas would go. Slightly watered-down PVA was painted on and the ballast is sprinkled over the top. After 15 minutes or so we used a hand vacuum to clear off any excess. This is where you want your models to be able to walk so it’s worth getting this part done first.
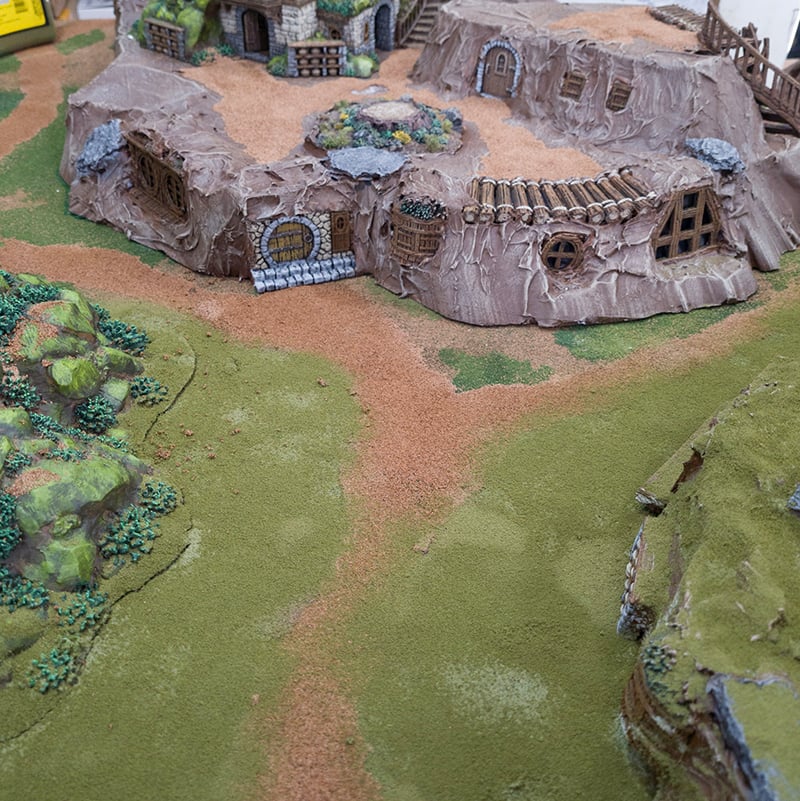
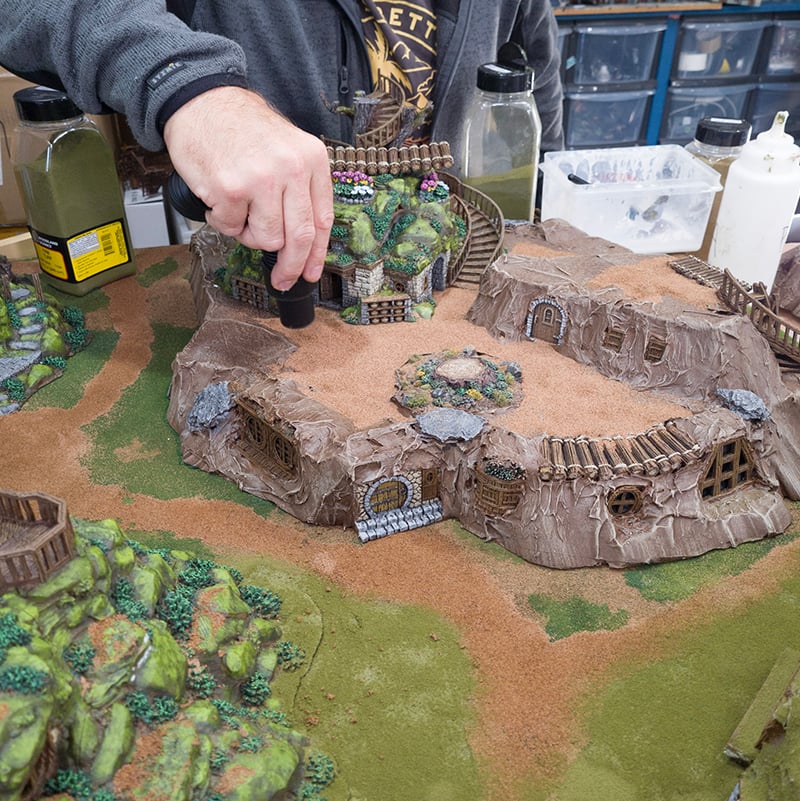
The next stage is to lay down the first few colors of turf. We began with a light green followed by patches of darker greens as we progressed. This fine layer gives some uniformity to the ground and hillsides. Be sure to leave some spots of earth showing on the steeper sides of your hills where grass might struggle to grow.
As with the ballast we painted on glue and carefully sprinkled on the turf where required, using a spoon to apply it in small gaps. Once the glue had set we used a hand-vacuum to clear up any excess turf.
Next we applied some areas of rougher flock in patches to act as moss in a variety of green tones., We concentrated on areas where it would grow naturally, so placed darker moss colors in crevasses and shady areas, while lighter flocks were put in the sunny spots.
There are no rules on where you can stick what color. The only recommendation is to keep the amount of texture consistent across your buildings. It can be good to texture one building to completion to use as a reference when doing the others.
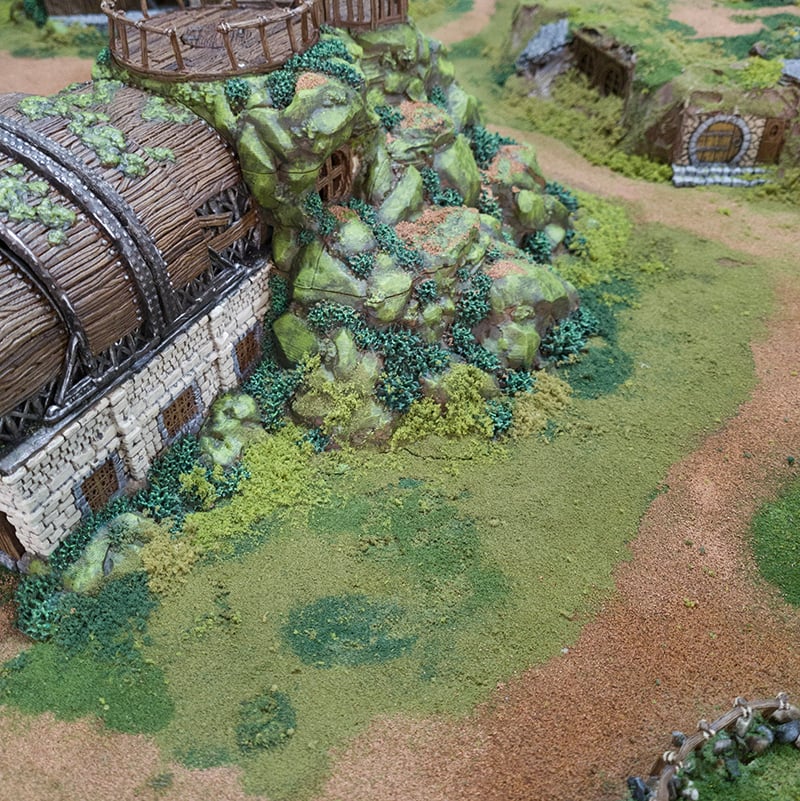
Once these were done we freestyled a few different textures to add interest to the buildings. We used coarse foliage, clump foliage, dyed sphagnum moss, bushes, and flowers to texture out our village.
Its good to get a variety of textures as well as colors to give variety to your gardens.
We also used lines of small pebbles to define the edges of pathways, with a little bit of flock sprinkled in to age them and railings stuck in as fences. These finishing touches help bring the hillsides to life.
The final stage is to seal it all by mixing up a spray bottle with a 30/70 PVA to water mix. Carefully spray it all over the hillside and textures you’ve glued on. To avoid blowing away loose flock, squeeze the trigger gently so that it drips out over where you need to seal. This step can take up to 24 hours to dry but is well worth it for the longevity of your terrain.
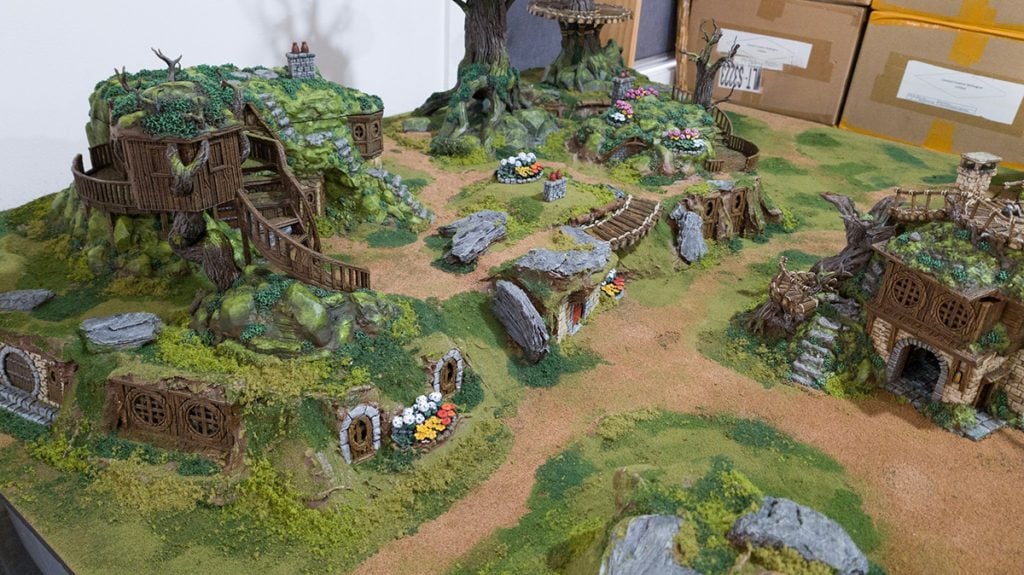
Finished!
Materials List
Things you will need to make your own Halfling Homes and table with the Hillside Builders Kit. Specific brands have been left out as availability will be different depending on your region.
High-density foam or polystyrene
Box-cutter/hot-wire cutter
PVA Glue
Hot Glue Gun
Hillside Builders Kit pieces
Tree-bark and twigs (suggested)
Spare newspaper/paper
Large paint brushes
Gap filler and caulking gun
Small spatula
Hand-held vacuum
Spray bottle
Paints:
Oak Brown, Leather Brown, Skeleton Bone, Dungeon Grey, Ash Grey, plus colors for details
Textures:
Fine ballast or Modelling sand
Fine turf
Clump foliage
Coarse foliage
Sphagnum moss
We used a variety of textures from Woodland Scenics and Gamer Grass, though you can use anything you like the look of, from dried herbs to beach sand.
Wow So Amazing
Thank you for your feedback