Building a Tribal Fort Table
Taking your 3D printed terrain and creating an awesome looking wargaming table is really easy. This article will focus on using the Ork & Tribal terrain to create a fantasy wargame table for use in Age of Sigmar or Kings of War scenarios.
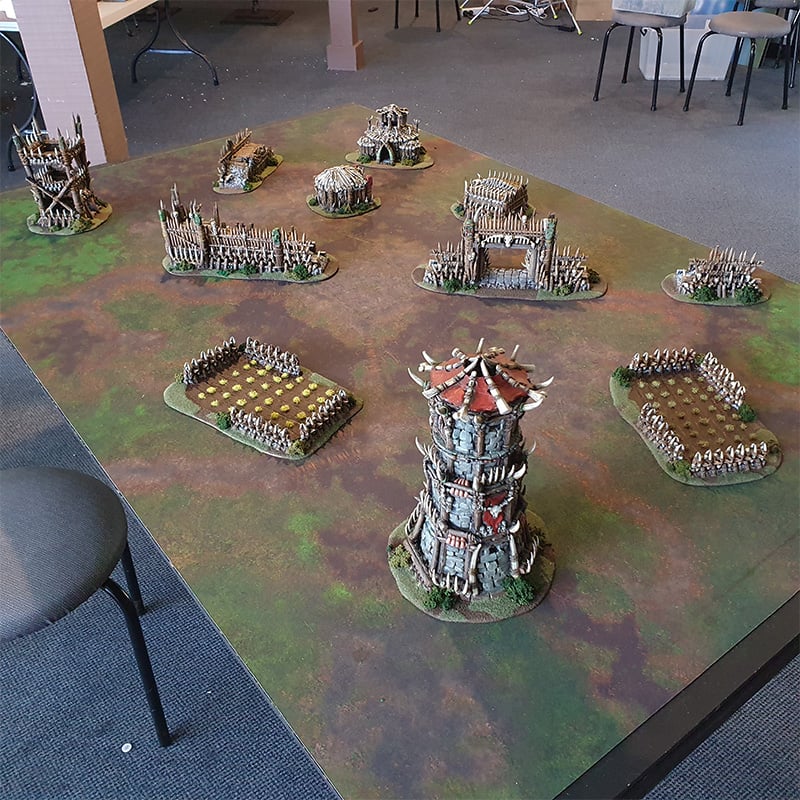
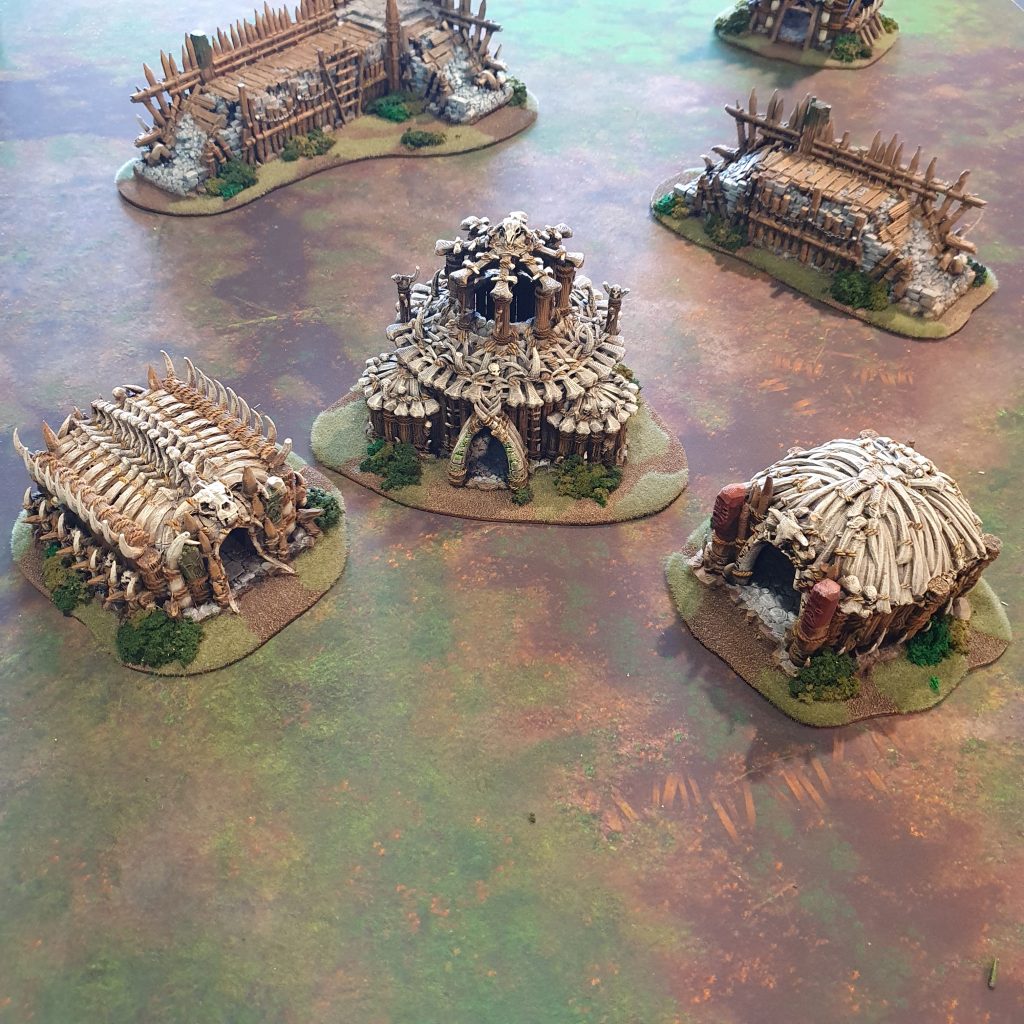
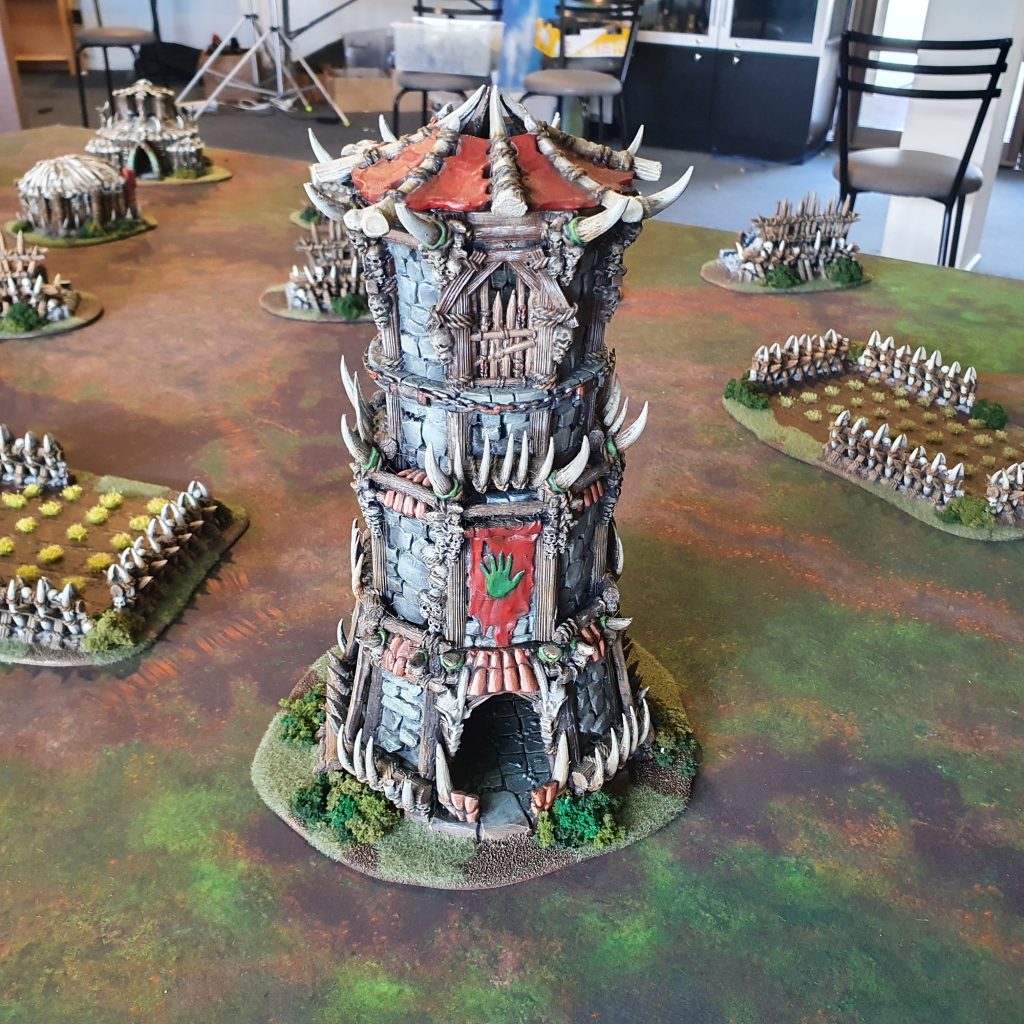
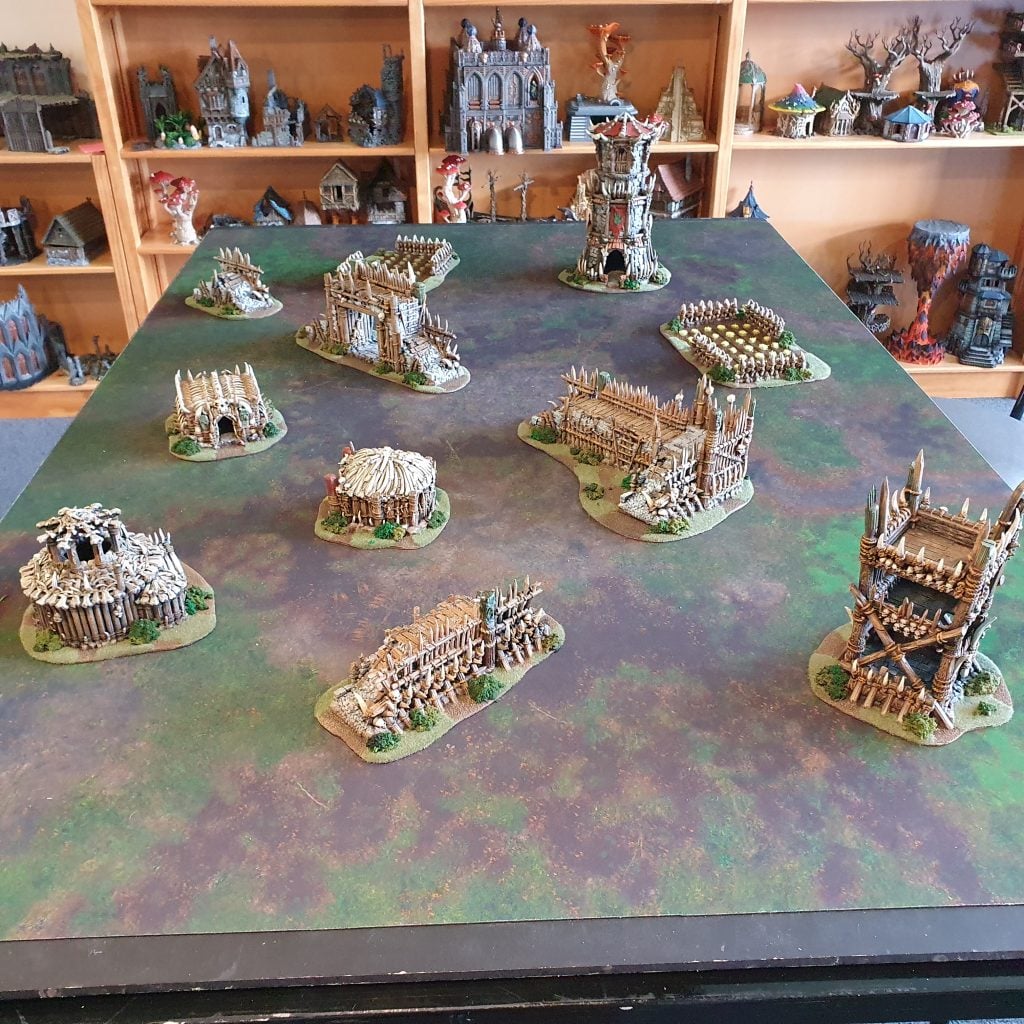
The walls in the Tribal Ramparts and Ramparts Gate sets act as line of sight blockers through the center of the board. For the dwellings the Shamans Hut, Witch Temple and Tribal house give the field a bit of variety, while the Tribal Fort, Tribal Tower and Tusk Fences flesh out the immediate countryside on the other side of the ramparts.
List of paints used:
- Black Primer.
- Army Painter Oak Brown
- Army Painter Leather Brown
- Army Painter Khaki
- Army Painter Strong Tone
- Army Painter Arid Earth
- Army Painter Drake Tooth
- Army Painter Basilisk Brown
- Army Painter Mat black
- Army Painter Dungeon Grey
- Army Painter Ash Grey
- Games Workshop Mephiston Red
- Army Painter Pure Red
- Army Painter Chaotic Red
- Army Painter Fur Brown
- Army Painter Tanned Flesh
- Army Painter Gun Metal
- Army Painter Lava Orange
and the following basing materials:
- Vallejo Thick Mud
- Woodland scenic fine ballast sand
- Woodland scenic burnt grass clump foliage
- Woodland scenic medium green clump foliage
- Army Painter battlefields: meadow flowers
- Army Painter battlefields: lowland shrubs

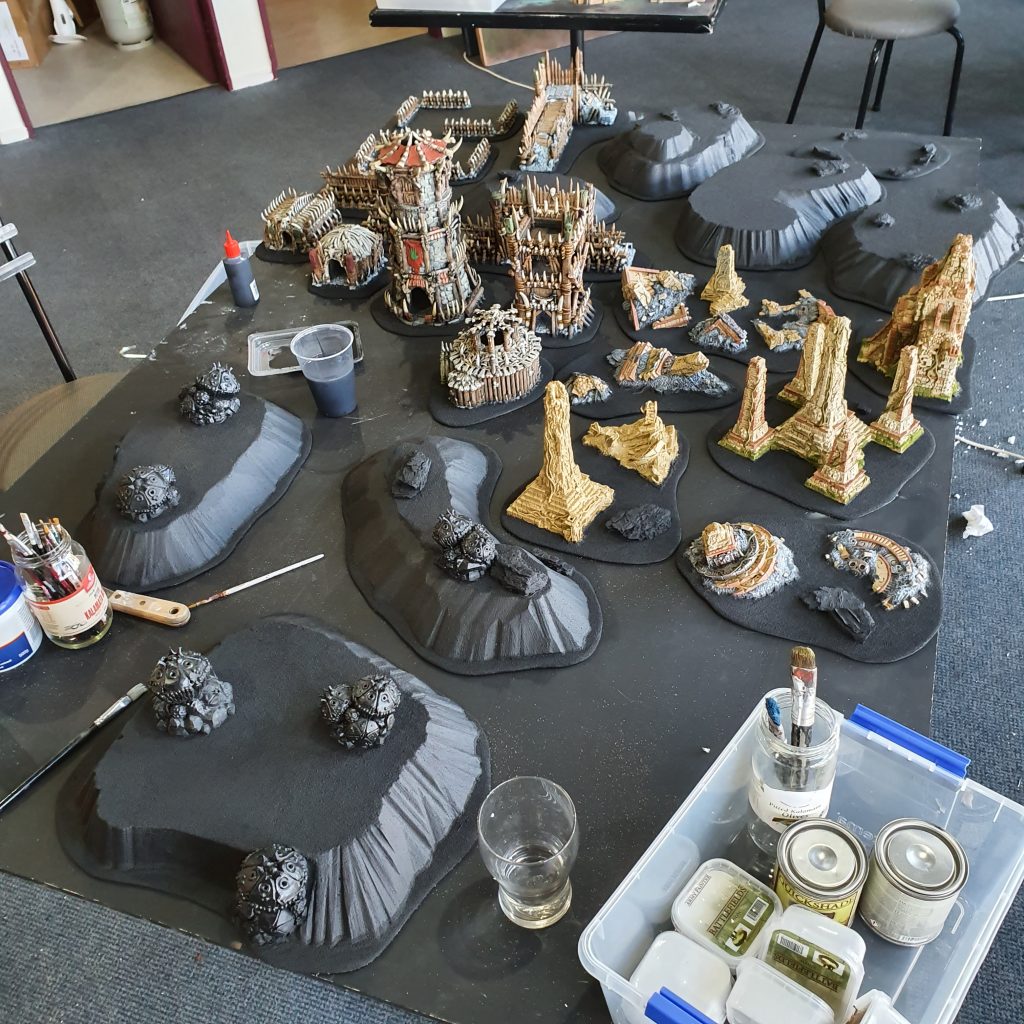
The Build
Map out the size of the area terrain and the basing for each building on paper, before cutting them out of 5mm MDF and sanding down the edges.
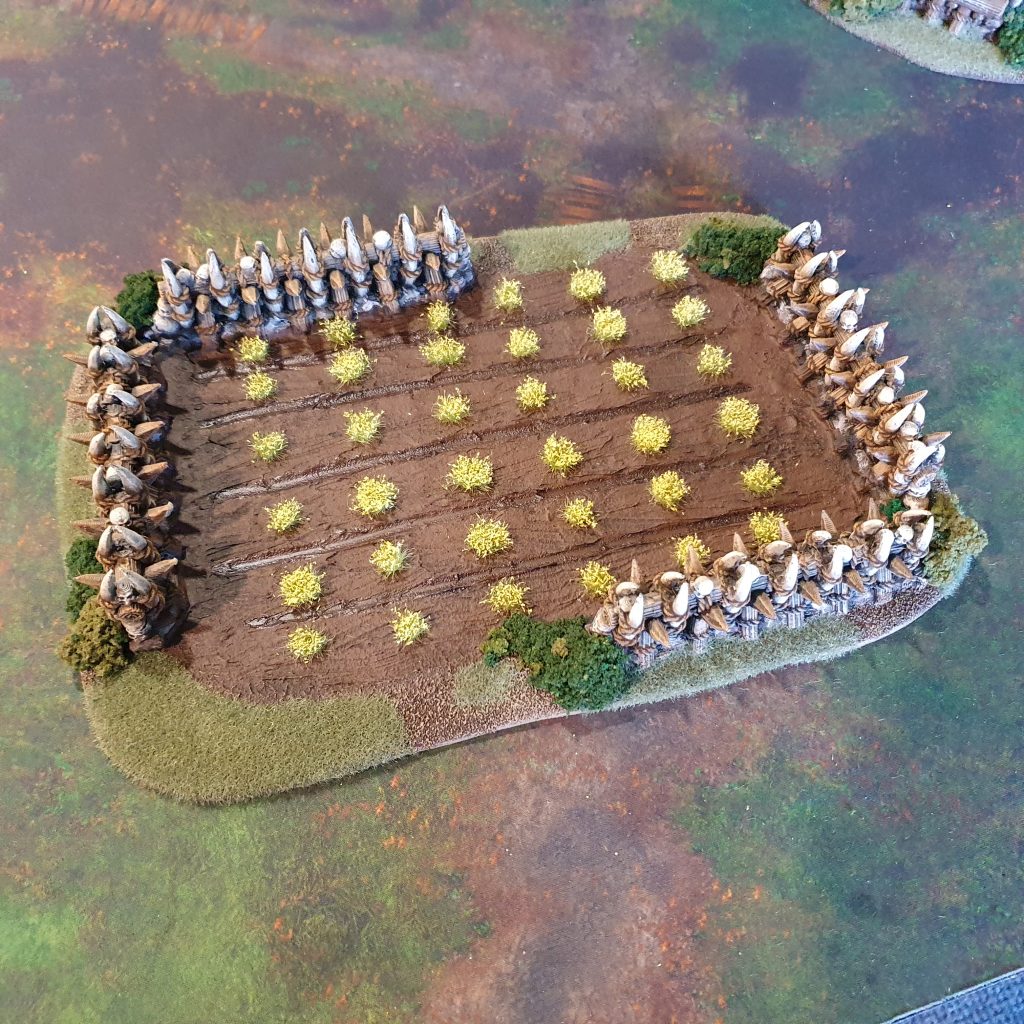
Glue down the 3D printed terrain, and flock the exposed MDF with the fine ballast sand. The Tusk Fence’s can be used to create field borders, flocking the outer edge above and filling in the center with a 1mm layer of Vallejo thick mud paste. Run the end of a thick paintbrush through the paste to create “ruts” in the fields.
Painting
To start base-coat the entire model black and follow the steps below for each section.

Ground:
- Apply a heavy drybrush of Oak Brown over the black base coat.
- Apply a light drybrush of Khaki over the Oak Brown.
Tilled Soil
- Apply a heavy drybrush of Oak Brown over the black base coat.
- Paint Strong Tone Ink into the “ruts” in the field.
Rock:
- Apply a heavy drybrush of Dungeon Grey over the black base coat.
- Apply a light drybrush of Ash Grey over the Dungeon Grey
Wood
- Apply a heavy drybrush of Oak Brown over the black base coat.
- Apply a lighter drybrush of Leather Brown over the Oak Brown.
- Apply a light drybrush of Khaki over the Leather Brown.
- Apply a light drybrush of Arid Earth to the tips where the wood comes to a point.
Bone
- Apply a heavy drybrush of Khaki over the black base coat.
- Apply a lighter drybrush of Arid Earth over the Khaki.
- apply a light drybrush of Drake Tooth over the Arid Earth.
Red leather
- Paint a base coat of Mephiston Red over the black base coat.
- Apply a coat of Pure Red over the Mephiston Red.
Rusty metal
- Apply a heavy drybrush of Gun \Metal over the black base coat.
- Apply a light drybrush of Lava Orange to small patches of the metal.
Cords and straps
- Apply a heavy drybrush of Leather Brown over the black base coat.
- Apply a light drybrush of Basilisk Brown over the Leather Brown.
Roof tiles
- Apply a heavy drybrush of Chaotic Red over the black base coat.
- Apply a lighter drybrush of Fur Brown over the Chaotic Red.
- Apply a light drybrush of Tanned Flesh over the Fur Brown.
Once the models have been painted use PVA glue and a static flock applicator to create patches of grass on the bases, leaving gaps where the ground can show through. Then glue clumps of the burnt grass and medium green clump foliage to make bushes around the models and tie them all together.
For the fields make sure no grass was applied to the thick mud, instead glue down army painter tufts in between the ruts to represent farmed plants.
Once it is all set up on its Tablewar 6′ by 4′ Swamp mat it looks incredible, with choke points, open ground and areas for units to outflank by going up and over the terrain.
Great use of terrain. The fields you made are so cool! Seriously, great idea.
Cheers Troy, They have been a firm favorite for our in-house games