


Description
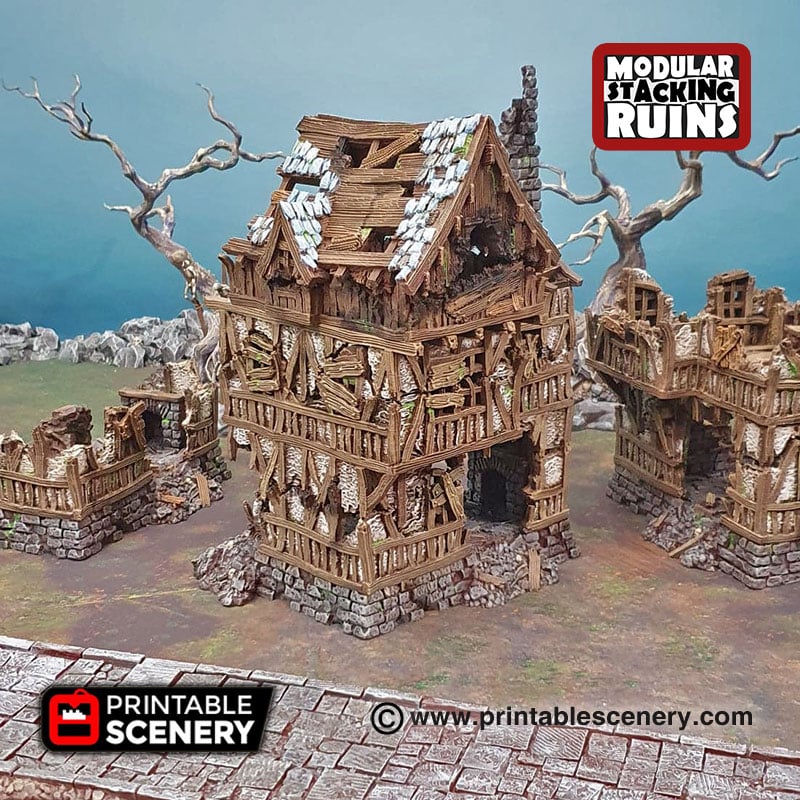
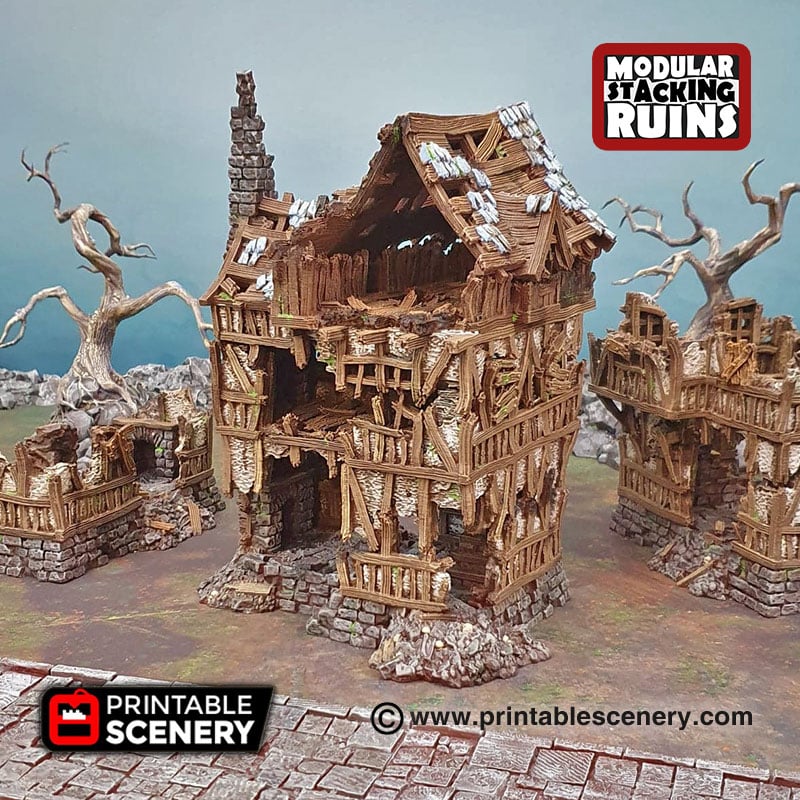
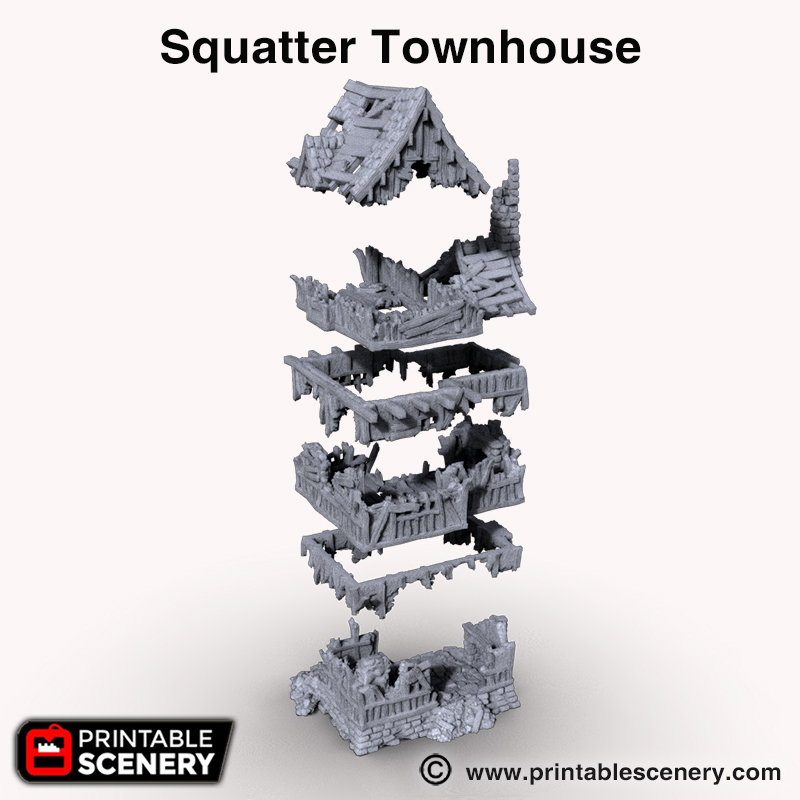
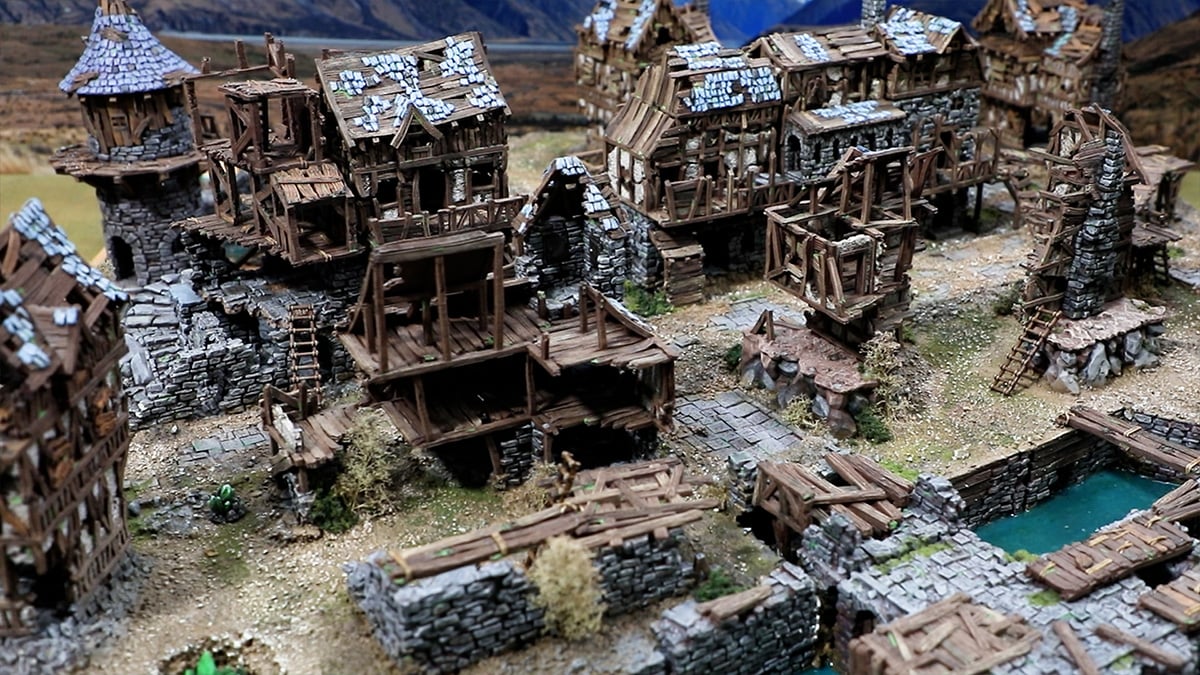
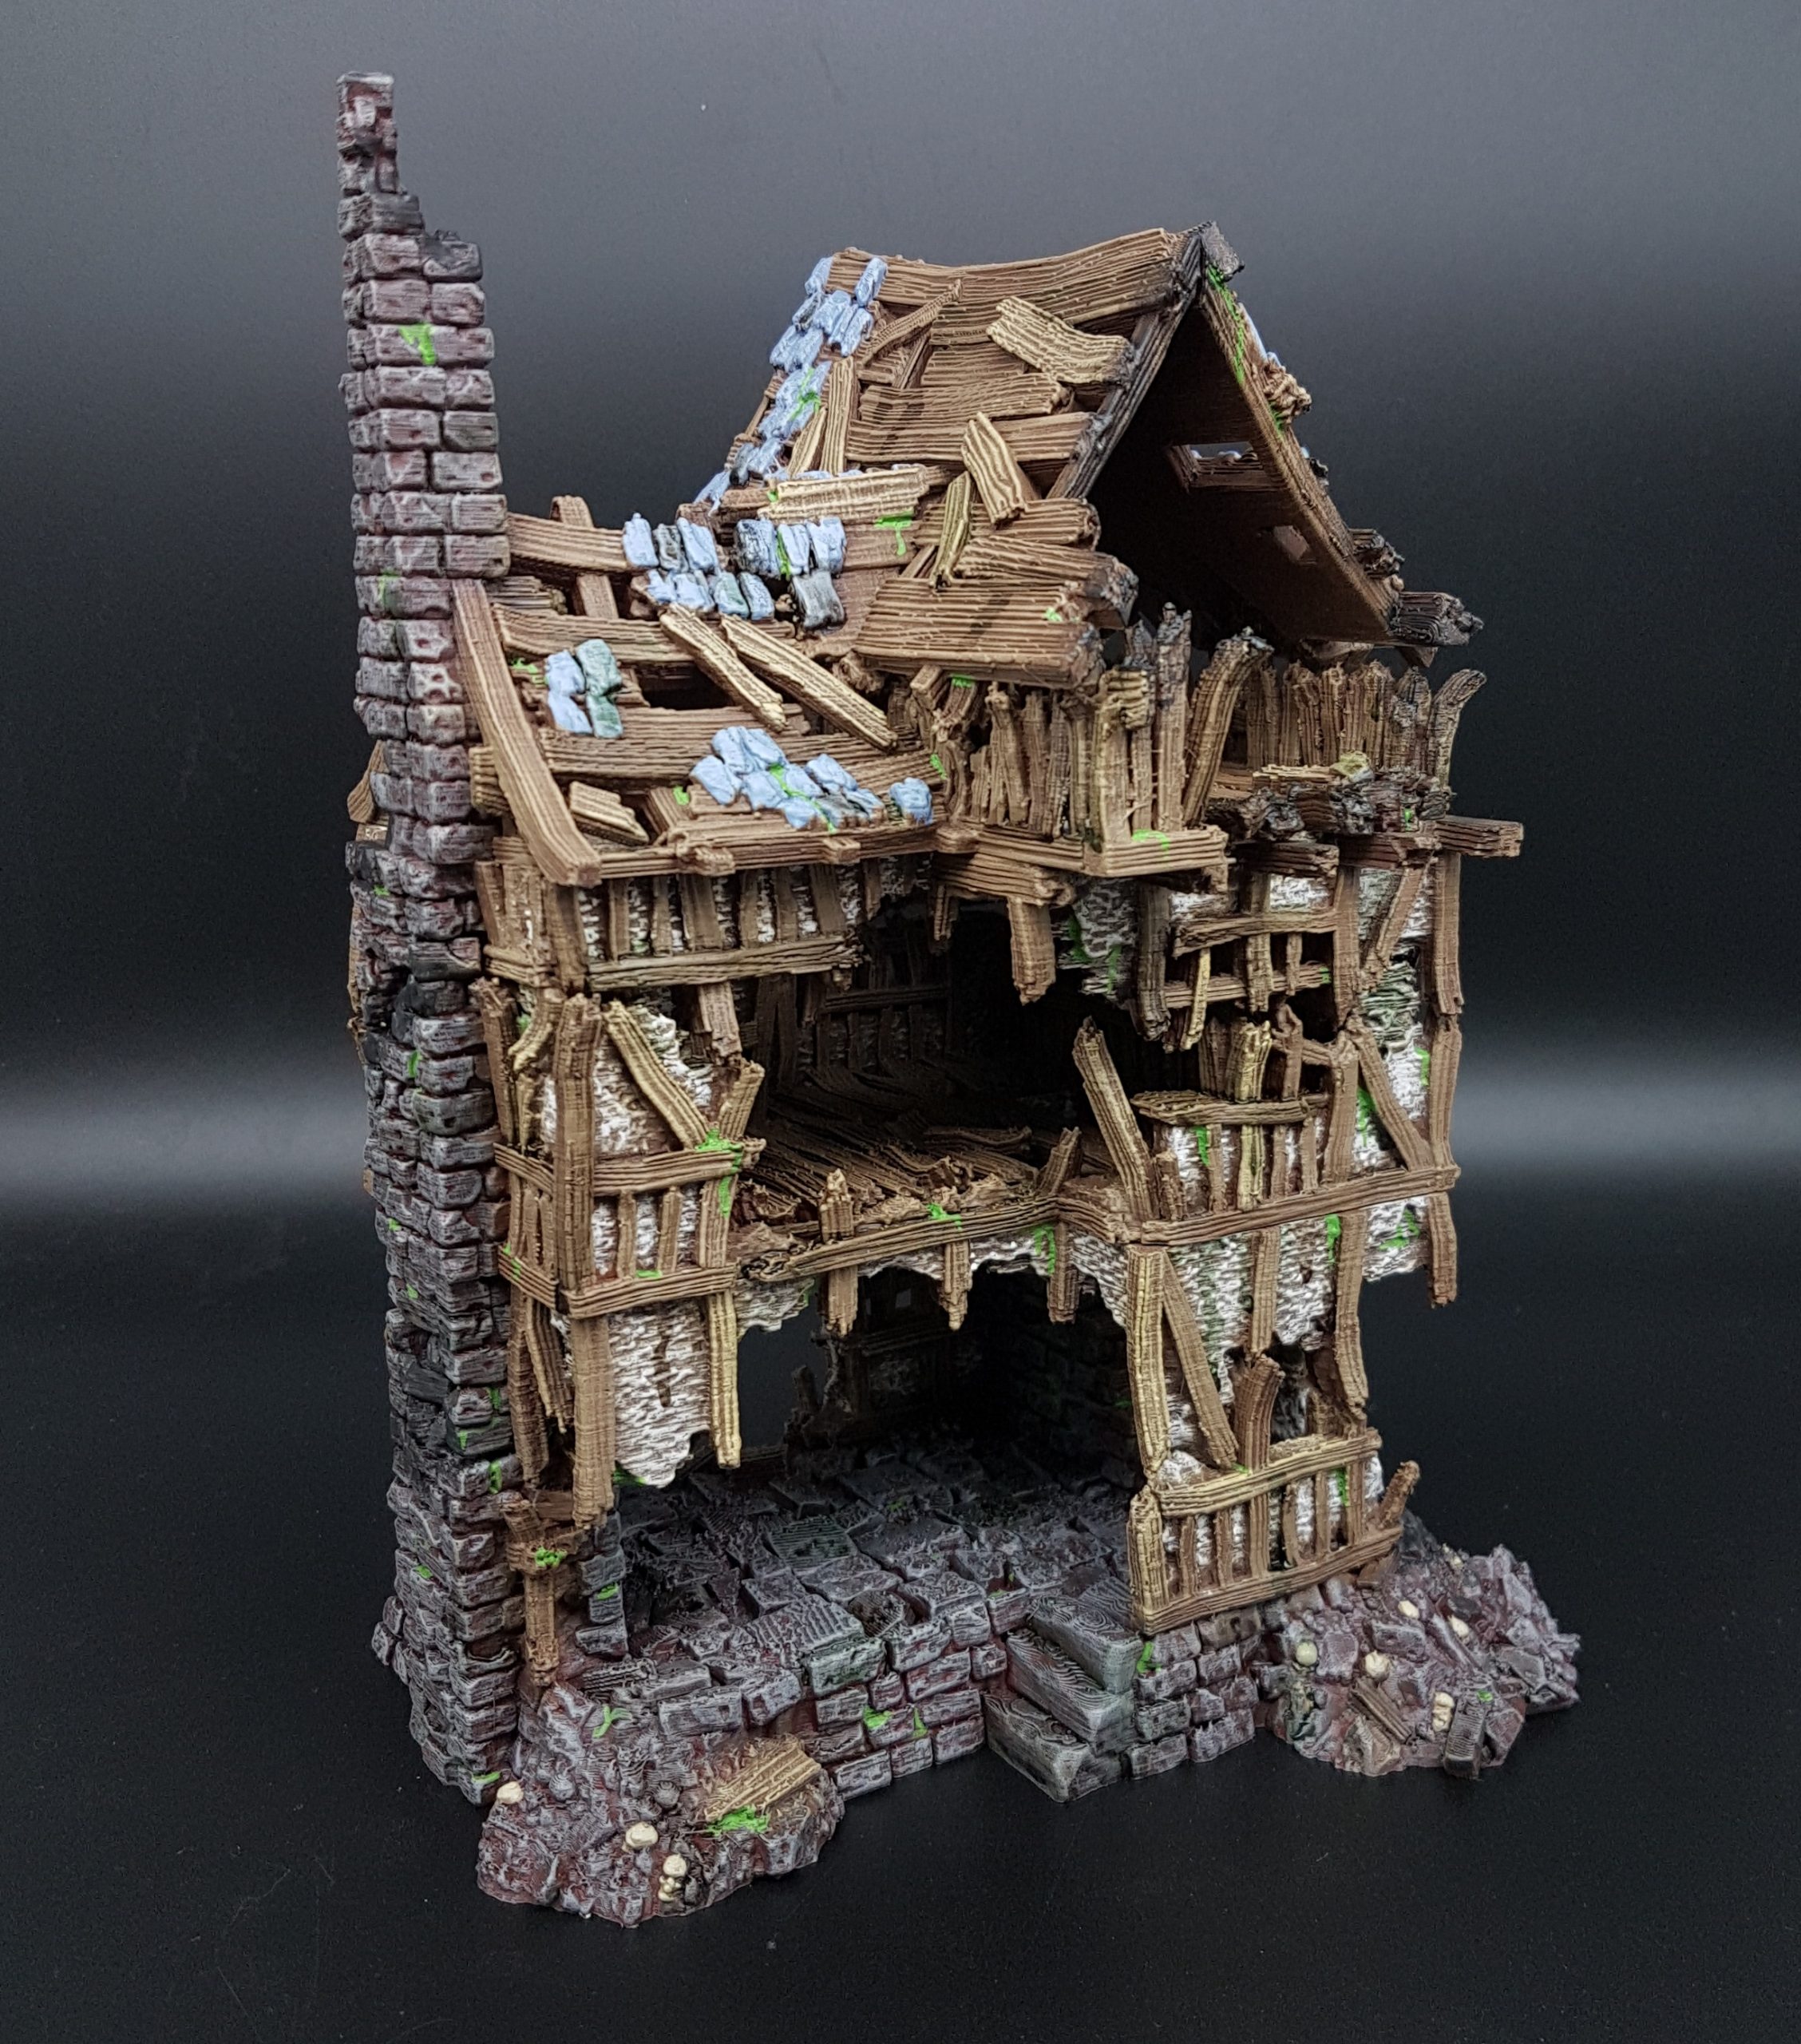
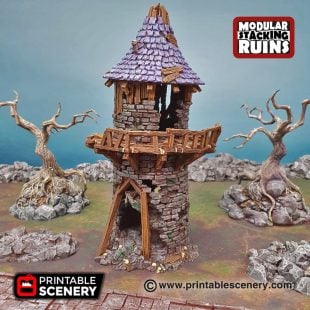
A well to do family had once taken residence in the townhouse away from the country villa. Now a less well to do family huddles away from biting rain and ravenous monsters that stalk the ruins of Shadowfey.
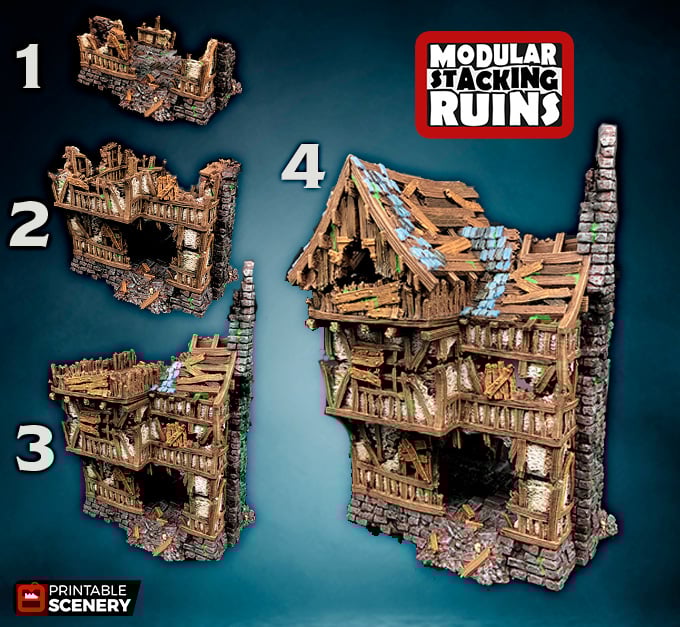
Updates:
- 17 March 2021 (version 1.1) Small printer cuts added.
- 26 May 2022 (version 1.2) Beams adjusted to allow the levels to sit more flush together and guide holes added for filament connections.
- 4 July 2024 (version 1.3) Filament guide holes added to roof parts 2 and 3.
Notes:
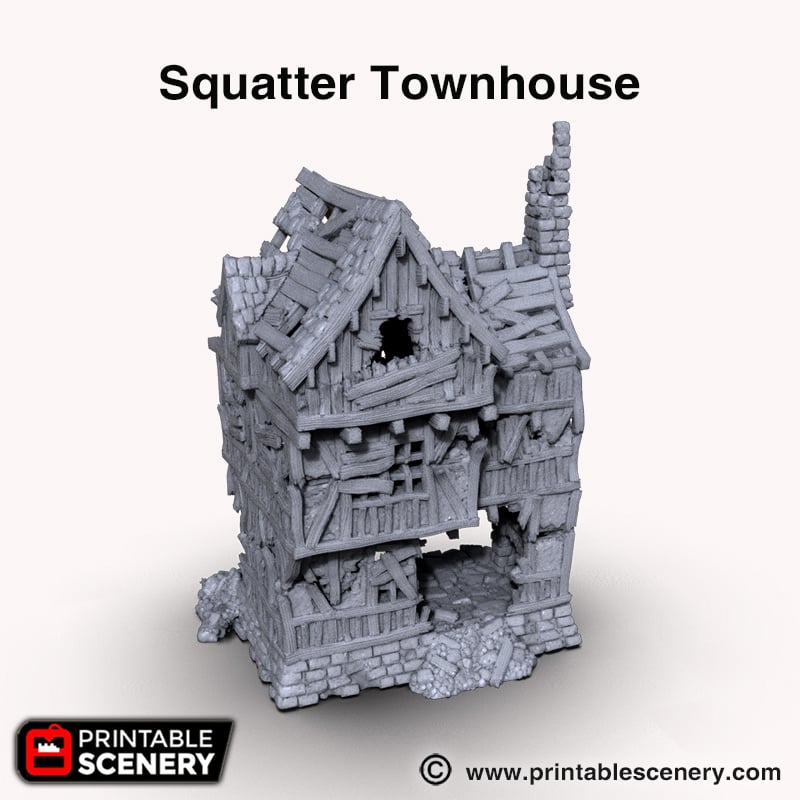
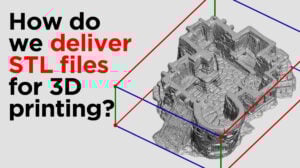
- Right-click on the image below and “Save As” to download the reference sheet for this pack.
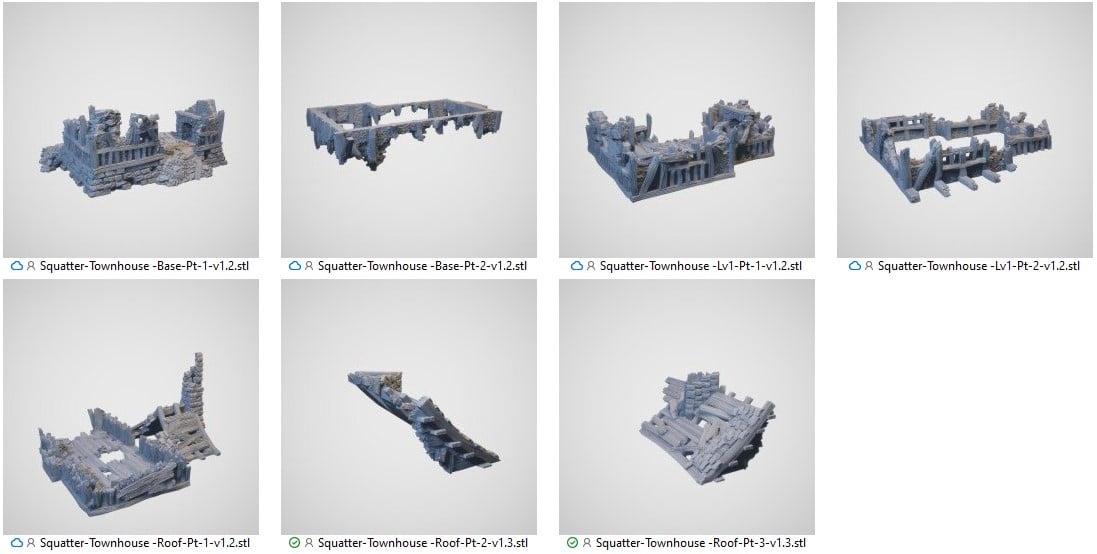
- Reference sheets for small printers are included in the zip.
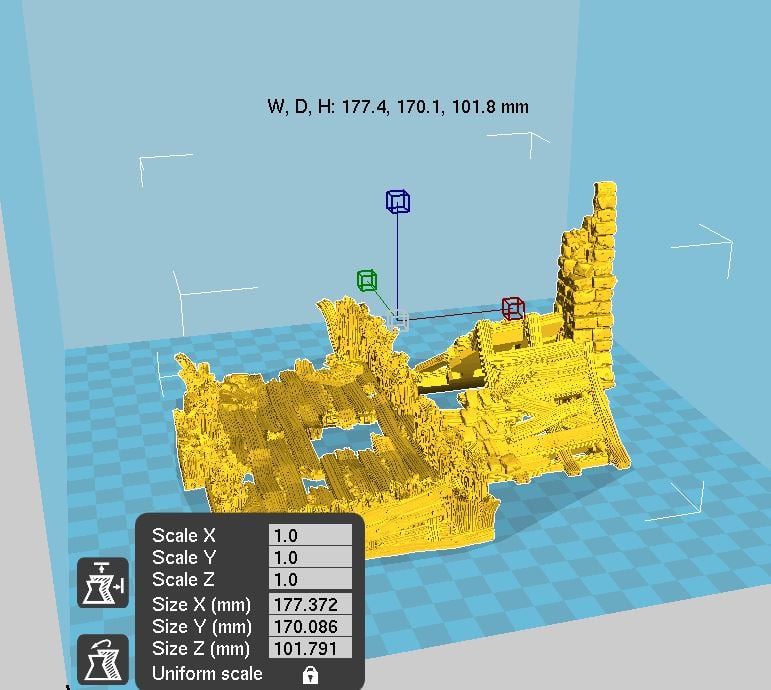
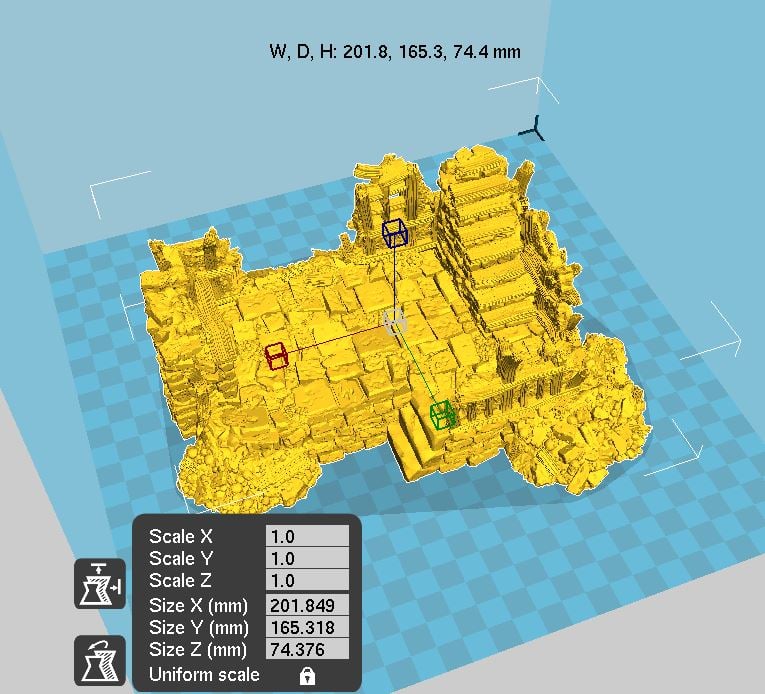
- Product measurements can be found in the image gallery.
- First Published version 1.0


David Allen (verified owner) –
Cura won’t slice this because it’s a large model that doesn’t fit in the build volume. Will this model be chopped into a few smaller pieces to make it easier to fit? Any recommendations on how to proceed?
I’m using an Ender 3 v2.
Nicholas Jebson –
Hey David, I’m unsure how it is not fitting on your build plate as our test models were printed on Ender 3 V1’s, which are slightly smaller. Sam’s only thought was that you might have your brim or raft set quite wide and to check your settings just in case.
David Allen (verified owner) –
@Nicholas Jebson – I think that was it. I ended up keeping the brim, but rotated the model and moved it a bit to fit within the build volume.
icristian.hrimiuc (verified owner) –
Is it scaled for 28mm tabletop games? It appears to be a bit small and thin, especially when compared to Rickety Lodgings. Should I scale it up before printing or should I keep it as it is to match the future buildings from Shadowfey?
Nicholas Jebson –
It is scaled for 28mm, and just fits onto the average buildplate of a FDM printer. Other buildings will be scaled to match it though do note the Squatters Townhouse is meant to represent an average citizens townhouse. Sets like the Burgomeister’s office are being made in sections to represent parts of larger buildings.
Jowan Vogel –
Hello,
Will this fit on the bed of a prusa mini?
Thank you
Nicholas Jebson –
Hey Jowan, the Prusa Mini has a build volume of 17cm cubed. The base of the squatters Townhouse is 20.1cm x 16.5cm x 7.4cm, so will fit via all axis but the X axis. the upper layers are at most 17.4cm on the X axis. you would need to either slice the sections to accommodate this or scale it down to 84% for the Prusa mini.
Hugo Nogueira (verified owner) –
Hello,
Will the roof pt2 and pt3 print without supports?
Thanks
Nicholas Jebson –
Yes they will Hugo, with next to no stringing as well. As long as the angle of the build is above 45 degrees it will happily keep building up the layers.
Samuel Bonnet (verified owner) –
Hello,
I’m having a hard time trying to print Lv1 Pt2.
The brim is layed in a chaotic order (see screenshot link), it’s the third time my print fails on the first layer. I never had this problem when slicing other models so I guess it comes from the model.
Did anyone had success slicing this file (with a brim added) on Cura 4.8 ??
Samuel Bonnet (verified owner) –
Sorry for the double post, here is the screenshot that was missing :
https://i.ibb.co/qDtNjRc/Capture.png
Nicholas Jebson –
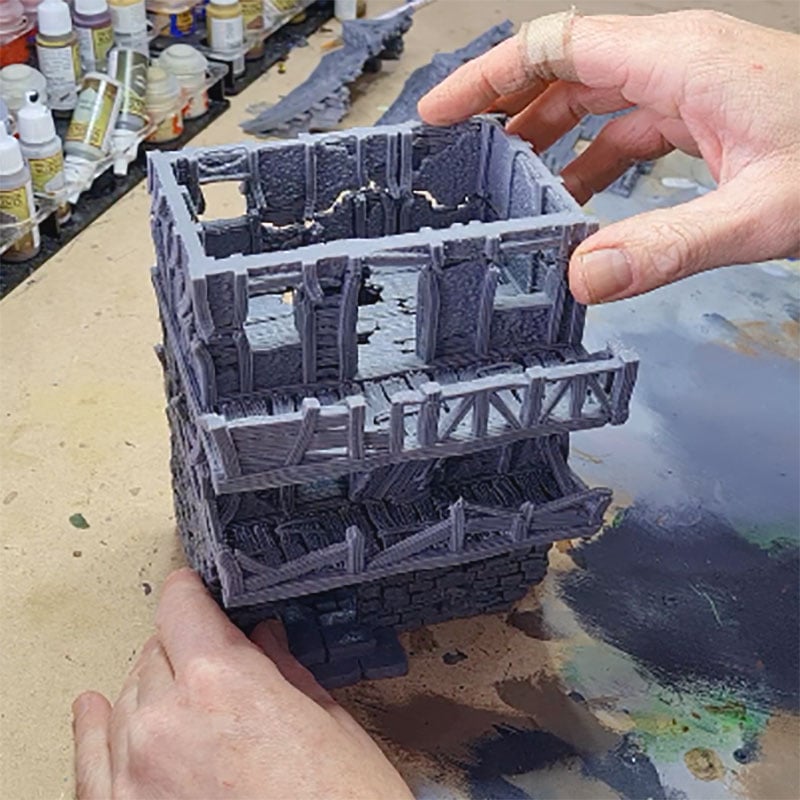
Howdy Sam. You have definitely stumped us. The brim should build out directly touching the model, where as what is happening in your slicer seems more like half way between a brim and a skirt. Have you changed any build plate adhesion settings in the configure Cura tab under preferences? I have loaded the piece into Cura and this is what I get when selecting brim:
Samuel Bonnet (verified owner) –
OK I’m not sure what was going on but I’ve finally sorted this problem by unchecking the “Brim only on outside” option.
It’s weird because there can only be outside brim on this piece, but it worked this way.
Every piece printed flawlessly and everything fits together perfectly. Very nice building, I love that new “Modular Stacking Ruins” concept !
stefan.regner (verified owner) –
Our gaming club recently made a review video of the squatter townhouse from printable scenery. The video is in German but you will get the message 🙂
Have fun – I had when I printed and painted the model
https://youtu.be/kdELRu4M_Os
Mark Warren (verified owner) –
I’m printing this building now, it’s beautiful. However, I’m really concerned about those pieces of wood hang out on the air on the roof parts 2 and 3. I have good part cooling, but that’s still pretty scary for a 1-day print. Do these parts need to be tilted or something?
Nicholas Jebson –
No they should print fine as is. If you are worried you can attach some spot-supports to that section just to make 100% certain, but it should be fine.
James Jones (verified owner) –
I’ve printed this out, and I have to say I’m a bit disappointed tbh. The concept of modular stacking ruins is cool (and works really well on some of the other Shadowfey models), but here the gaps between each layer are so pronounced that it’s not immediately obvious how the whole thing actually stands up. Almost none of the vertical beams touch from layer to layer, which gives the impression that each later is basically floating. I think with some small tweaks you could have more of the stackable layers truly flush, which would greatly improve the piece. You could still have some gaps, or even lots of gaps. Just my $0.02.
Mike –
Hi James,
Thanks for getting in touch, we appreciate your feedback. You’re correct in that the vertical beams do bow out a bit so that they don’t quite line up flush with each other.
We will take this advice on board and look at updating it in the future so that the levels of the building fit a bit more flush.
redbjork (verified owner) –
I enjoyed painting this model 🙂
https://imgur.com/gallery/VsMybsN
JulesVernes (verified owner) –
I am really concerned about printing the roof parts 2 and 3. Anything to be aware of? Loading the file in PrusaSclicer it basically hangs completely in the air? Do I need to rotate it or add supports?
Jo Boorer (verified owner) –
These parts will need supports added.
David Weeks (verified owner) –
Hello,
I am having an issue printing lev 1 pt 2. It has failed 3 times. It won’t adhere. It looks like there is only 1 adhesion spot?
I am brand new to printing. This is the 1st thing in have attempted to print. Lev1 pt 1 printed no problem and lev 1 pt 2 seems to be printing fine currently.
This is probably user error, but any suggestions?
Thanks!
David W
Jo Boorer (verified owner) –
As this part is printed upside down it will be due to it not sitting on the build plate flat. This happened when I tried to turn it in the slicer but if I open it up first in netfabb and rotate 180 on the x and save it then bring it into the slicer it sits perfectly flat.
Michael Becker (verified owner) –
Overall great file. Not a fan of Roof pt 2 & 3 see feedback on what they need.
Feedback: Roof part 2 & 3 needs 3 filament holes to help align the parts for assembly.
Help for others with printing: Roof pt2 and 3 should be rotated 90 degrees so the ridge and half gable half lay flat on the bed. Printing with supports on these two parts helps.
Jo Boorer (verified owner) –
Thanks for your feedback.
Will put this on our update list.
Alexander Sawyer (verified owner) –
I’m currently printing these files, and while the print themselves are coming out well I’ve been a bit surprised that the files are behaving differently in my slicer (Ultimaker Cure 5.6.0). When I load them, the files load in correct final alignemnt – i.e. top levels are hanging “in the air” instead of loading inverted and flush with the build plate. Same with the roof pieces. And most of the files get a warning from my softwere until I turn them 90 degrees. Also, they take about three times as long to slice as similar files from you guys (I just did all there sections of the gatehouse).
Like I said, after adjustments are made the prints are coming out fine! No problems, I’m very happy with the results! I just found the other stuff so strange I wanted to let you know!
Jo Boorer (verified owner) –
Hi
Could you send us pictures of these errors to [email protected]
Thanks
joshuar56 (verified owner) –
This is probably the best of the 4 sets I’ve printed from printable scenery, but it still has issues. For the most part it prints well without supports, which seems the be the exception not the rule, but it still doesn’t have good connections for the top and bottom pieces.
Jo Boorer (verified owner) –
Hi
Thanks for pointing this out. I have put this on our list of model updates.
Michael Wilton –
I’m having trouble printing LVL 1 PT2. Its failed twice on my. seems like about 50% completion a layer shift happens and completely ruins the print. This section of the building should print support free by all accounts. I’ve set up a third attempt with tree supports and a brim to hopefully hold it all in place. Is there a possibility there’s a issue with the file itself?
I’m currently using an Ender 3 Pro to print this section. If it fails again, I’ll use my CR-10 to see if there’s any difference. Any help or suggestions would be appreciated.
Joanne Boorer (verified owner) –
Hi Michael, Is the first Layer completely flat on the buildplate?