
Painting 3D Printed Grey Ruins
In this article, we’ll cover how to paint grey ruins in a few simple steps. This beginner-friendly tutorial uses almost exclusively drybrushing techniques, making it easy to replicate. We’re using terrain from our Throne & Ash range, but the techniques apply to any model with bricks and rocks.

We used the following paints if you’d like to follow along with this tutorial, but you can easily swap them out for other brands or similar colours to match your own.
- Rustoleum Flat Black Undercoat spray
- Dungeon Grey (Army Painter)
- Uniform Grey (Army Painter)
- Field Grey (Army Painter)
- Stone Golem (Army Painter
- Brainmatter Beige (Army Painter)
- Dryad Bark (Citadel)
- German Pale Camo (Vallejo)
- Banshee Brown (Army Painter)
For tips on technique, check out our tutorial video here on drybrushing terrain.
Model preparation
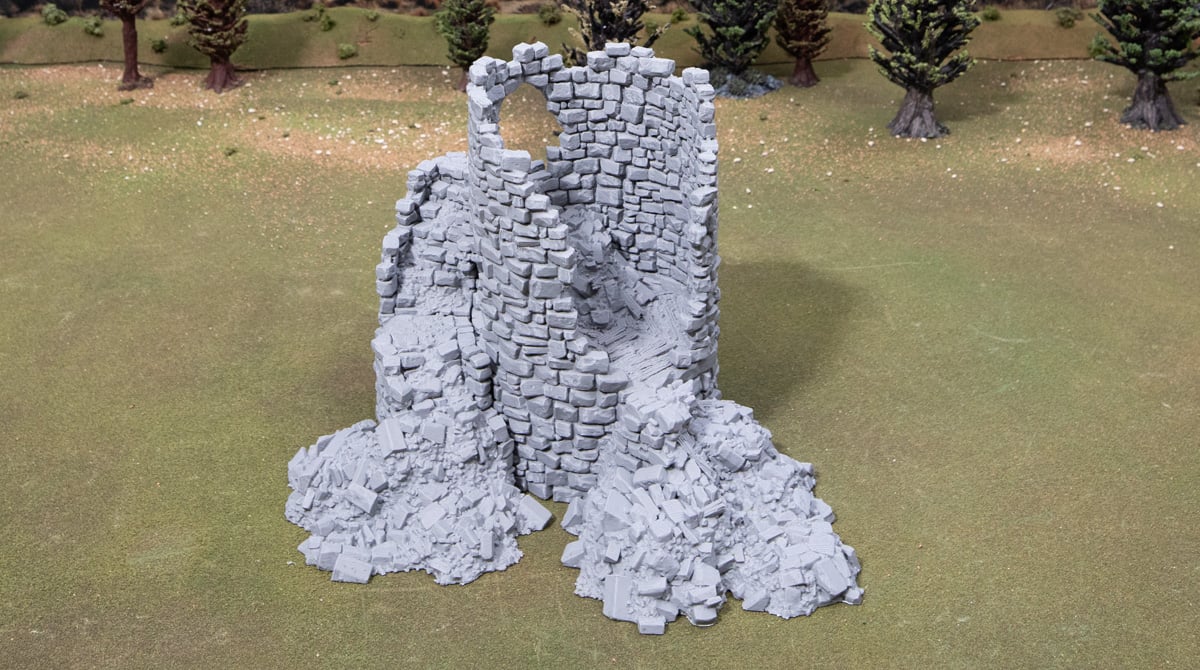
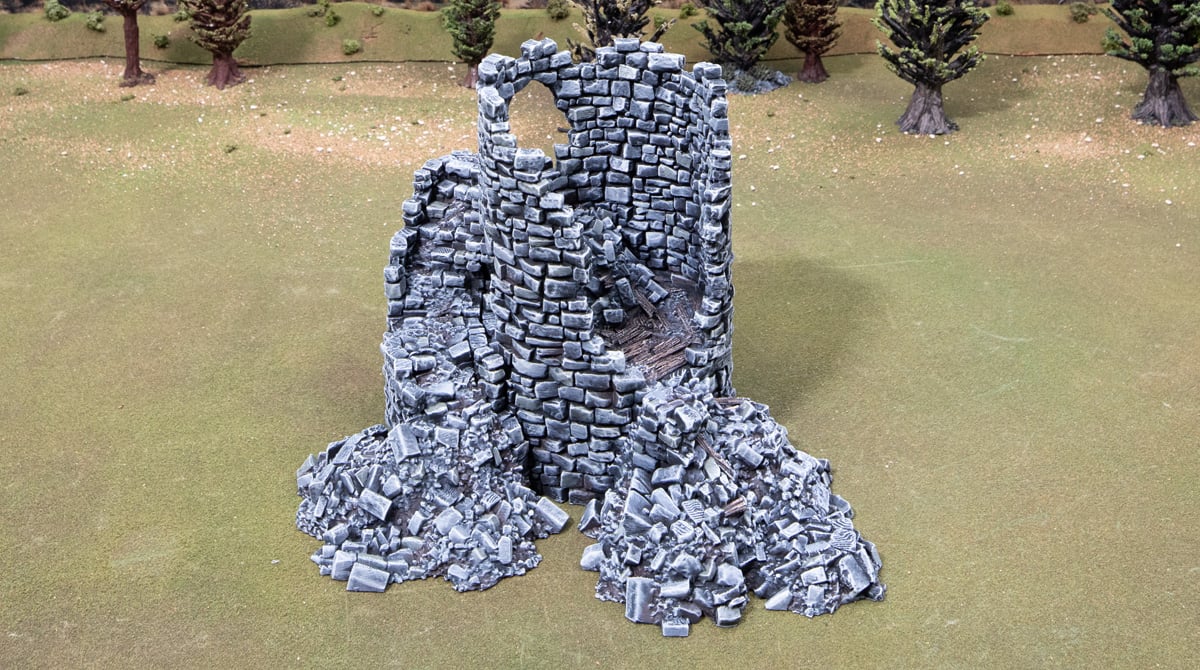
We’re using the Ruined Count’s Tower in this tutorial, 3D-printed on our Bambu Labs P1P at standard settings. We recommend a brim on these wider models to help with lifting. A quick go-around with a lighter to remove any cobwebs is also recommended.
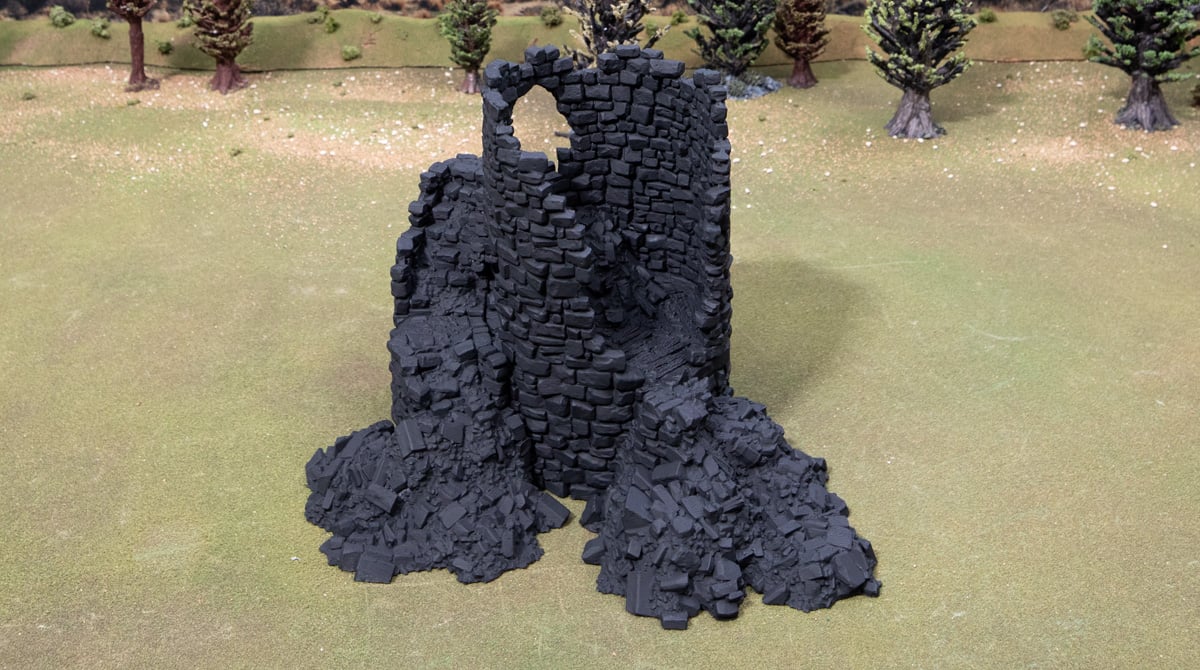
Step 1 – Undercoat black!
Any brand of black undercoat primer is fine here. Avoid priming in too-dry or too-humid conditions if you can help it, and spray about 20-30cm from the model to avoid drowning the details in paint.
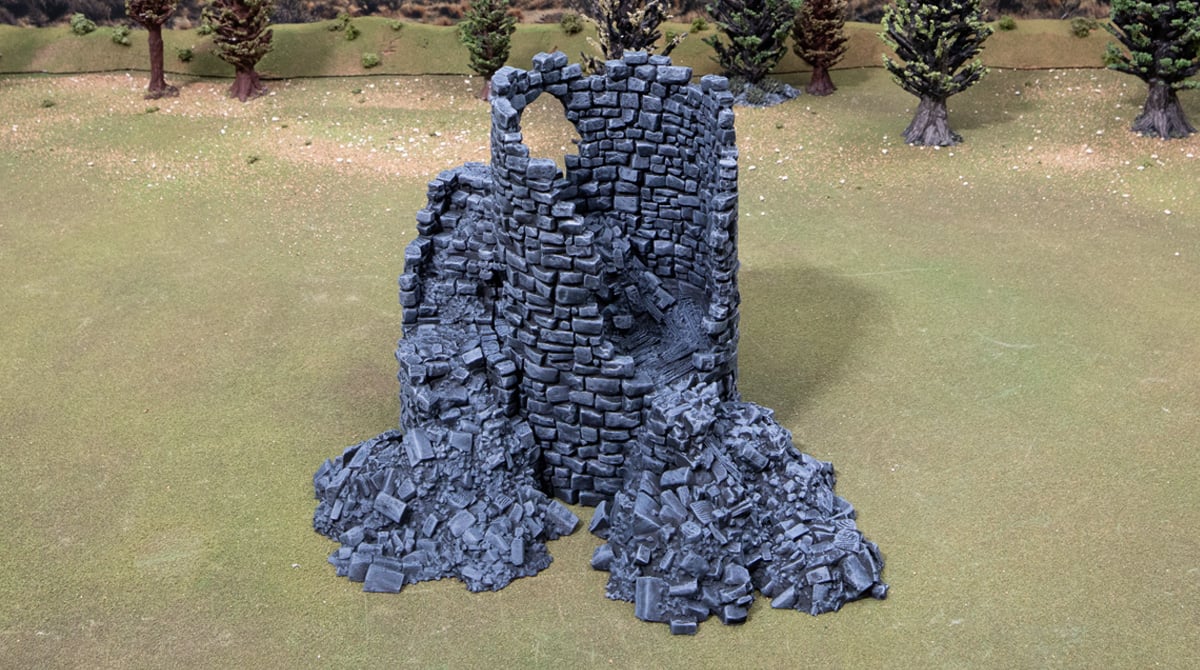
Step 2 – Drybrush of Dungeon Grey
A generous drybrush of Dungeon Grey all over, getting all the raised areas evenly.


Step 3 – Pick out bricks
Next, we’ll use Uniform Grey and Field Grey to randomly select a few bricks. This gives the brickwork a more natural look and helps break up the monotony of the ruins, too.
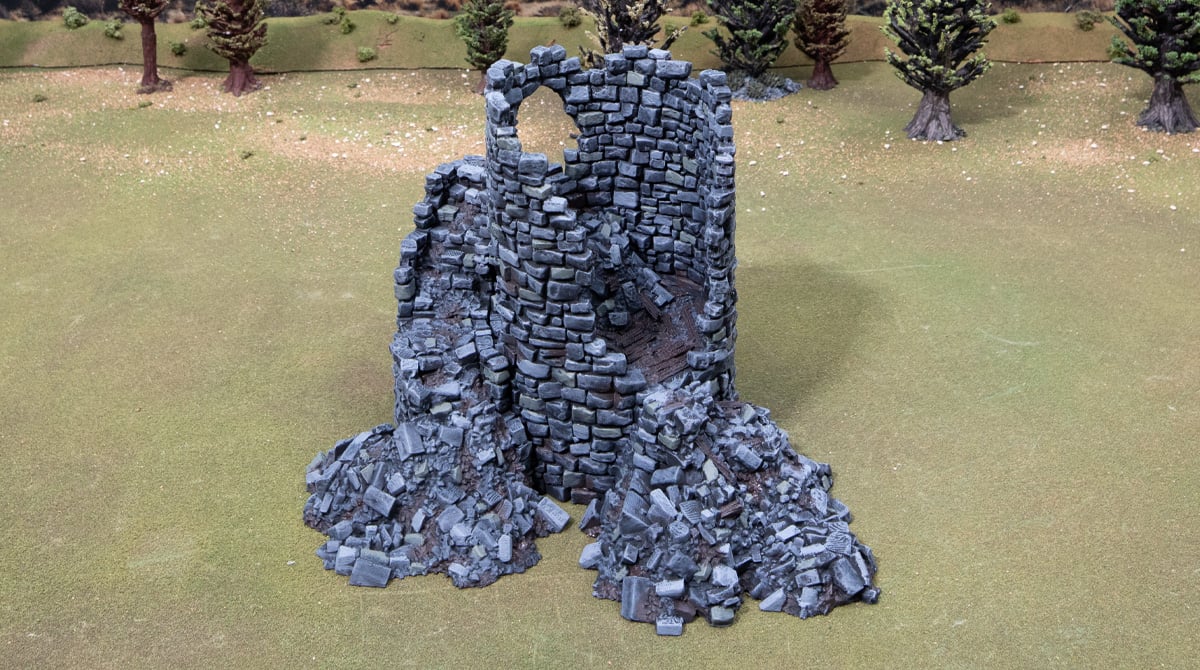
Step 4 – Painting wood and dirt
Paint all the wooden planks in Dryad Bark, and then use that paint to also create some dirty areas in between bricks and especially in the rubble pile areas.

Step 5 – Highlight the wood
Carefully drybrush all the wood areas first with the German Pale Camo, then again on the very edges of the wood with the Banshee Brown.
Step 6 – Drybrush of Stone Golem
In this step, we want to hit the terrain’s highest points and most pronounced edges for additional contrast. It pays to keep the brush strokes downward to simulate the light hitting those top edges.

Step 7 – Final drybrush highlight
For the final painting step, we just hit the top-most edges and shape-defining edges with the Brainmatter Beige. These are places like around doors, the ruined rim of the tower, the edge along the staircase, and larger bricks in the walls and rubble.
These super-easy, cool-looking ruins are easy for anyone to paint. So if you’ve got a bunch to paint, try recruiting friends or family to help you! It’s effective and fun, and it will get your terrain looking good and ready for the battlefield.
great information, would like to see a stone building painted please..
Thanks Steve, here’s another approach to Stone Buildings: https://www.printablescenery.com/2022/08/11/painting-realistic-stone/