Building a Normandy board for Flames of War using the Country & King terrain.
When I first saw the 3D printable models for the Country and King Kickstarter, I knew that they would make an excellent Wargaming table for Flames of War. With permission from Matt, I grabbed a bunch of the new STL files and got to work planning an epic new battlefield for my home games!
Concept Phase
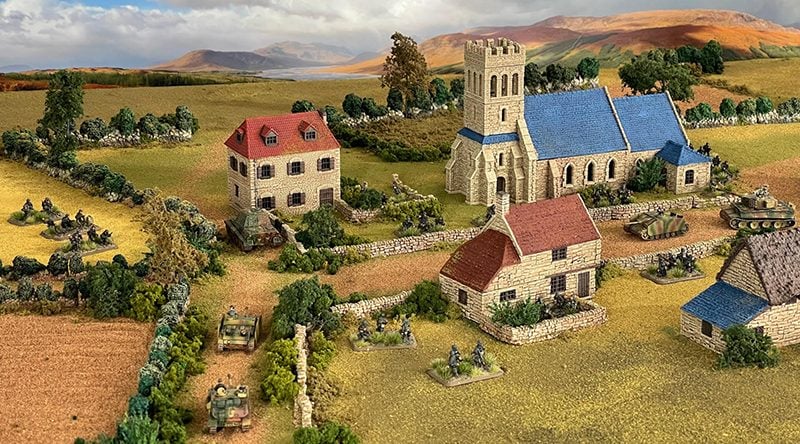
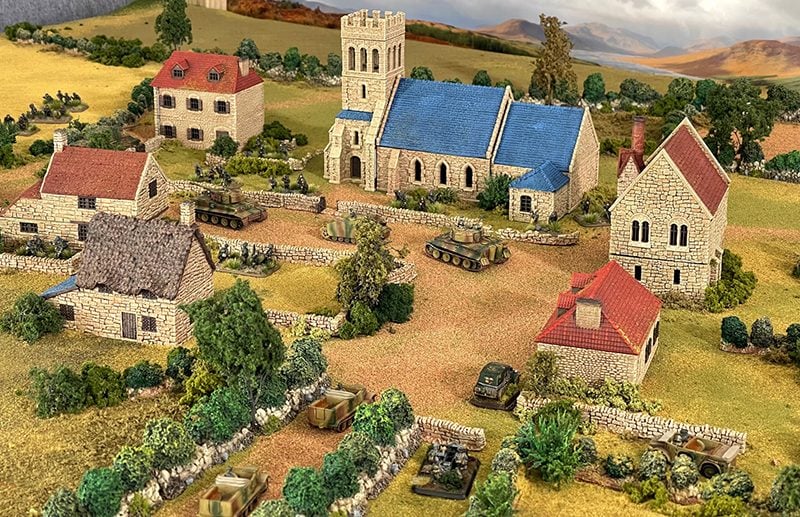
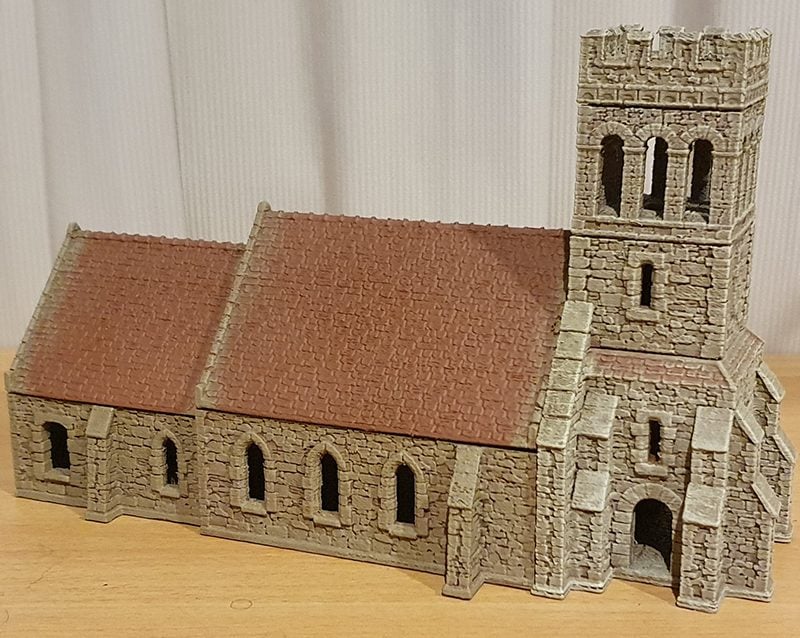
I knew from the start I wanted to make an Operation Overlord-themed table. The Norman Church, buildings, and bocages put me in mind of the small towns-turned-strongpoints during the invasion of Normandy. Planning on centering my table around that epic new church, I started preparing the files to print.
Printing
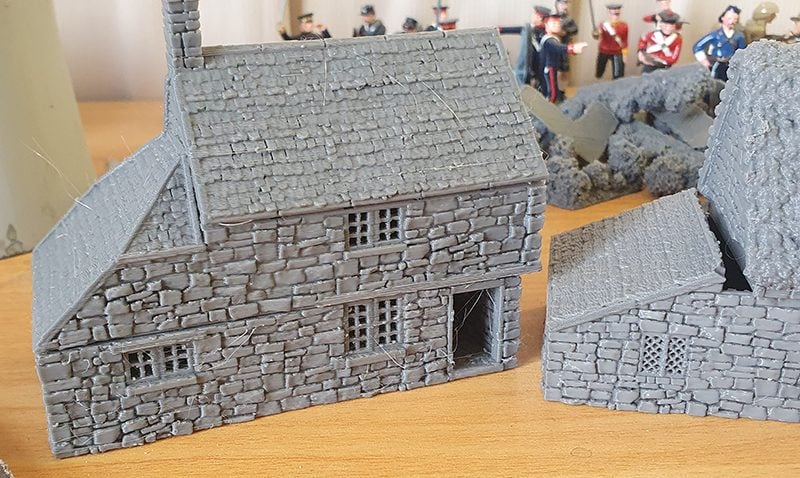
Flames of war use 15mm miniatures, so the buildings needed to be scaled down to 60% of their original size to look the part. Infantry are based in groups in the game, so I made sure they could still fit inside at the reduced size.
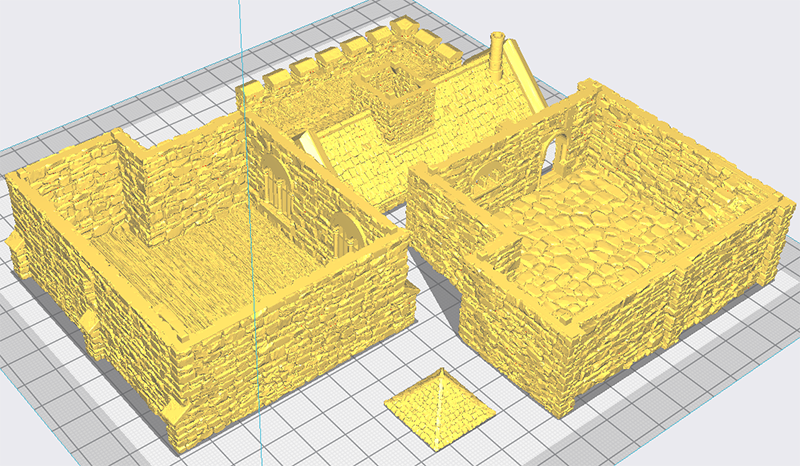
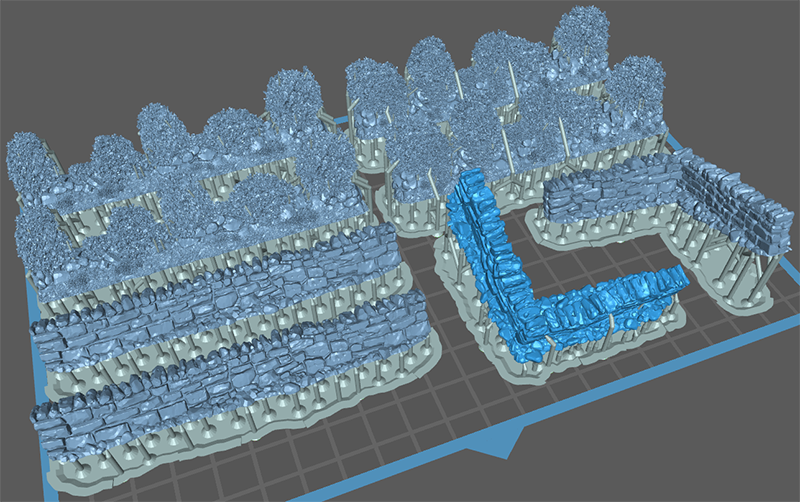
It’s awesome to see how much detail the models retain at this size, especially the Bocages. I tested them on both my resin and FDM printer and found the bush details fantastic on both machines. The FDM printer’s larger build plate made printing the buildings a breeze, as I could fit the entire model in one print bed. At the same time, the speed of the resin printer allowed me to quickly and easily churn out walls and hedgerows while the buildings were printing.
I’m terrible at visualizing things in my head, so used a board to “stage” the models as they became available. The board made it easier to see what was needed, adding extras to the print queue as I saw fit. I highly recommend this technique when planning any wargaming board.
Painting
When painting a full board, dry brushing is your friend! As long as you have a solid base coat down it will be a quick and painless way to get all the models ready.
I wanted a nice warm tone for the models, so started with the Army Painter Fur Brown primer and built the varying colors from there.
Stone Tone
For an easy ‘warm stone’ heavily dry brush the models with Zandri dust, followed by a lighter dusting of Flayed One Flesh. Make sure the Flayed One is just picking out the edges of the stones, as too much will not look very realistic.
I recommend using this on every piece on the table, it will help unify all the pieces into one cohesive board!
Wood Tone
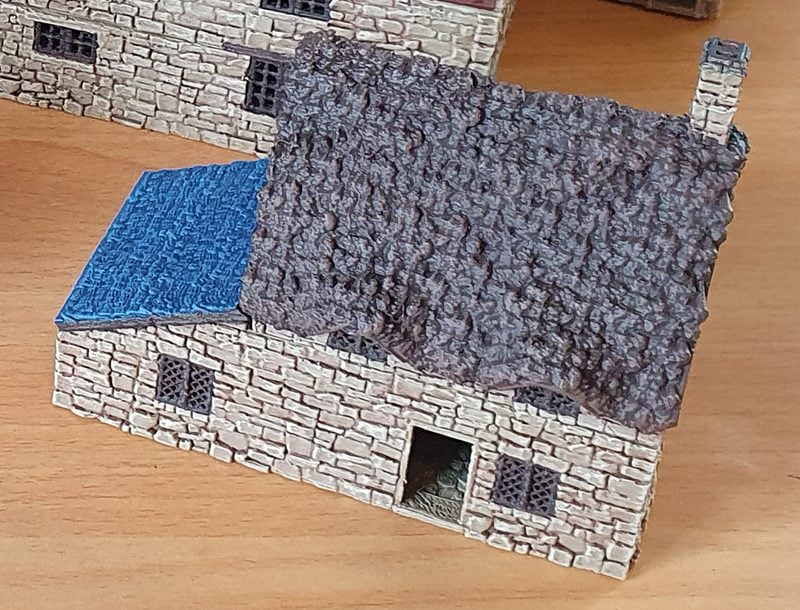
I got a great ‘aged wood’ look on the wooden floors by lightly dry brushing Gorthor Brown over Dryad Bark. It also worked on the thatch roof and doors.
Roof Tiles
Rooves are a great way to add a bit of character to the village. Bright blues and reds are great as they help balance out the more neutral tones of the wood and stone. It might seem garish, but on the table, it works.
A base of Army Painter Dark Sky was used to basecoat the blue tone, with a light brush of Hoeth Blue to pick out the edges. Both the reds started with a base of Chaotic Red, with lighter applications of Doombull and Mephiston Red to give a subtle difference to shingles.
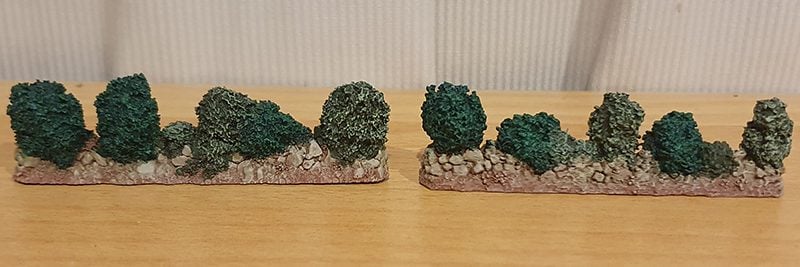
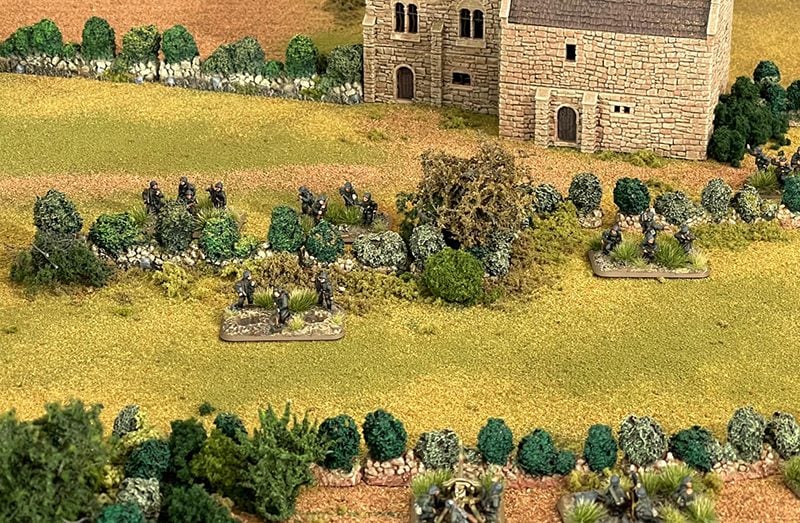
Bocages
When painting bushes remember to use more than one green tone, as too much of one color will make the final look a bit dull. For the Bocages, vary the ratio of dark and olive green so that every length of the hedge looks subtly unique. For the darker tone, just drybrush Warpstone Glow over a base of Caliban Green. The olive is likewise a brush of Nurgling Green over Castellan Green.
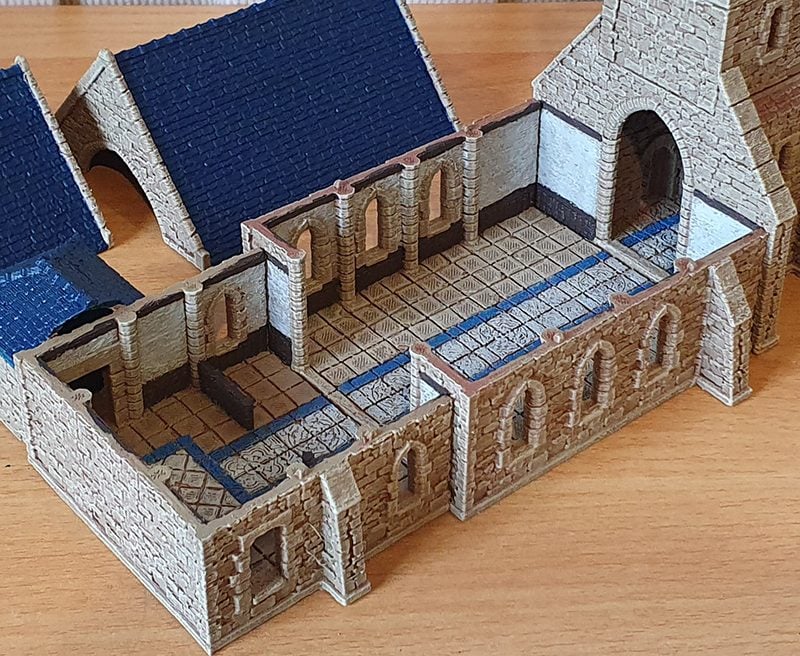
Church Interior
I spent some additional time on the church, as you should on any centerpiece model. Since you can garrison buildings in Flames Of War, I decided to pick out its internal details.
Ulthuan Grey was used as a nice off-white tone (you don’t want it too bright) for the walls and central aisle. It was still looking a little bland, so I added a strip of Caledor Sky on either side of the aisle to help frame it.
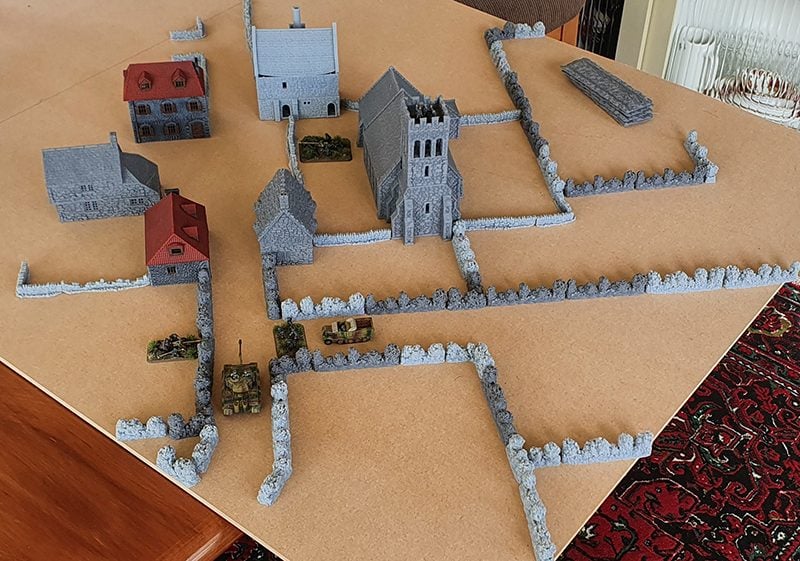
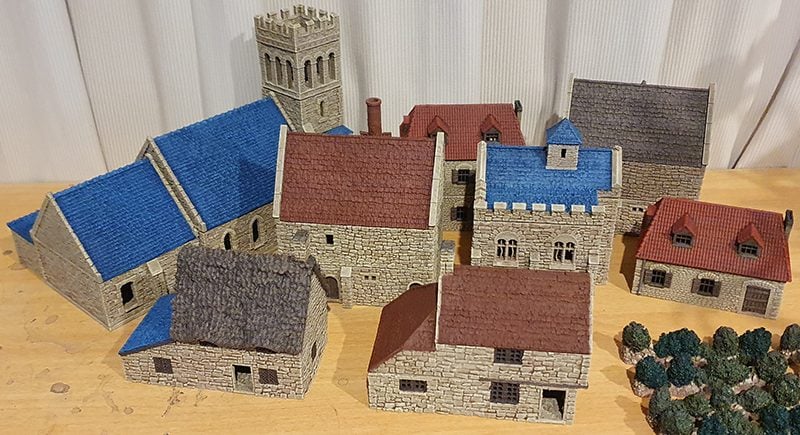
Final Layout
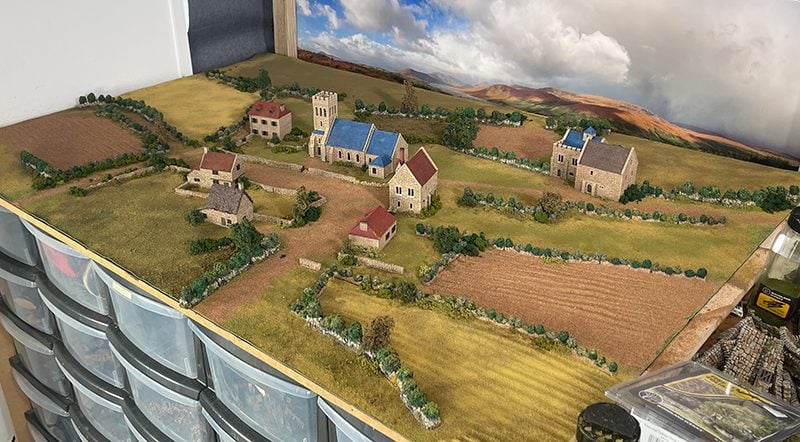
And with that, it’s done! The buildings and laneways of northern France are ready for my Germans to bitterly defend. Surprisingly, as I had designed everything on a 3′ x 3′ board, the models worked well spread across a 6′ by 4′ table as well. Who would have guessed the results you could get in just over a fortnight of printing and painting!
This is not the end, however. I have even more plans for expanding this table. Currently, I am lining up files from the Shadowfey Wilds, Hagglethorn Hollow bonus items, and Timewarp Europe sets to add even more character to the board while I await the free stretch goals from the Kickstarter to start pouring in.
There is still time to pledge to the Country & King Kickstarter to get all these buildings at a bargain price. I recommend pledging now if you can, so even more awesome stretch goals can be unlocked.