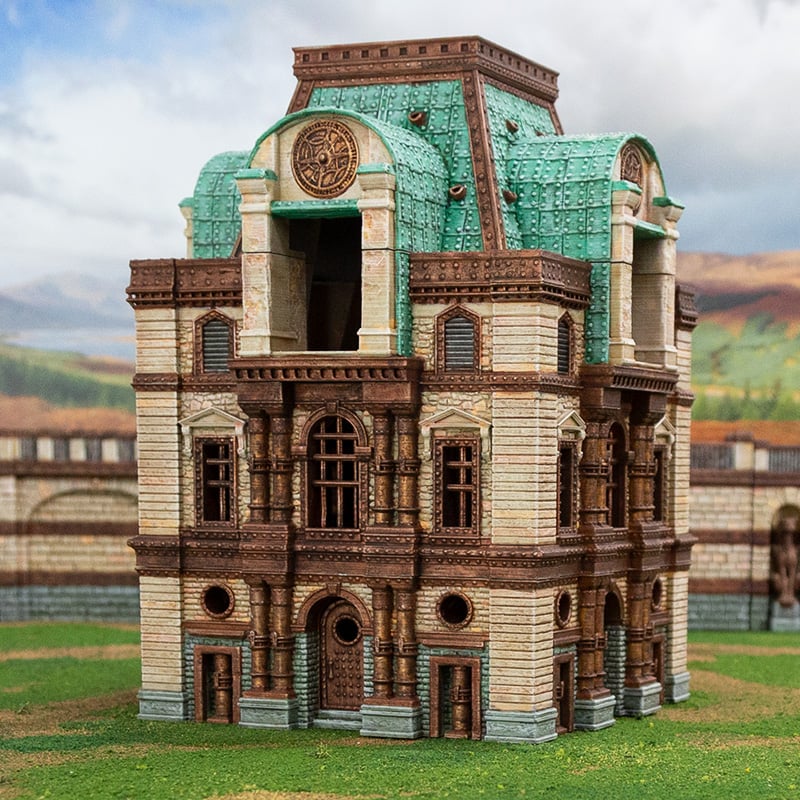
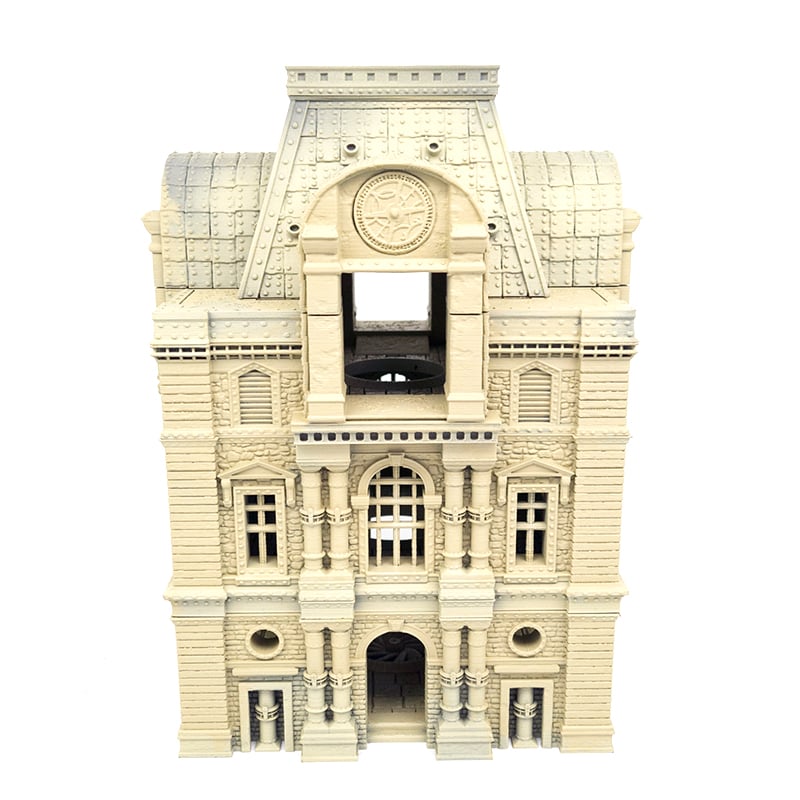
Painting Rise of the Halflings: Barrel Rider Barracks
The Rise of the Halflings buildings have a distinctive style that looks great on the gaming table. This guide will show you how to paint your prints in the same color scheme you’ll see on our site.
For this guide, we are using Citadel, Vallejo and Army Painter colors. However, due to the quantity of terrain we’re painting, it is sometimes worth getting larger quantities of paint made up in the tones you need. You can do this in any good hardware or paint store. Simply take the original color and they’ll match it as best as possible.
We got the four main colors of the buildings made up into mix pots using the Valspar range of interior acrylics. For an exact breakdown of the colors and a list of the others paints we used see the bottom of this article.
Now, on with the painting!
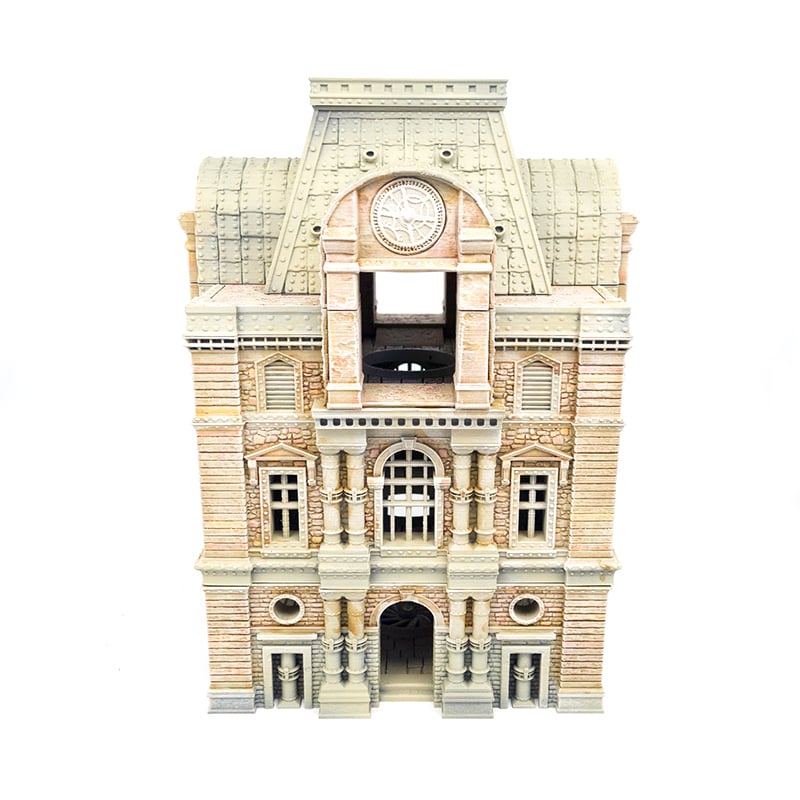
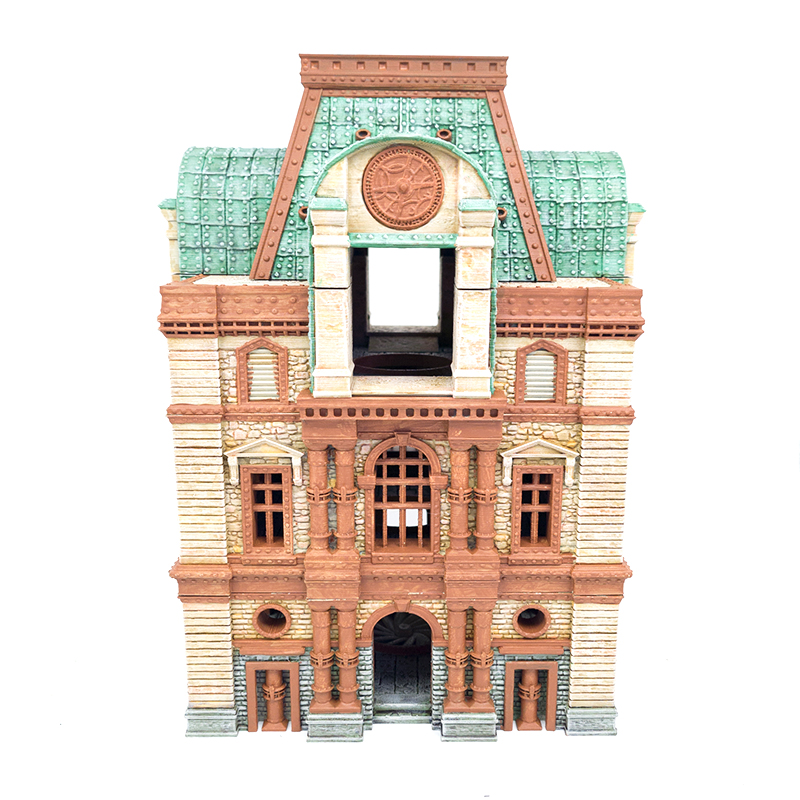
After cleaning up your print, undercoat it with Skeleton Bone Spray. This was then given a light coat of Skeleton Bone paint where we will be painting the walls, to ensure it gets an even coat.
The Walls
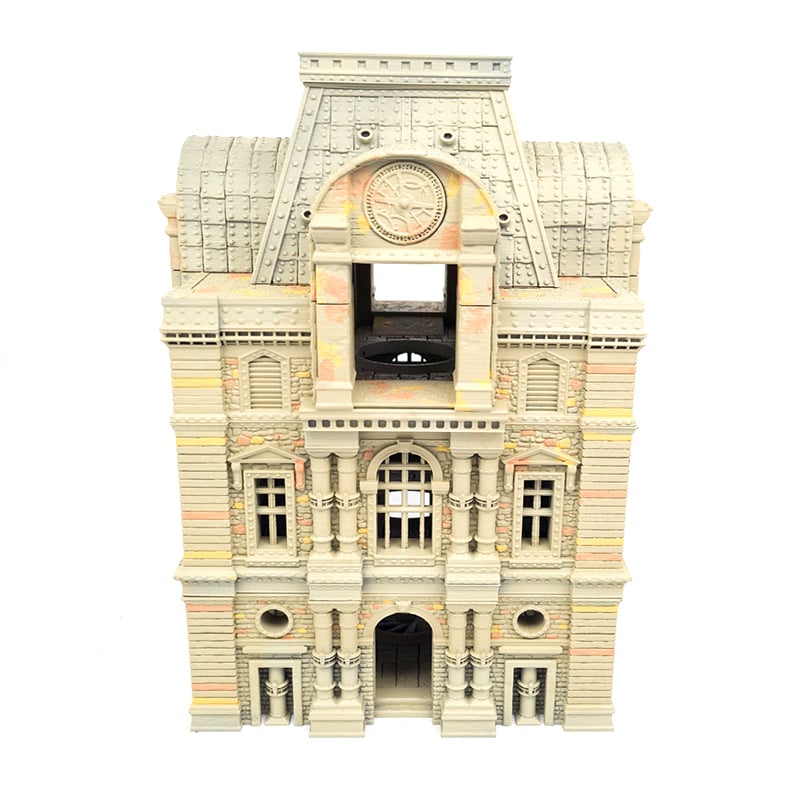
Using Elf Flesh and Barbarian Flesh, pick out random bricks as you see fit, aiming for 20-30% of the bricks being colored using these tones. For the large, flat stone areas, roughly stipple it on.
Once this is done drybrush the walls with Mummy Robes, then Matt White before washing everything with Light Tone.
After the wash has dried give it a light drybrush with Mummy robes.

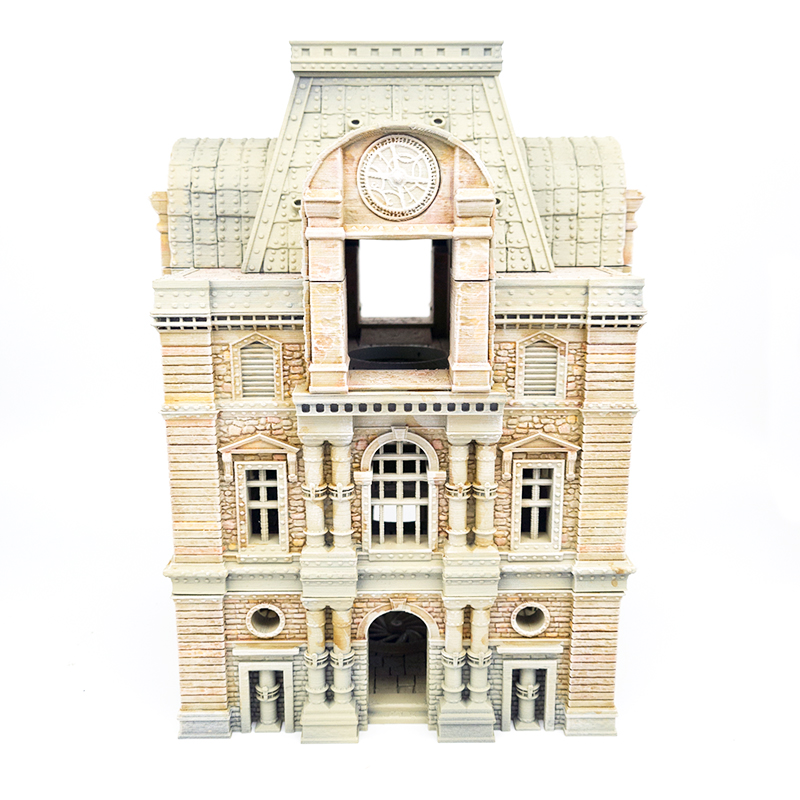
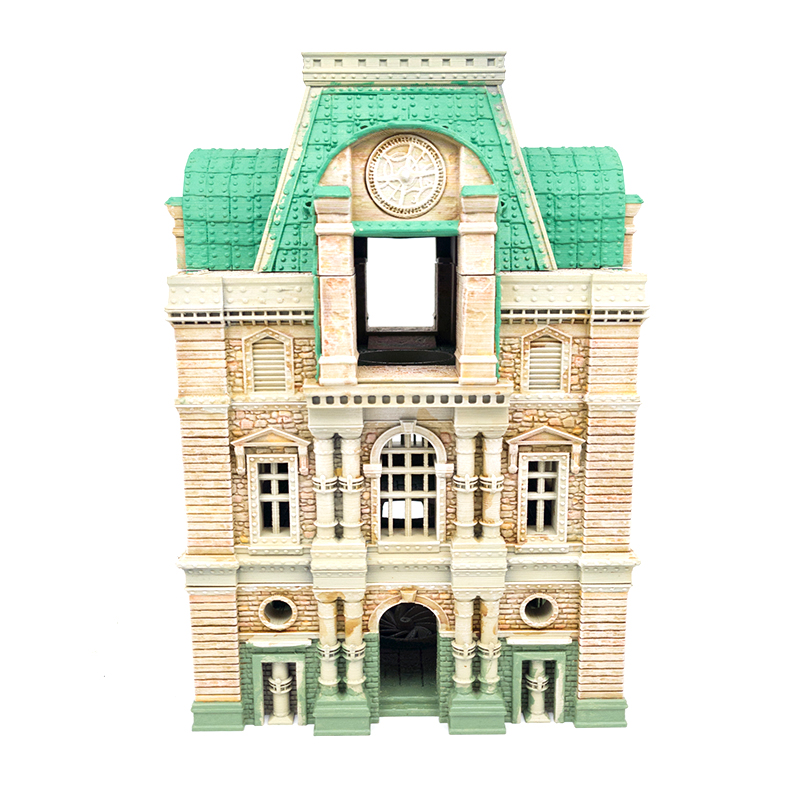
Roof and Stone
Basecoat the Roof with Sybarite Green (or Roof Tile Green if you make the same mix paint as us) and the Stone in a 4:1 Mix of Crypt Wraith and Ash Grey (or Arcane Stone if you’re using our mix). You may need to do two thin coats to achieve a solid basecoat.
Drybrush the roof with Grey Green then Matt White. The Stone is drybrushed with Ash Grey.
After this wash the roof with Green Tone and the Stone with Strong Tone.
The final highlight for the roof is a drybrush of Gorgon Hide whilst the Stone is drybrushed with Stone Golem.
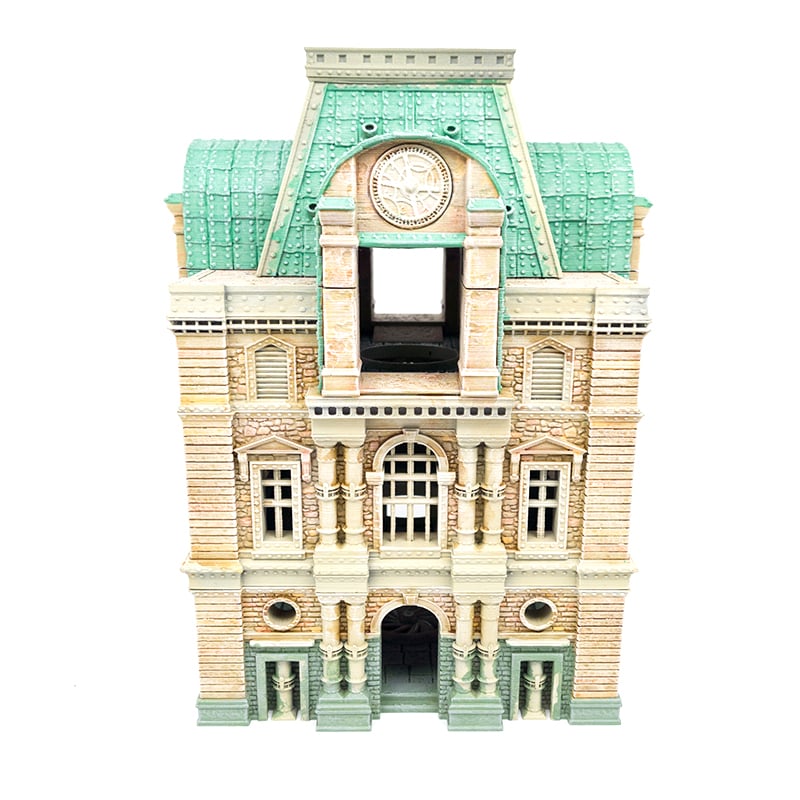
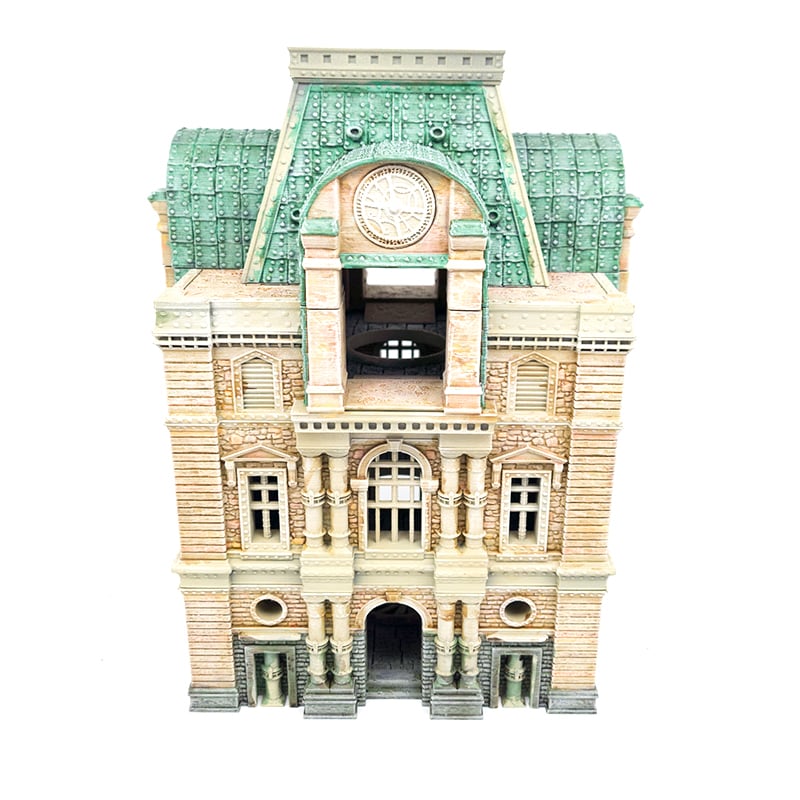
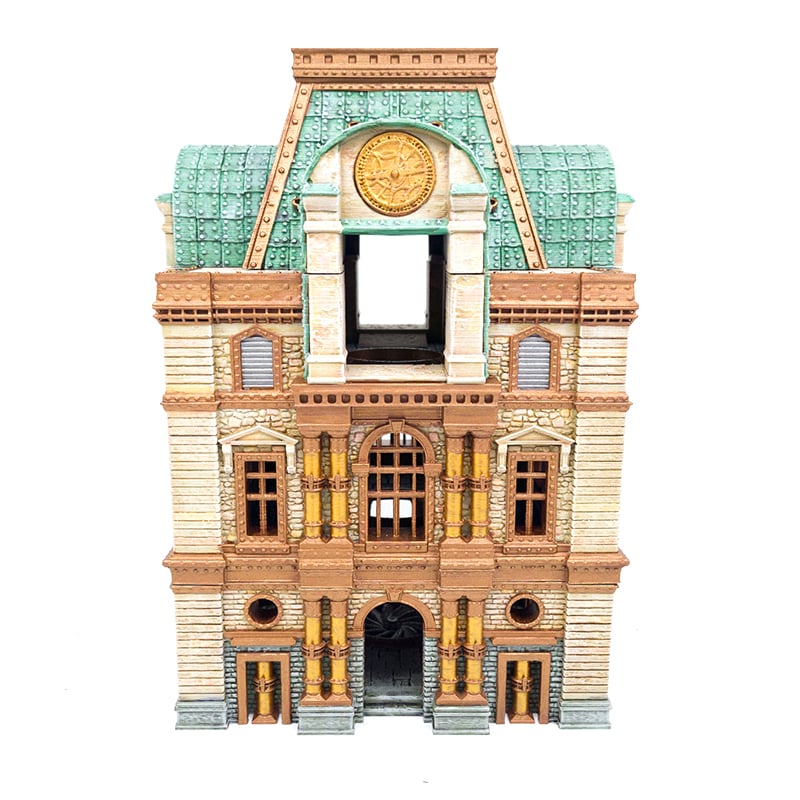
The Metal
Basecoat all the metal areas with Fur Brown before basecoating the copper trim with True Copper and the gold details with Greedy Gold. The silver vents are basecoated with Gun Metal.
Next drybrush all the metal areas with Shining Silver
Wash the Copper with Mid Brown, the Gold with Strong Tone, and the Silver with Dark Tone.
The final step is to dilute Typhus Corrosion with water in a 50/50 mix and wash it over the copper and gold areas.

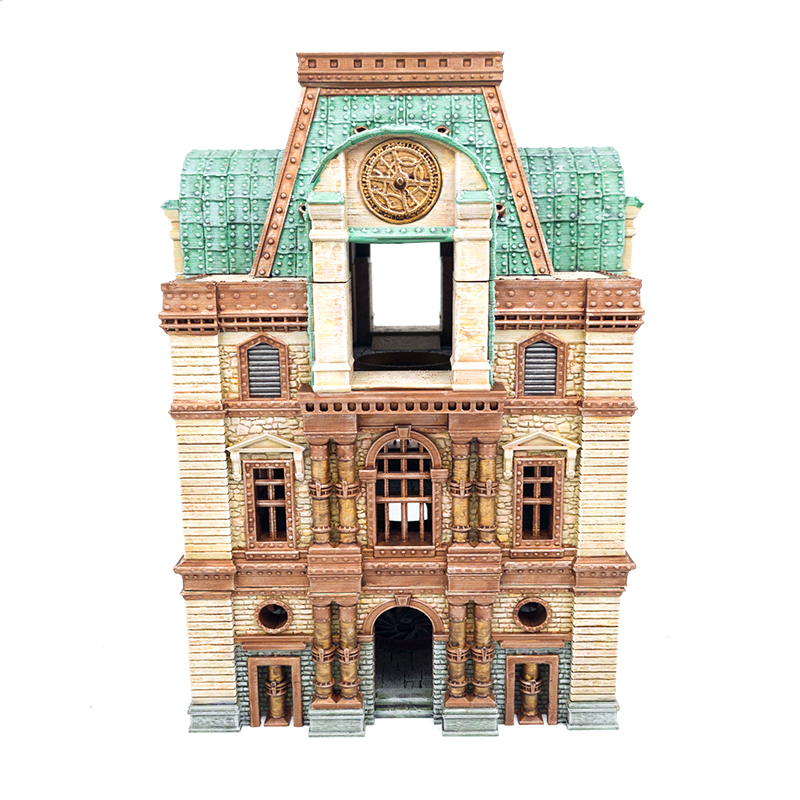
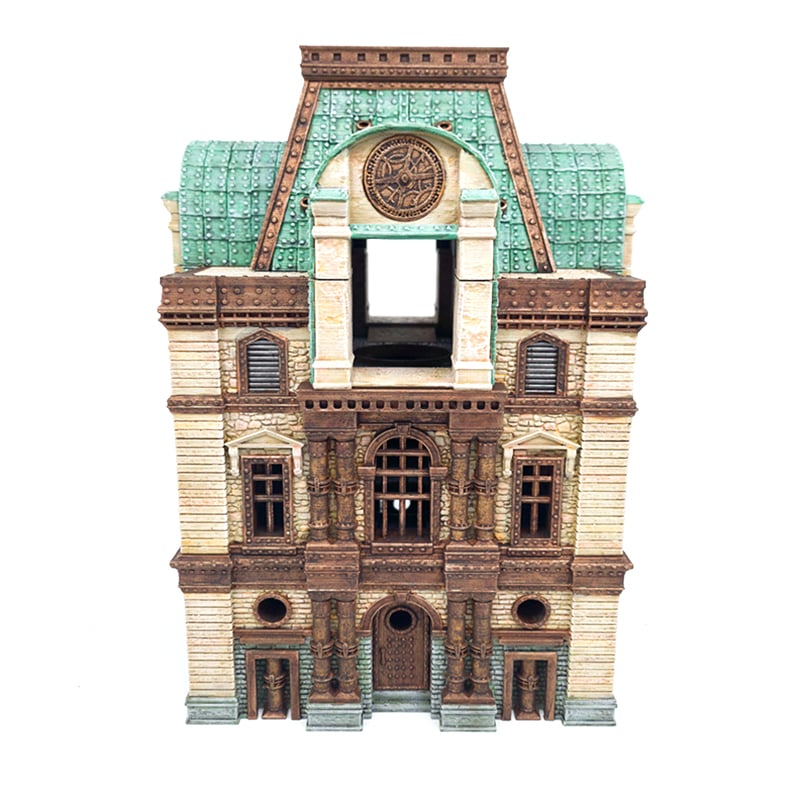
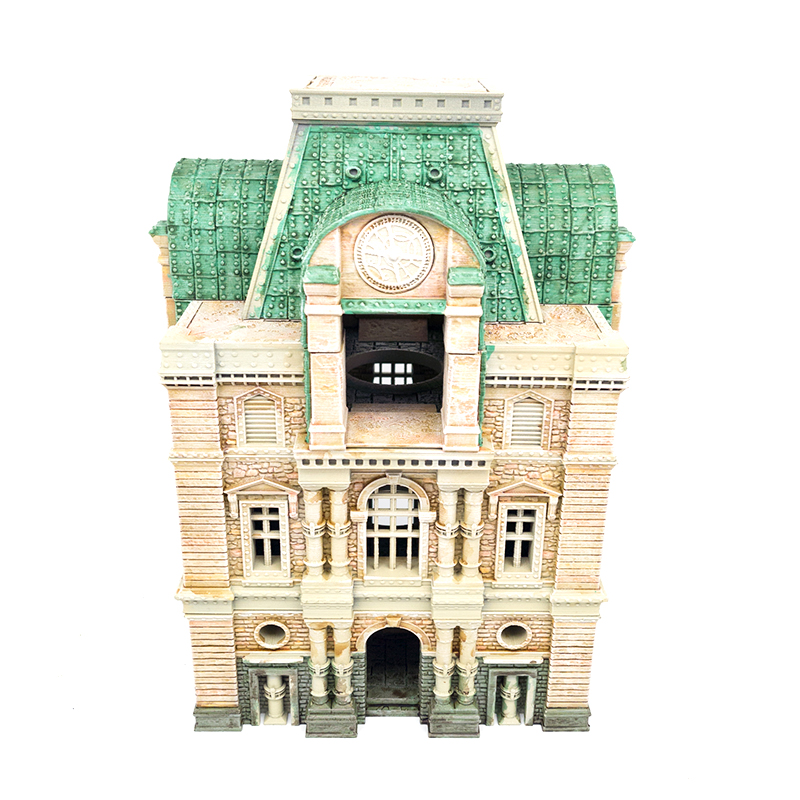
Once dry make any final touch-ups in the basecoat colors and it’s ready for the battlefield!
We hope you found this guide helpful and if you have any follow up questions don’t hesitate to get in touch!
Paints Used:
Skeleton Bone Spray (Army Painter)
Skeleton Bone (Army Painter)
Elf Flesh (Army Painter)
Barbarian Flesh (Army Painter)
Mummy Robes (Army Painter)
Matt White (Army Painter)
Light Tone (Army Painter)
Sybarite Green (Citadel Colour)
Crypt Wraith (Army Painter)
Ash Grey (Army Painter)
Green Grey (Vallejo)
Green Tone (Army Painter)
Strong Tone (Army Painter)
Gorgon Hide (Army Painter)
Fur Brown (Army Painter)
True Copper (Army Painter)
Greedy Gold (Army Painter)
Gun Metal (Army Painter)
Shining Silver (Army Painter)
Mid Brown (Army Painter)
Dark Tone (Army Painter)
Typhus Corrosion (Citadel Colour)
Our paint mix information:
You should be able to take these tables to a hardware store or paint shop that sells the Valspar brand and they’ll be able to mix it up for you.
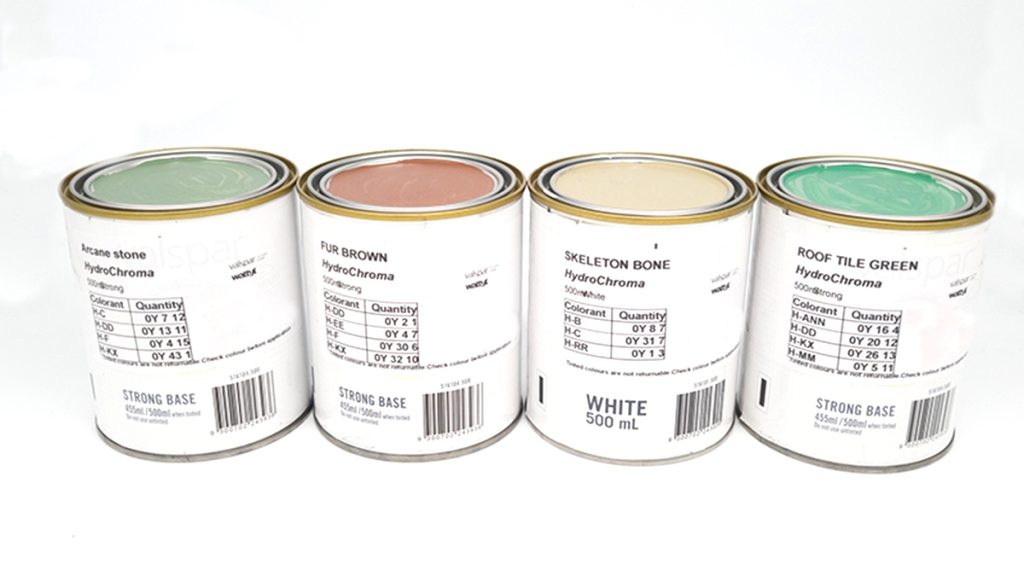
Quantities are per 500ml/16.9fl oz tin using Valspar interior acrylic paints
| Arcane Stone | |
| Colorant | Quantity |
| H-C | 0Y 7 12 |
| H-DD | 0Y 13 11 |
| H-F | 0Y 4 15 |
| H-KX | 0Y 43 1 |
| Strong Base |
| Fur Brown | |
| Colorant | Quantity |
| H-DD | 0Y 2 1 |
| H-EE | 0Y 4 7 |
| H-F | 0Y 30 6 |
| H-KX | 0Y 32 10 |
| Strong Base |
| Skeleton Bone | |
| Colorant | Quantity |
| H-B | 0Y 8 7 |
| H-C | 0Y 31 7 |
| H-RR | 0Y 3 1 |
| White Base |
| Roof Tile Green | |
| Colorant | Quantity |
| H-ANN | 0Y 16 4 |
| H-DD | 0Y 20 12 |
| H-KX | 0Y 26 13 |
| H-MM | 0Y 5 11 |
| Strong Base |