Building a Shroom Grotto table
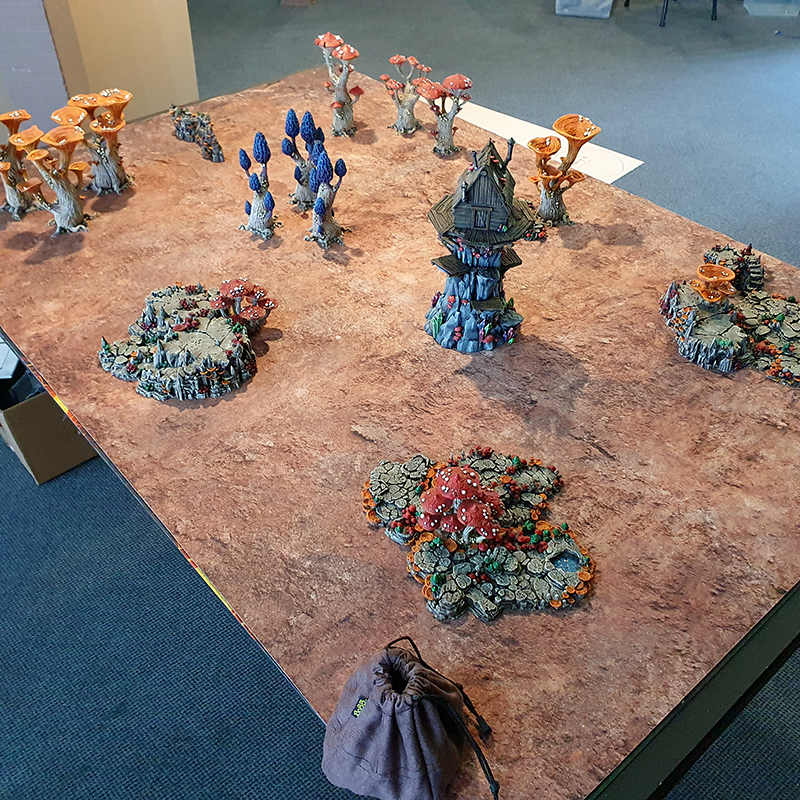
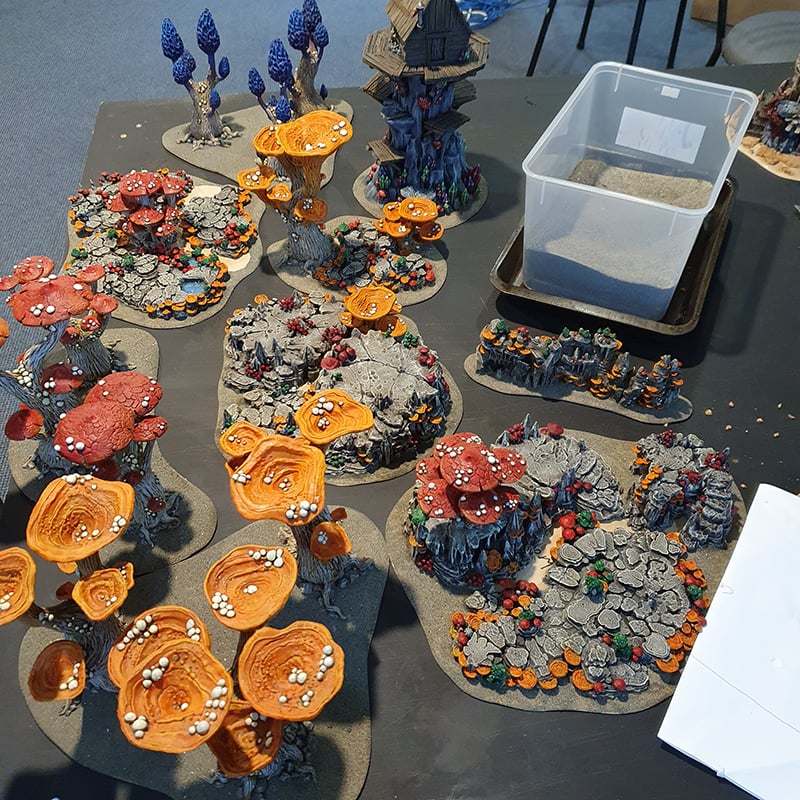
Our incredibly popular Goblin Grotto terrain is perfect for Dungeons & Dragons, but also fantasy wargaming too. This article will focus on using the Grotto kits to easily make an awesome gaming table for Age of Sigmar or Kings of War.
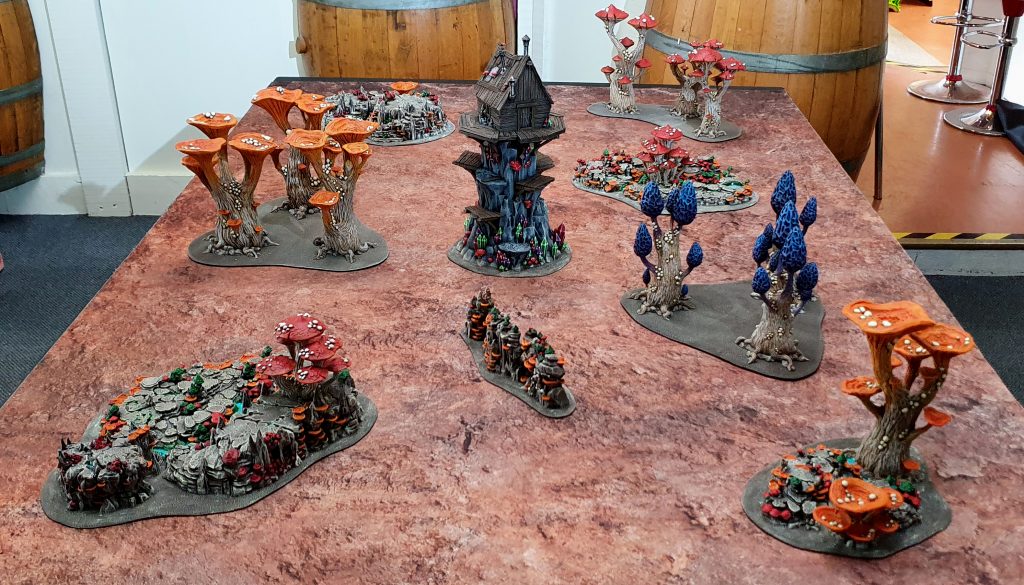
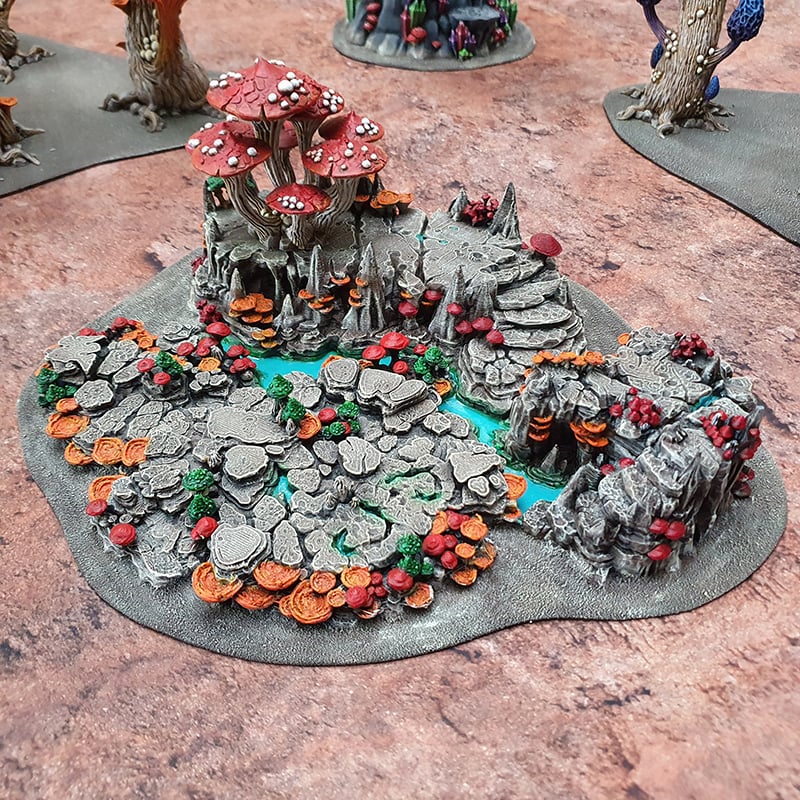
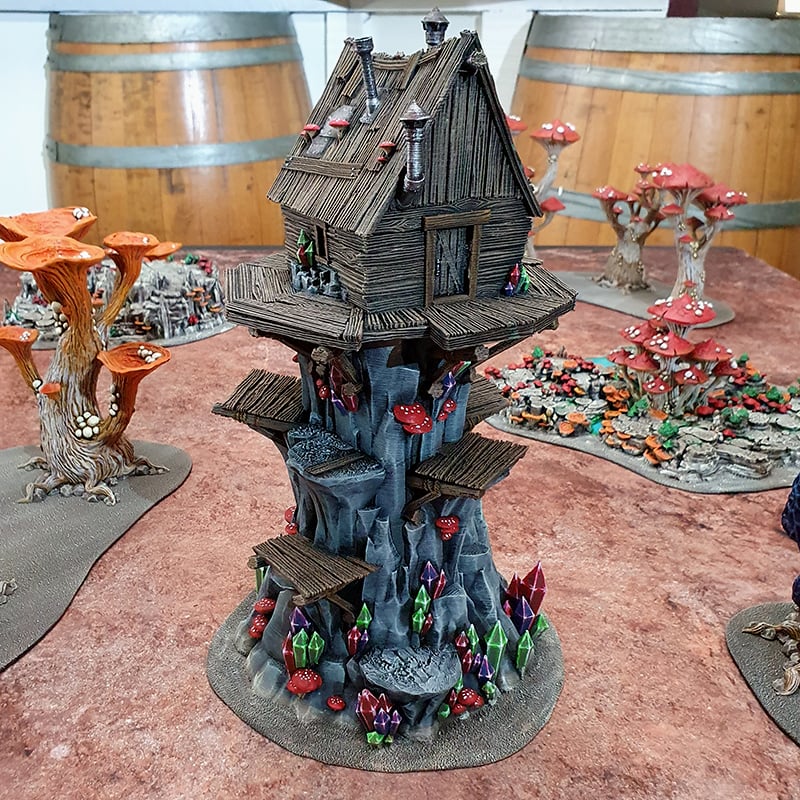
We used the Blooming Lanterns, Mesmerizing Morels and Magic Mushrooms to create fungal forests, Then used the Shroom Floors, Raised Shroom Caverns, Magic Mushroom Clusters and Lantern Clusters to create raised area terrain. Finally we used Shroom Grotto Walls and the Shanty Tower to provide line-of-sight blocking terrain, as well as a centerpiece model in the case of the Shanty Tower.
You will need:
Paints:
Army Painter Matt Black Spray
Army Painter Oak Brown
Army Painter Leather Brown
Army Painter Khaki
Army Painter Arid Earth
Army Painter Royal Cloak
Army Painter Greenskin
Army Painter Goblin Green
Games Workshop Mephiston Red
Army Painter Pure Red
Army Painter Skeleton Bone
Army Painter Lava Orange
Games Workshop Seraphim Sepia wash
Army Painter Castle Grey
Army Painter Ash Grey
Games Workshop Ork Flesh Contrast
Games Workshop Iyanden Yellow Contrast
Games Workshop Ultramarines Blue contrast
Army Painter White
Army Painter Gun Metal
Games Workshop Agrax Earthshade
Basing Materials:
PVA glue
Sand
Woodland Scenic’s Realistic Water Effects
Tools:
Brushes
Jigsaw
Electric Sander
The Build
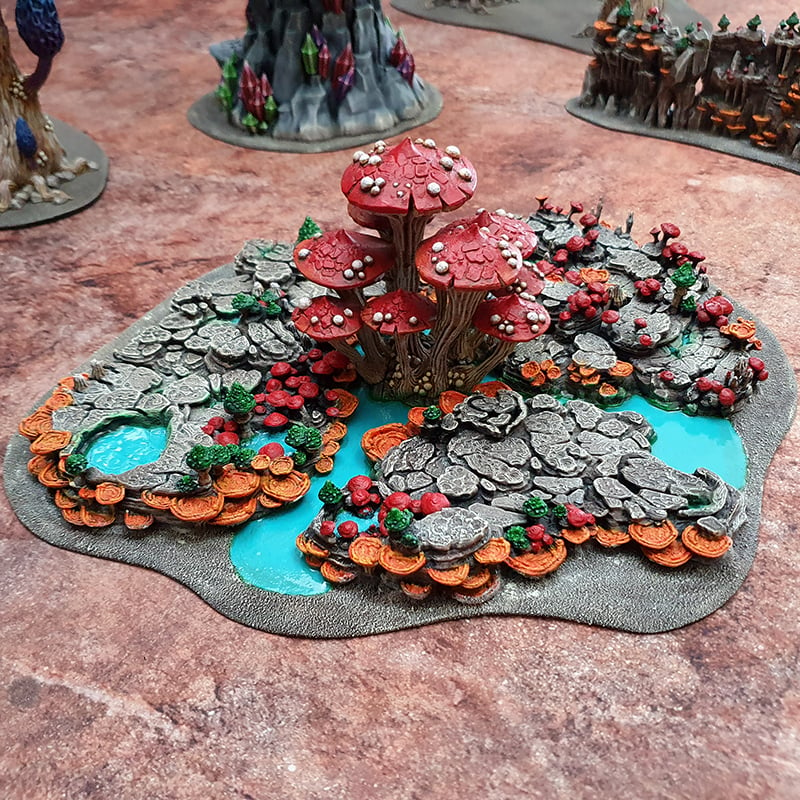
As always I started the build blocking out the table and area terrain. I clumped together the shroom grotto floors, raised caverns and mushroom clusters in order to get as natural a connection between them as i could. This was very easy to achieve thanks to the shapes of the pieces in question.
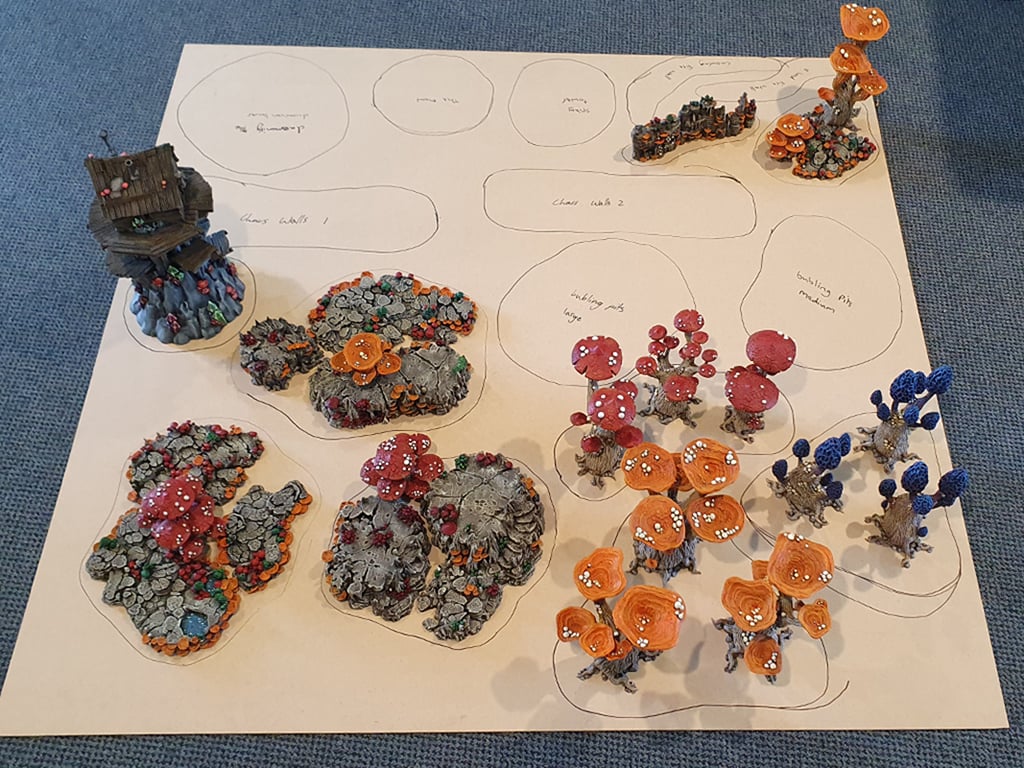
Next we measured up some bases on 5mm MDF, making sure there was at least half an inch or so clearance around each model. The mushroom trees were spaced out for their base in order to allow plenty of room to move between them. I recommend noting on the underside of each piece and its base what goes with what, as this will save time later down the line. We then used a Jigsaw to cut out the shapes and sanded down the edges with the electric sander.
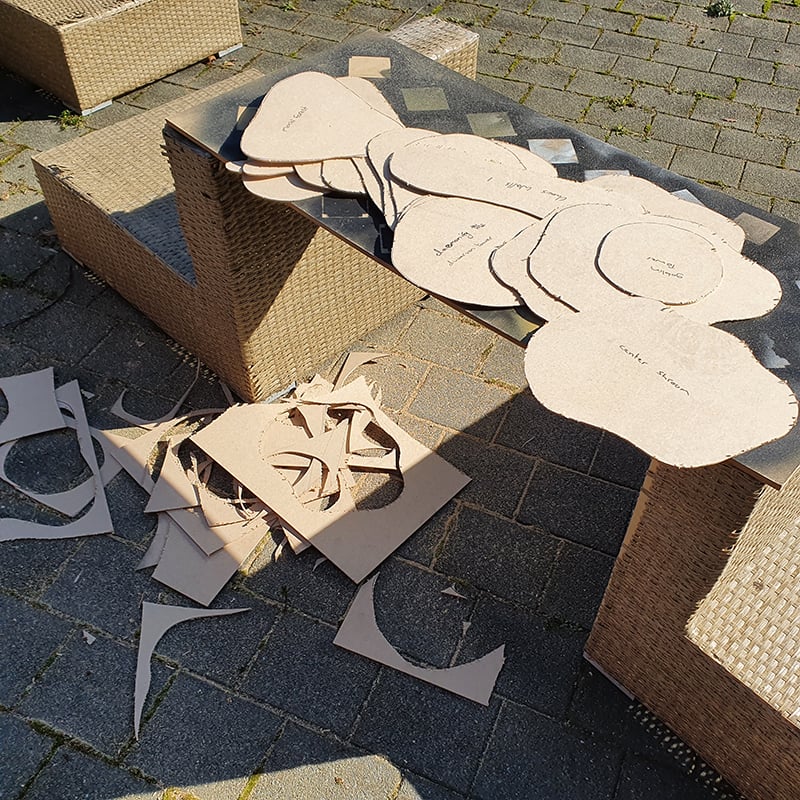
Once the bases were ready I glued down the grotto pieces except for the mushroom trees using PVA. When this was dry I applied PVA to the edges of the bases, though not in the gaps formed between two cavern sections, and flocked it with fine sand. I left the gaps between the cavern pieces clear as I planned to turn these into little reservoirs of water.
Once this is all dry I was ready for painting. Since I was using our office terrain to make the board I did not have to paint the terrain, just the sanded areas. For this I just painted black and followed the steps below for the ground. If you are doing the build from scratch it is easier to just spray everything black at this stage and paint from there.
Painting
Follow the steps below to recreate our colour schemes.
Ground, cavern stones & sand:
1: Heavy dry-brush the black with Oak Brown.
2: Heavy dry-brush the Oak Brown with Khaki.
3: Light dry-brush the Khaki with Arid Earth.
Rocky pillars:
1: Heavy dry-brush the black with Castle Grey.
2: Light dry-brush the Castle Grey with Ash Grey.
Mushroom trunks, underside of the mushrooms:
1: Heavy dry-brush the black with Khaki.
2: Heavy dry-brush the khaki with Skeleton Bone.
3: wash with Seraphim Sepia.
4: Light dry-brush with skeleton bone.
Water Areas:
1: Paint the black with Greenskin, you may need more than one coat to get a consistent coverage.
2: Paint over the Greenskin with Royal Cloak, this should leave a hint of green showing through it.
3: Mix equal parts Greenskin and Royal Cloak together and paint a thin coat near the edges of the pools.
4: Dry-brush Greenskin round the edges of the caverns were they meet the water.
Shanty tower wood:
1: heavy dry-brush the black with Oak Brown.
2: Light dry-brush the Oak Brown with Leather Brown.
3: Light dry-brush the Leather Brown with Khaki.
Shanty tower metallic areas:
1: Heavy dry-brush the areas with Gun Metal.
2: Wash the metallics with Agrax Earthshade.
Red mushrooms:
1: Basecoat the tops with Mephiston Red.
2: Heavy dry-brush the tops with Pure Red.
3: Lightly dry-brush around the edge with Lava Orange
Orange mushrooms:
1: Basecoat the tops with Lava Orange, as it is a thinner colour you may need to apply multiple coats to get a good coverage.
2: Wash the tops with Seraphim Sepia
3: Light dry-brush the tops with Lava Orange.
Green mushrooms:
1: Basecoat the tops with Greenskin.
2: Dry-brush the tops with Goblin Green
Crystals:
1: Basecoat the crystals in White
2: apply either Blue, Red or White contrast to the crystal as you see fit.
3: Apply an edge highlight of white to the points were edges intercept.
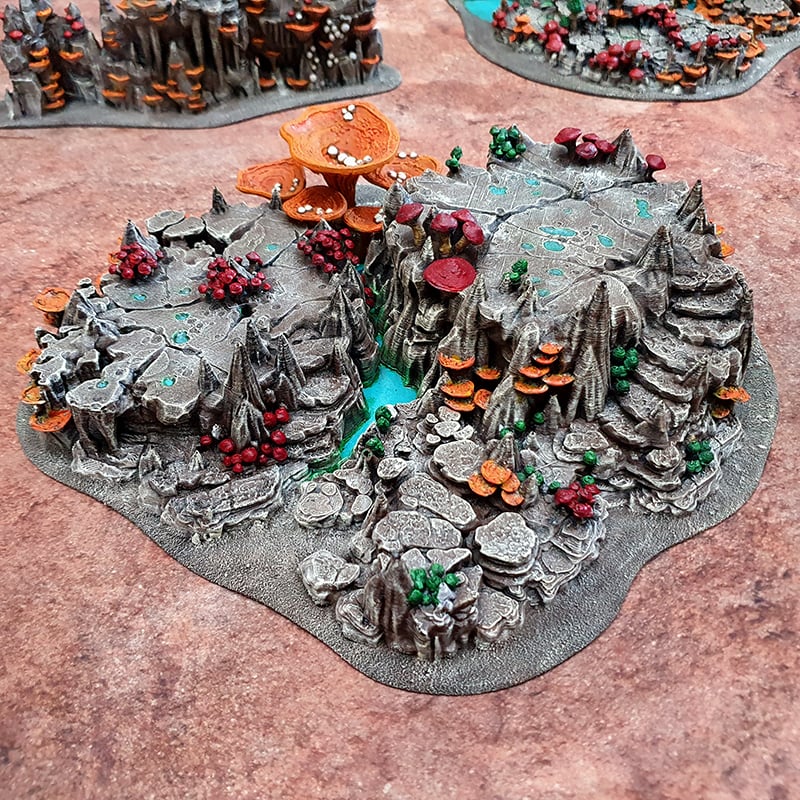
Once the painting is complete seal the model with a Matt coat varnish. Once this is completely dry, apply a thin coat of Realistic Water Effects to all the water areas using a dropper bottle. Follow the instructions on the bottle and use a toothpick to remove any air bubbles from the resin. Let it dry for the recommended amount of time.
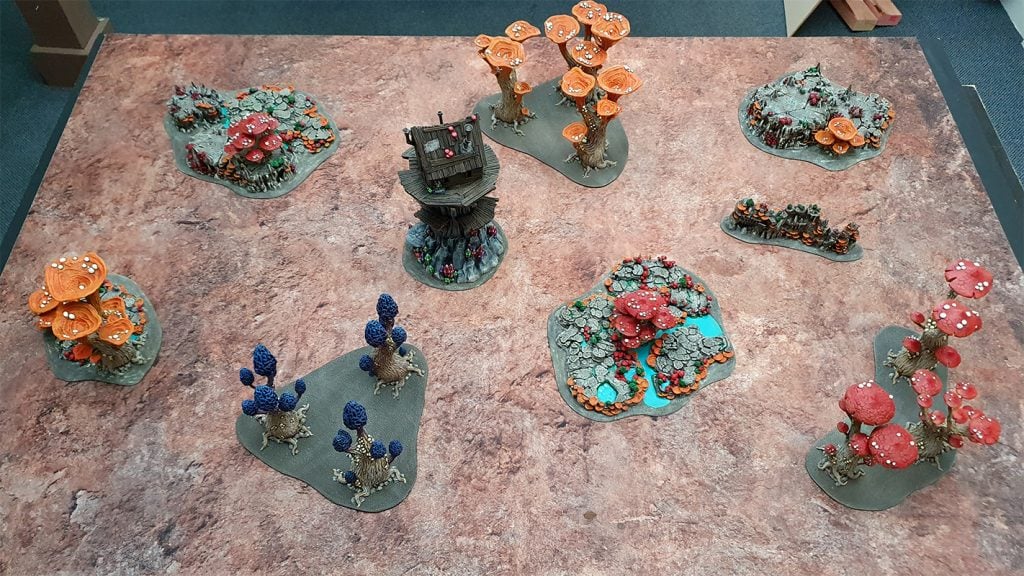
We display and play with our terrain on a 6′ by 4′ Deepcut Studio’s Badlands battle mat. The board has lots of large area terrain so even large units can defend effectively while gaining the benefits of cover.
Dude that table looks awesome! Great use of your printed terrain. Really enjoying your designs.
Great to hear Troy, cheers.
This set is super awesome, printing it at the moment ^_^
How did you paint blue mushrooms (Mesmerising Morels)?
Kantor Blue, drybrush Caledor Sky then drybrush Temple Guard Blue.
Thank you! :))