
Lighting the Torch Walls
In preparing the torch walls you will need to print each piece separately. The torch flames are printed in yellow translucent filament . The Sleeve may need to be sanded to fit cleanly depending on how fine a resolution you print at.
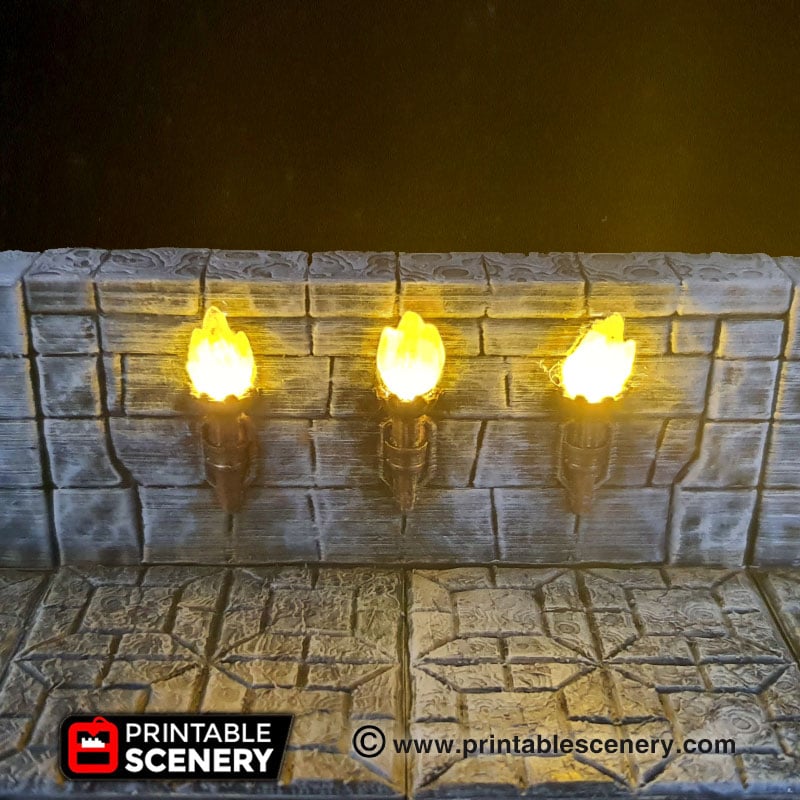
To light the torch walls we investigated a number of different miniature LED systems, but this was by far the best. It’s 5mm thick allowing it to be fitted snugly inside the lighting sleeve cavity. I sourced these from Aliexpress here and R232 batteries. They include a string of LEDs, a battery and switch housing containing a simple series circuit.

The LED string comes with 10 lights but you can cut them off to however many you need as they are wired in series. For the Q wall with 3 lighting cavities you can refer to the “LED Sleeve Placement Diagram Below”. Each LED can be folded into a point and slid into each light cavity. Use some electrical or scotch tape to secure the wires and LEDs. The battery and housing are small enough to fit into the sleeve with the wire coiled neatly in the sleeve.

For the D-Wall cut your string of LEDs to 2 LEDs and you will need to cut the Battery and switch housing to size so it can fit into the sleeve.
For the A-Wall you can remove the switch circuit and battery contacts from the housing and cut the LED to one. Then place the contacts around the battery and tape with electrical or scotch tape and wrap the wires neatly around the battery.
You can use this guide or you can construct your own miniature circuit to fit inside.
This is seriously cool. Thanks for providing these models!
Is there a way to set this up to be remote controlled please?
This is a good question to put on the Printable Scenery facebook page to see if anyone has be able to do this?
The Aliexpress link in this article no longer works.
If you search for “LED Fairy String Lights” you’ll find a bunch of different listings for similar products.