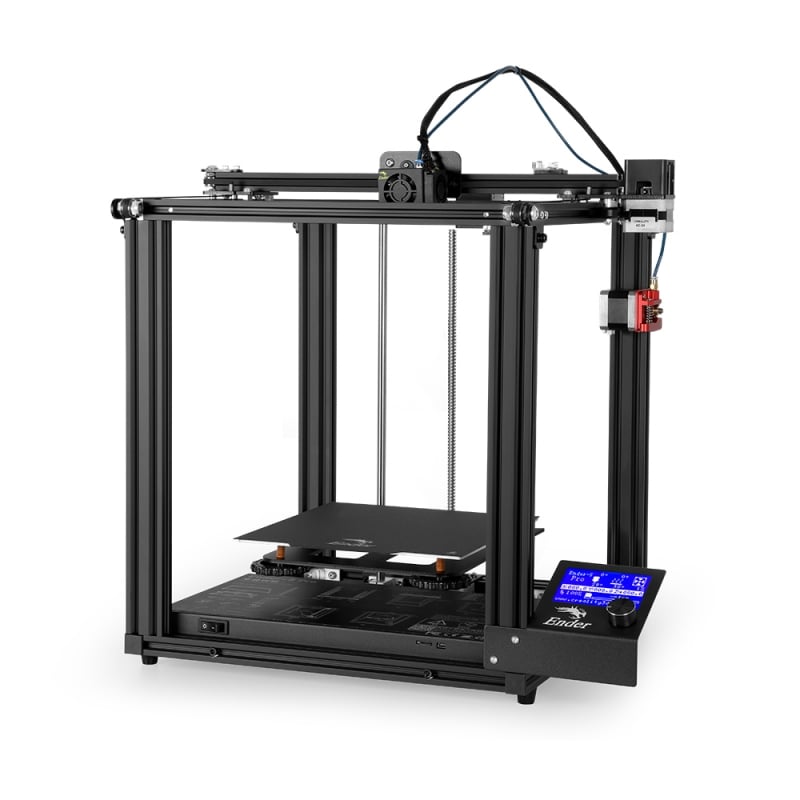
FDM printer settings for Ender 5 3D printer
Here you can find the slicer settings we use for our office Ender 5’s, using the Creality Slicer 4.8.2. All features highlighted here are available in other slicers.
In general, the only difference between machines will be the printing speed & build volume. If you select your preferred machine in the slicer, the print speed will be set to the machine’s specifications. You can then modify the other settings to your liking.
Note: If you do have issues, it is best to go directly to the manufacturer for help. For problems with Creality, the Creality Forums are a good place to start.
Creality 4.8 Ender 5 Settings
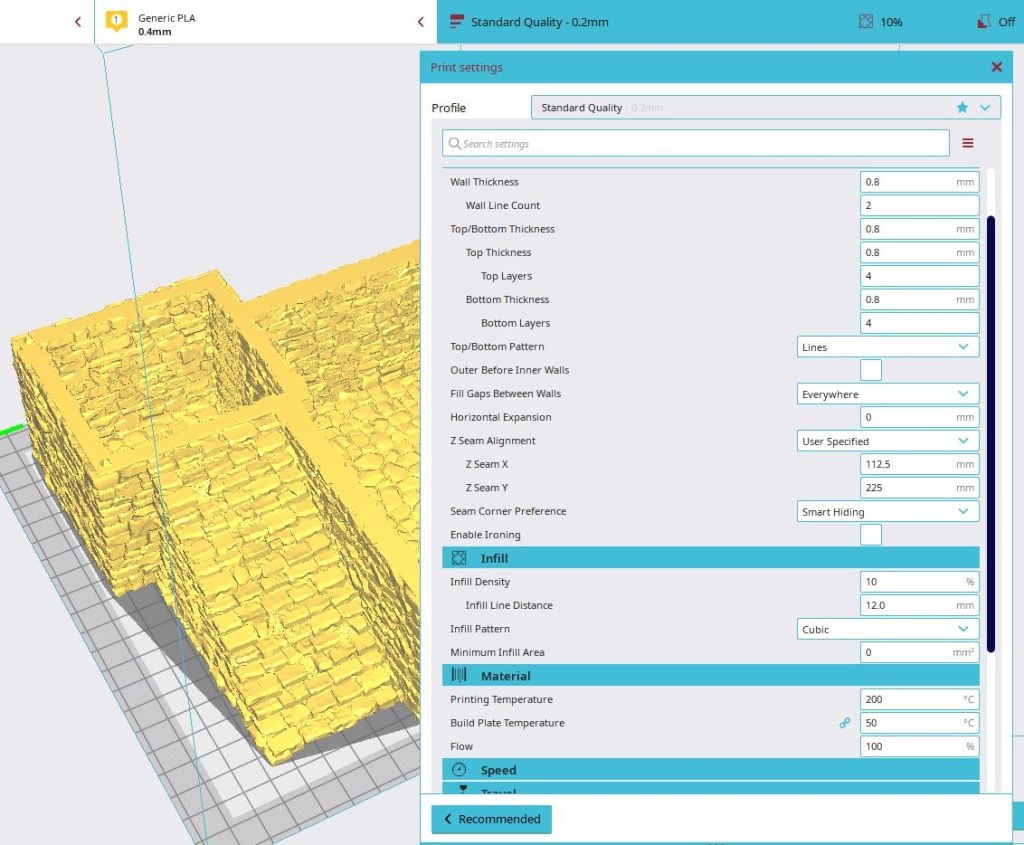
When first loading in Creality Slicer 4.8.2, only the basics will be available in the Print Settings dropdown menu to the right of the build plate. To add additional settings, you can find Configure Creality in the Preferences menu. The following additional settings are recommended:
- Enable Ironing
- Z Hop When Retracted
- Use Adaptive Layers
- Adaptive Layers Maximum Variation
- Adaptive Layers Topography Size
- Enable Bridge Settings
Not every slicer software will have the configured menu in the same place. You may need to check all the menus to find where it has been hidden for your specific slicer.
The following settings are tailored to a printer with a 0.4mm nozzle extruding PLA filament. When using other specialist filaments, you will want to change the printing temperature to the recommended level.
Main Printer Settings
- Layer height: 0.2mm
- Initial layer height: 0.2mm
- Wall thickness: 0.8 mm
- Wall Line Count: 2
- Infill Density: 10%
- Infill pattern: Cubic
These settings will provide the right balance between print detail, filament usage, and print times.
Printing Temperature
- Printing Temperature 210 degrees
- Build plate temperature 50 degrees
If there is likely to be cool air blowing around the build plate, you may want to increase the recommended build plate temperature to 60 Degrees to help prevent the base layers from curling.
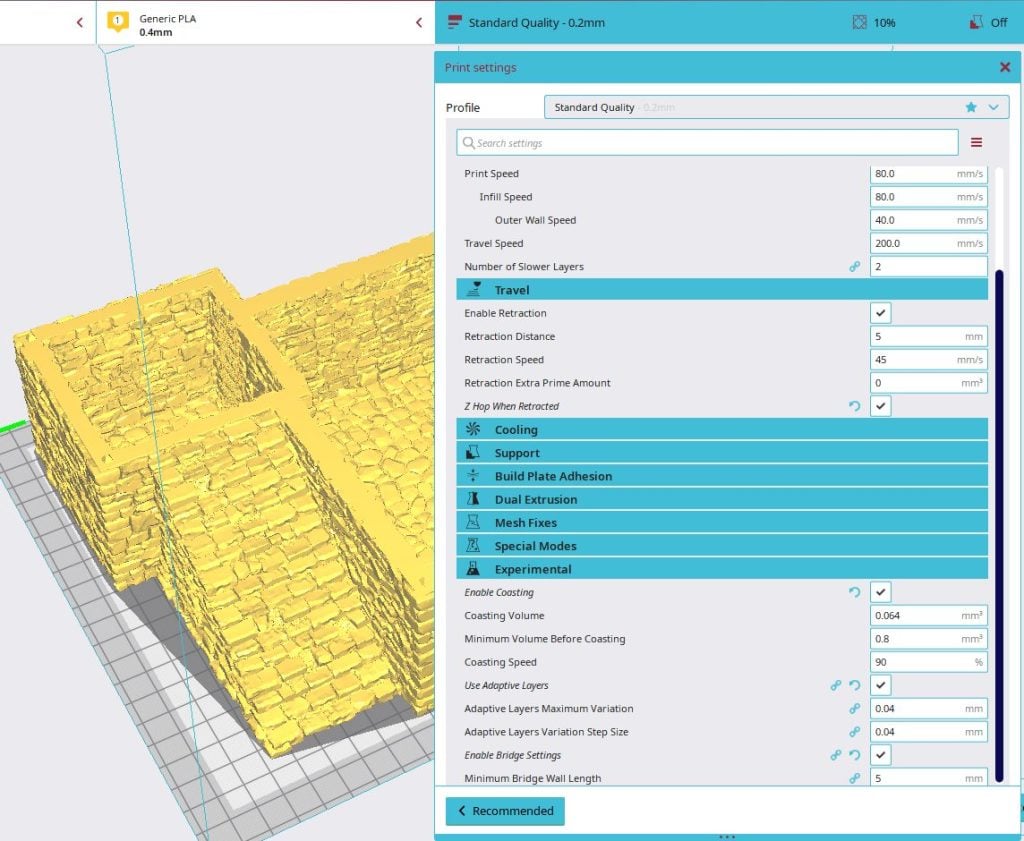
Travel and support settings
- Enable Retractions
- Retraction Distance 5.0
- Retraction Speed 45mm/s
- Z Hop When Retracting
- No supports (unless otherwise stated)
Enabling retractions will minimize small nodules of plastic forming as the nozzle moves between layers. The nozzle will also be lifted when traveling with Z Hop enabled, making it far less likely to knock into sections of the model as it is built.
Depending on the design you may or may not want to enable support. The vast majority of Printable Scenery files print support-free, but where this is not possible it will be noted.
Experimental Settings
- Make Overhangs Printable
- Use Adaptive Layering
- Maximum Variation 0.04mm
- Topography size 0.1mm
- Enable Bridge Settings
- Minimum bridge wall length 1.0mm
Adaptive Layering changes the layer height of the print when creating curved surfaces to smooth the transition between layers. Bridging changes, the cooling settings when printing in an open space between two sections, allowing it to print with minimal sagging. Make overhangs Printable modifies the bottom of overhangs to minimize spaghettification. Note that not all slicers will have these settings labeled under experimental and may have them built into the main program.
I’m having issues pulling this into CURA. I keep getting an error “Could not find a quality type standard for the current configuration”. Am I the only one?
This is a a few months old, but you can try some thigns from this thread. Are you using the latest version of Cura?
https://github.com/Ultimaker/Cura/issues/6453
If anyone else has this problem, following the link above did lead me to the answer. If you go to the bottom of the thread it talks about installing a “Legacy Profile” from Fat Dragon Games. This seemed to resolve the issue.
Thanks Sam!
Would these settings be the same with cura 5.0, an ender 3 pro and the stock bed?
We are unsure as we do not have that printer here.
We have the Creality Ender 3 and Prusa Mk3 so can only answer questions on those.
Can this be used for Ender 5?
You can try importing it. We haven’t used Ender 5. If it doesn’t work, try manually entering in the details into the profile.
What material is this setting for?
I know that PLA and ABS require different temperature settings, and that will affect other settings too.
The settings are for PLA, for ABS we would advise reading the filaments recommended settings, though it will be somewhere in the ballpark of 240
Will these settings also work for the Ender 3 Pro? The one that has the magnetic printing bed instead of a glass bed.
These settings should be fairly similar.
Using this on my Ender 3 Pro. I have to say after using other profiles this gives an overall standard that is very nice! Thanks for giving specific support for the Ender.
What filament do you use for your printer
Suntop global 1.75mm dark grey. We have yet to have any issues with it
Thanks
Any chance for a 0.04mm profile for faster prints? Or would just changing it to 0.04mm work?
We don’t test for 0.04mm resolution, but you can change the profile to what resolution you like. It will be faster.
Hey Guys,
After a long time, I’m finally able to get into printing again, in the meantime I’ve got a new computer so I had to install Cura again.
So I’m in Cura 4.4.1. I’ve imported the print settings file from here.
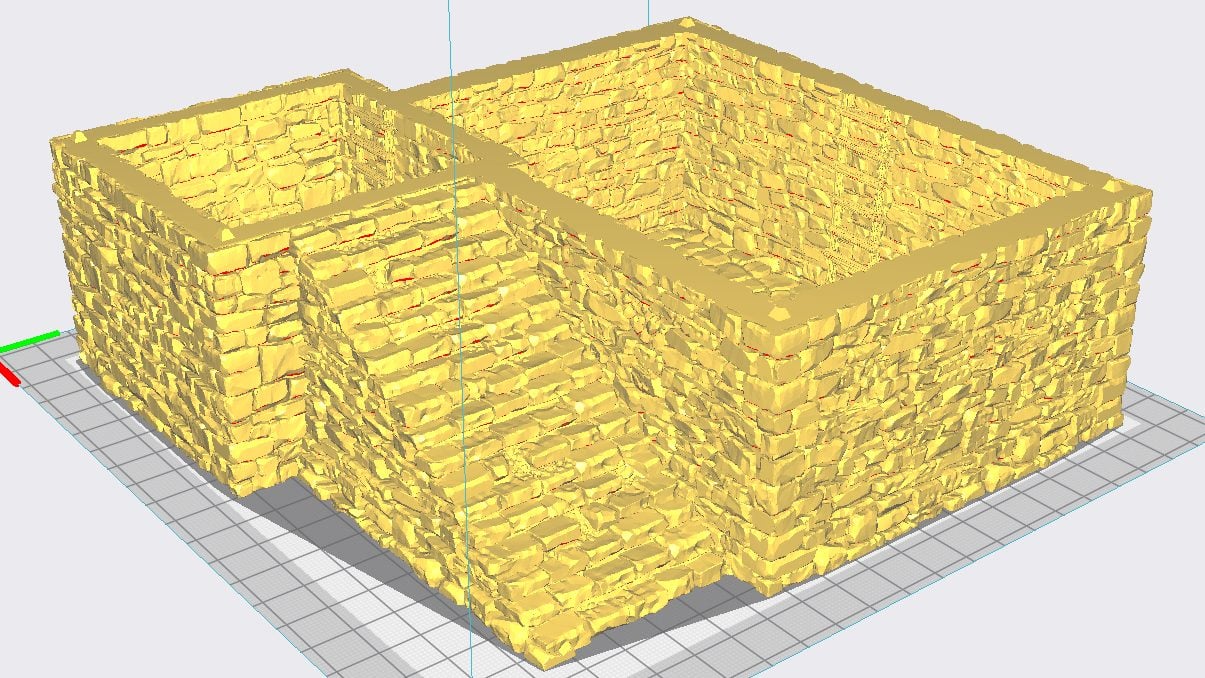
I want to print a Tudor wall. It’s estimated print time is 3 hours and 24 minutes.
I remember that previously it took be about an hour to print. Of course, I had fine tuned everything, but I don’t think it takes you 3 and a half hours to print one wall.
I have the exact print settings file that is posted on here. Any idea how can it give me such a strange estimate?
It usually takes about 2 hours to print a basic wall and goes out from there. You can turn adaptive layering off but with this profile it’s more attuned to quality than speed.
Sam, you are eternally my 3d printing hero, thanks for the fast reply as always!
It´s so weird, I’m slicing ‘A-Wall-Tudor-v0.2’ with exactly your profile, yet I still get an estimated print time of 3 hours and 24 minutes.
I really have not changed any settings and just downloaded Cura yesterday.
I cannot imagine any reason why the same program with the same settings gets another estimate for the print time.
Thank you for this! It does seem very hot (the nozzle temperature), which might lead to stringing with the PLA I use (Overture 1.75). Which PLA do you use?
We typically use suntop but adjust the temperature to suit your printer and PLA, Temperature tower test prints are good for this.
Anyone print these files using an anycubic mega? Should I look to use similar settings?
We only test print on Creality Ender 3 or Prusa i3 mk3. I would recommend contacting your manufacturer or posting on the forums or our Facebook group for other users who might have an Anycubic Mega.
https://www.printablescenery.com/forums/
https://www.facebook.com/groups/Openlock/
Does this need supports? If so what’s the best supports settings. I notice you guys use supports but its not default on for the profile.
995 of our kits require no supports, so the main profile does not include them. We have made a note on any set that we believe requires it for the best print.
Hi,
I’ve just bought an ender3 v2 to print the Shadow Fey Kickstarter the problem is I like others cannot get the Cura settings to import.
I have tried everything mentioned above plus other forums to get a solution but it still will not work.
Could someone help me please or even try putting up some screen shots of the settings?
Thank you any help would be greatly appreciated!
I am running 4.8.0
Everything’s sorted got the settings imported! Now to print!
Awesome. Happy printing.
Hey there what worked for you? I am new to 3d printing as well. I also have the ender 3 v2.
How’s the printing on the new profile? I’m trying to print out the Feywild Cottage and I’m getting some failure on the branches. How’s the profile coping with small details like this? Thanks.
Has anyone tried this with the CR10-V3?
Hi Obiwan,
It doesnt appear so, in the office we use the Ender 5 Pro and Prusa I3 Mk3. Let us know your findings and we’ll share them with others!
I used your Ender 5 settings and it came out perfect with my CR10-V3 when I printed the hagglethorn hollow cottage.
Excellent news! Thanks for letting us know 🙂
Hello,
I would like to purchase a 3D printer. I am totally inexperienced at 3D printing and I am non-tech savvy. I am considering to purchase one of the following from Amazon: Creality Ender 3 ($189), Creality Ender 3 Pro ($236) or Creality Ender 3 V2 ($279). Could someone make a suggestion given my inexperience and lack of tech savvy?
Thank You Very Much,
Chris
Hello,
I have a Creality Ender 3 Pro. I use the Creality Ender 3 Cura 4.4.1 Settings, which work great. Unfortunately, many of the stalagmites of the Goblin Grotto have broken off. I was told that PLA+ is stronger then regular PLA. Does anyone have an opinion on PLA+ and more importantly, does anyone have any recommendations on how to change the settings on the Creality Ender 3 Cura 4.4.1 Settings for PLA+?
I have not tried PLA+ yet on these printers, but one of the major things I have seen is that you need to increase the printing temperature a bit, generally to 200 degrees or so. A lot of the sites seem to suggest to treat it a bit more like ABS filament.
Thanks for getting back to me so soon Nicholas, but I’m using the Creality Ender 3 Cura 4.4.1 Settings which already has a Printing Temperature of 210°C and an initial layer printing temperature of 235°C, which are both already higher then 200°C. Do you recommend that I should increase both numbers? Thanks again.
I would say do a test tower, and see how it comes out. If it looks like the temperature is a little low then increase it, but its always best not to push the machine too high so as to not burn out any of the systems.
I am completely new to 3d printing: bought Ender 3 v2 Neo printer and filled the above settings into their Creality Print. Could it be correct that printing the Small Round House takes almost 14 hours?
Yes, if you are printing all the pieces at the same time it will take 14 Hours unless you wish to print at a lower quality.
Hello,
i tried with many settings, i change some piece and now i think my profile is false. It’s possible for you to offer to dowload your Cura profile for Ender 3 ?
Thank you for all your work !
Hi Cyril,
Here are some default settings for you to try:
Layer Height: 0.2mm
Infill: 10%
Infill Pattern: Cubic
Printing Temperature: 200
Build Plate Temperature: 60
Print Speed: 80
Enable Retraction
Build Plate Adhesion: Brim
That said, some printer settings depend on factors unique to your setup; outside temperature, the brand of filament, the STL you are printing.
A big improvement to my prints was by putting my printer in an enclosed space to regulate outside temperature and humidity.
Try and those settings and see how you go. From there it will just be minor tweaks 🙂
Just wanted to share my findings as a novice 3D-print hobbyist. I’m using Cura (5.7.1) on my Ender S1 and noticed that the 1st floor from ‘Winterdale Tavern’ didn’t have the alignment holes. Turned out the experimental setting ‘Make Overhangs Printable’ in Cura modified the model a bit too much. Only noticed those model changes once I checked the .gcode against the .stl. Prints are successful without that experimental setting.
Thanks, Joey, that’s interesting. People have reported a few issues with Cura when printing complex models
I think Cura changed the model too much because of the default model angle (50 deg) and overhang hole area (0.0mm2). Recent prints all turned out perfectly fine with the setting turned off.
Just getting started. I plan to get a larger fdm printer and a resin printer but I started with the Bambu Lab A1 Mini. Would this printer be compatible?
Please email me at [email protected] so I can share screen shots of our Bambu settings.