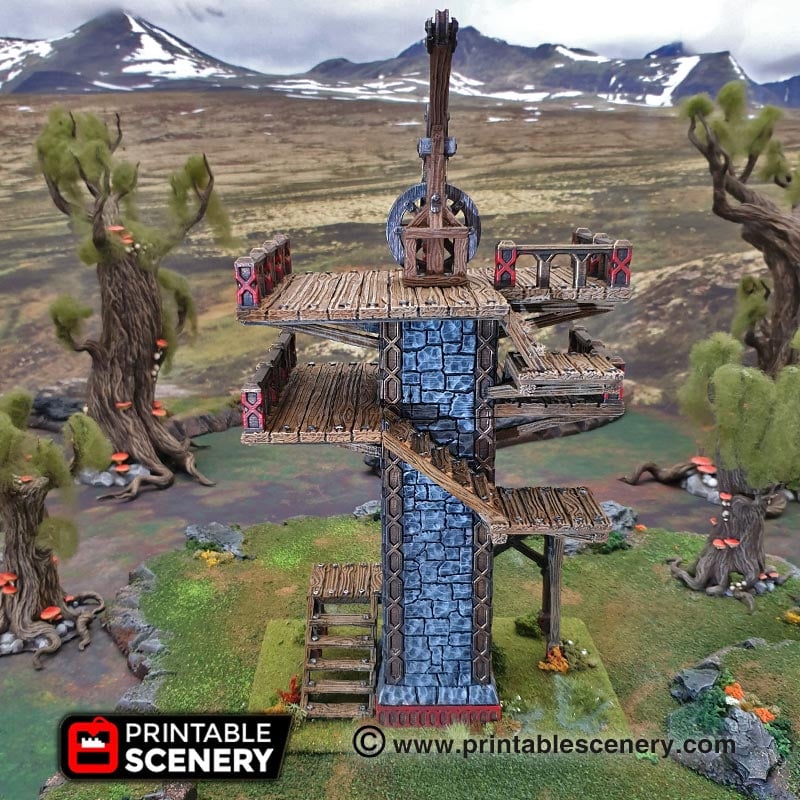
Quick Reference Sheet: Ironhelm Skydock
The Ironhelm Skydock is designed to be assembled in pieces, all surrounding the large column in the centre (Base-pt1). Assembly of the stairway and landing pieces starts from the ground and works all the way up. Below is a series of pictures of the fully assembled skydock, to aid in assembly.
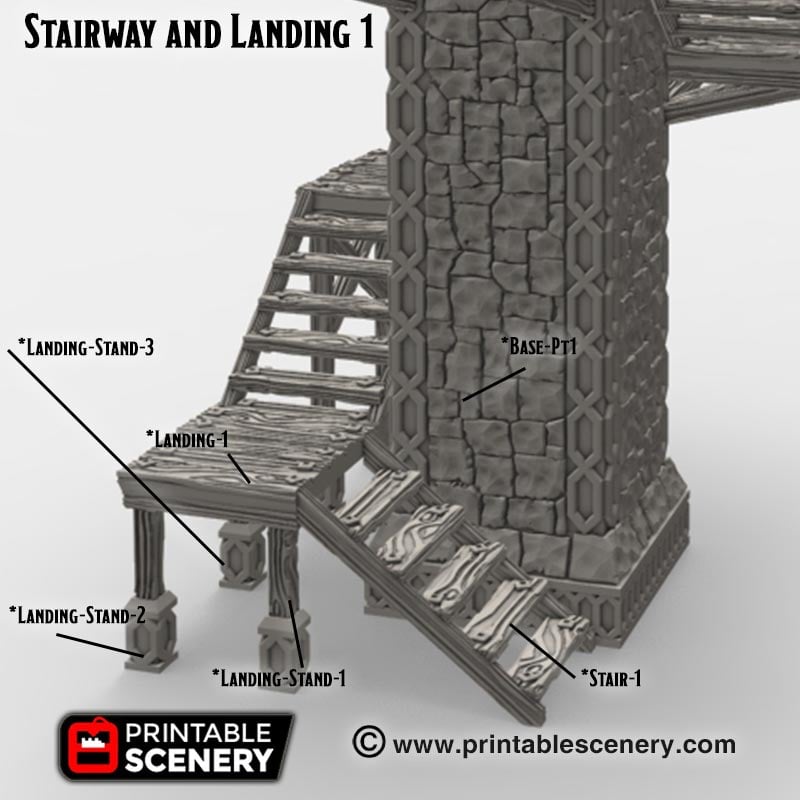
First stairway and landing 1
Shown in the image below are the assembled pieces Base-Pt1, Landing-1, Landing-Stand-1, Landing-Stand-2, Landing-Stand-3 and Stair-1. The stairway and landing pieces can be connected with a piece of filament or wire, using the guide holes provided.
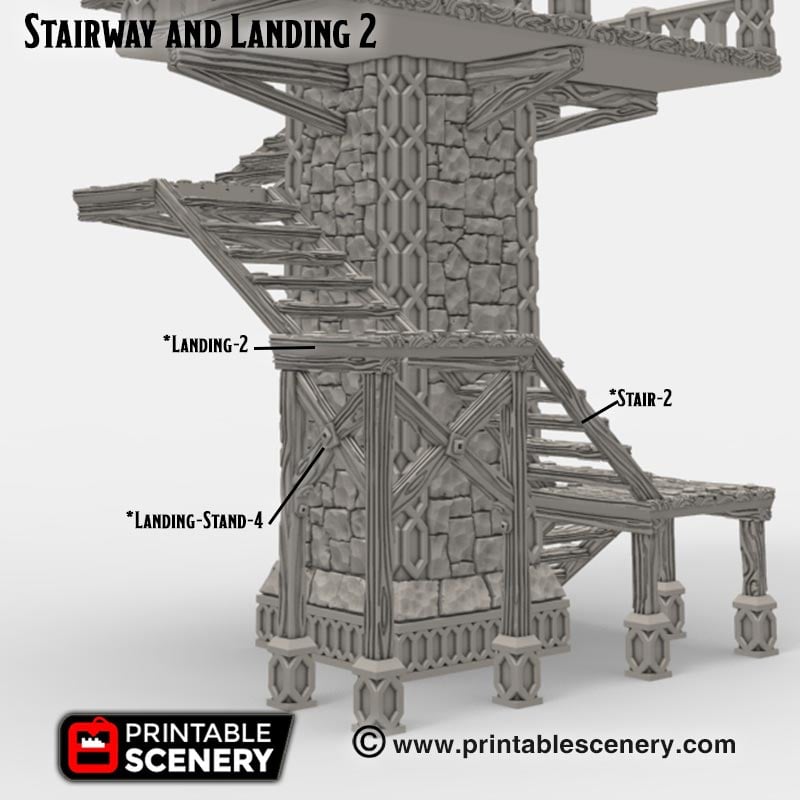
Second stairway and landing 2
Shown in the image below are the assembled pieces Landing-2, Landing-Stand-4 and Stair-2. As with the lower section, the stairway and landing pieces can be connected with a piece of filament or wire, using the guide holes provided.
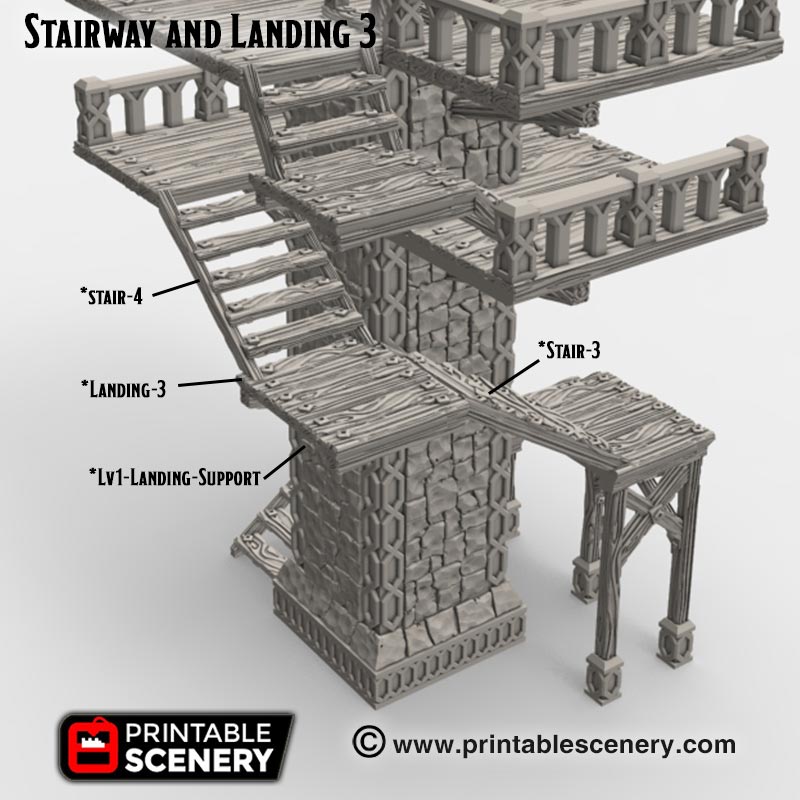
Third stairway and landing 3
Shown in the image below are the assembled pieces Lv1-Landing-Support, Stair-3, Stair-4, and Landing-3. As with the lower sections, the stairway and landing pieces can be connected with a piece of filament or wire, using the guide holes provided.
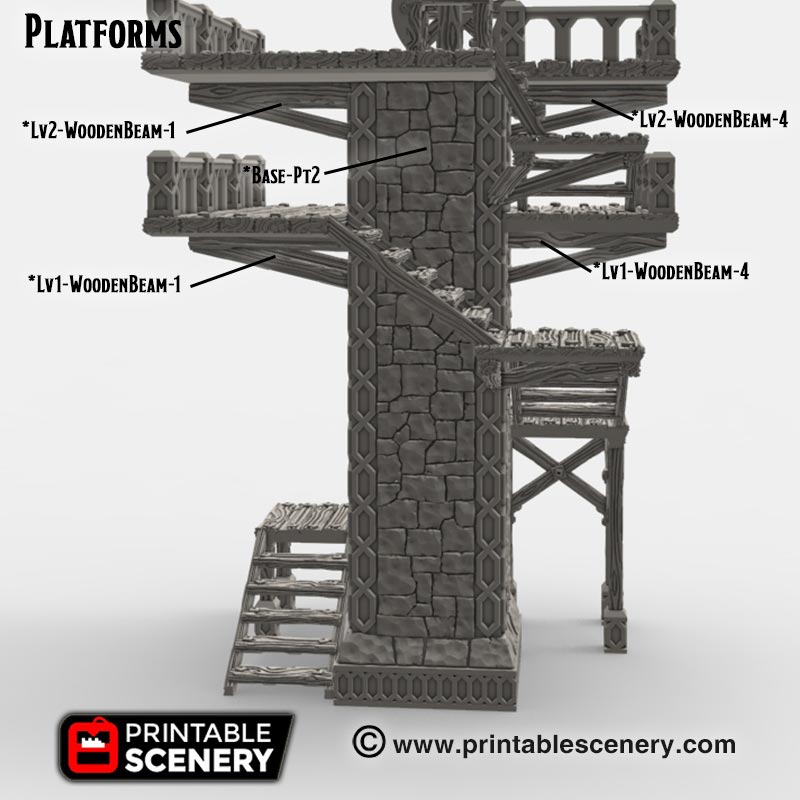
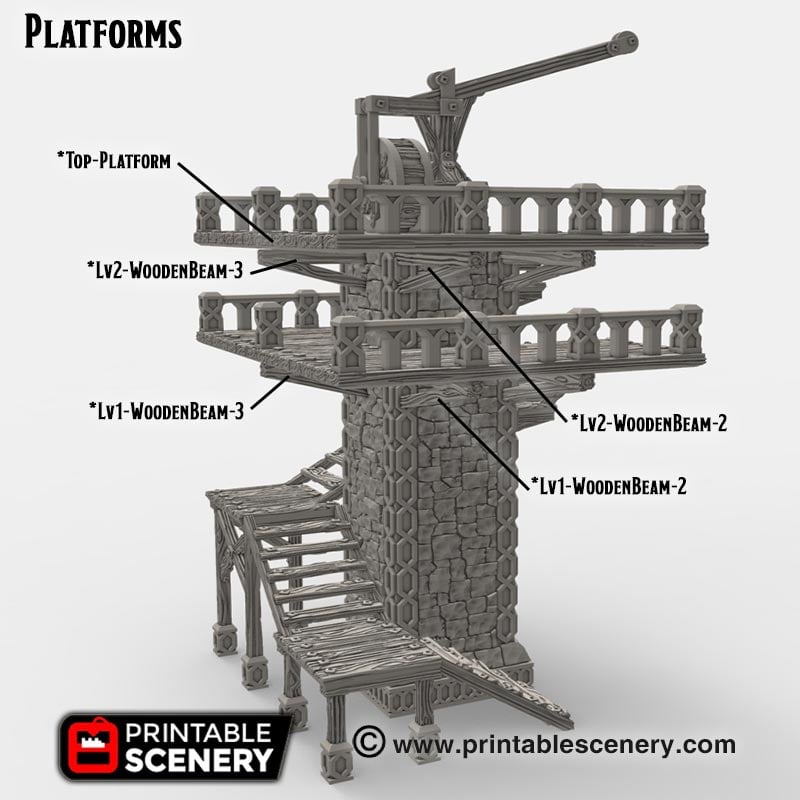
Base-Pt2 and wooden beams
Shown in the image below are the assembled pieces Lv1-WoodenBeam-1 through 4, Lv2-WoodenBeam-1 through 4, Top-Platform, and Base-Pt2.
The wooden beams attach to their respective Base pieces, and sit underneath the platforms as support. They can be connected with a piece of filament or wire, using the guide holes provided.
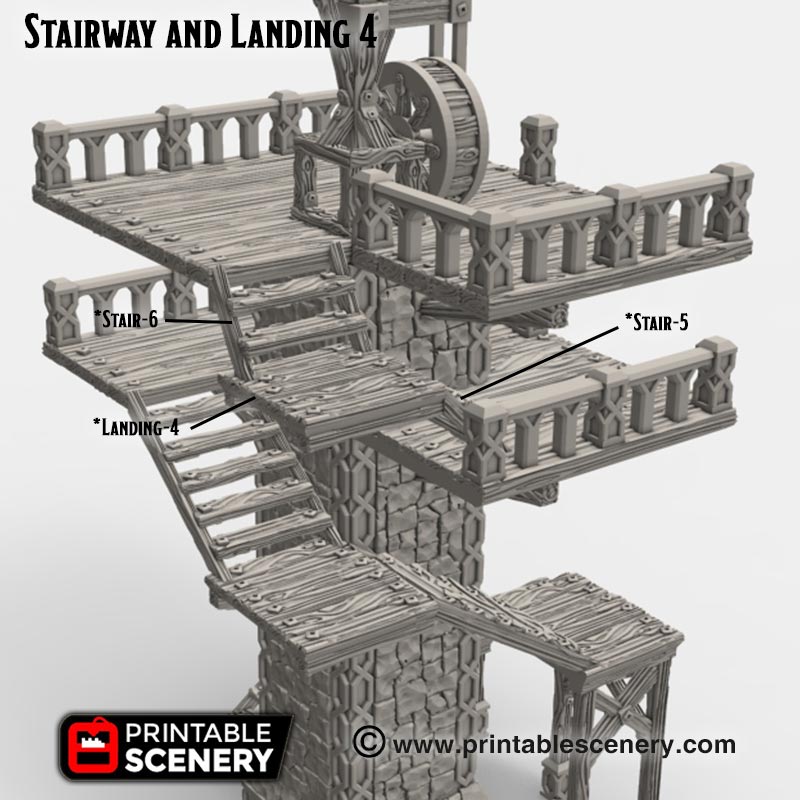
Fourth stairway and landing 4
Shown in the image below are the assembled pieces Stair-5, Stair-6, and Landing-4. As with the other sections, the stairway and landing pieces can be connected with a piece of filament or wire, using the guide holes provided.
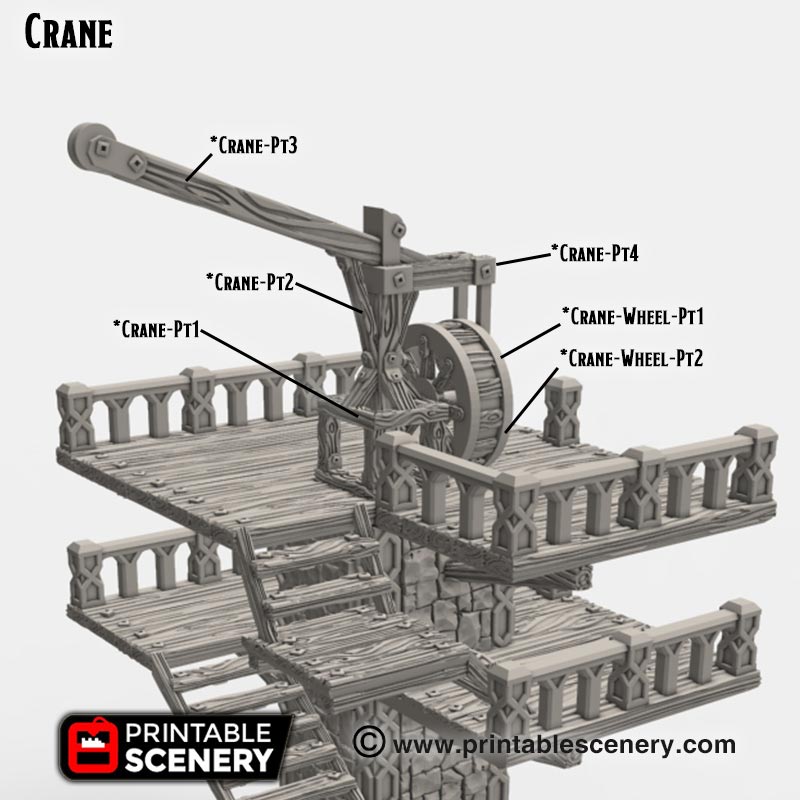
Crane
Shown in the image below are the assembled pieces Crane-Pt1, Crane-Pt2, Crane-Pt3, Crane-Pt4, Crane-Wheel-Pt1, Crane-Wheel-Pt2.
To assemble the crane you will need to connect Crane-Pt1 to Crane-Pt2 and then Crane-Pt3 on top to form the frame.
Crane-Wheel-Pt1 and Crane-Wheel-Pt2 need to be connected together first before attaching to Crane-Pt4. Then this assembly can be added to the frame.. There are guide holes to connect the pieces together with filament or wire.