Prusa I3 Mk3 Printer settings
Here are the settings for the Prusa Slicer v2.0 that we recommend and use on our Prusa I3 Mk3’s.
Layers and Perimeters

Layer Height: We recommend 0.2 for the vast majority of models, moving down to 0.1 when printing smaller pieces like furniture.
Vertical Shells: We have it set at 2, if you do modify it it must be a multiple of your nozzle diameter (in this case the nozzle is 0.4)
Horizontal shells: We find 5 for a top layer is sufficient. Increasing will increase strength but also print time.
Infill
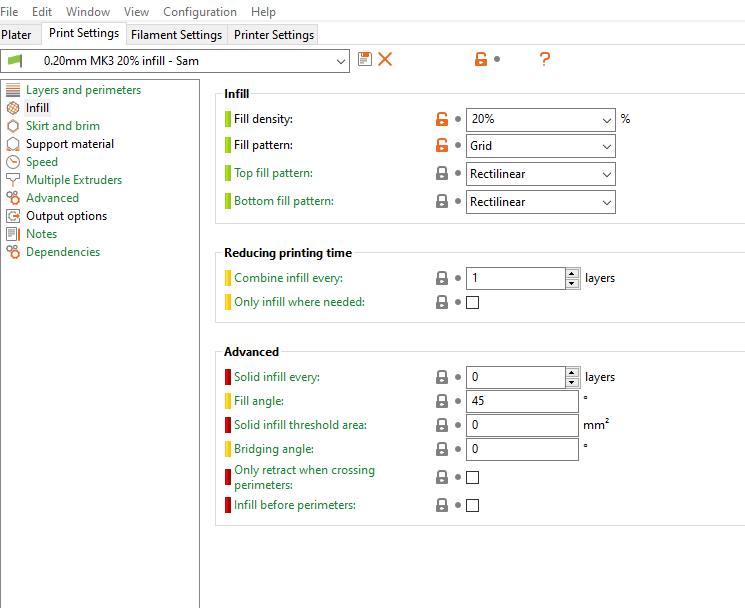
Fill Density: We have it set at 20% for most buildings. For areas with very large volumes like the Shadow Gate or Corrupted Feyheart we will decrease this to 10% to save material and print time.
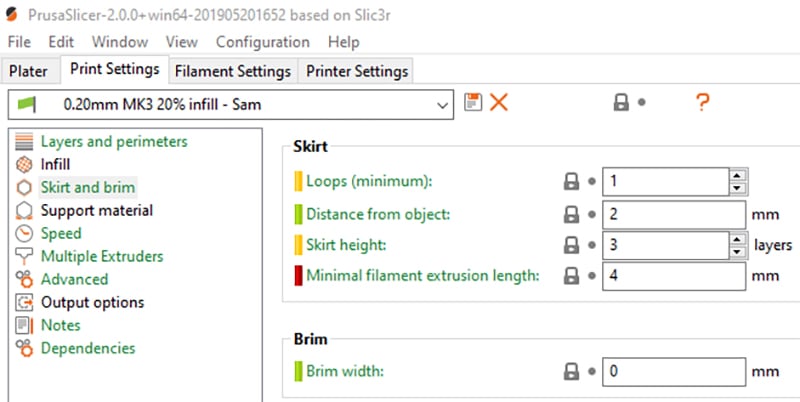
Skirt and Brim
We print with a skirt, as the Prusa’s have self-leveling beds.
Supports
We try our best to design models that do not need supports, but on the rare occasion that we recommend them these are the settings we use. We generally only recommend Supports Touching Buildplate when you do, but it will be specified on the product page what setting to use.
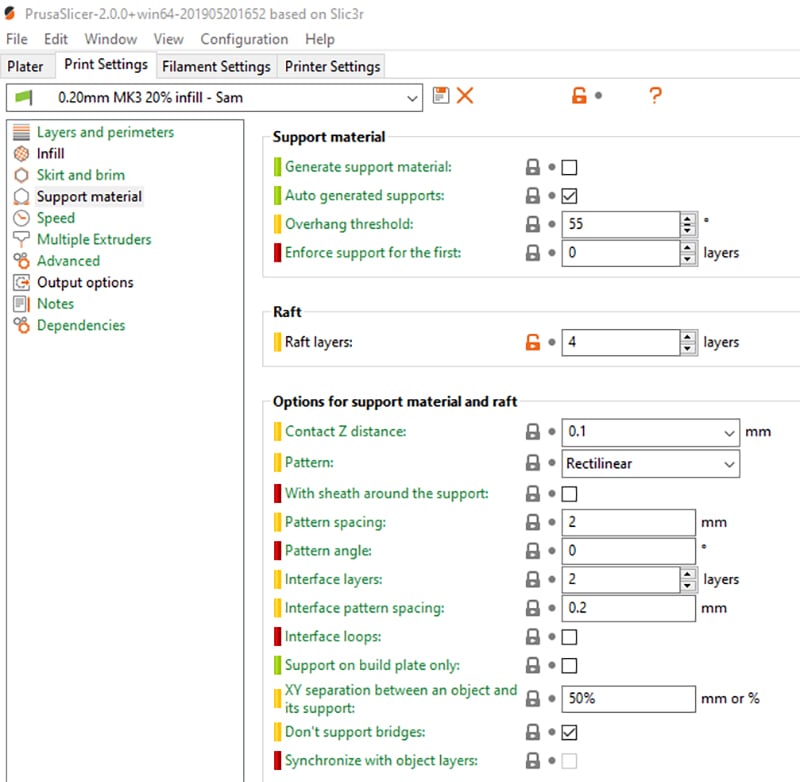
Overhang Threshold: 55 degrees is the optimal angle to start applying the supports as to not completely encase the model.
Contact Z distance & XY separation: setting the Z distance to 0.1 and separation to 50% will give enough structure to the support contacts without fusing them to the model and making them impossible to remove.
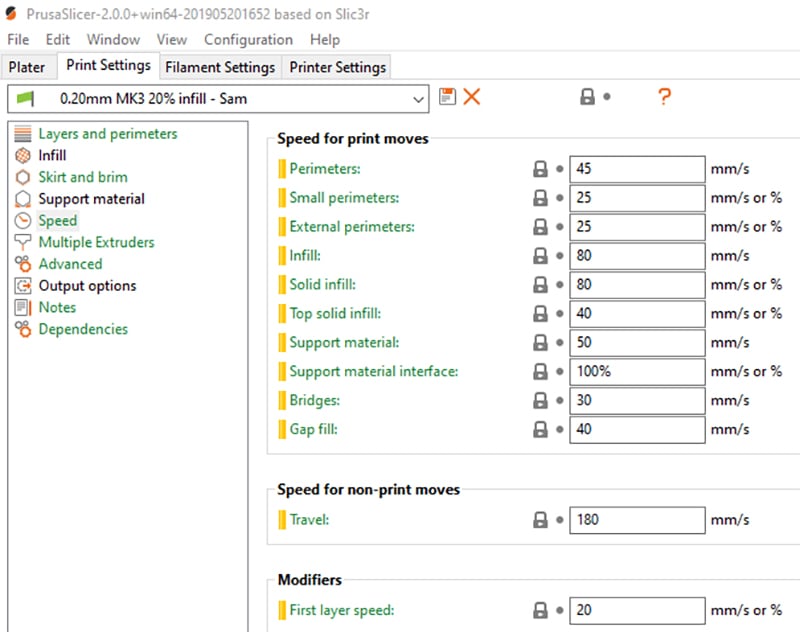
Printer Speed
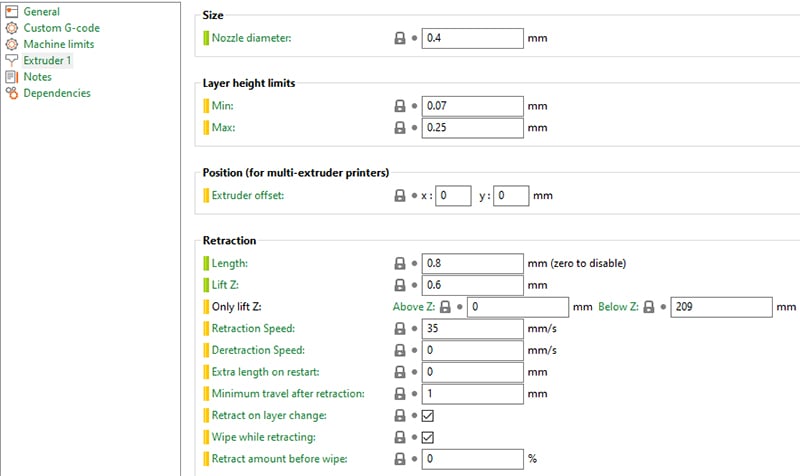
Retraction Settings
After a layer has been completed or the extruder is traveling it will retract the filament in the nozzle to minimize stringing. No matter what speed you choose for your printers retraction, make sure that ‘wipe while retracting’ is turned on to prevent blobs.
These are the settings that we recommend for setting up your printer.
How do import the setting to Cura?
Download and save the ini file locally to your computer. Then in Cura Select the menu option “File” and then select “Load profile” and find the ini file and select open.
For the noobs amongst us,where do we find the ini file? i have looked around this site and cant find it?
Depending on your printer, we use cura for Ender 3s and Prusa Slicer for Prusa i3 mk3 at the moment. I’m looking to update with new settings after I’ve fully tested 4.4.1.
Hi,
is this profile valid for i3 Mk3 as well?
Thank you in advance.
For the Prusa i3 mk3 we recommend using the slic3r PE downloadable from https://www.prusa3d.com/slic3r-prusa-edition/ with settings 0.2 and 10% infill.
Could you make another profile for Cura 3.6.0? It seems the ini file for Cura 1.15 doesn’t supported by 3.6.0.
We only use the older version of cura, we use Sli3r for the Prusa i3MK2. the core concepts will still be the same.
Is there a reason why you use an older Cura version? Or just preference?
I wrote this blog a few years ago when we were using Cura. It still contains useful information that I often get asked.
Do you have any profile setting recommendations for the ender 3?
We don’t have specific settings for the Ender however the same concepts will apply as per the Prusa
Hi, would you recommend using a SLA/DLP Resin 3D Printer for printing your models? Any considerations for this 3D printing method?
Thank you.
You can get very good results for resin pieces from our furniture range. The large buildings are designed for FDM printers with larger print volumes.
Do you have any settings for simplify3d? I have had some great results with your models and some ugly results. Obviously the difference is the settings. I’m a bit at sea as to which ones matter.
We do not use simplify3d, check out the recommended print settings for each product in the additional information tab.
I use s3D and just downloaded the free samples to get a feel for it. What issues are you having?
One of the biggest issues i noticed is when i lay the floor flat on the bed (stone side up) the detail is lost. However, when i stand the floor vertical on its side, it’s perfect, like the walls.
I had success using the following settings with various 3D Fuel PLA
0.4mm nozzle
0.2mm layer height
15 % grid infill (though rectilinear would be fine)
4 bottom layers
4 top layers
3 outer layers / shells / perimeters
for 3D Fuel Pro PLA i print at 230, for the Workday I print at 220, and I just threw the standard on at 210 but it’s the 1st time i’ve used that level of filament.
-Matt
@Potent3D on Twitter & Instagram (used to be @Jet_Prints)
Hi Matt, any chance for an updated profile? Since Prusaslicer is now on 2.6. I have a Mk3S+ so I imagine not a lot would change.
We have not made any changes so far.
Hi,
Maybe a stupid question from a newbie, but what color of pla filament is the best to print the models ?
White, grey, brown ???
Thank you
Philippe
Hi
We use Grey filament but any colour is fine as we spray primer on our models before painting.
Are you still running with the same setup after all these years?