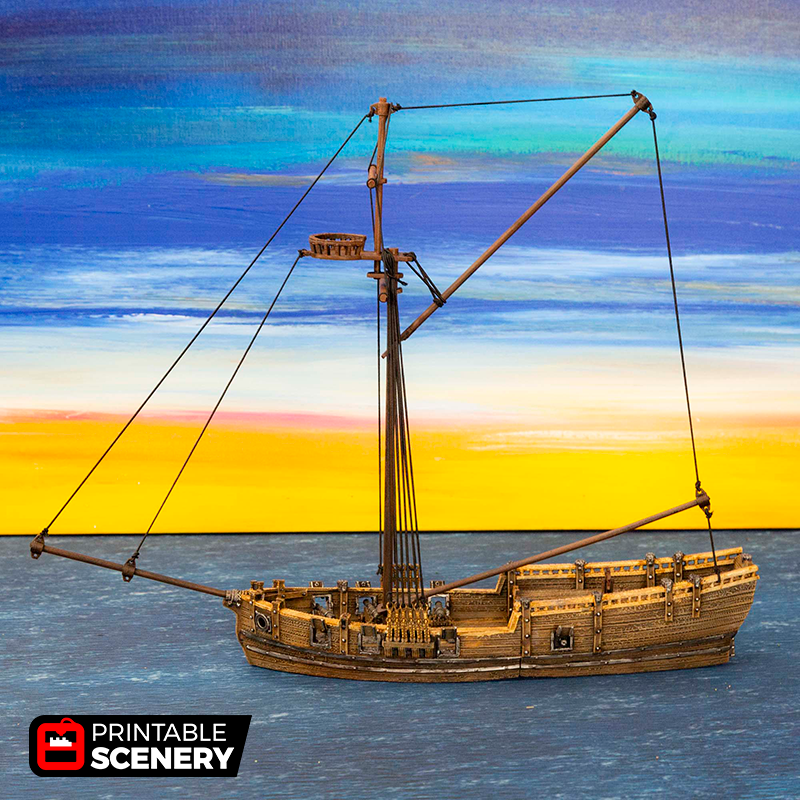


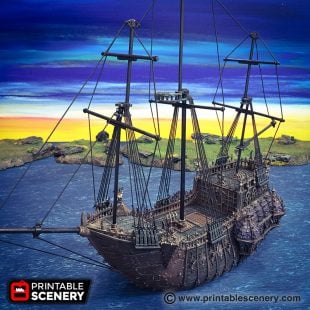
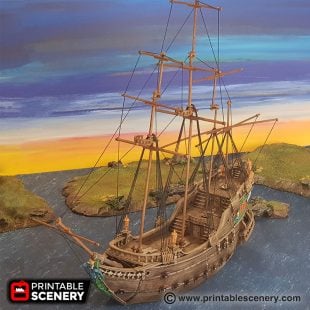
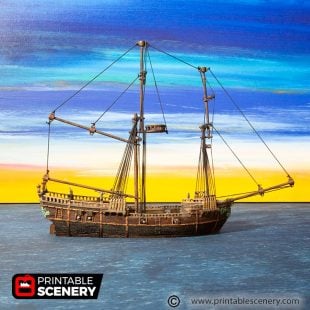
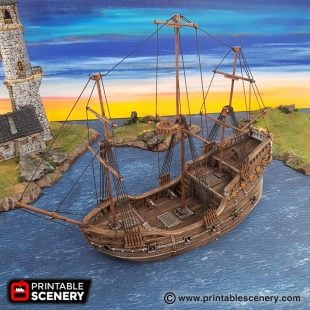
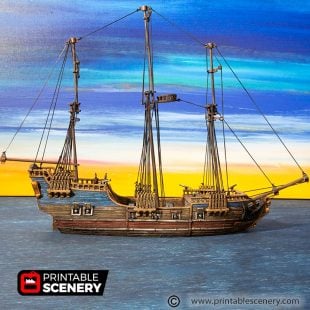
Description
Give me a Sloop, a barrel of rum and a star to guide the way.
Updates:
- 2 May 2018 (version 1.1) Rigging now includes a metric and imperial version. It also includes a crow’s nest option in the rigging. An anchor has also been included in the fittings.
- 8 May 2018 (version 1.2) Gun two-part option added.
- 5 November 2019 (version 1.3) Small Printer parts added for the Ballista version.
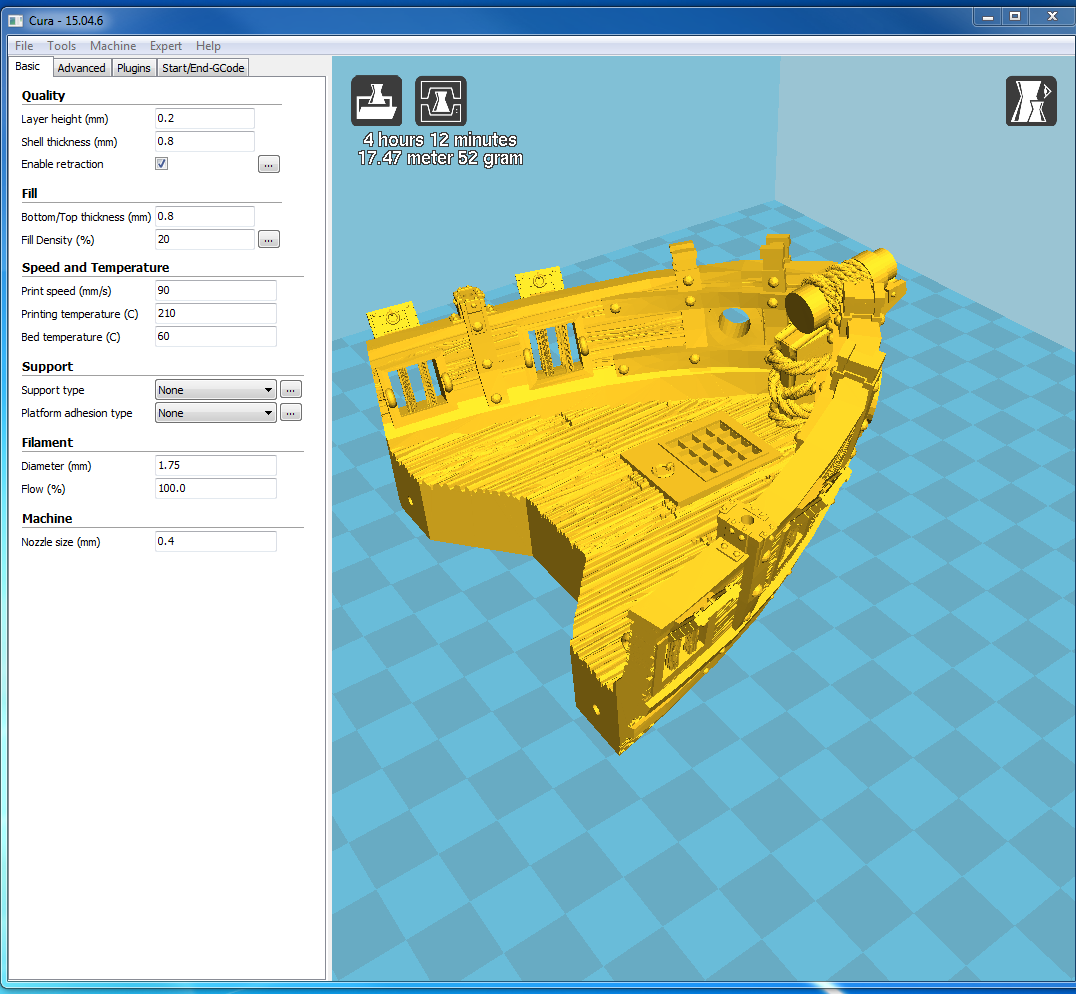
- 10 December 2020 – (version 2.0) Hull wood grain re-textured to prevent stringing.
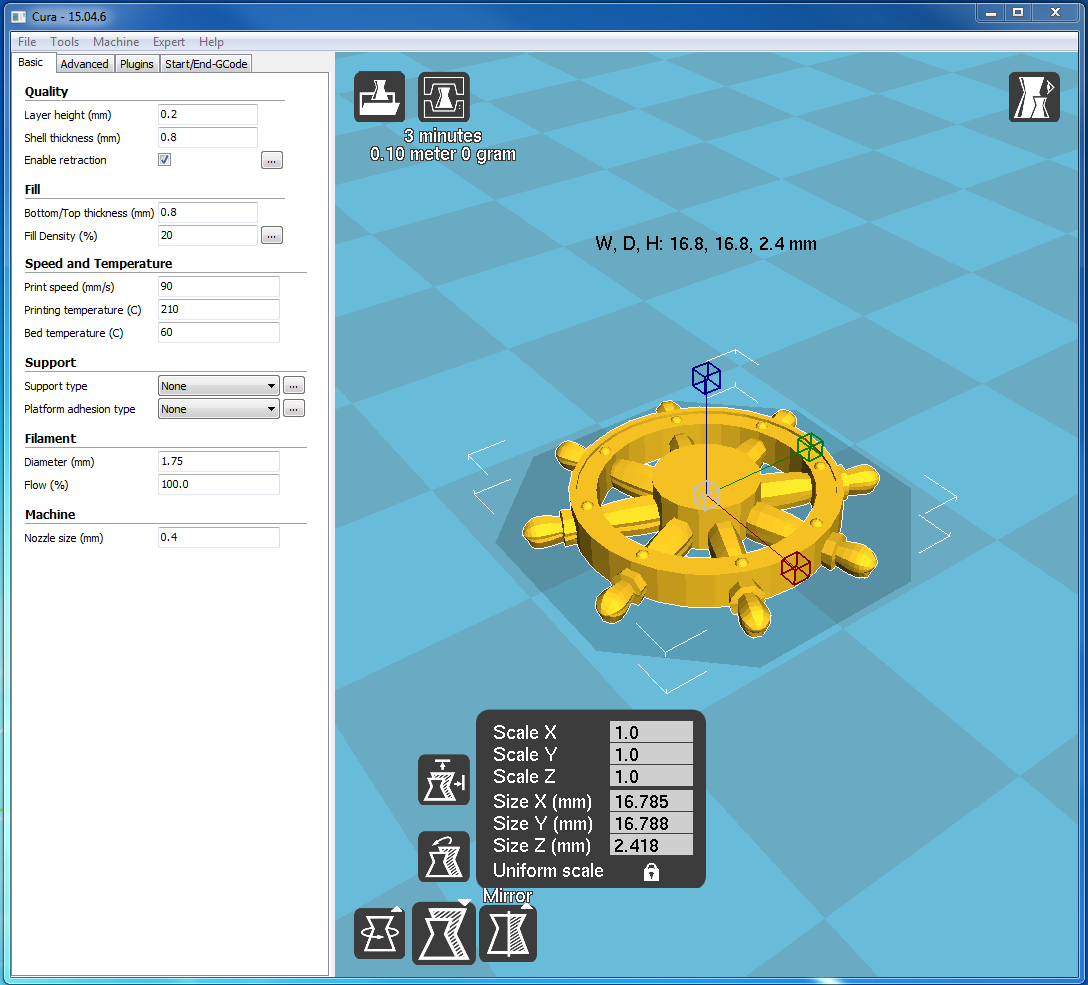
- 16 December 22 (version 2.1) Boat wheel options added to allow a Whole wheel resin print or print a filament connection version to allow the wheel to move.
Notes for The Sloop:
- Anchor will need to be scaled down by .8 to fit the Sloop
- Add supports touching build plates if you get too much stringing on the lower section of the hull or if using Cura select “make overhang printable.”
- Product measurements can be found in the image gallery.
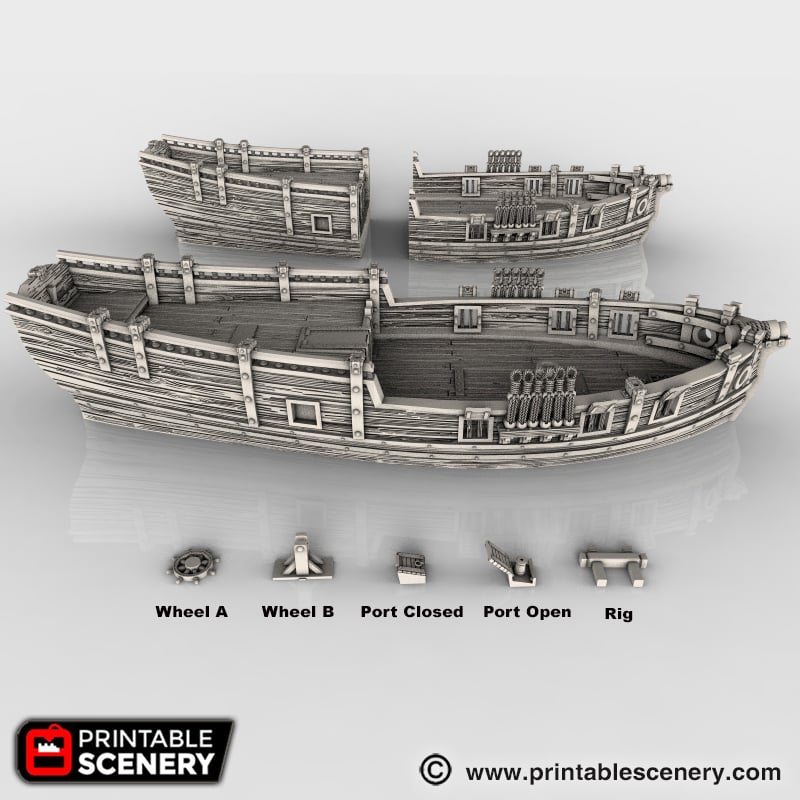
The sloop includes:
- Separate deck layouts, see the video below.
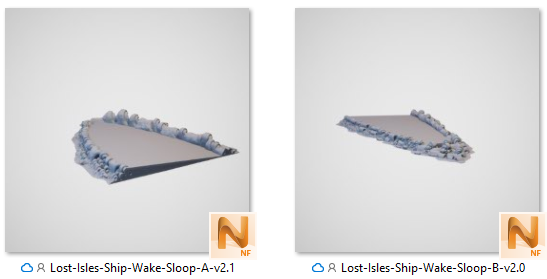
- A removable ‘Wake’ that simulates ship movement
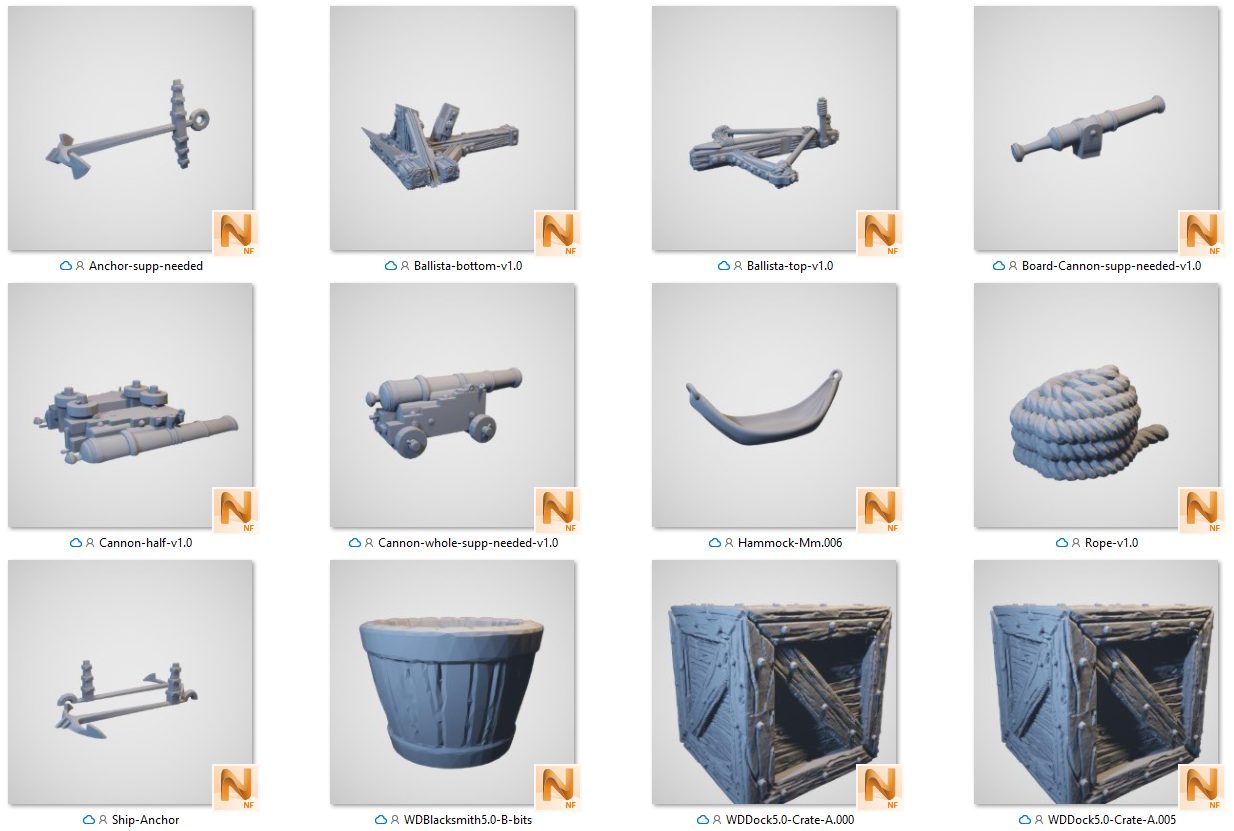
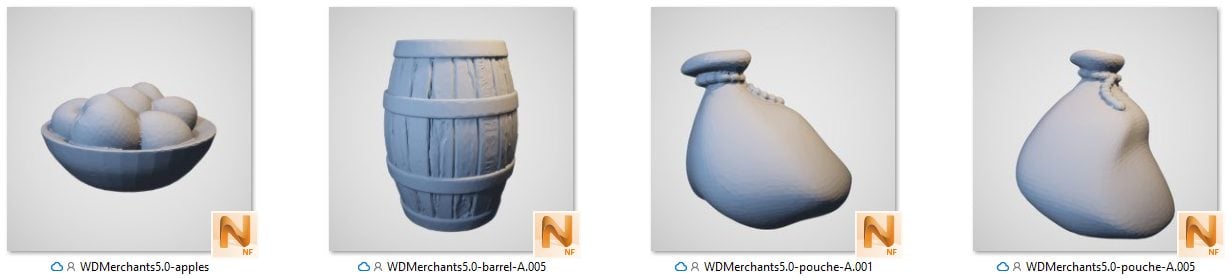
- Interior fittings like boxes and barrels
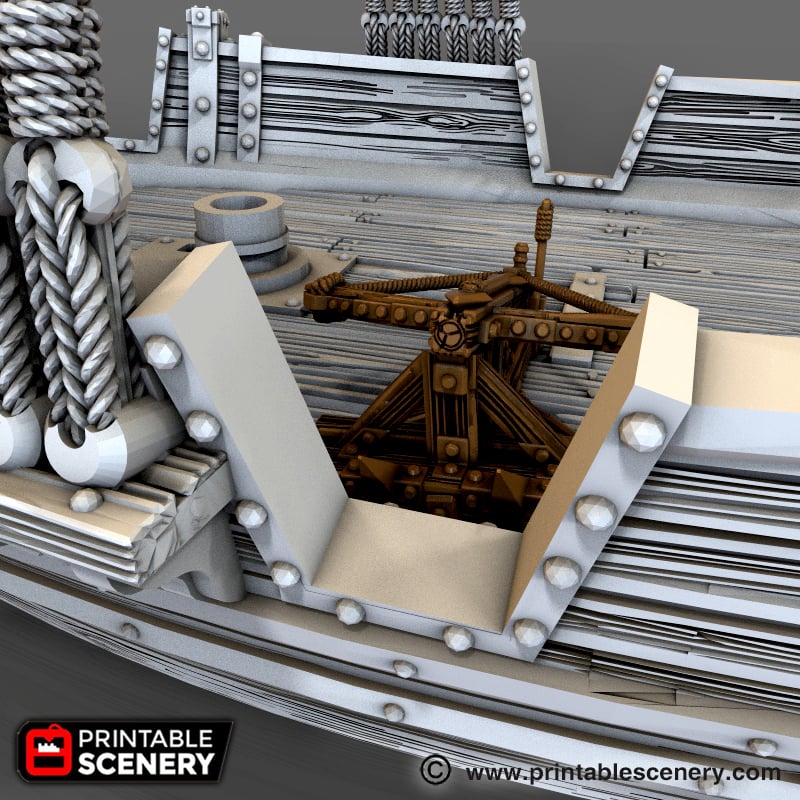
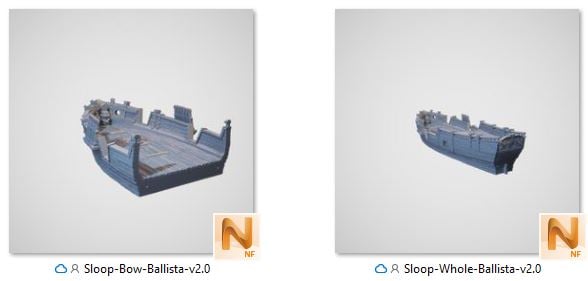
- Cannons, Ballista and Deck Guns
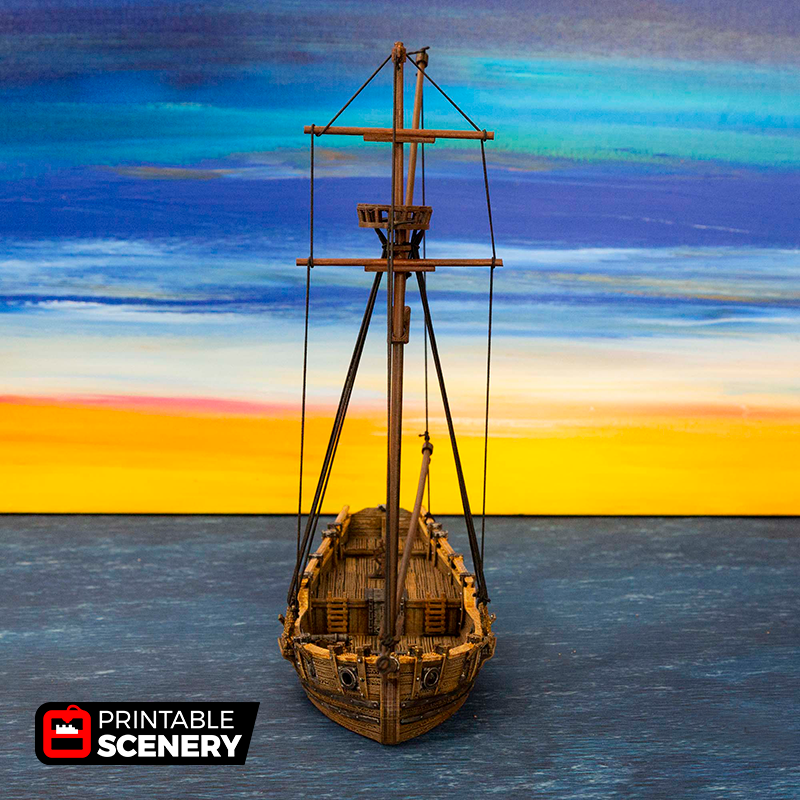
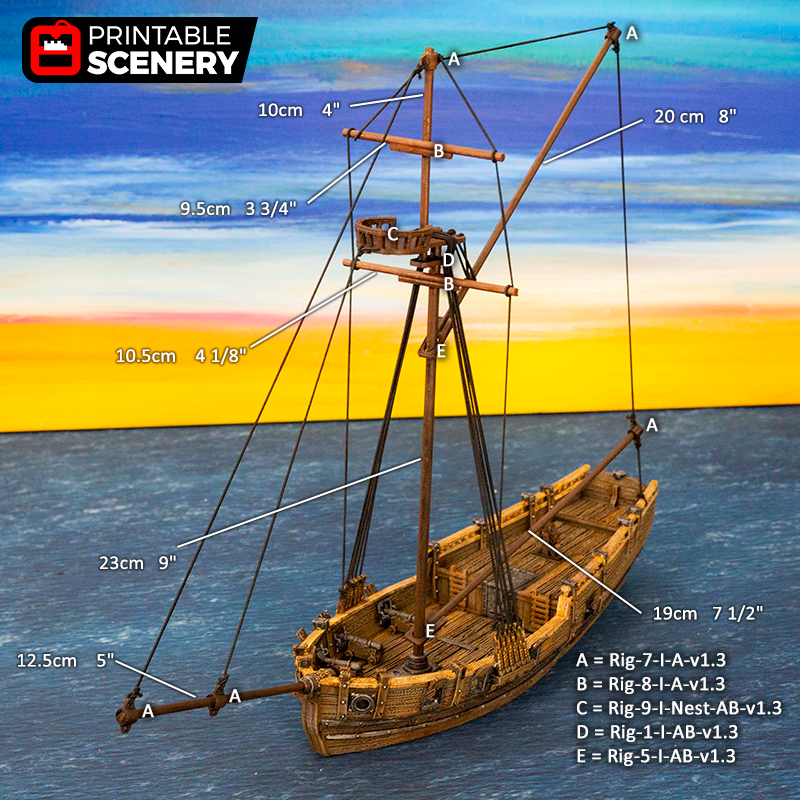
- Rigging clips. You will need 4mm, 6mm dowel and black elastic string. See the rigging diagram in the images.
Sloop Hull
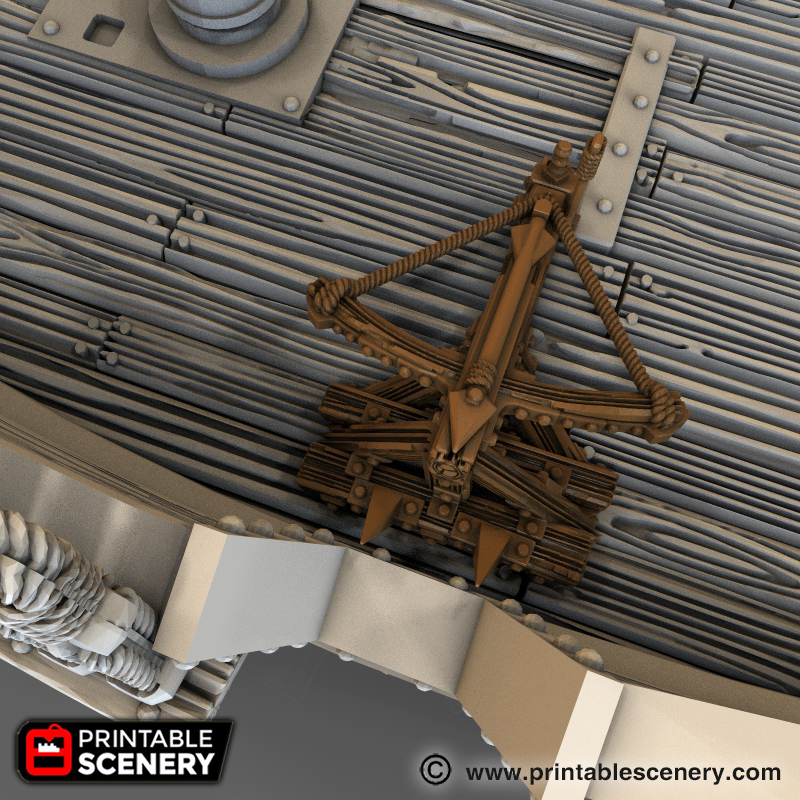
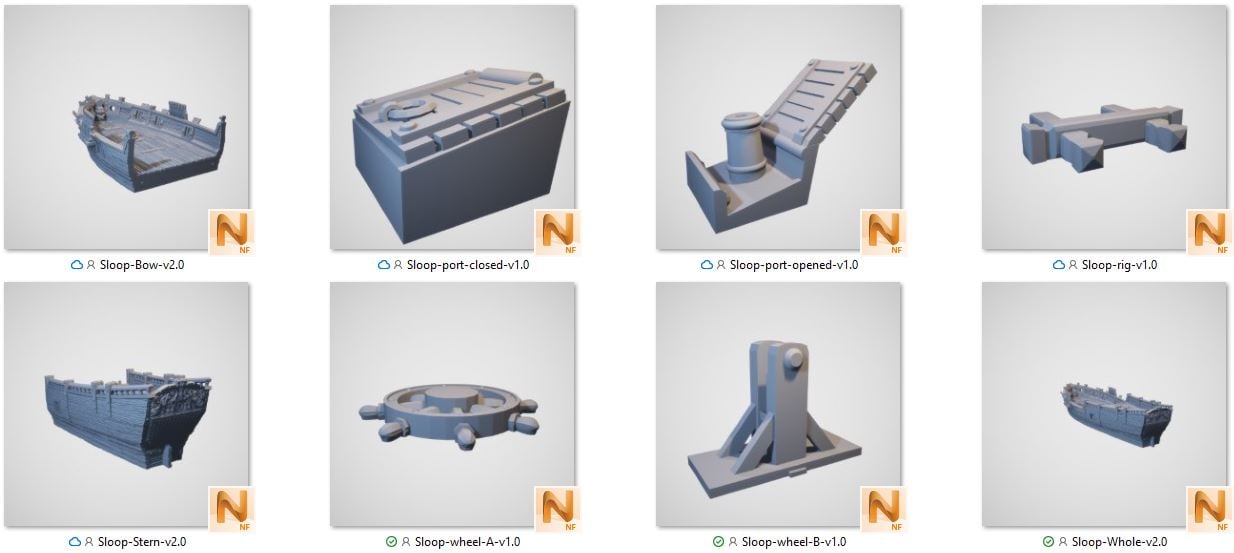 Fittings
Rigging
Each piece of rigging 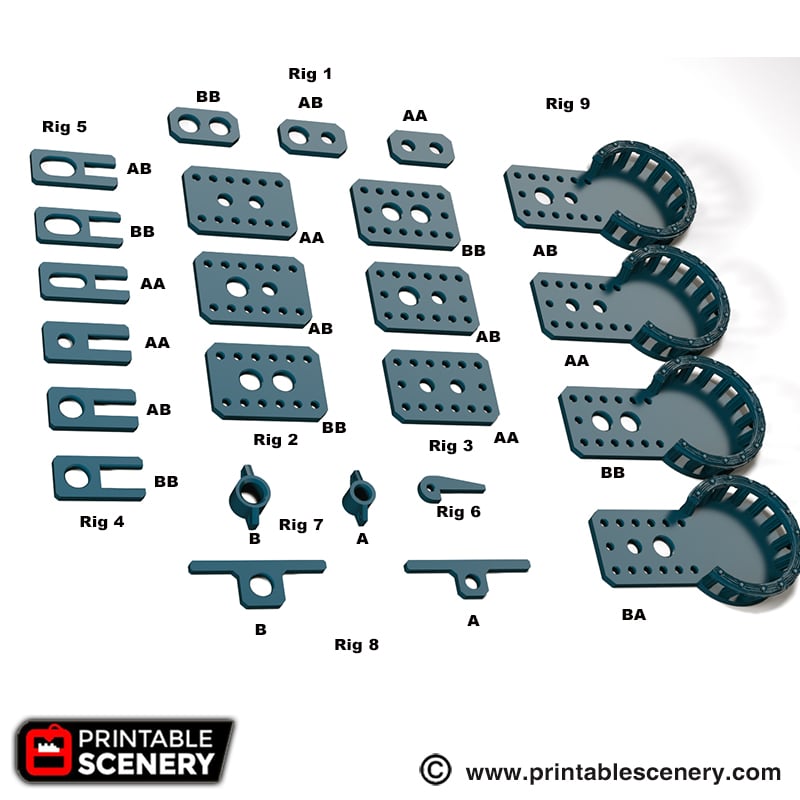
You will need 6mm (1/4 inch) and 4mm (5/32 inch) dowel for the masts and black elastic string for the rope.
6mm for the main mast and 4mm for the other sections.
Ballista Version of the Sloop
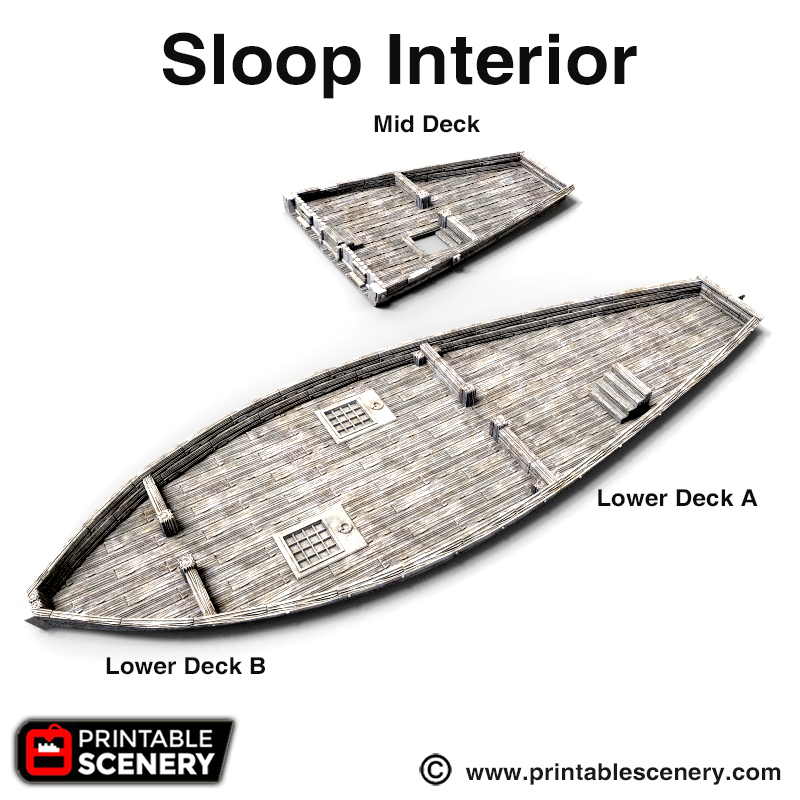
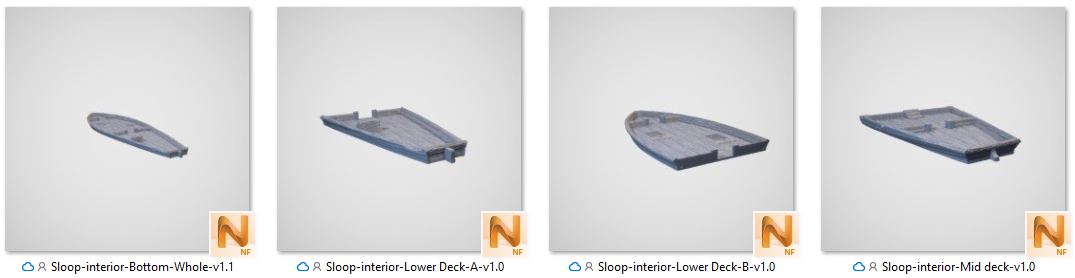
Sloop Interior
Sloop Wake


Franky Thijs (verified owner) –
Hey,
Any tutorial coming up for how the rigging works?
Matt Barker –
I’ve moved the image from the product gallery into the main description and also added the dowel sizes
Matt Barker –
I’ll make a video today, I’m printing out a new sloop now
jeskritt (verified owner) –
Where is the rigging diagram? I see the images of the individual rigging pieces, but not how to combine them with the dowel to produce a nice looking mast and rigging setup.
Matt Barker –
There is an image in the image gallery for the product. I have moved it a little closer to the front of the images so you can see it.
thomas.heider (verified owner) –
Where I can find the round platform pictured after the stern(in german we say krähennest) in the files?
Matt Barker –
I’ll add it in there tomorrow
Scott Nash (verified owner) –
Those dowel sizes seem hard for me to find in the US. The closest I’ve found is 1/4″ and 3/16″ – will probably have to make due…
Matt Barker –
I’m making an Imperial US version and will upload it tomorrow
Scott Nash (verified owner) –
Thanks Matt, you are awesome. I can easily adjust the dowels I have to get them to fit into the ship itself, so it is really just the riggings adjusted that “I need”. I am sure I could just scale them up a tad and be all set. But I really appreciate that you will do it officially.
Petr (verified owner) –
Hello Matt, I printed the hull, its amazing, but my son told me where is the anchor?
Matt Barker –
We have an anchor in one of the other models, I’ll add it to this pack
david3 (verified owner) –
Will you be posting templates for the sails?
Matt Barker –
I hadn’t thought of that but it’s a great idea, I’ll make some templates that can be cut out of cloth or paper
LELAND (verified owner) –
What are the dimensions of the rods I need for the imperial (ie stupid US) system. Is it the 1/4 and 3/16? Wish we could just use the metric system to but alas, thanks for making those versions.
Jo Boorer (verified owner) –
Yes that is correct. 1/4 and 3/16 is what is required for Imperial.
david3 (verified owner) –
Any suggestion on the length of the rods?
Matt Barker –
We have just updated the image to include the Dowel sizes
david3 (verified owner) –
Thank you for the update.
valascbrl (verified owner) –
What is the sloop-rig used for
Jo Boorer (verified owner) –
The Sloop-Rig is the piece that needs to be glued down next to the main mast. It strong point on a ship for lashing ropes to.
Sbfirekid (verified owner) –
I’m looking for the sail diagram mentioned above has it been made yet
Matt Barker –
Not yet but we have it on our to-do list
Dan Dinolfo (verified owner) –
How do you attach the swivels to the boat? 1.75mm filament?
Sam Campbell –
We have them glued on. You can try the filament but the pieces are very small to get any actual swivel movements happening.
michielwoltering (verified owner) –
what’s the total length in CM for this ship and the others without frontmast?
Sam Campbell –
The Sloop is 31cm in length without the front mast (bow sprit).
awnsheghlin (verified owner) –
Would it be better to use 1mm or 1.5mm elastic cord for the rigging?
Sam Campbell –
We used 1mm elastic cord for the rigging.
jesseefutch (verified owner) –
Concerning the imperial measurement, I see the rigging. However, 1/4″ and 3/16″ aren’t fitting the ship’s holes for me, any advice on proper scaling for those dowels? Unfortunately, US is stupid and makes it incredibly hard to find them in mm
Sam Campbell –
The imperial measurments are a rough guide for comparison as we design in metric.
darkdman94 (verified owner) –
if I scale the ship up, how should I go about scaling the needed dowels?
Sam Campbell –
You need to purchase dowels that are the same ratio of scale increase.
darkdman94 (verified owner) –
how would I figure out the scale increase of the dowel when I’m using imperial? lol. this sort of thing is definitely not my forte, but I know the standard sized ship isn’t going to be big enough for the standard DnD sized minis to make sense on it visually
Sam Campbell –
When you scale increase the model by 20% you would need to increase the diameter of the dowel by 20%; i.e. 3/16″ would become 9/40″ or 0.225″ approximately. We design for 4mm and 6mm so you may need to sand or fill to fit for standard imperial dowel sizes that you can purchase off the shelf.
ssandulak (verified owner) –
Probably a dumb question, but how do you know which rigging to print? Is it just all AA’s with AA’s? One set of AA’s is all you’d need? Any help you could provide would be much appreciated, thanks!
Nicholas Jebson –
Hey Ssandulak, their are 2 sizes of rigging’s there, A and B. A rigging is designed for the smaller 4mm dowels and the B’s for the 6mm dowels. most of the main mast will use B with the transition between the mast and topmast using the AB transition piece and AB crows nest in conjunction. pretty much everything else uses A.
ssandulak (verified owner) –
So you do need to print all the rigging files included assuming you want the fully rigged Sloop?
Nicholas Jebson –
No you Don’t, as some of them are designed for people only using 4mm dowel for all the masts as opposed to 6mm for the main mast and 4mm for the beams. Scrolling down on the Sloops page has an image of the rigged sloop with what parts are needed where to put it together. just here:https://www.printablescenery.com/wp-admin/post.php?post=93040&action=edit
henrik1 (verified owner) –
It seems the models are now 20 mm. The sloop seemed to small for my 28 mm . Is this correct?
Sam Campbell –
The sloop is one of our smaller ships, but is designed for 28mm figures. If you feel it is too small you can scale it up.
info19 (verified owner) –
Did you ever get a chance to make templates for the sails?
Sam Campbell (verified owner) –
There are no templates for the sales. This is something we may do in the future.
William Manley (verified owner) –
Trying to figure out which STL’s to print for the Sloop rigging using Imperial masts and files? See a forum post under “Sloop fittings” for a labeled diagram, in case this is of interest.
Tim Voegeli (verified owner) –
Hey there – great model which has printed really nicely! I can’t seem to find the ship’s wheel in the files? Has it fallen away with the recent update?
Nicholas Jebson –
Oh dear it has! Jo is getting right on that to quickly add it back in. We did not change any of the textures on it so if you have the older files still there it will still be relevant, otherwise give it an hour or so to update and re-download it and it should be back in there.
Andrew Myers (verified owner) –
Stupid question, but what connectors do I use to join the pieces?
Jo Boorer (verified owner) –
We use a piece of filament in the holes to help glue it together.
Sam Hudson (verified owner) –
ok i’m dense….
where does the interior go?
Doesn’t go under the main hull. The pieces are solid so can’t go inside? is the interior just a seperate piece to use
Jo Boorer (verified owner) –
The interior pieces are used for role-play games like Dungeon and Dragons so do not attach to the ship.
Michael Wilton (verified owner) –
Why are there so many rigging pieces, i.e., 4 x Crowsnest if only one is needed ? Likewise will all the other pieces of rigging ?
Jo Boorer (verified owner) –
Customers requested this so that they had an option to create their own rigging.
Michael Wilton (verified owner) –
you need to edit the rigging picture. there’s no clear way of of knowing what size dowel is required at each section. The lengths to cut are clear but the required diameter in each position is not clear at all
Jo Boorer (verified owner) –
Thanks for pointing this out. I have made a note above the Rigging picture on the site to let people know that the main mast is 6mm and the other sections are 4mm.
Michael Wilton (verified owner) –
Thanks for the quick response. With that solved, I can get building. Its an excellent model and I can’t wait to get it completed and on my D&D table !
Jo Boorer (verified owner) –
Thanks for your feedback.
Sunamon (verified owner) –
Just noticed that the rigging picture has an error. On the main sail the cross pieces are listed as the same part. I believe it’s rig A and Rig B you need one of each not two the same.
Jo Boorer (verified owner) –
Can you please send me a screenshot pointing to what piece you are referring to.
Sunamon (verified owner) –
Jo Boorer – how do I send you photo? I sent one to the facebook group, but I can’t find an email.
Jo Boorer (verified owner) –
[email protected]
Michael Fitzpatrick –
Is this printable on an Ender 3 size wise?
William Gouldin Jr (verified owner) –
Hello,
What is with the AA BB AB etc? Obviously, a sloop isn’t going to have 3 different crows’ nests so how do I know which to use?
Joanne Boorer (verified owner) –
Hi William, there is a rigging guide on the main product page and in the gallery that shows this model uses the AB nest. “A” refers to the thinner 4mm dowel used and “B” the thicker 6mm dowel to fit in the holes.
BrickSlamchest (verified owner) –
Hi,
What size wooden dowels would fit the 32mm Heroic & OpenLOCK scale?
Alternatively, is there an .stl file available for the simple mast for that scale if there isn’t a good fit?
Joanne Boorer (verified owner) –
Hi, At 32mm scale you would require dowel at 8mm. You will need to sand paper the tip for a for easier placement.
We currently do not have a STL file for this. If you email me at [email protected] I can give you step by step instructions to create on to the length you wish to use.