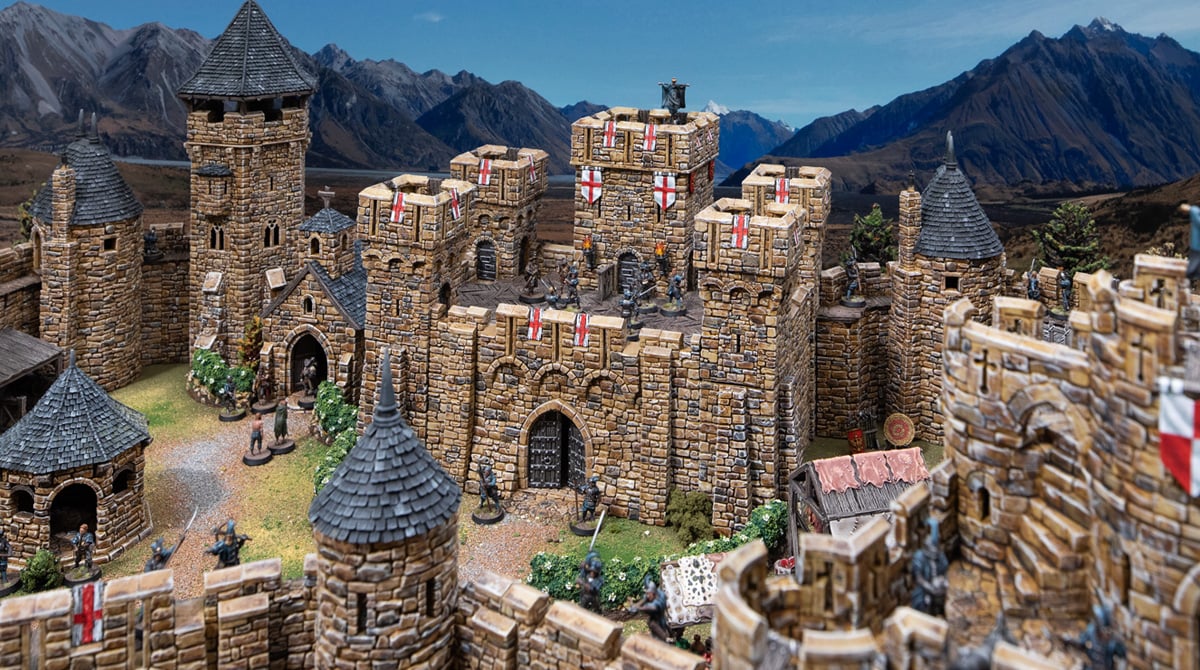
How to Build the Duke’s Fort
In this article, we’re going to cover building Duke’s Fort from Throne & Ash. We’ll go over all the components and exact quantities you’ll need, as well as any tips along the way to make putting this castle together easier.
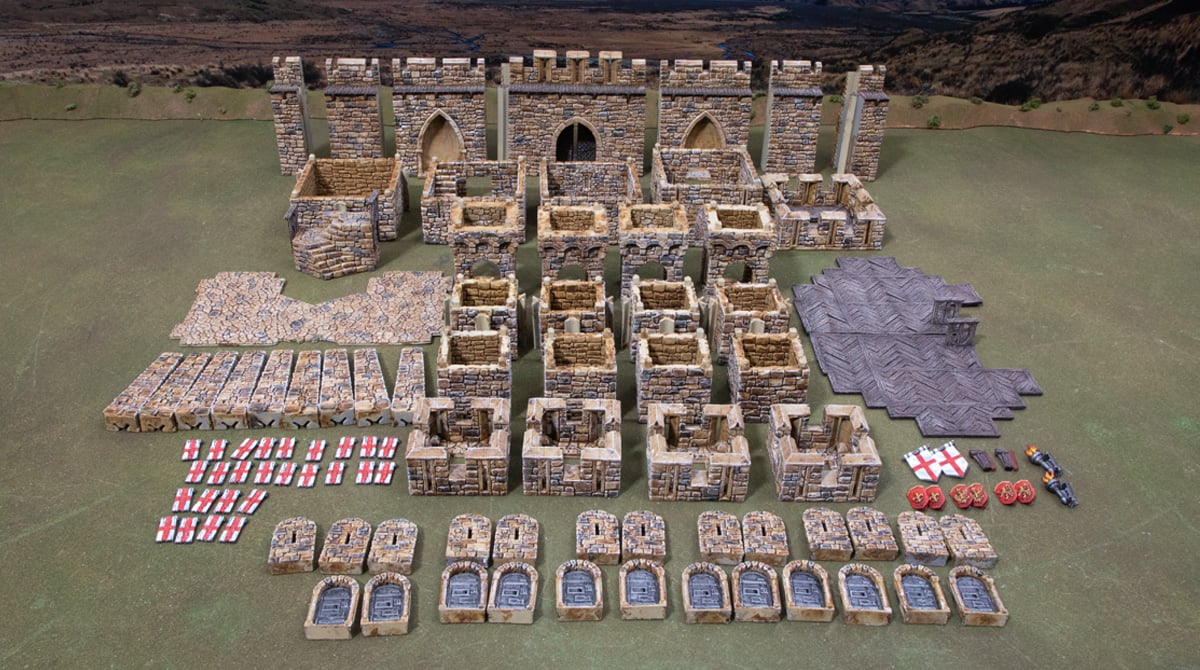
You’ll need the following number of components from the Dukes Fort:
- 1x Square bastion level 1
- 1x Square bastion level 2
- 1x Square bastion level 3
- 1x square bastion level 4
- 1x Square bastion battlement
- 1x Stairway
- 9x Buttresses
- 1x Gateway
- 2x gate doors (attached to the gateway with filament)
- 2x I to I connectors
- 2x I to B connectors
- 2x Gate to H connectors, male and female
- 2 cobblestone floor pieces
- 2x wooden platforms
- 4x small square level 1
- 4x small square level 2
- 4x small square level 3
- 4x small square battlements
- 12x door frames
- 12x metal doors (attached to the door frames with filament)
- 13x arrow-slit wall plugs
- 26x tilt shields
- 2x flag corbels
- 2x wooden corbels
- 2x torch corbels
- 6x shield corbels
This is a massive list of components, so to help save time, we recommend putting multiple items on the build plate where they fit, but don’t overdo it, either, as a print fail half through 10 door frames is a lot worse than failing on just one door frame. Our preferred amount is 4 door frames per print bed, and similar for corbels, doors, and wall plugs.
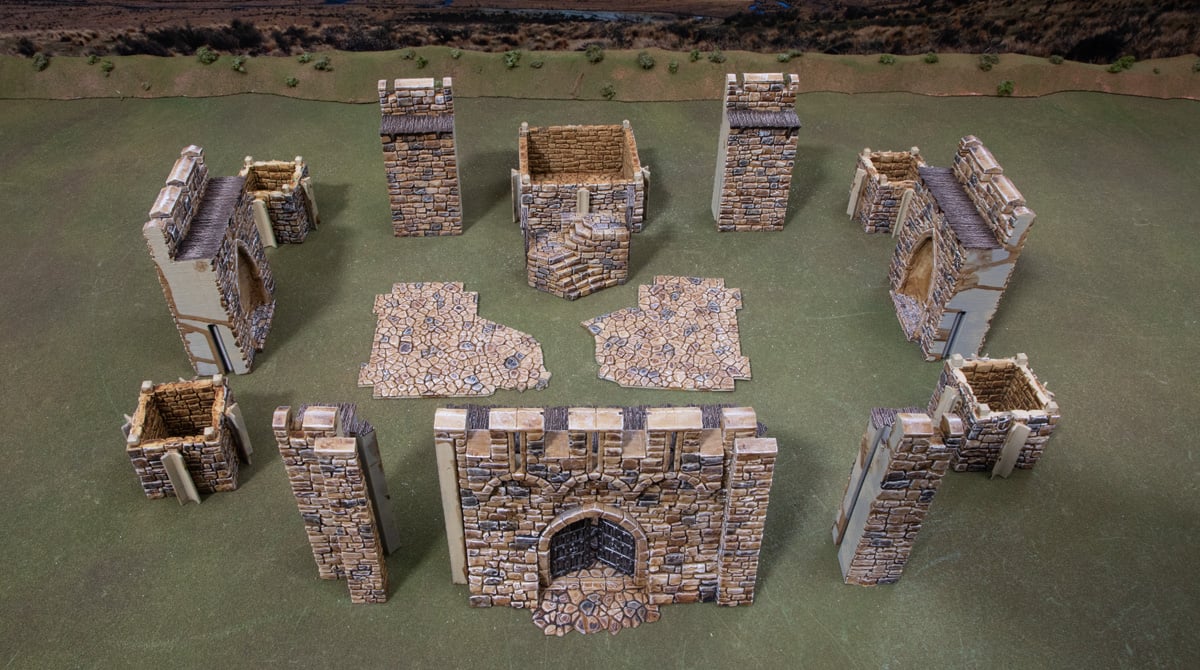
Step 1: Line up the ground floor pieces. This consists of all the tower level 1s, the connectors, and the floor tiles. This will give you a good idea of how it all comes together.
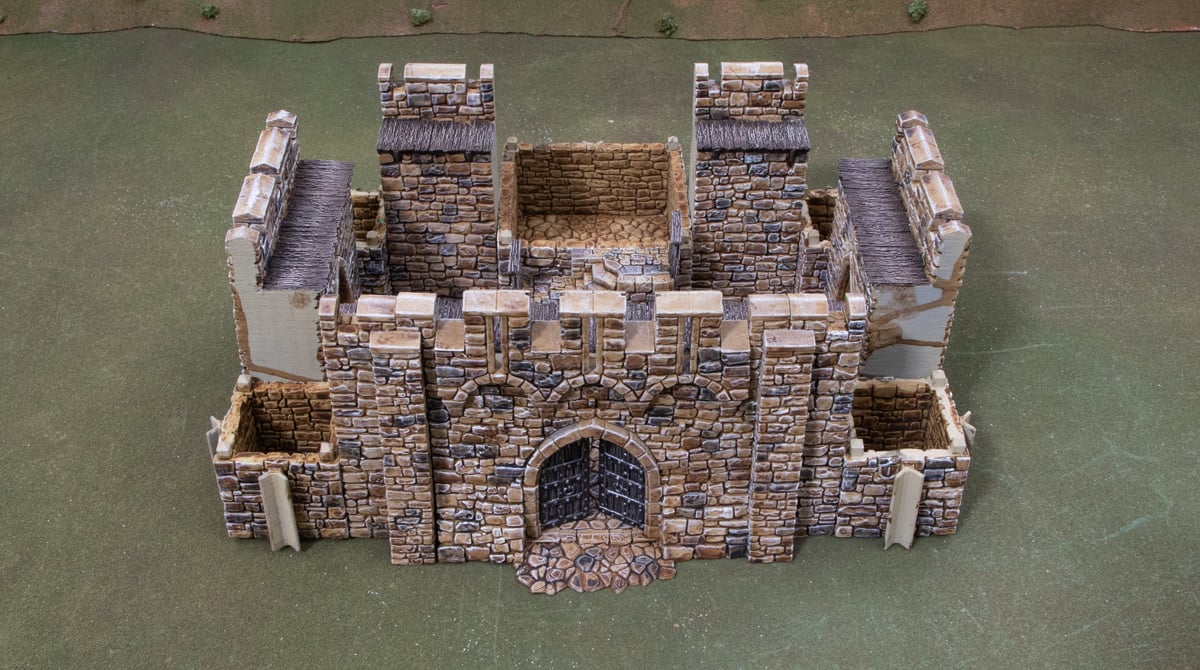
Step 2 is to slot it all together. We like to start with the main square bastion and work around each side, finishing with the gateway sliding into place.
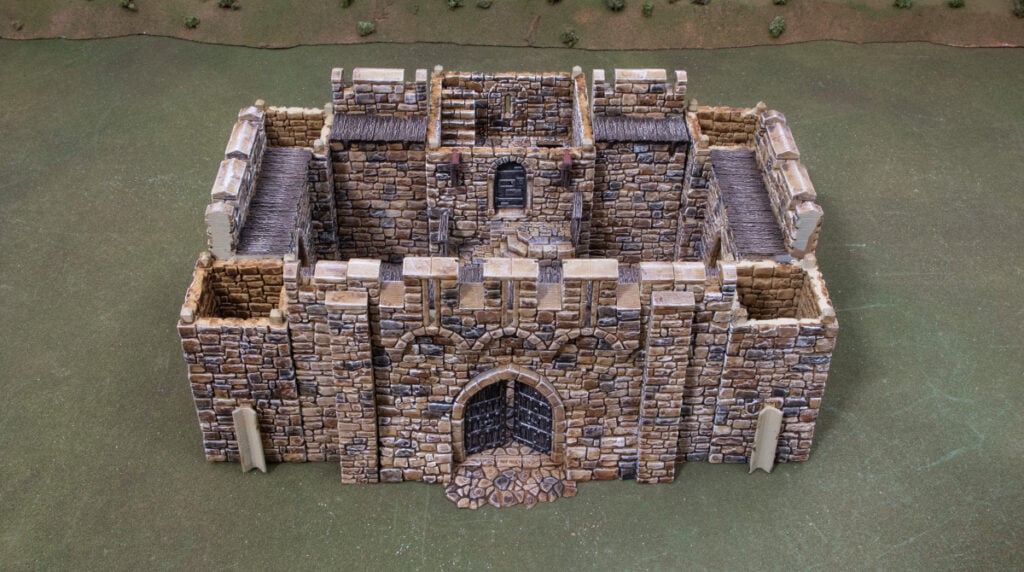
Step 3 is adding in the second-floor pieces. The small square tower parts are blank for this level, but the main square bastion has a doorway facing the stairs, and an arrowslit on the back. Also, attach the wooden corbels to the front of the small square bastion, level 2.
Step 4: Add the level 3s to the build, including the wooden platform. This is an optional part that sits atop the walkways to create a wider battlement if you want. Each small square bastion has 2 doors and 2 arrow-slit windows, arranged so the doors go around the corner, joining the walkways. The main square bastion has three doors on the inside and an arrowslit on the back wall facing out. Also, attach the torch corbels to the small square bastion and slide the buttresses on at this stage.

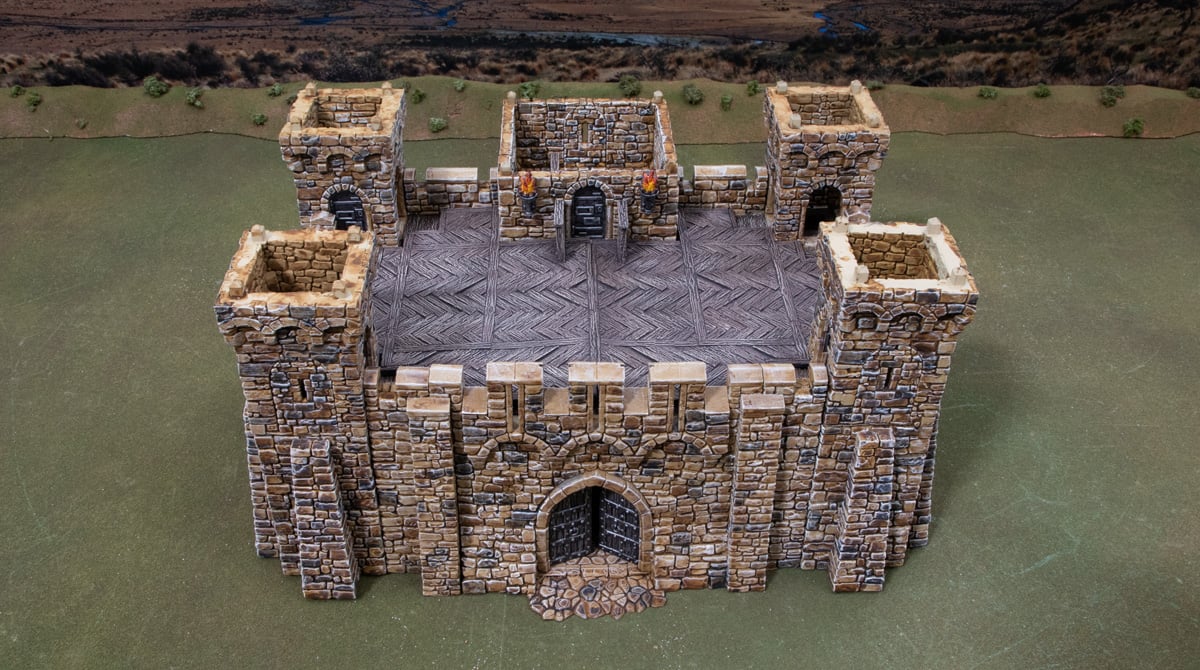
Step 5: Place the battlements on top of the small square towers on each corner. Place the main square bastion level 4 on top, with four arrow-slit windows, and the flag and shield corbels arranged so the flags face forward.

Step 6 is the final piece of the castle, the battlement to cap the main square bastion.
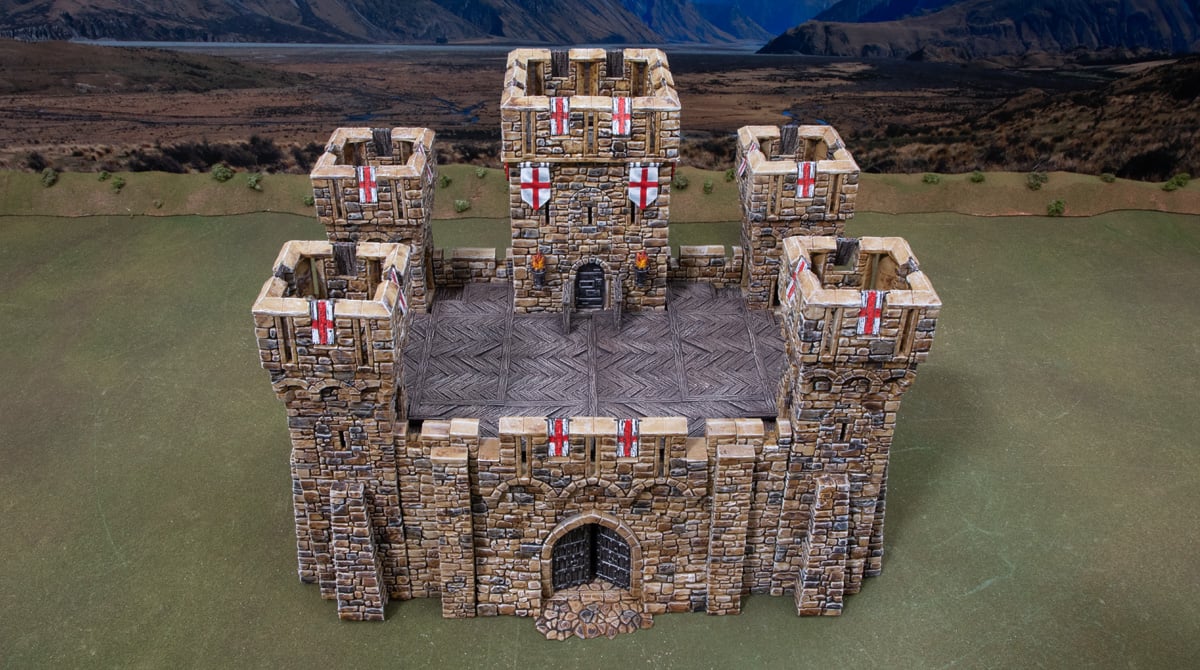
Step 7 is the final flourish: the tilt shields. These go between the crenelations on the battlements, where you’ll see the small gaps for each to slot into. Four go on each small square tower, eight go on the main square bastion, and the last two go in the front gate.
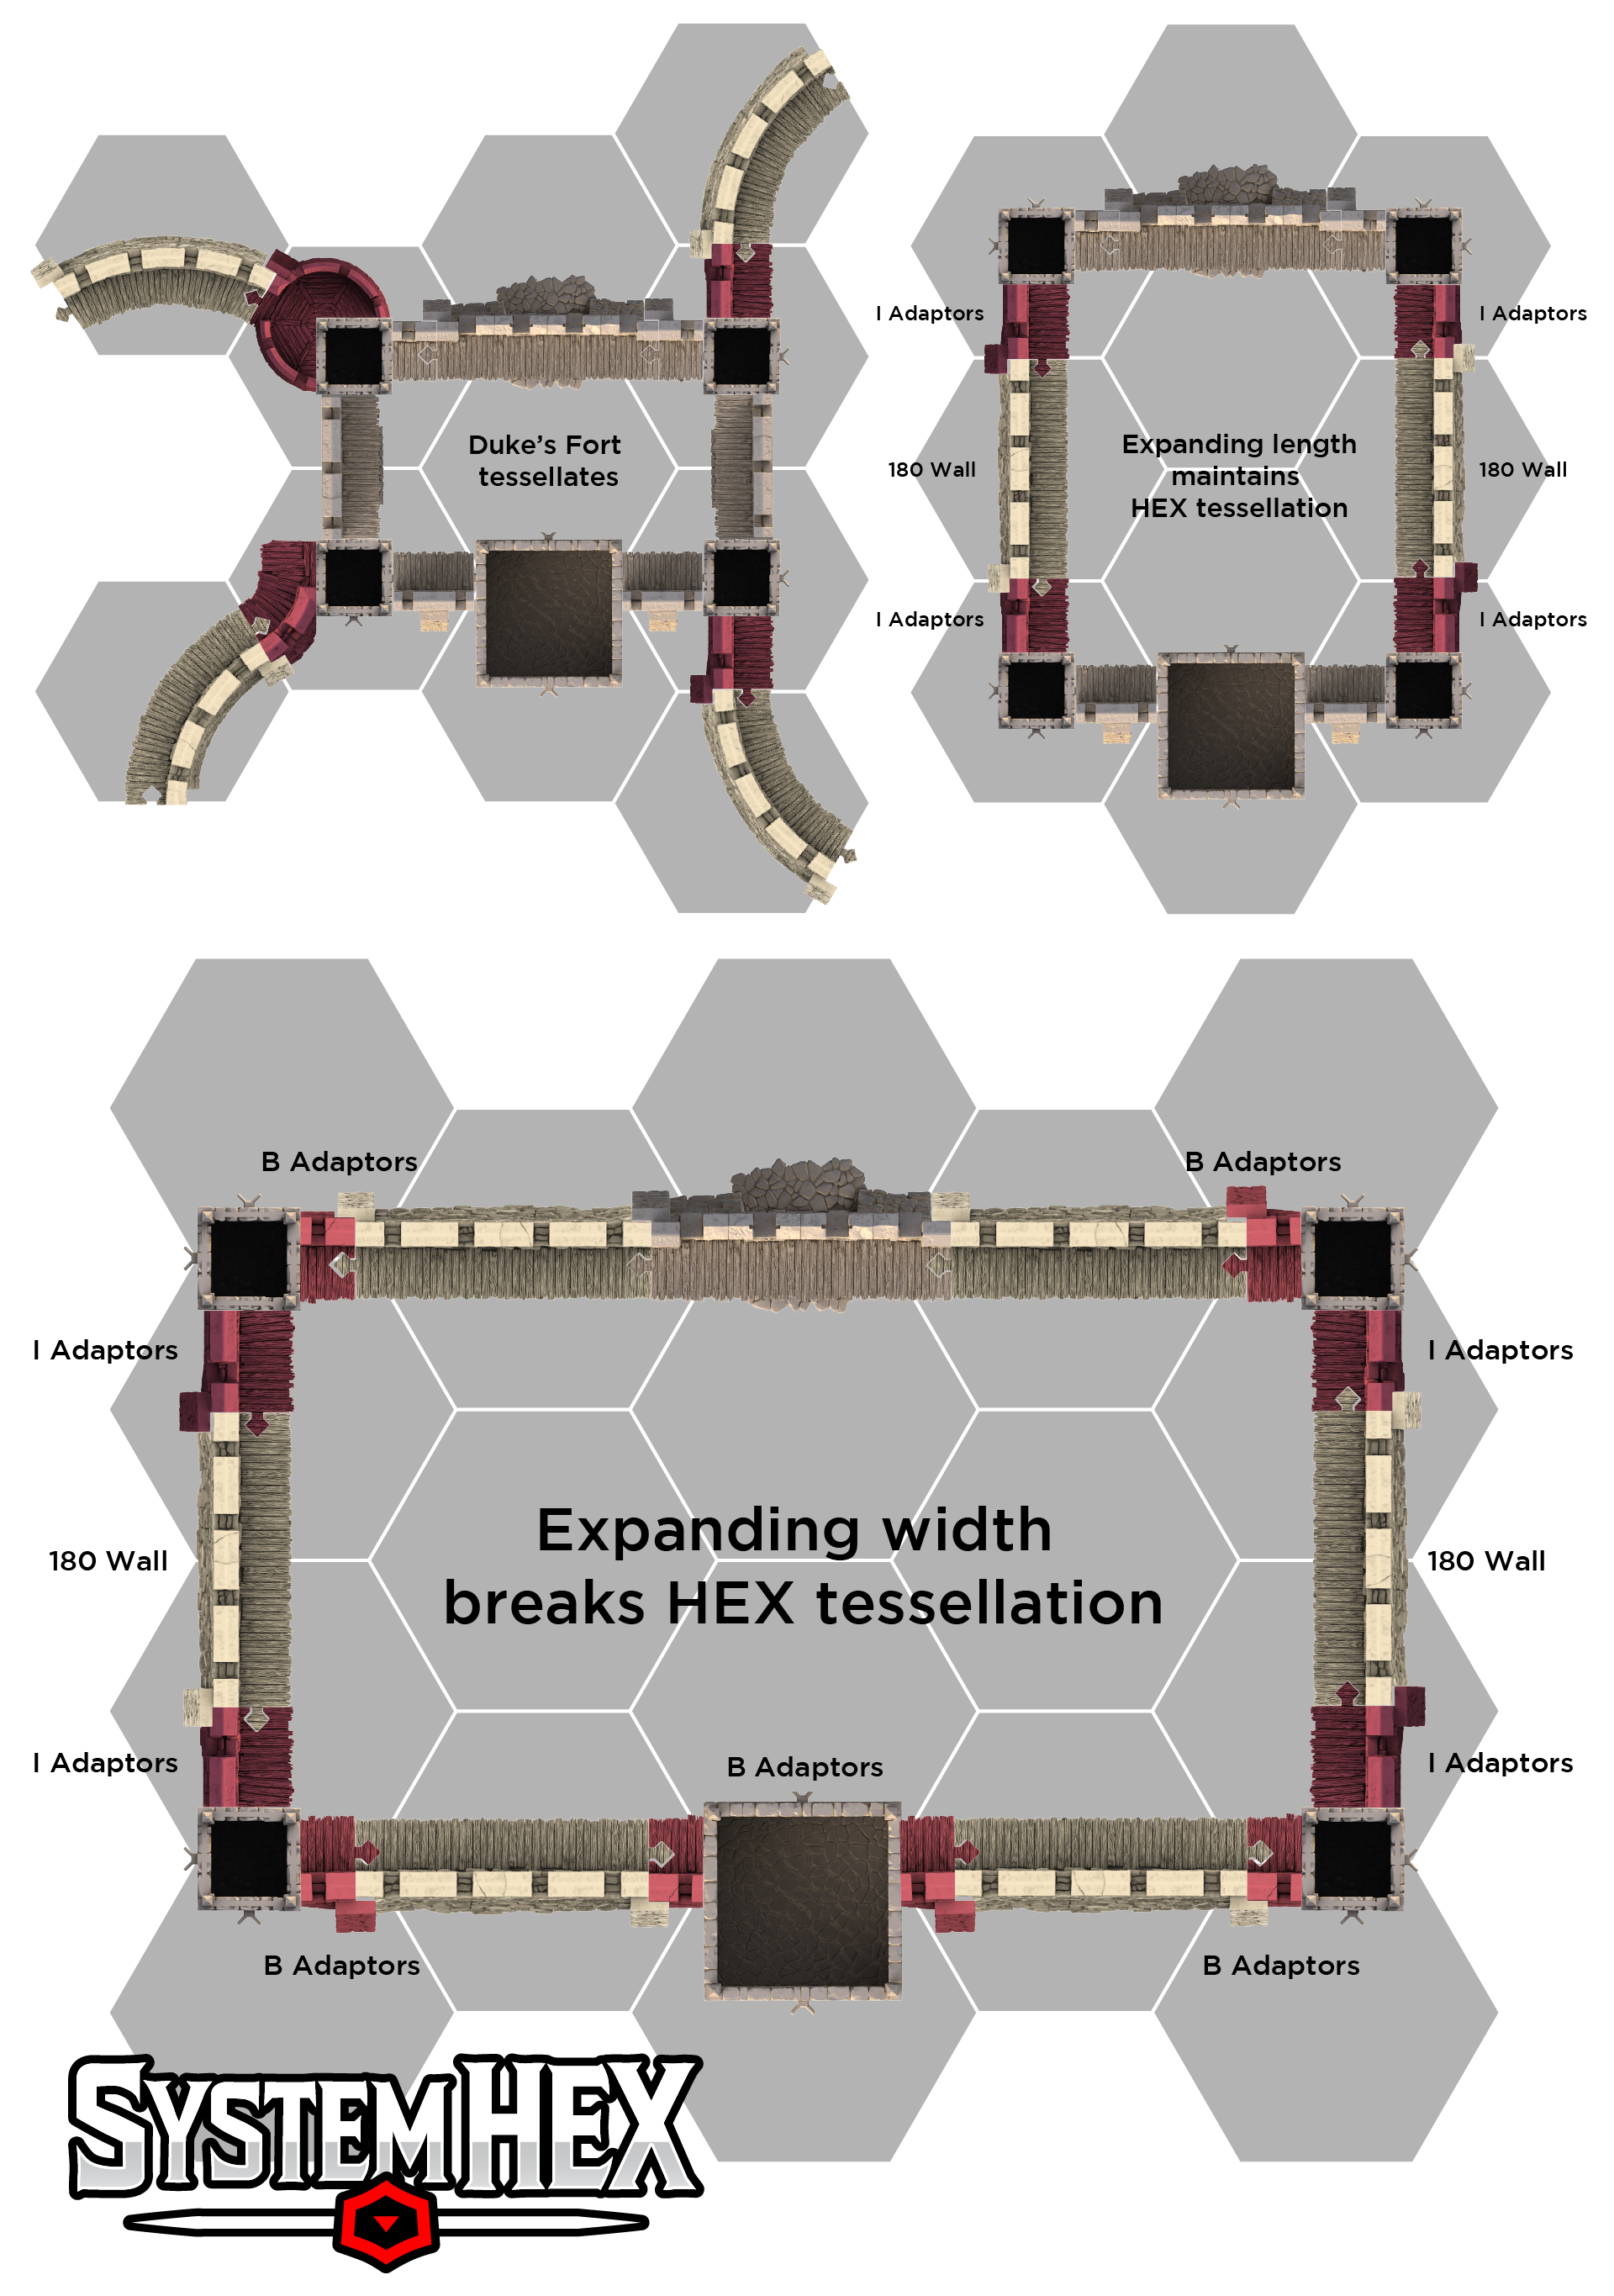
And there you have it, a complete Duke’s Fort. You can leave this as a standalone castle, or make it larger using straight wall pieces and connectors like in the example below, or use some connectors from the Small Square Bastion to tessellate the Duke’s Fort into a larger castle with walls and towers.