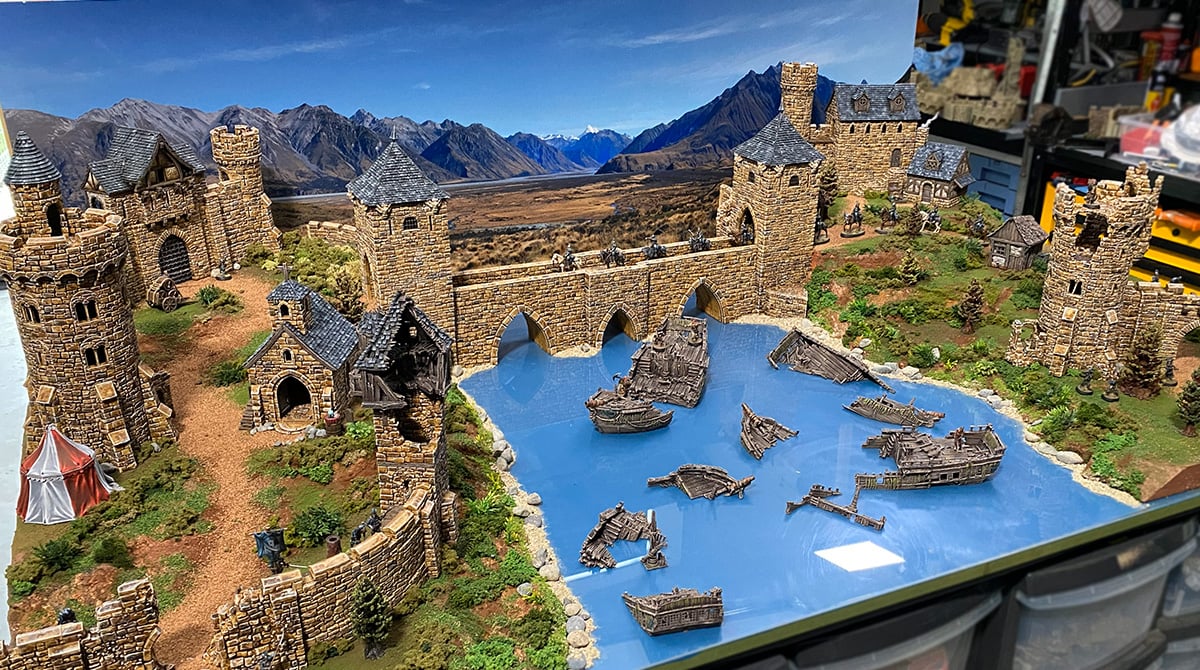
Building a Throne & Ash Grand Bridge Board
In this article, we’re going to run you through our process for building the board we used to show off the Grand Bridge from Throne & Ash. It’s a really simple process that requires very few hobby supplies to achieve a great result. To build this set, you’ll need:
- A 6×4 (roughly) sized table
- A large sheet of 40mm polystyrene
- Large, clear PVC sheet
- PVA
- Plaster
- Brown and Blue house paint
- Black and Sepia wash
- Brown weathering powder
- Various green flocks to your taste, both fine and clumps
- Shrubs and grass tufts
- The Grand Bridge
- Sand and ballast
Making the layout
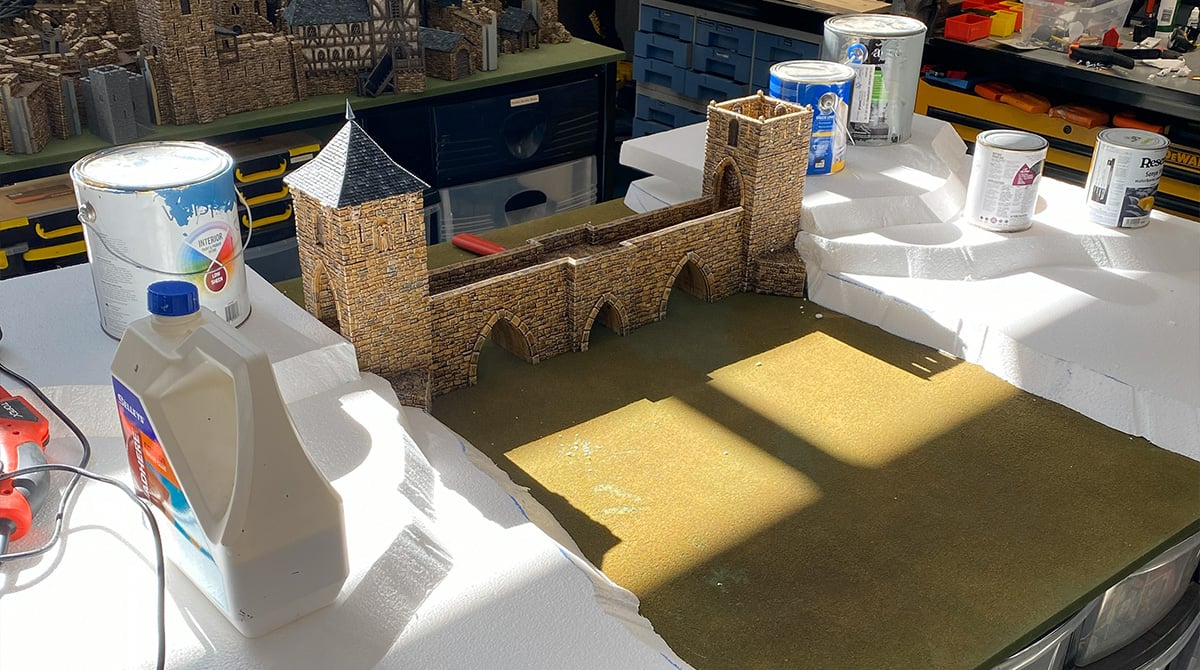
First, we set up our board and cut the polystyrene to make our hills. These need to be elevated to the height of the grand bridge, so we used three layers of polystyrene, and PVA glued them in place with some rough-cut hills. Some heavy items weigh them down to dry flat.
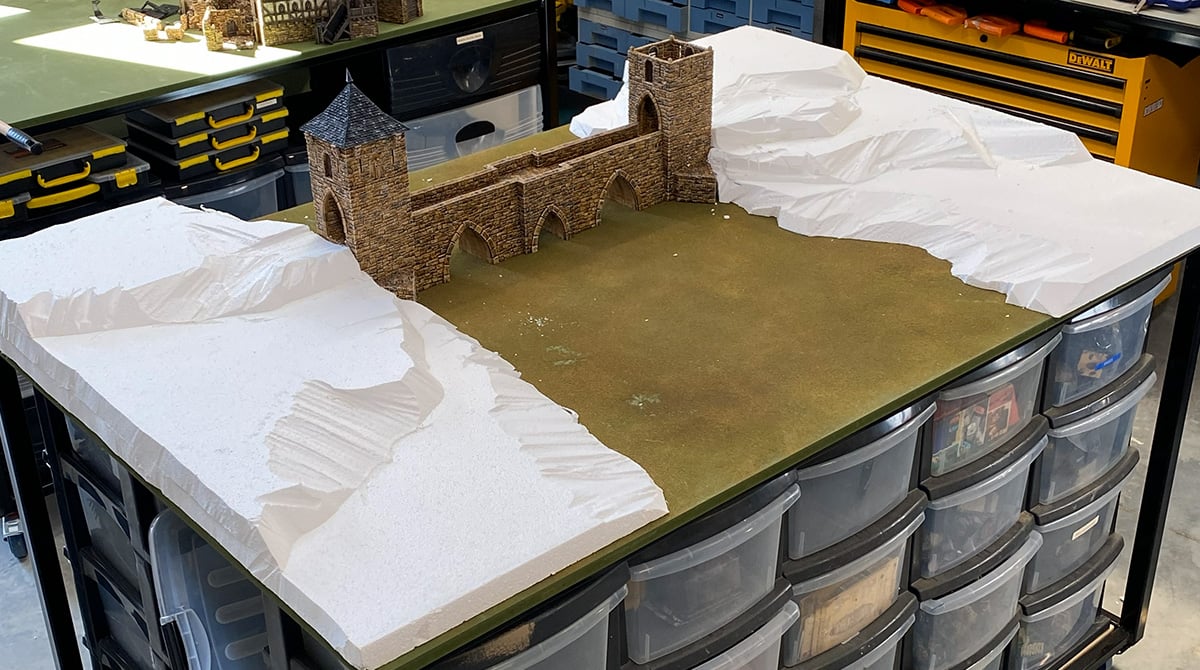
Then we trim the polystyrene into a more refined hill shape. Here, we can establish where our road is going to be. We then mix some plaster and use that to cover the hills, smooth the shape,s and fill any gaps. It also adds a more soluble layer to the polystyrene.
Painting and flocking
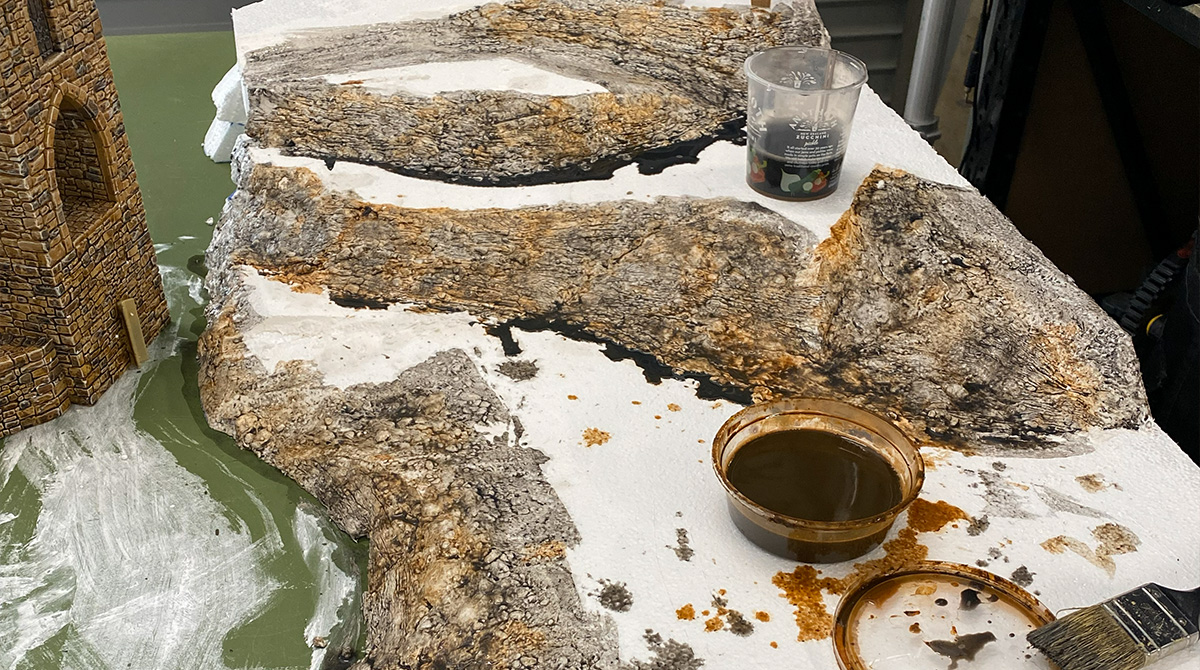
We first mix our black wash and sepia washes with some water to thin them down. Then we cover the hills with the black first, letting it soak into all the white areas. Then, while the black is still drying, we drip heavy amounts of the sepia down the hills, letting it bleed into the black and create some blended colours.
After that dries, we can paint the flat areas of the polystyrene with our brown paint. We went with a reddish, muddy tone. While that’s still wet, you can start sprinkling your green flocks so they have something to stick to initially. Sprinkle the ballast over your roads and paved areas.
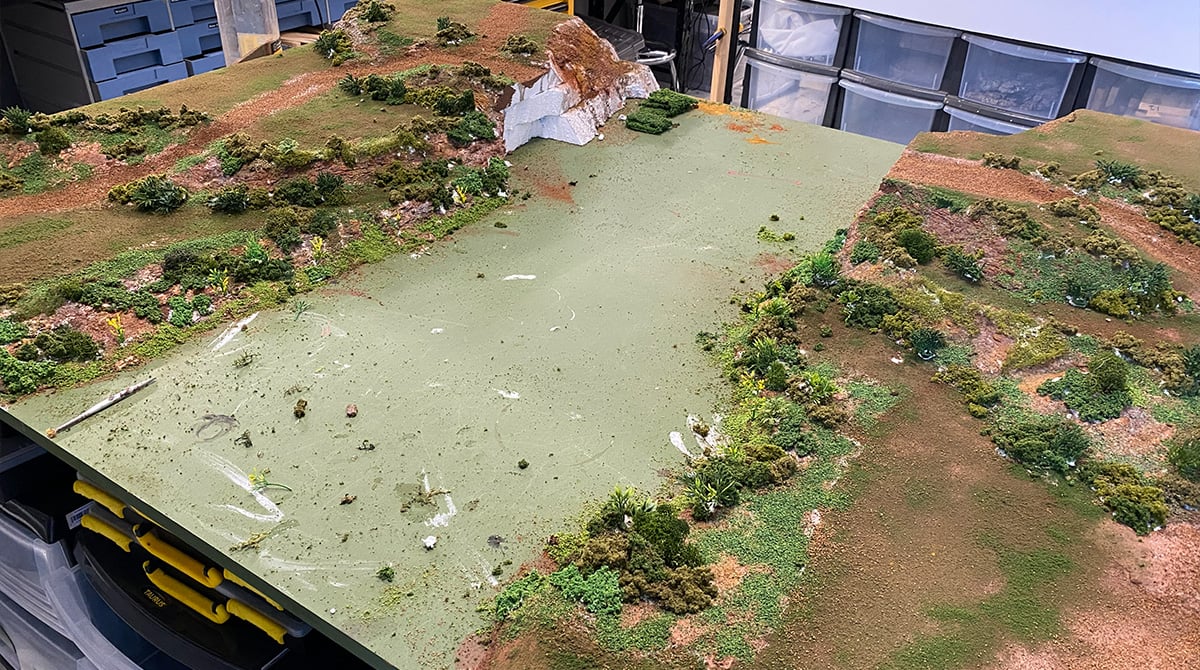
We like to keep the grass areas on the flat distinguished from the grass on the shore to show the diversity of flora. Once that has dried, you can start placing the clumps of flock and the grass with small dollops of PVA to bind them. You can create an overgrown shore, and bushes along roads here.
There might be areas that appear too bright, or there is still exposed PVA or polystyrene; in these cases, you can apply the weathering powder and work it into those areas to blend it naturally into the brown undercoat. It also makes a more natural-looking terrain.
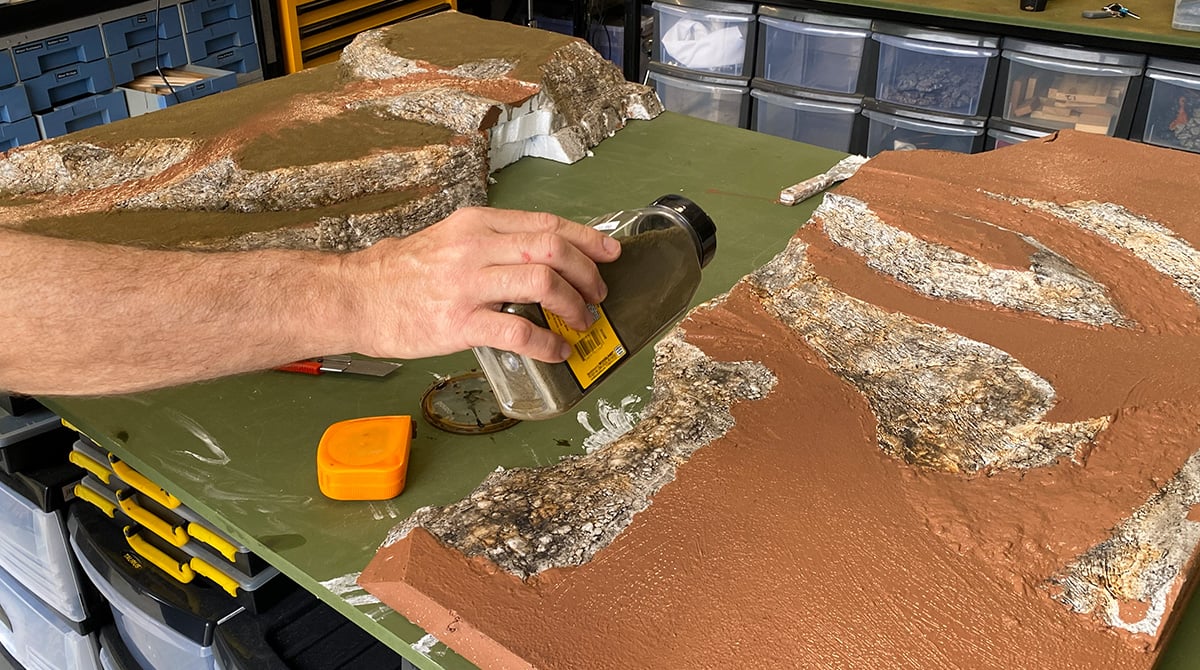
Finally, you can seal it all with watered-down PVA sprayed through a bottle all over. Apply two coats to make it more durable.
Finishing Touches
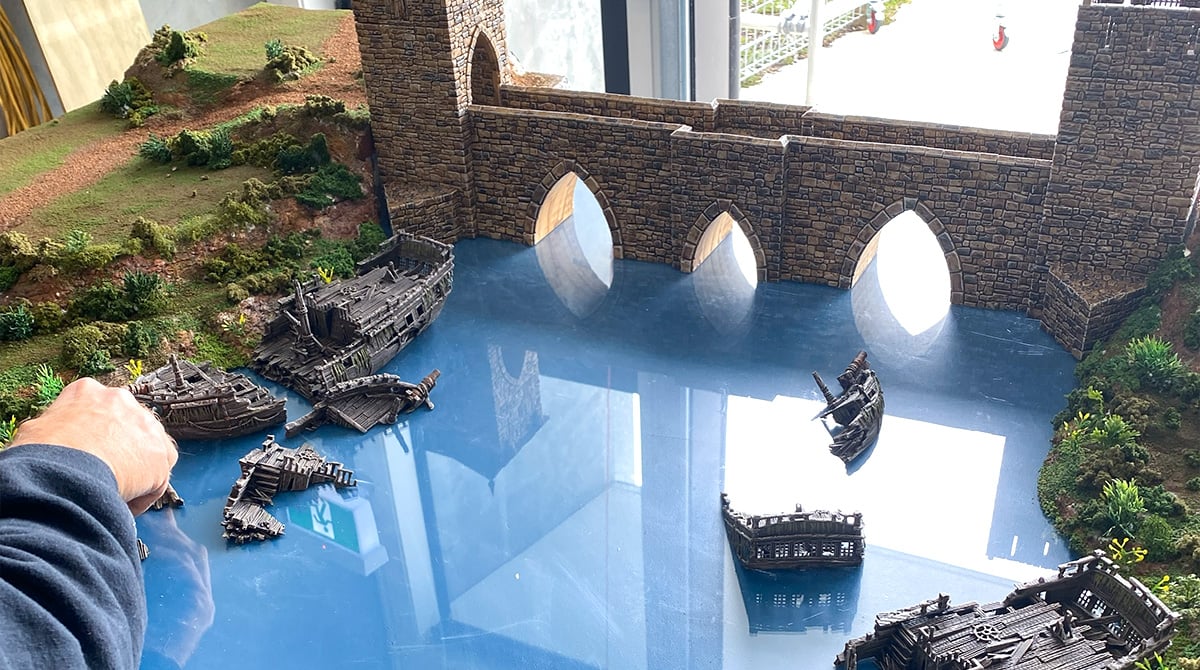
Now you can start to lay out your scene properly using the PVC sheet and any watery scenery. We painted our table blue before placing the PVC on top, but you can use anything blue if you don’t want to commit to painting a table. Cloth, paper, or a playmat can all work.
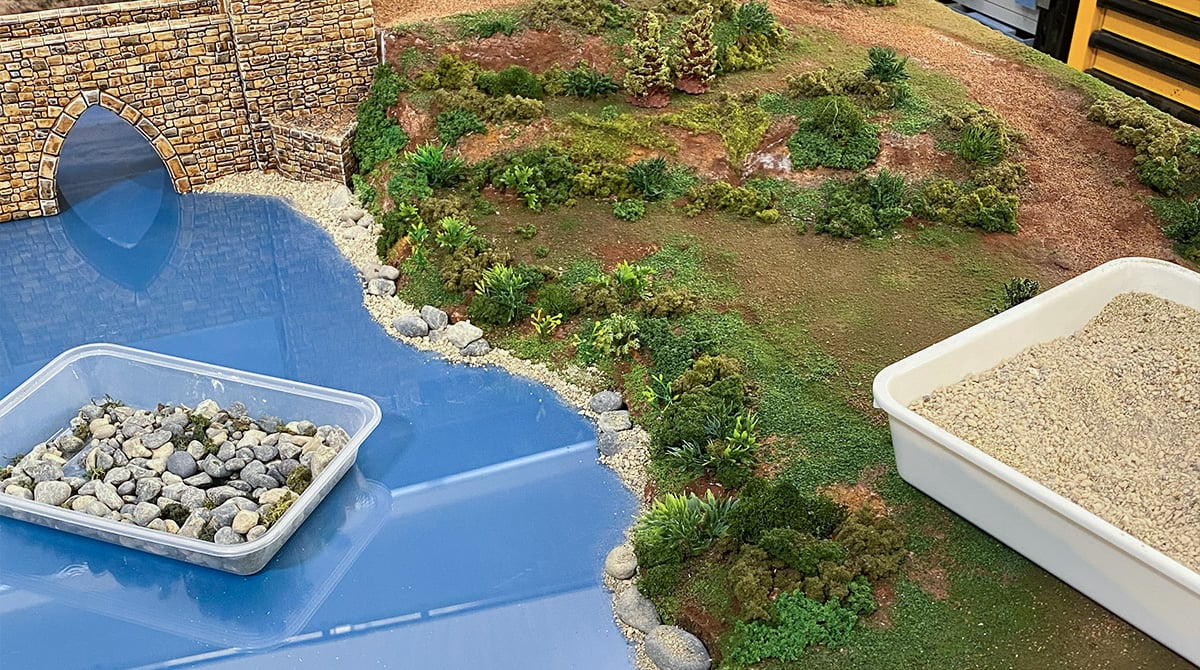
To really blend the shore into the water, we used some light sand and stones along the shoreline. Then we used a brush and a wet wipe to clean up and powder the leftover on the reflective table.
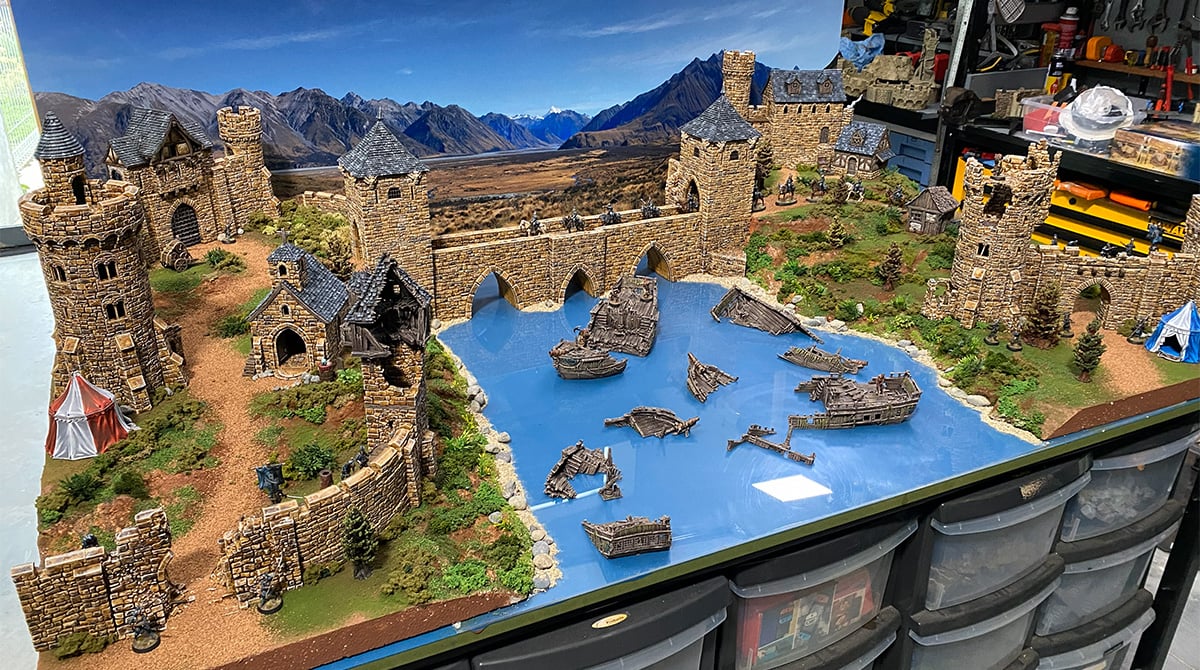
With all the terrain work done, it’s on to the final touch: adding our Throne & Ash terrain to set the scene. Here, you get to really tell the story and build up all the elements for your display or gameplay.
And there you have it, our process for building the Grand Bridge board using our Throne & Ash models. You can find the Grand Bridge here, and a lot more Throne & Ash models to dress your board here too.
Amazing. I really like the use of the clear PVA sheet with blue underneath. Nice effect. I tend to go for the epoxy resin pour but as you know it has it’s pitfalls and risks. This is a great alternative once you’ve blended it in on the shores. Great article Sloane. Thank you for sharing this process. Really helps my own hobby processes learning what others are doing.
Awesome, thanks Jeremy