How to assemble the King’s Keep
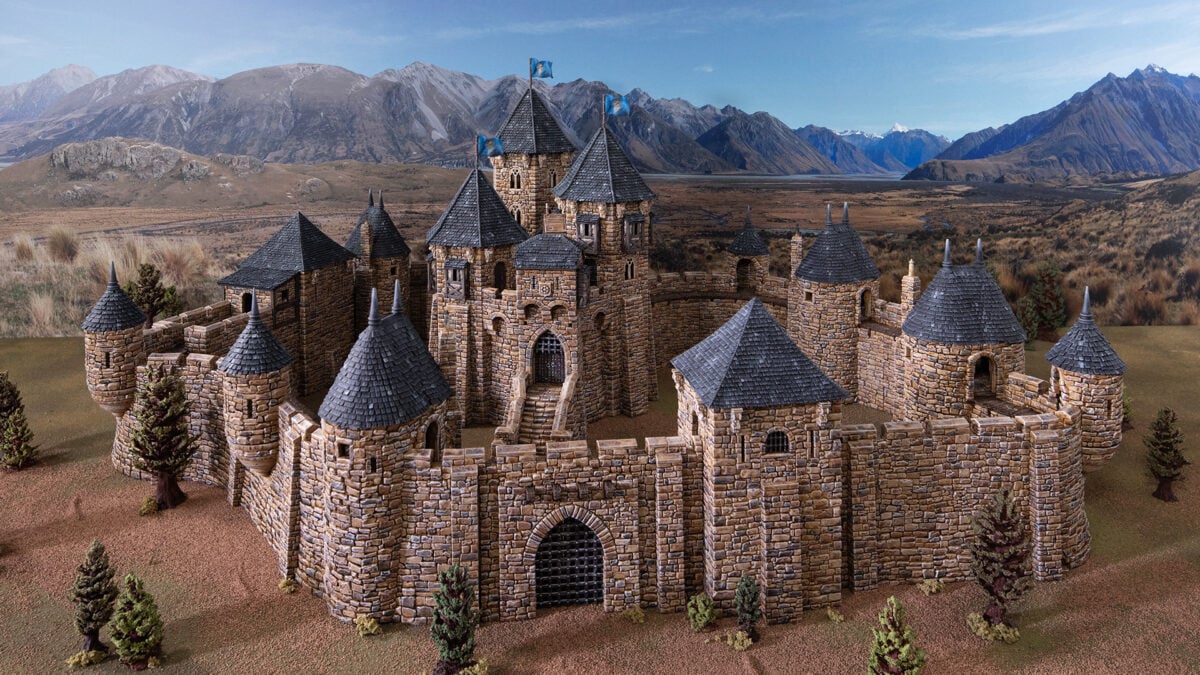
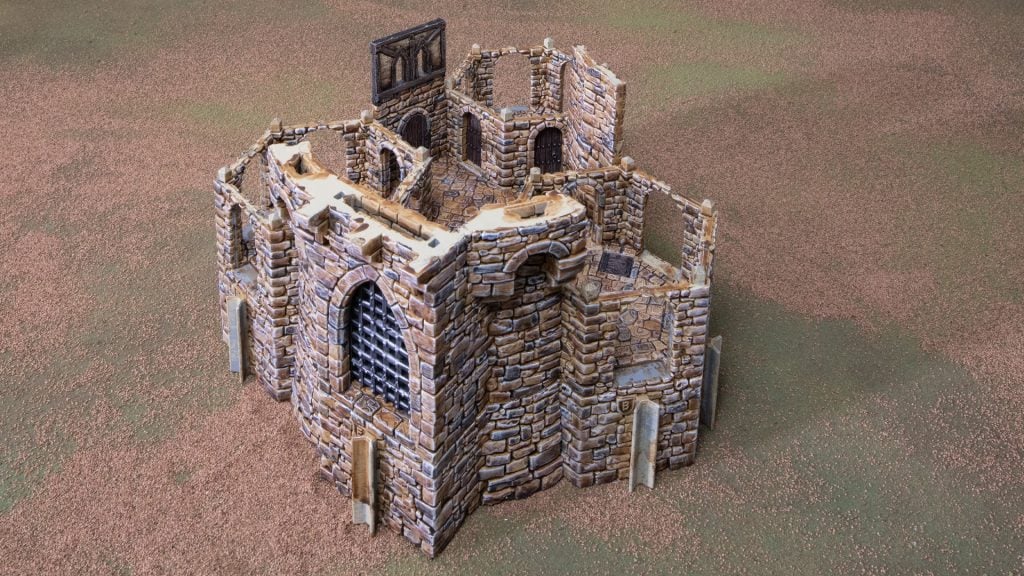
In this article, we’ll show you how we assembled the King’s Keep, the large 3D-printed centerpiece in our Throne & Ash campaign. We’ll go through all the components needed to put it together and provide a step-by-step process for what and how we used those components. We’ll also cover making the functional windlass included in the King’s Keep 3D print file.
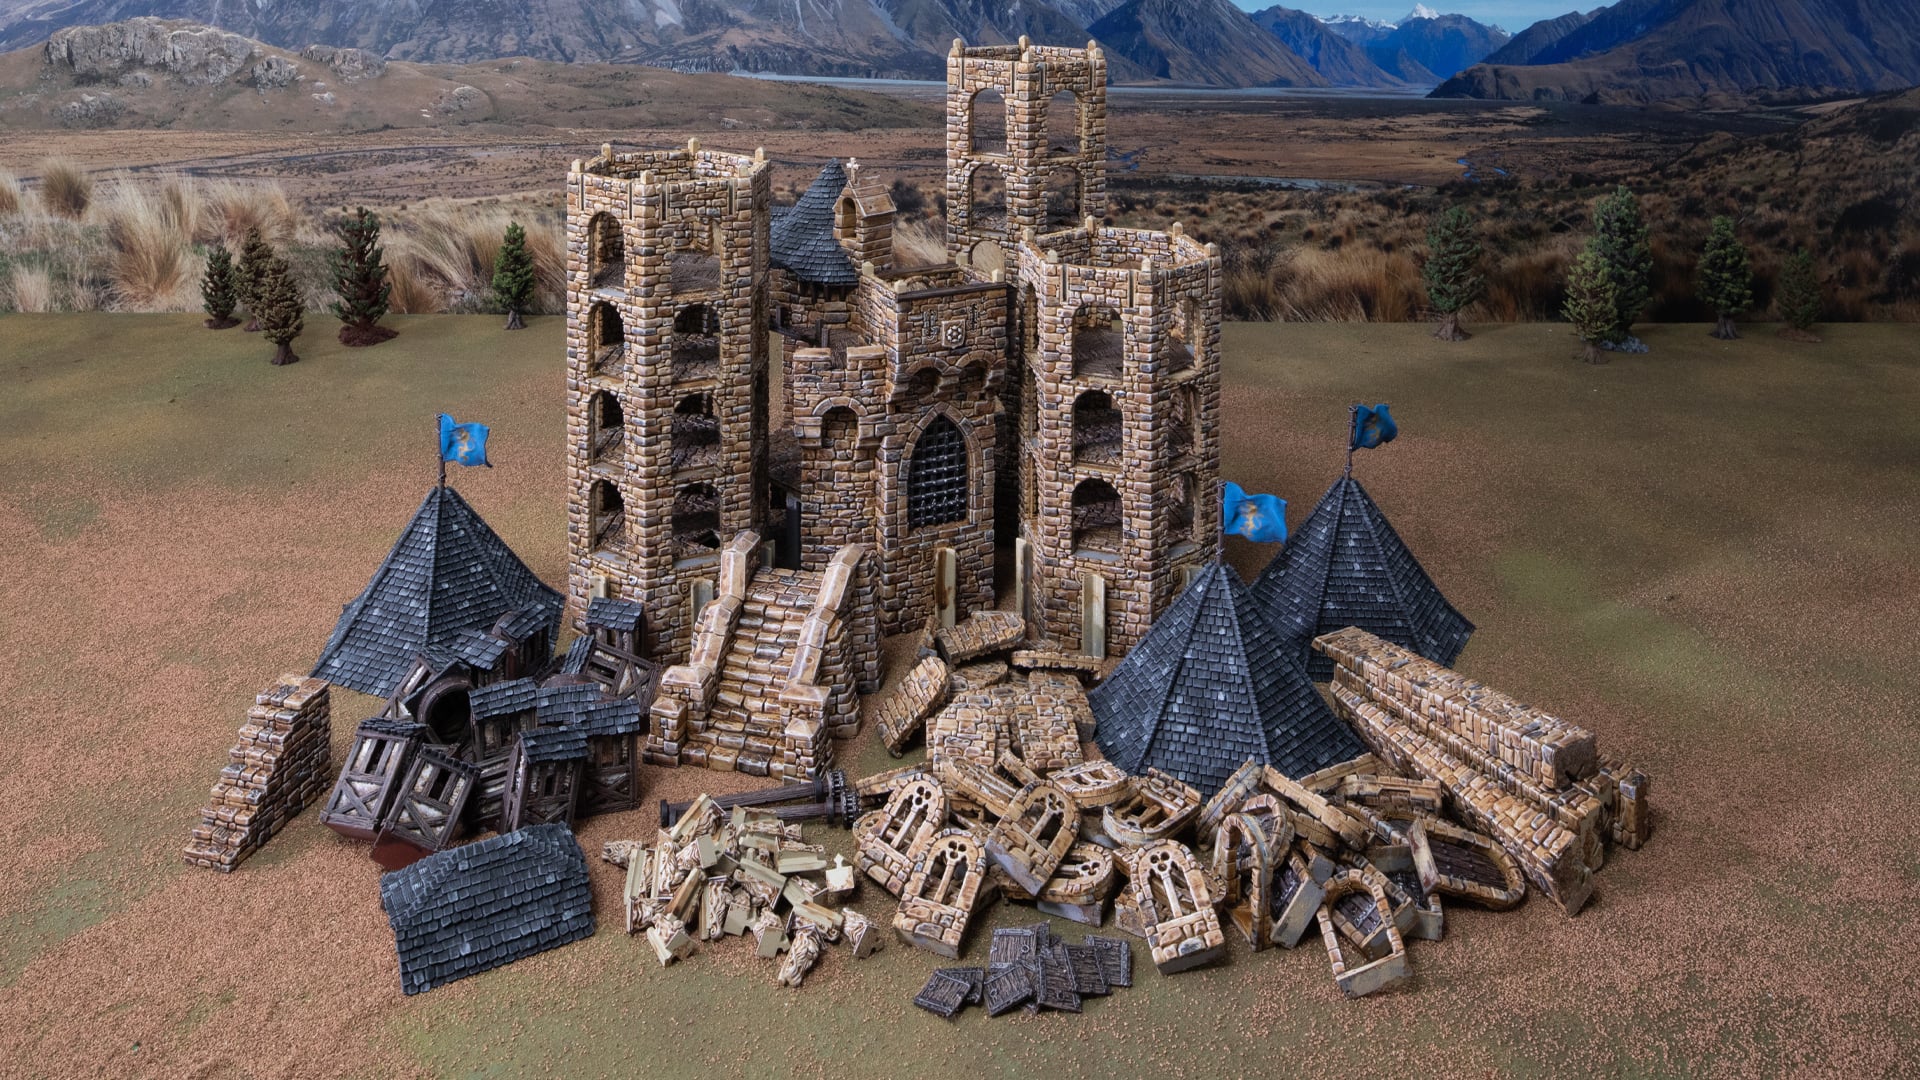
To assemble the King’s Keep, you’ll need to 3D print the following:
- Kings Keep centre piece. This consists of: base (Hex-Kings-Keep-Lv1), middle (Hex-Kings-Keep-Lv2), and top (Hex-Kings-Keep-Lv3),
- 2 Doors (Hex-Kings-Keep-Door-L and -R)
- 1 Portcullis (Hex-Kings-Keep-Portcullis)
- 1 Bell (Hex-Kings-Keep-Bell)
- 1 Cross (Hex-Kings-Keep-Cross)
- 1 Shield (Hex-Kings-Keep-Arms-Hexafoil)
- 3 Keep Towers. We used three bases (Hex-Tower-Keep-Lv1-Basement), nine middle pieces (Hex-Tower-Keep-Lv2), three top pieces (Hex-Tower-Keep-Lv3, and three roof tiles (Hex-Kings-Keep-Tower-Roof) with 3 flags (Hex-Kings-Keep-Flag)
- 1 large steps (Hex-Kings-Keep-Stairs)
- 1 small steps (Hex-Tower-Stairs-Opt2)
- Windlass components (2x Hex-Kings-Keep-Windlass-Beam, 2x Hex-Kings-Keep-Windlass-Bearing, 2x Hex-Kings-Keep-Windlass-Wheel, and 1x Hex-Kings-Keep-Windlass-Plug)
- 8 large buttresses (Hex-Tower-Buttress-Long)
- 2 small buttresses (Hex-Tower-Buttress-Small)
- 36 lion corbels Hex-Kings-Keep-Lion-Corbel)
- 12 trap doors (Hex-Tower-Hatch-Door)
- 9 doorways (five with doors, four left as just archways), (Hex-Tower-Plug-Doorframe-Stone, Hex-Kings-Keep-Door)
- 12 windows (Hex-Tower-Plug-Window-Trinity)
- 13 bay windows (Hex-Kings-Keep-Plag-BayWindow-Wattle)
- 35 flat wall plugs (Hex-Tower-Plug-Stone-Wall)
- Some string or jeweller’s chain (1.5mm)
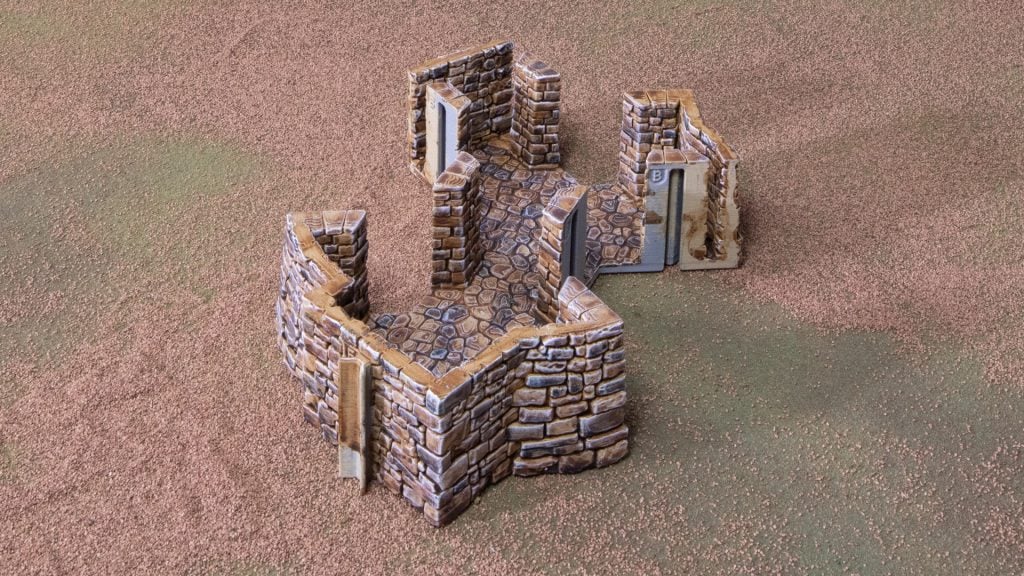
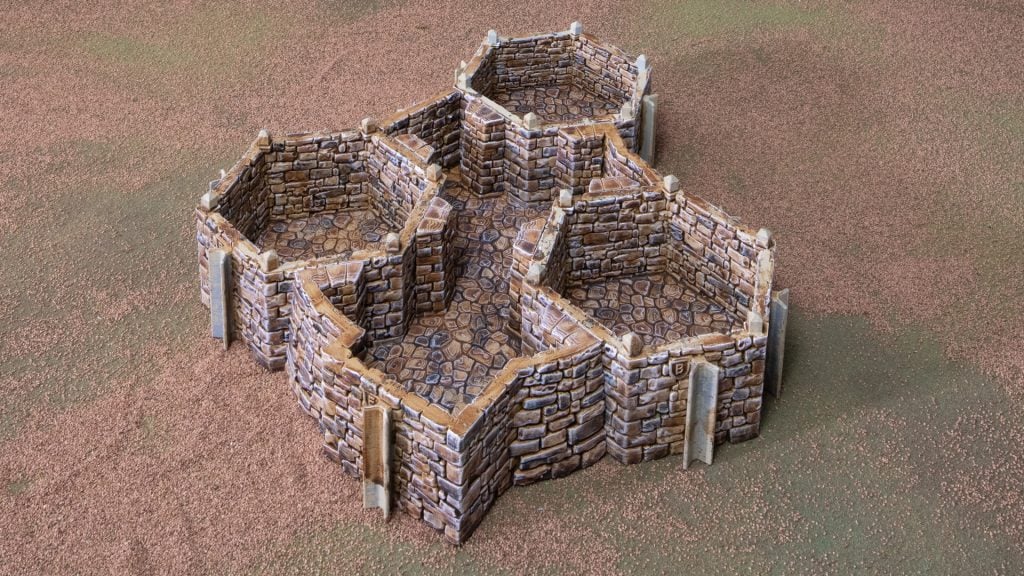
Add the three keep tower bases to the King’s keep base.
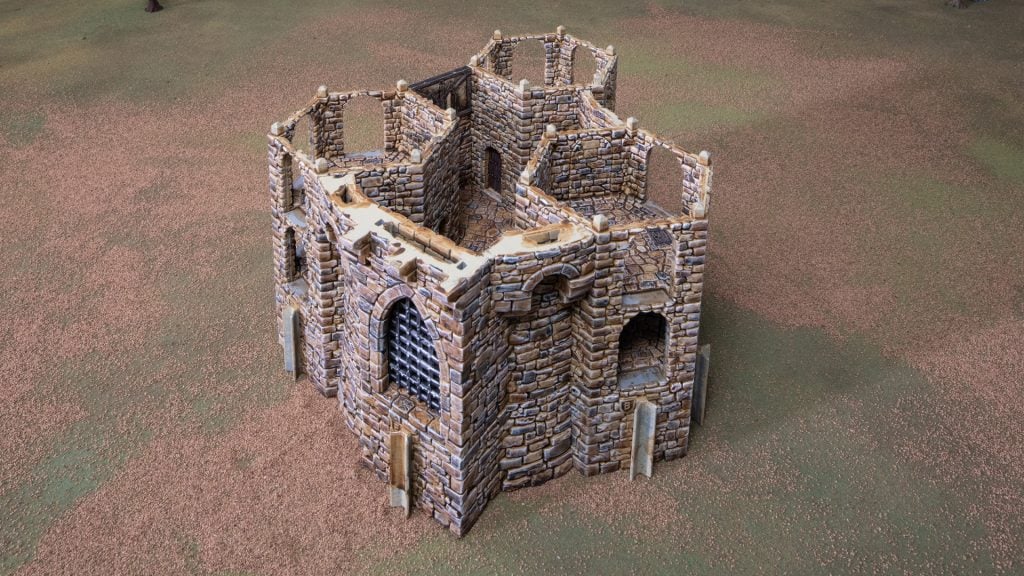
The next step is to begin adding layers of the tower levels. Each tower level has a trap door inserted. We plug the internal-facing gaps with doors and flat walls. This is primarily up to you and how you want to lay out your keep.
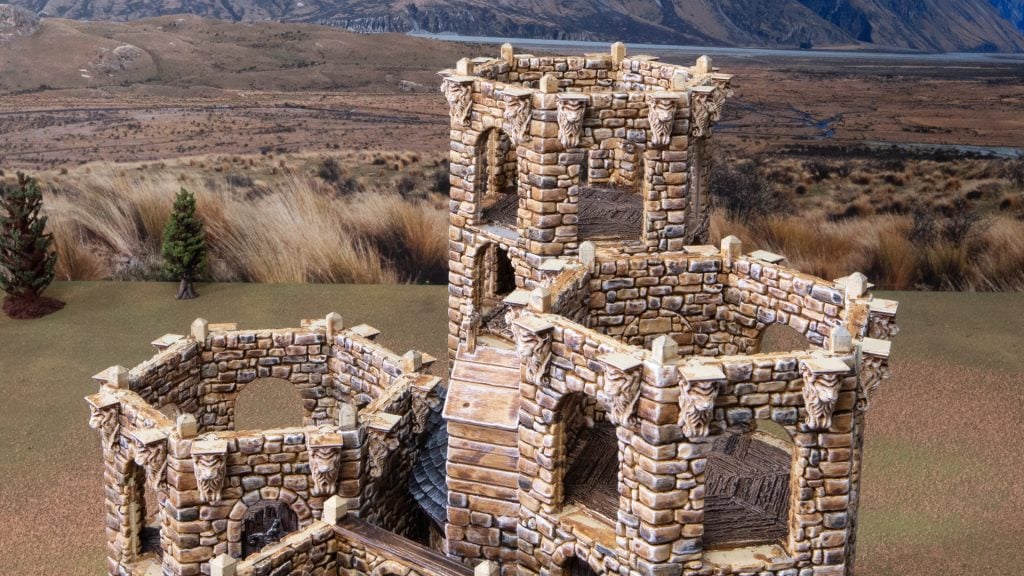
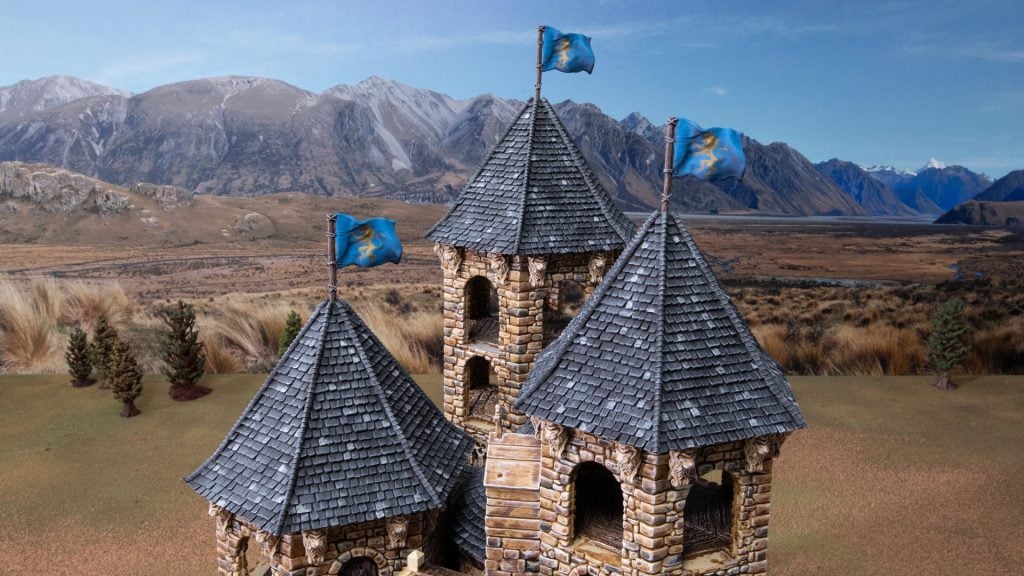
Continue adding keep tower layers and filling the internal sections with doors and flat walls. We wanted differing tower heights for visual variety, and when we reached the desired height we used the tower top piece and placed in the lion corbels. Then it was time to add the roof tiles and the cherry on top: the flag.
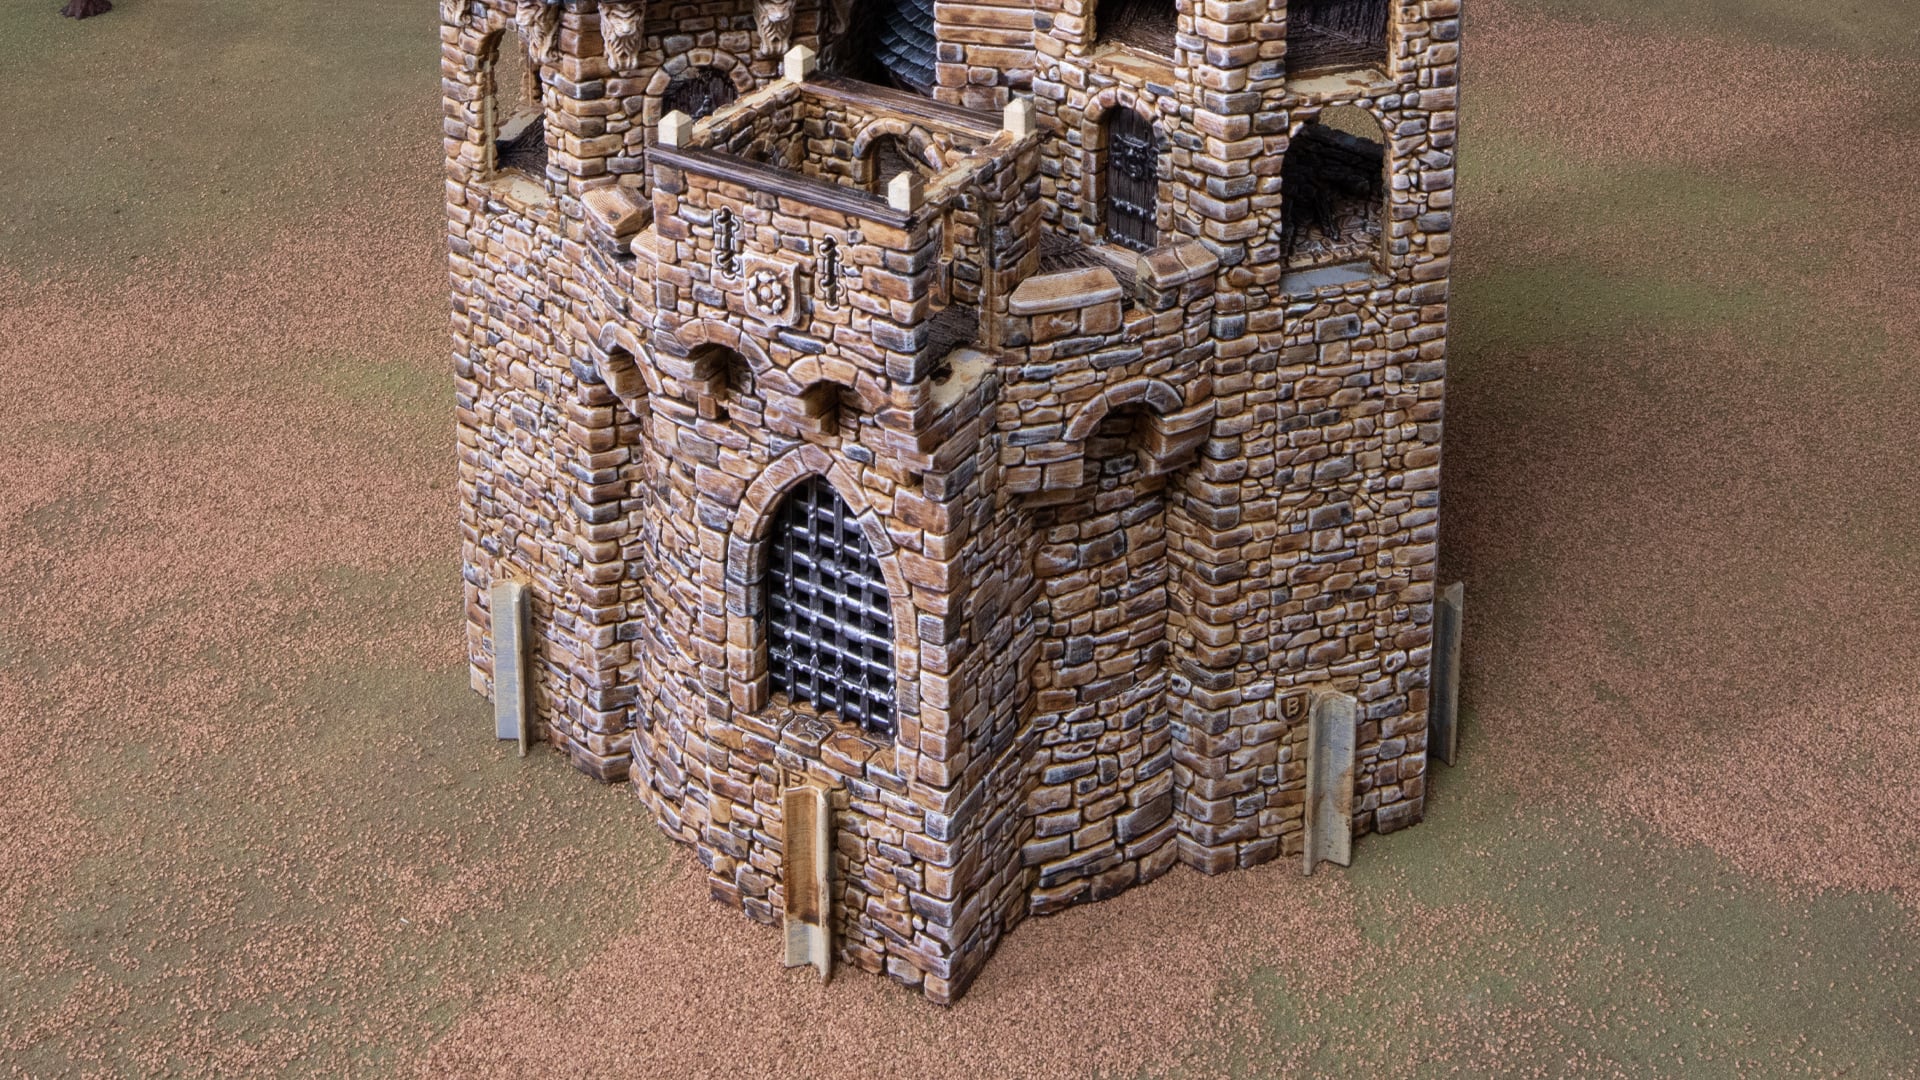
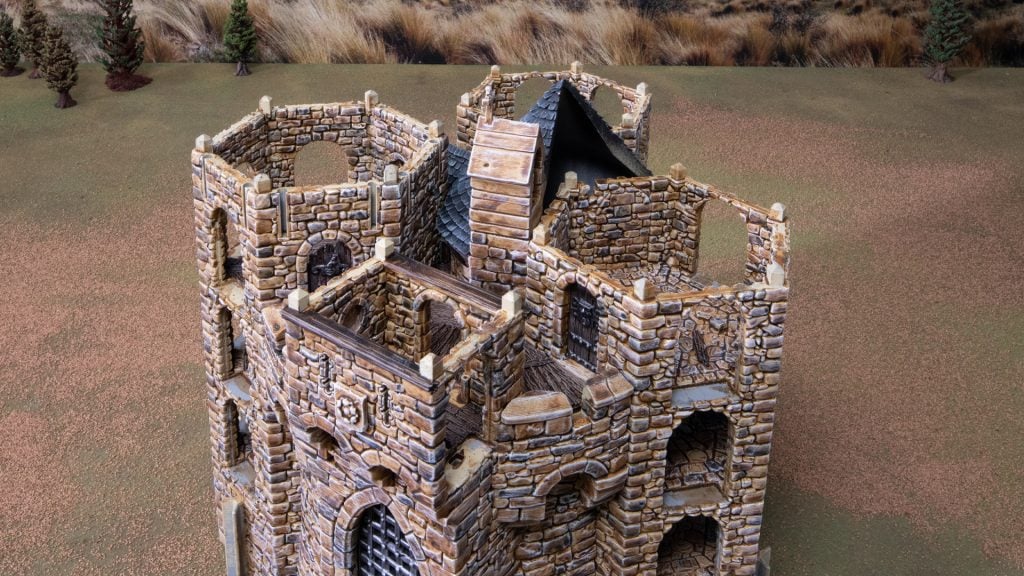
Now, we fill the outer wall gaps with flat wall plugs. This is because the gaps are visible with the buttresses on, so you need to put something here. We will use large buttresses extending three levels, but you could use any length and instead put windows here if you liked.
The remaining gaps can be filled with your choice of windows and bay windows in any orientation you like. We alternated them around the towers for variety.
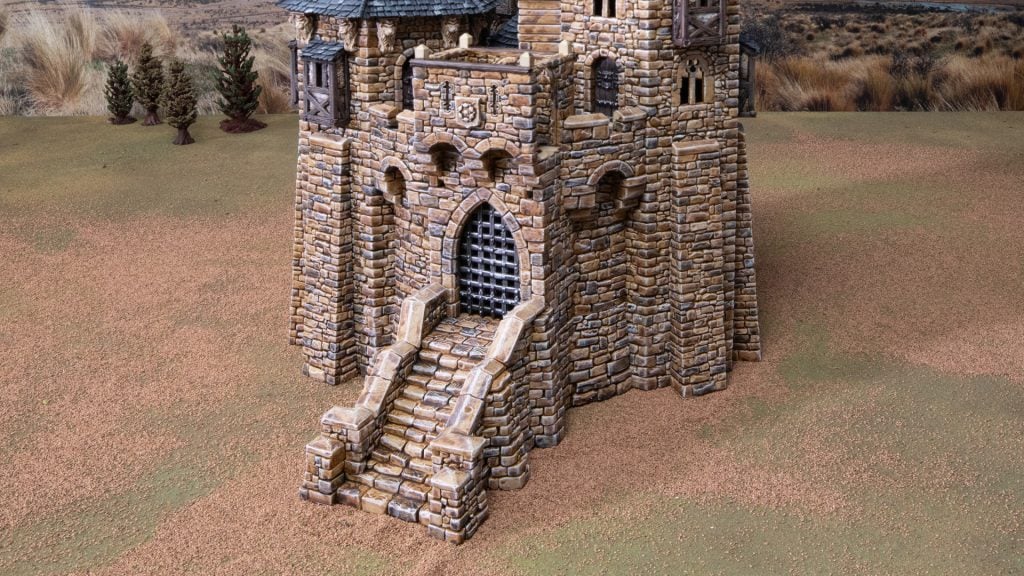

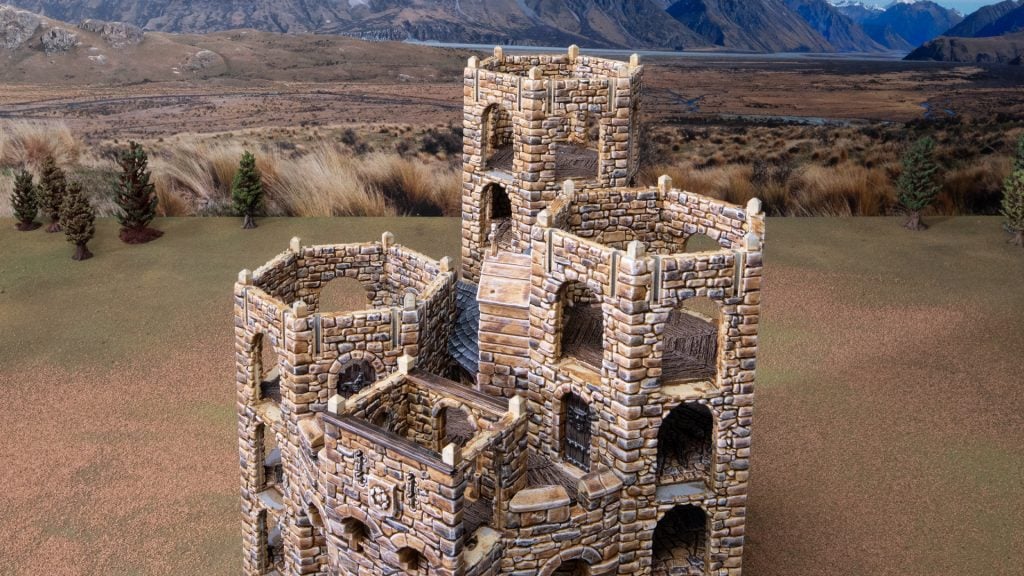
The next step is to add the steps and buttresses to the exposed connectors. And you could finish here if you like and have an excellent looking King’s Keep. But the next step is to add the functional windlass to raise the iron gate.
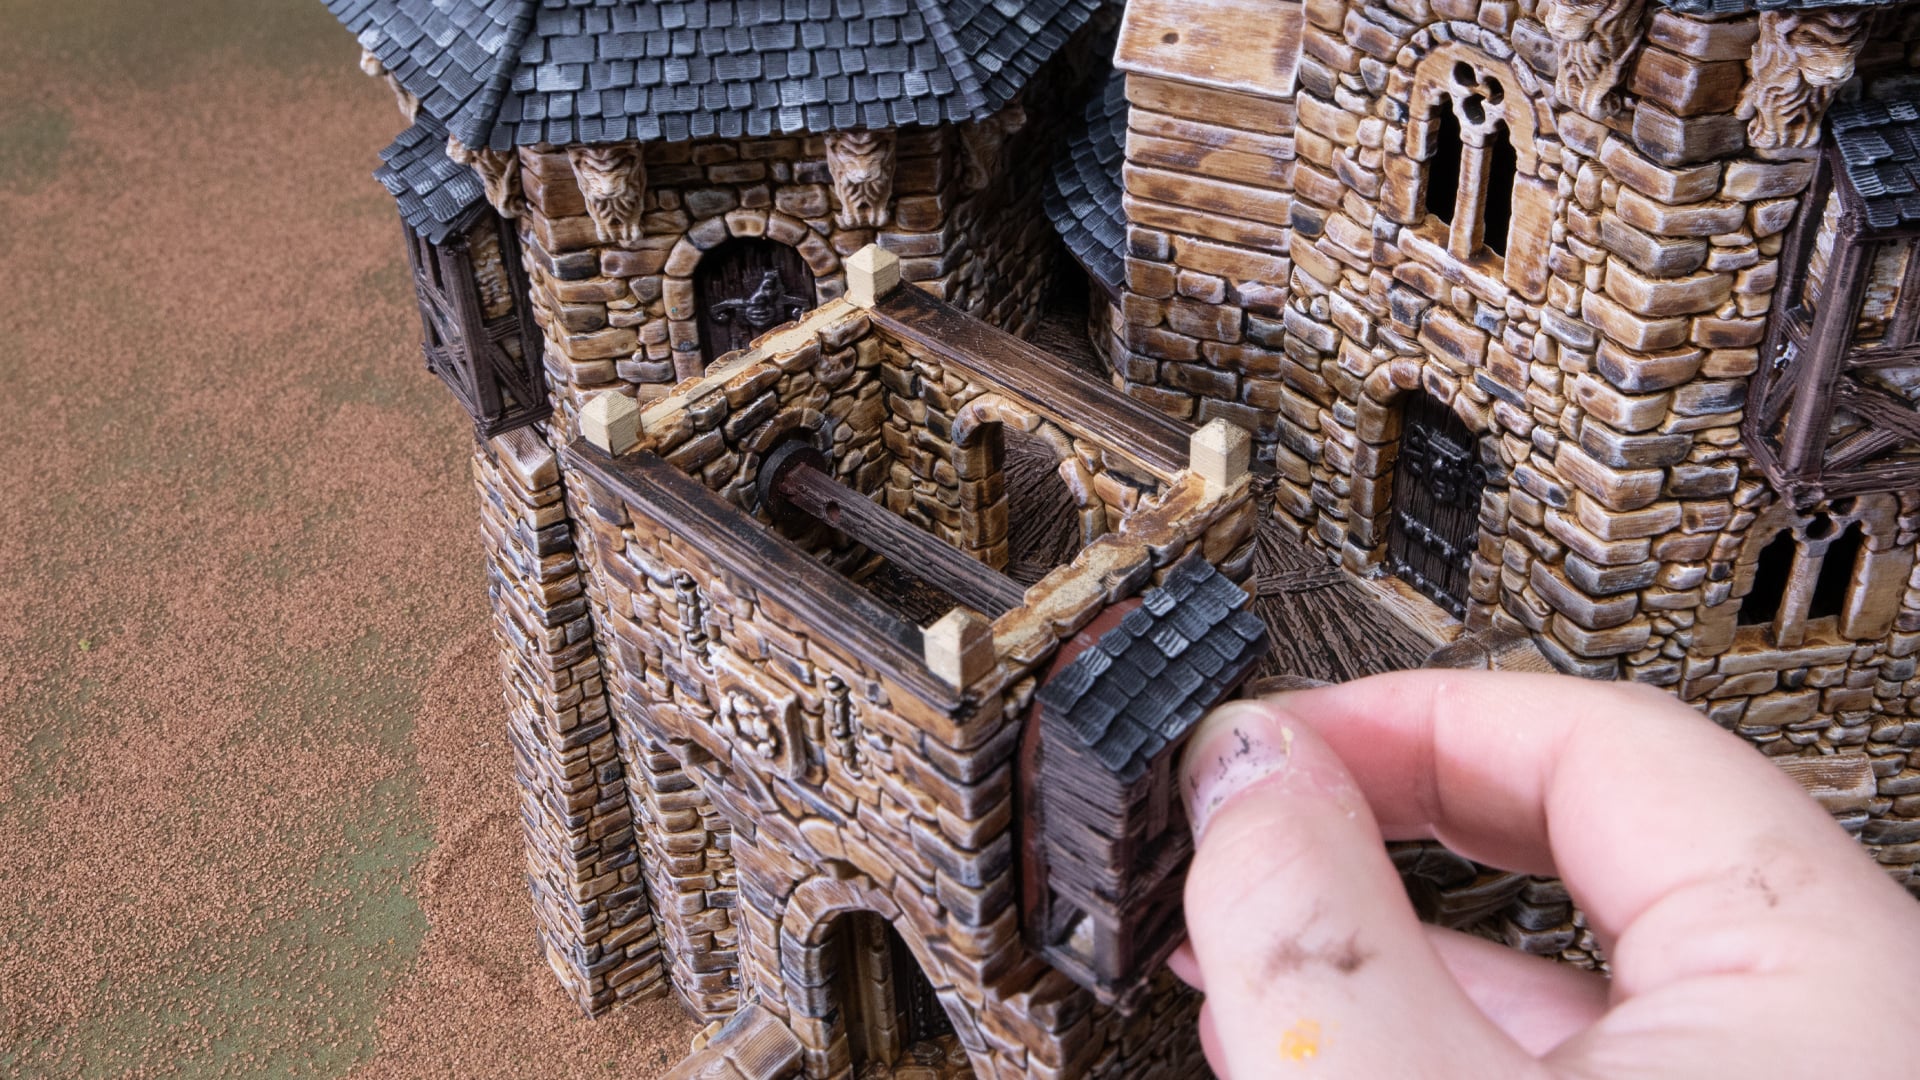
Assemble the windlass by slotting the two discs over the wooden beam where the flat surface is. Then line the beam up with the top disc gap and slot the bay window with holes over the other end. Push the bay window in t seal the beam in place. You’ll know it works if the beam rotates smoothly.


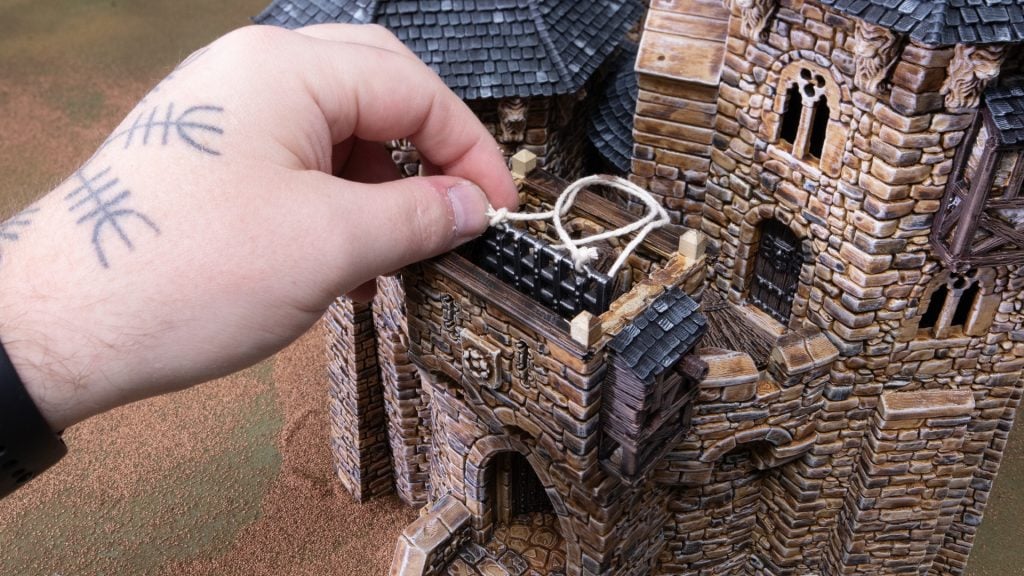
Next, thread your two pieces of string through the two holes in the beam and tie knots or glue them in place. Cut the two pieces roughly 30cm long (you can always trim them after). Then, tie the two pieces to the iron bars through the holes at the top. The key here is to make the two ropes as even as possible. Then slot the iron bars through the gap in the top gatehouse.
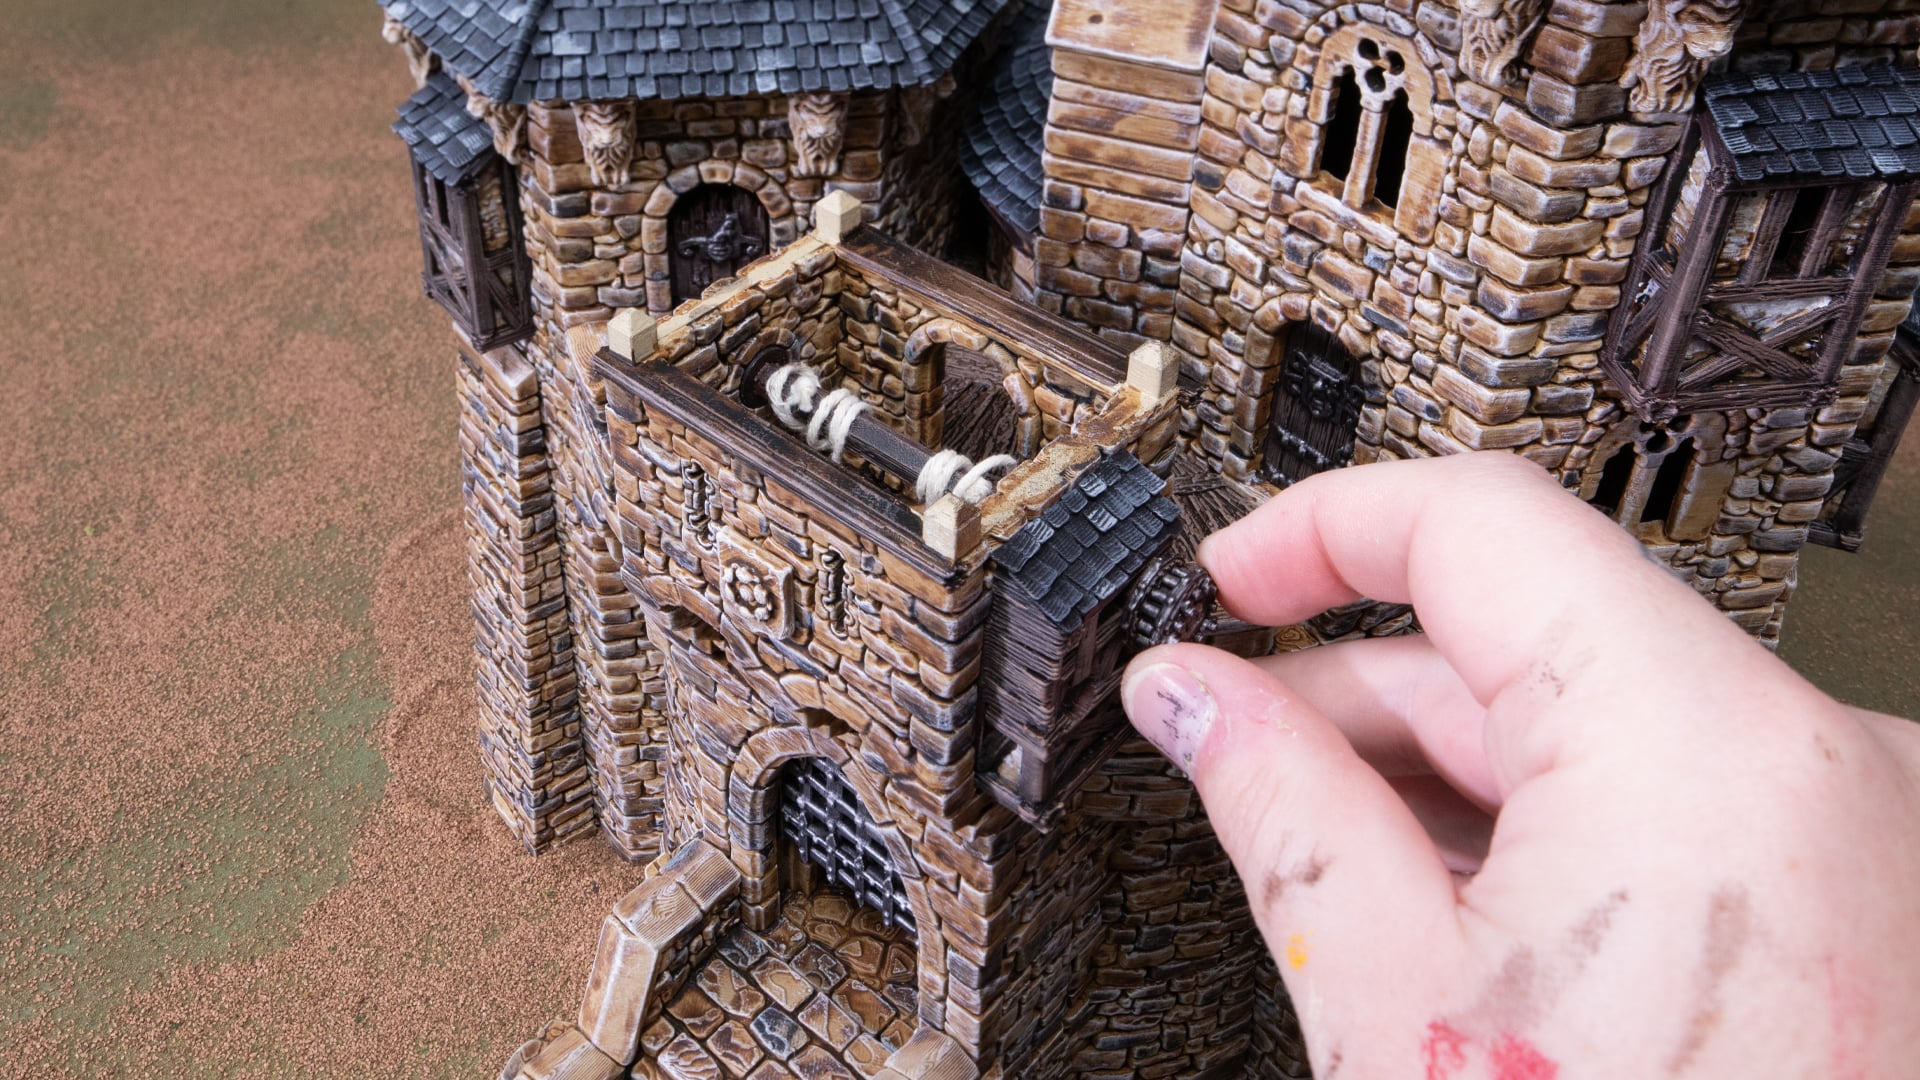
Then put the turning wheel on the end of the exposed beam and turn away, raising those iron bars for the King’s return.
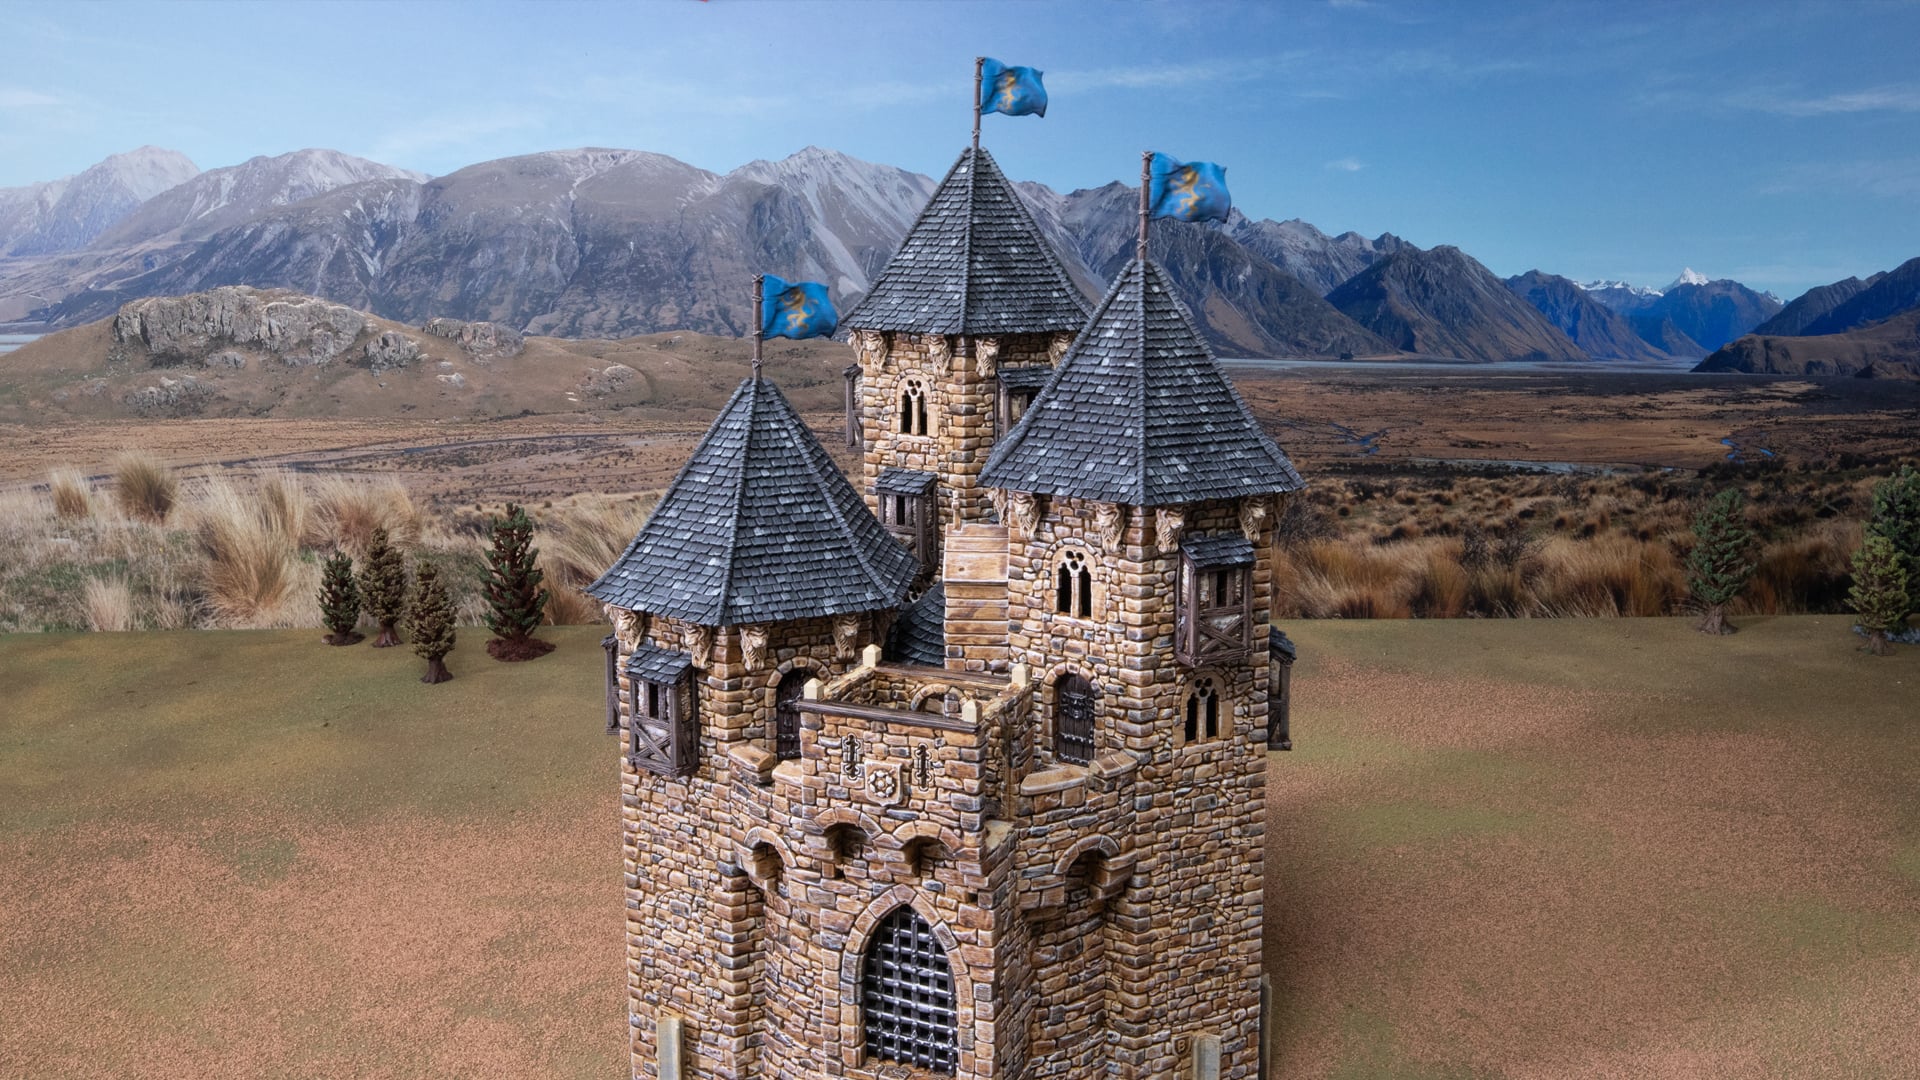
And there you have it, one complete standalone King’s Keep. You could put connectors in place of the buttresses and attach walls and other buildings to your keep here. Look at all the models you can add to your kingdom on the Throne & Ash campaign page here. If you have any thoughts of feedback be sure to leave a comment.
what is the second, lower windlass for, that lines up with the drop holes in front of the portcullis?
That’s for a potential drawbridge, when we make the bridge pieces
Apologies if this question is redundant. What approximate scale are these models? Thanks Tom
The are 32mm scale but they can be scaled in your browser (also they work well at 28mm heroic too
Where did you place the holy cross symbol? I can see the other little plaque thingy. Not sure what to do with the cross. Is it just an alternative?
Hi, you’ll see the small notch above the bell, it glues in there
Cool. Thanks. Yes, I see it. Ok.
Also, with the Hex Tower stairs, are you placing these on every level. i.e. is this the way to climb up and then through the hatches?
You don’t have to use them that way but that was the intention for them. We’re also talking about including a ladder option for the hatches
Yes, a ladder option would be good for those higher levels up to the battlements, and for the basement. I’m one of those modellers that enjoys his internal details. Although, it’s hard to imagine the king climbing a ladder up to his private quarters all the time. Especially after a few wines. I’m sure it was done but the stair option would be my preference if I lived here. 🙂
Also, perhaps a stone staircase option?
All done now with printing all the parts to this model, except some more staircases now. Phew.
Thank you Sloane.
Is it possible to use additional middle pieces to make the keep even taller?
I mean, can you stack middle pieces atop one another to make it higher?
Thanks
Absolutely you can, same goes for the square towers as well
Everything so far is absolutely fantastic and it’s all printing brilliantly on my Bambu A1.
I’m wondering if it would be possible to have crenelated battlements for the bastions instead of the roofs?
Also, what about wooden battlement hoardings, are you likely to provide them?
I’d be happy to pay extra for both the things I mention above.
Hi, glad you’re enjoying it! The crenelated battlement option is found in the Keep Tower here, which you’d have as well if you got the bundle, but otherwise here is the product: https://www.printablescenery.com/product/hex-castle-keep-tower/
As for hoardings, yes, we’re working on hoardings for along walls, but not yet for battlements, but that’s a good idea
Thanks for the reply. I did get the bundle so will have the crenelations thanks.
I noticed that Hex-Kings-Keep-Lv1-v1.1.stl to Hex-Kings-Keep-Lv3-v1.1.stl do not lock in anywhere – is there a reason why? or am I missing something?
It would be awesome if at least the walls of Hex-Kings-Keep-Lv2-v1.1.stl would somehow have an anchor or lock into Hex-Kings-Keep-Lv3-v1.1.stl…
Hi, yea some pins in the King’s Keep is something we’re looking into, thanks!
Ok I’m printing this and excuse my americanness but how tall in feet and inches will this be printed at 28 mm
Depends on how tall you want to make it, but ours sat at approximately 17 inches from base to top of the roof tiles
Very nice. I am loving the tutorials and the overall campaign. For the bigger pieces it would help to include a diagram of how the part fits into the hexagonal framework. It is not easy for me to look at a perspective picture and know the hexagonal arrangement, and I certainly want the castle walls to be big enough the contain such a cool keep.
Thanks
Hi, thanks Dennis. Did you see this post by chance? It helps explain the hex diagram graphically. The King’s Keep just uses three touching hexagons, so any of the keep tower parts can attach to a wall with a connector and maintain tessellation
I did see the post, and it did a great job explaining the overall structure. It was not clear that the Kings Keep is three hexagons. Thanks for letting me know.
Hello again, sorry if this is a silly question – on the ground floor middle section, there is a space in between the three tower basements. There doesn’t appear to be any options for doorways or any entrance to this space at all. The small buttresses are built on to the ground floor level plate. Is there a way to modify this so there are some access points to this space and therefore between connecting basements of the towers. Hope this makes sense. Thanks
I’ve been planning to suggest an alternative hex tower base with one door slot – I want one for a prison/dungeon door inside the keep – the same would also be great for the tower. In fact, what might be ideal would be a ground floor hex with two or three (or more) doorways and a plug with a buttress V, so doors could be filled and covered by butresses, but then a dungeon level could be connected through the base of the castle.
I am currently DIYing this by printing up two of the new 1.5 tower basement modules with the doorway and cutting off the middle slot buttresses in the hallway to open space for doorway plugs. It allows for two facing doorways to access that center section. Since the third tower at the end is only held in by the two facing slot buttresses and cutting those off would weaken the whole I just turned that into an oubliette-style dungeon accessible only from above 🙂
This is the itemized list of parts I am printing up based on this (Sloane, please correct any mistakes or omissions on my part that you spot if you don’t mind)-
FDM (I use an Elegoo Neptune Plus with a big build plate, so you may need the smaller parts)-
1 Kings Keep center, 1st floor (Hex-Kings-Keep-Lv1-v1.1)
1 Kings Keep center, 2nd floor (Hex-Kings-Keep-Lv2-v1.3)
1 Kings Keep center, 3rd floor (Hex-Kings-Keep-Lv3-v1.1)
3 Tower Base (Hex-Tower-Keep-Lv1-Basement-v1.1)
9 Tower Middle (Hex-Tower-Keep-Lv2-v3.1)
3 Tower Top (Hex-Tower-Keep-Lv3-v3.2)
3 Tower Roof (Hex-Kings-Keep-Tower-Roof-v1.3)
1 large steps (Hex-Kings-Keep-Stairs-v1.1)
1 small steps (Hex-Tower-Buttress-Long-v1.1 or opt2)
8 large buttresses (Hex-Tower-Buttress-Long-v1.1)
2 small buttresses (Hex-Tower-Buttress-Small-v1.1)
12 trap doors (Hex-Tower-Hatch-Door-v1.1)
5 doors (Hex-Tower-Door-Wood-opt1-v1.1)
9 doorways (Hex-Tower-Plug-DoorFrame-Stone-v1.5, four left as just archways)
12 windows (Hex-Tower-Plug-Window-Trinity-v1.1)
13 bay windows (Hex-Kings-Keep-Plug-BayWindow-Wattle-v1.1)
35 flat wall plugs (Hex-Tower-Plug-Stone-Wall-v1.2)
1 Windlass plug (Hex-Kings-Keep-Windlass-Plug-v1.1)
Resin- or printed in FDM at .1 (fine detail)
1 iron bar (Hex-Kings-Keep-Windlass-Beam-Resin-Support-v1.1)
1 windlass wheel (Hex-Kings-Keep-Windlass-Wheel-Resin-Support-v1.1)
2 Windlass Bearing (Hex-Kings-Keep-Windlass-Bearing-Resin-Support-v1.1)
1 Portcullis (Hex-Kings-Keep-Portcullis-Resin-Support-v1.1)
3 Short Ladders (Hex-Ladder-A-Resin-Support-v1.0)
36 lion corbels (Hex-Kings-Keep-Lion-Corbell-Resin-Support-v1.1)
3 Tower Roof Flags, Optional (Hex-Kings-Keep-Flag-Resin-Support-v1.1)
I left out the crosses and the hexafoil for this build as it’s for an AD&D game and will have different symbols based on the character, and I am not using a drawbridge so did not do the second windlass setup.
Hey, yea I think you got it! You got the roof part for the drawbridge control room? Don’t feel you need to do it exactly either, swapping some windows for the stone bay windows or using some parts from the Keep tower like changing one roof tile for the hex battlement can look cool on the King’s keep as well. But yea you’ll have it all I’m pretty sure. Nice one!
I am having to revise with the release of the Queen’s Quarters as the new keep is going to be both of these linked with curved walls forming a courtyard 😀
Can you provide the most up to date print profile?
Hi, if you’ve already purchased the King’s Keep and are logged in to the site, all you need to do is go back to the product page and re-download it for free. Cheers
Ok it took me until literally just now to figure out where the bell goes, haha. I felt too embarrassed to ask. Is there a best practice way you all use to keep the bell from sliding back out of its little roof/belltower slot, that still lets it swing?
Hi, we recently updated the bell to be a better fit, as there were problems with it not staying in place. So if you’re logged in, go back to the King’s Keep product page and redownload the STLs, and you’ll get the most up-to-date version. Cheers
Hi, absolutely loving this set. I’m currently working my way up through the second floor of the build and was toying with the idea of making the central structure 5-6 stories tall. Which central piece would be your best recommendation to continue raising the levels without having the main entrance of Floor 2 replicated on each subsequent level? Thank you for your time!
Hi, that sounds epic! Unfortunately, we don’t have an alternative central piece for the level without a door, but you could, with some slicer magic, cover it up with bricks from another flat wall section. Thanks!
This was actually a perfect recommendation! Whilst it’s certainly not quite blended seamlessly together it did accomplish exactly what I was hoping to achieve, thank you so much!
I printed the files from the complete level one folder, but it has the basement open. Is there any way to get the interior walls as if i had printed out the hex tower keep level 1’s?