How to Plane cut your models
Sometimes, a model is just too big for the bed of your 3D printer. In this case, you can cut it to a manageable size using the Plane Cut function in a mesh editing software tool. We use Meshmixer, a free editing program you can download here.
Select your model
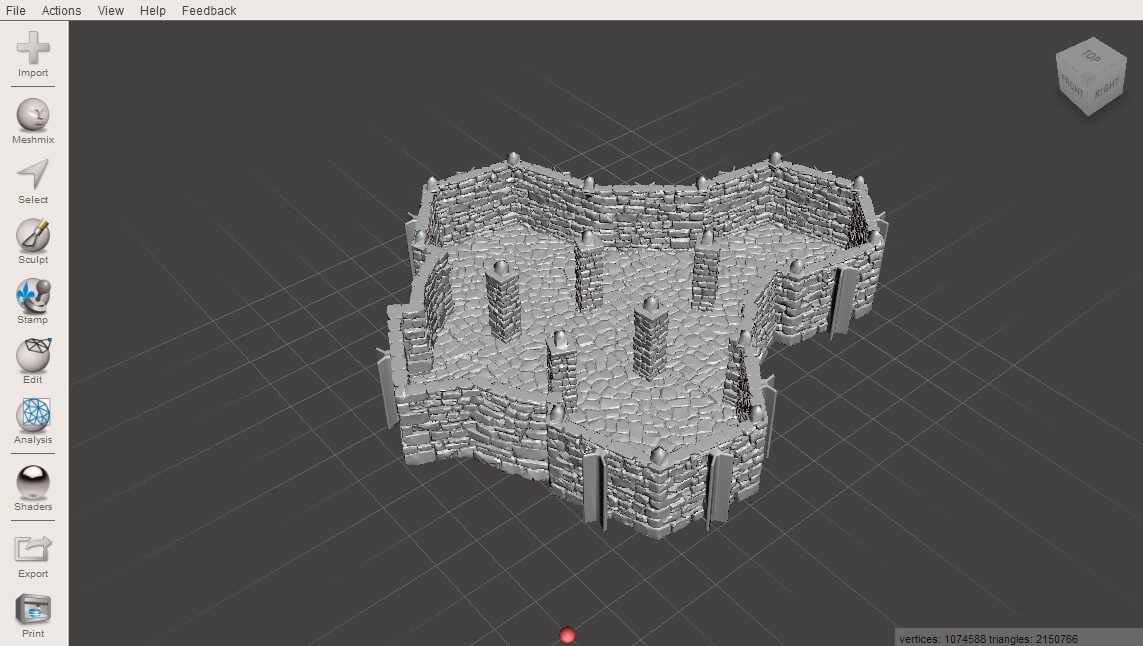
Click and drag the STL file you wish to modify into Meshmixer. In this example, we are using the complete level version of the Kings Keep from Throne & Ash.
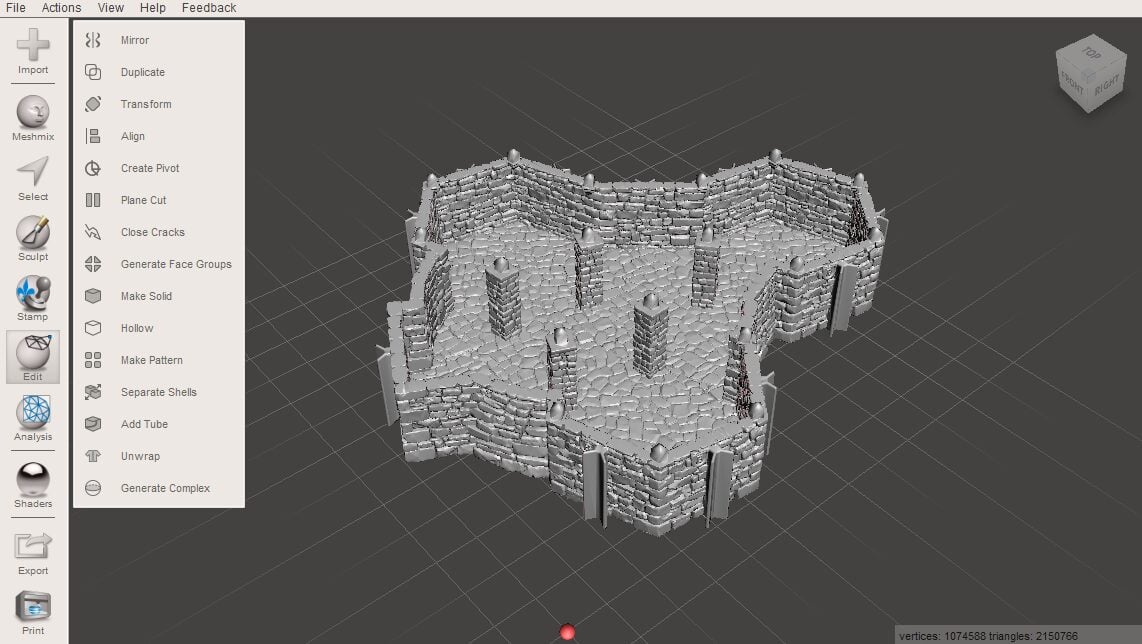
Select the Plane Cut tool
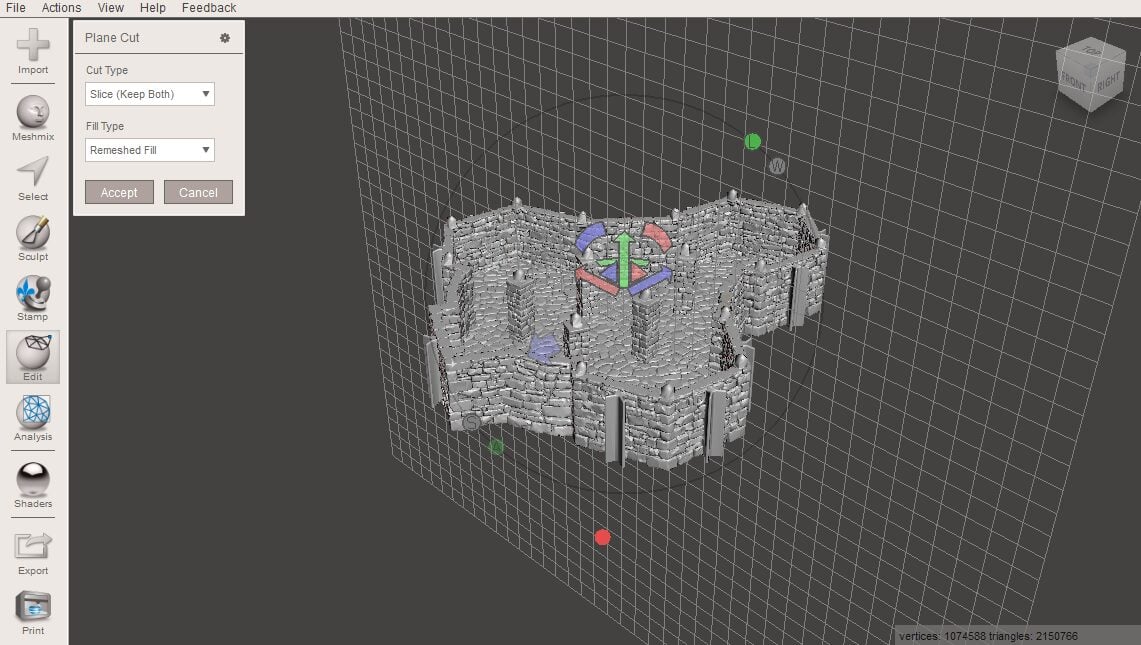
Select the Edit tool on the left-hand side of the screen, then select Plane Cut. A box with some options for your planecut will appear at the top left of the window. Select Slice: Keep Both so that when the part is cut, it will retain both halves. If you only want one half, select Cut: Discard Half. We recommend removing the grid by going to View>Show Grid and unticking it for the next step.
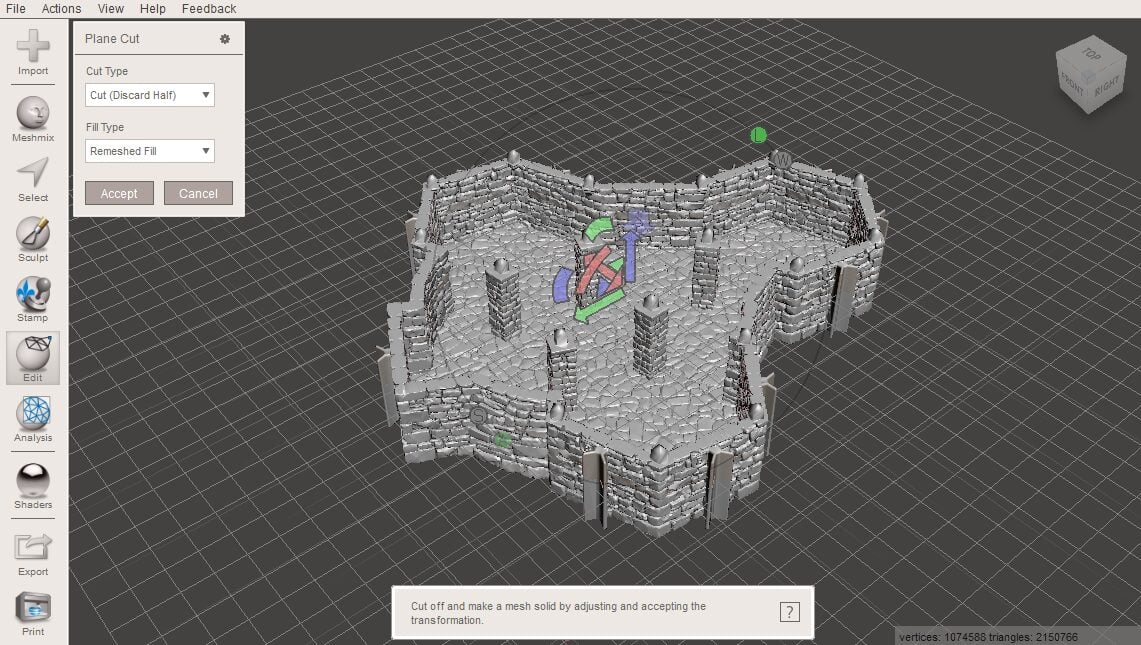
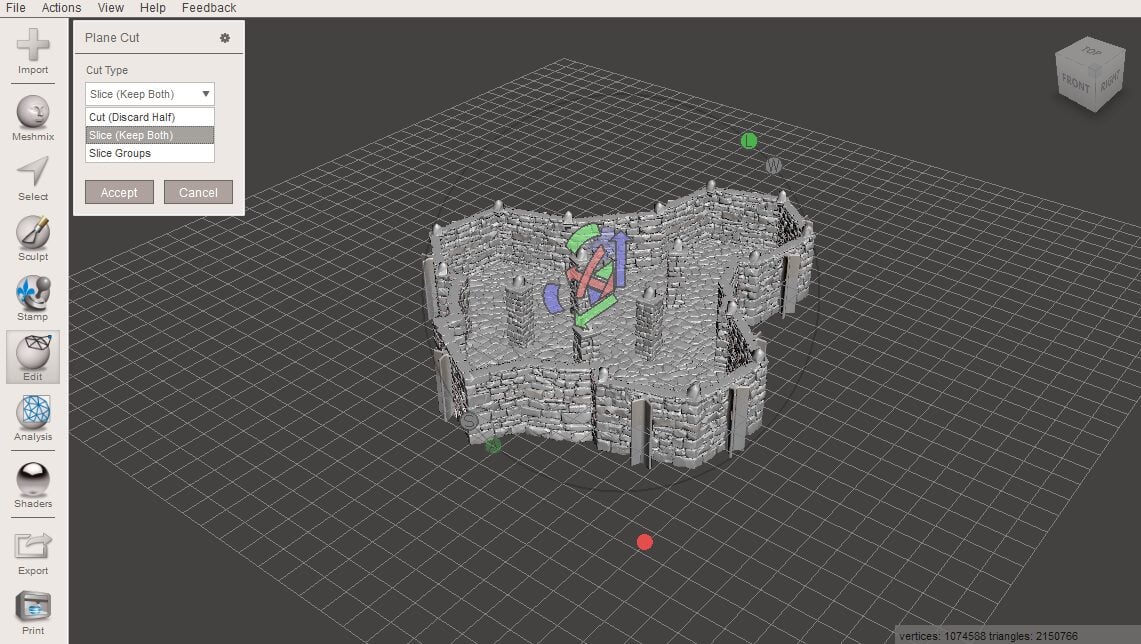
Use the directional tools to select your cut
In the center of the area being cut will be a series of arrows facing in the X, Y, and Z-axis. Click and drag on one of these arrows to move the cut in that direction. Clicking and dragging on the half circles will pivot the cut on that plane. There are snapping options when rotating, which snap to 5-degree angles, making cuts at 90 or 45 degrees easy. .
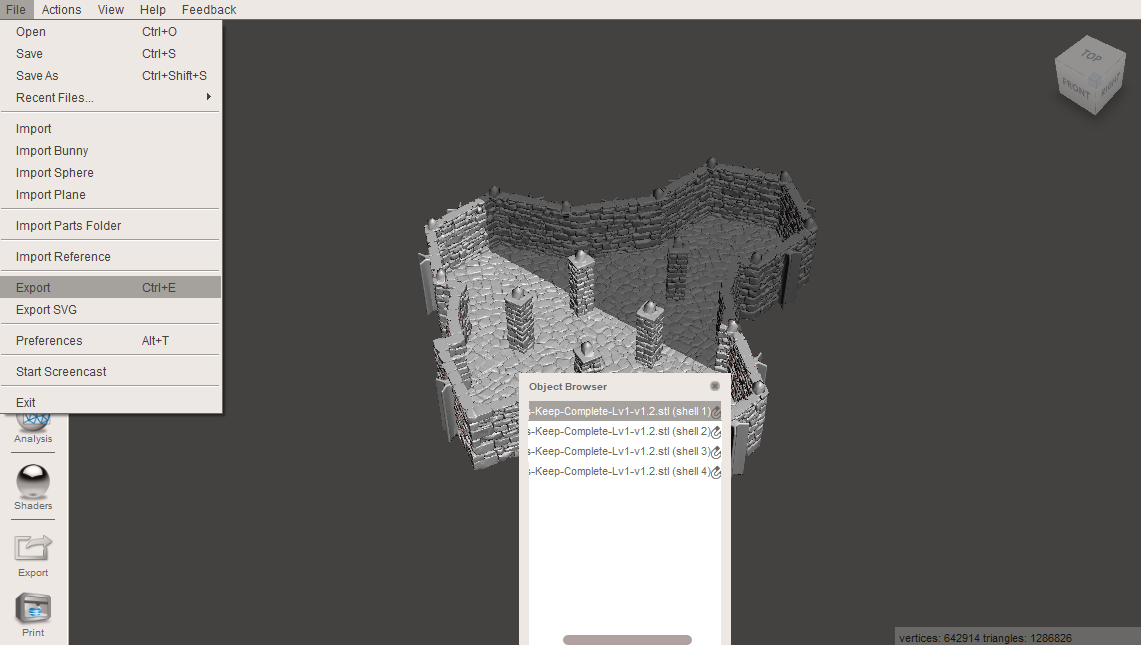
Separate the Shells
Once you have the plane in the right place, click the accept button in the dropdown in the top left.
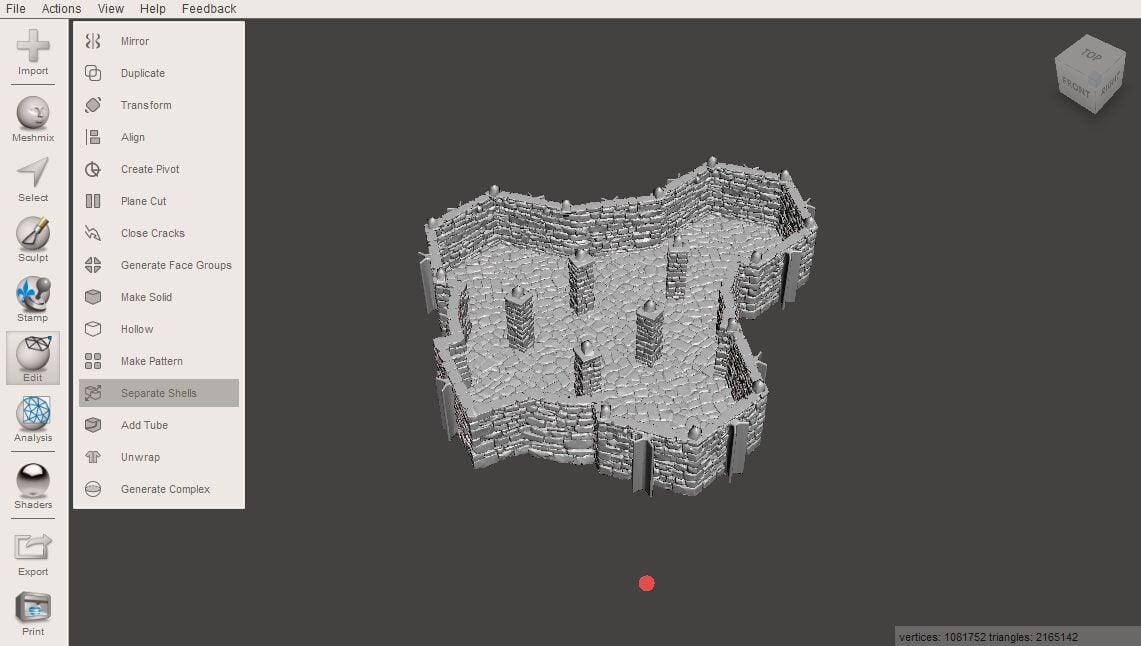
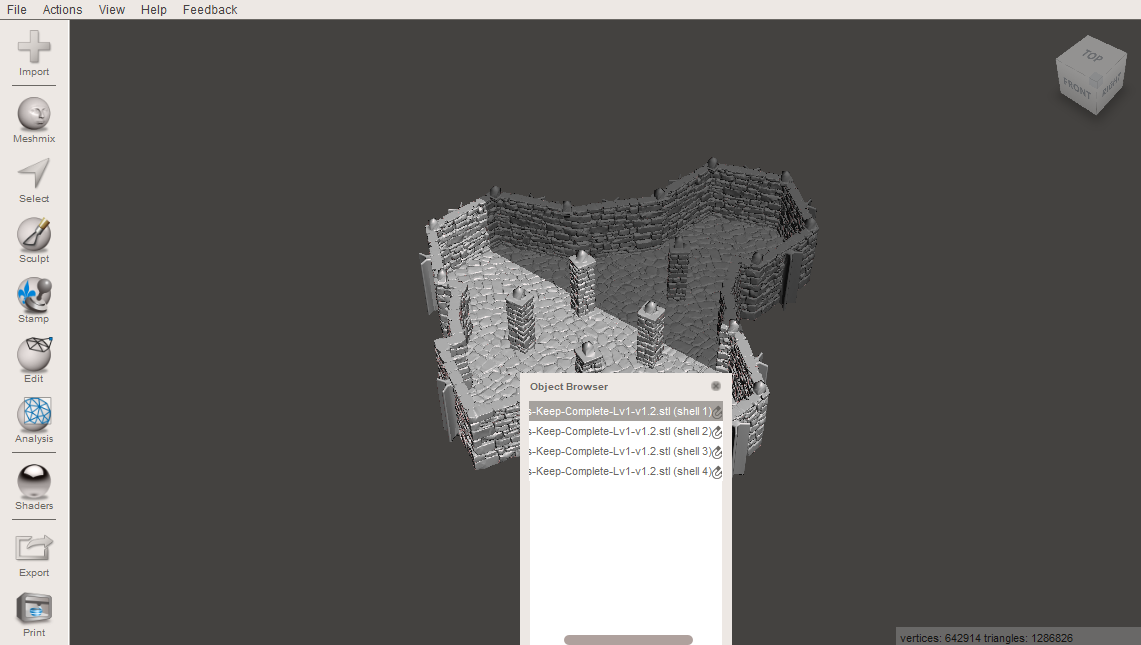
Open Edit again and select Separate Shells. This will break the model down along the Plane Cut you have just done. The object’s browser should open up with the models that the plane cut has created. If you accidentally cut something, select the pieces and use the Combine tool in the top left corner to re-unify them, or hit Ctrl+Z to undo your steps.
Export as STL
Highlight each section individually and either press Ctrl+E or go to File: Export. This will export your file as an STL that you can save on your computer.
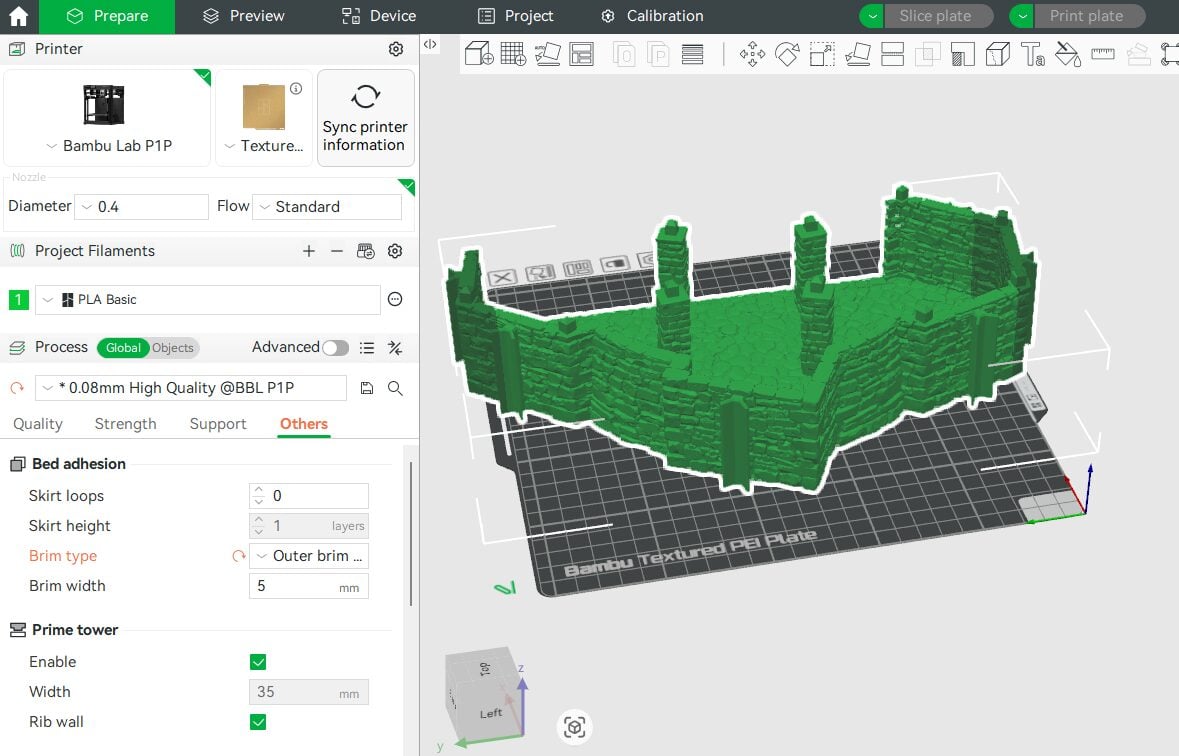
You can then use this STL file to print in your slicer of choice. Here we’re using BambuStudio to check our newly cut model before we send it to print.