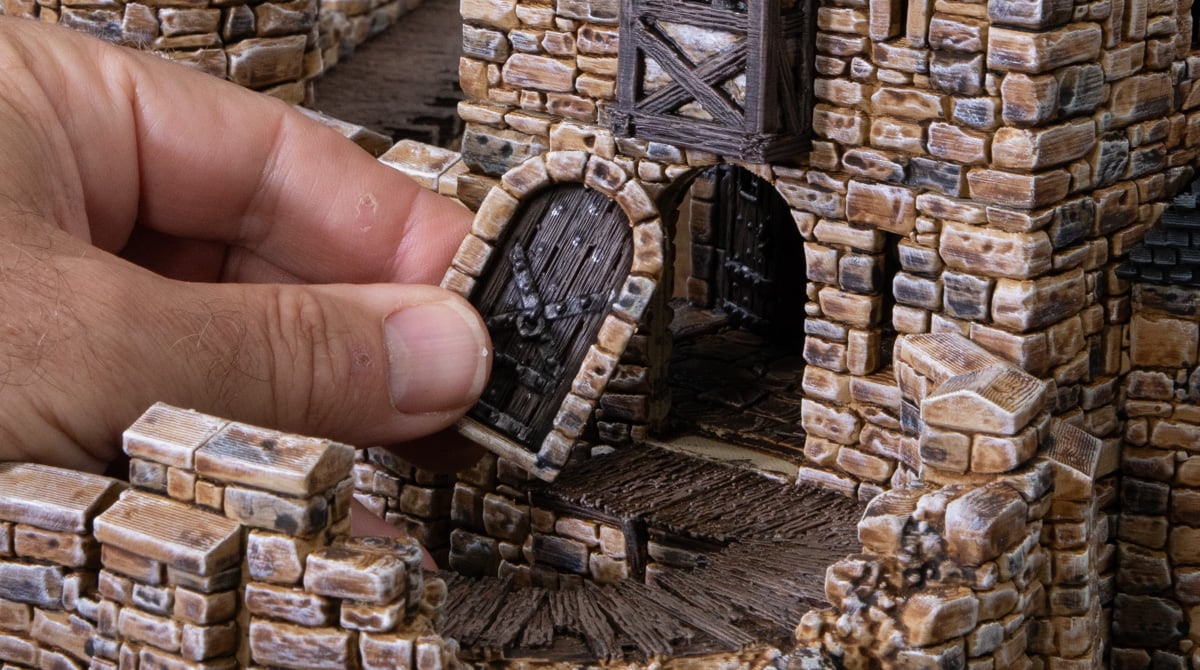
How to assemble Throne & Ash 3D printed doors
In this article, we’ll show you how to assemble your 3D printed Throne & Ash doors in a few straightforward steps. We’ll show you how to clean up the parts, fit them together, and check that it’s working. You’ll have functional doors throughout your castle in no time, perfect for when players need to sneak past a guard or pick a lock.
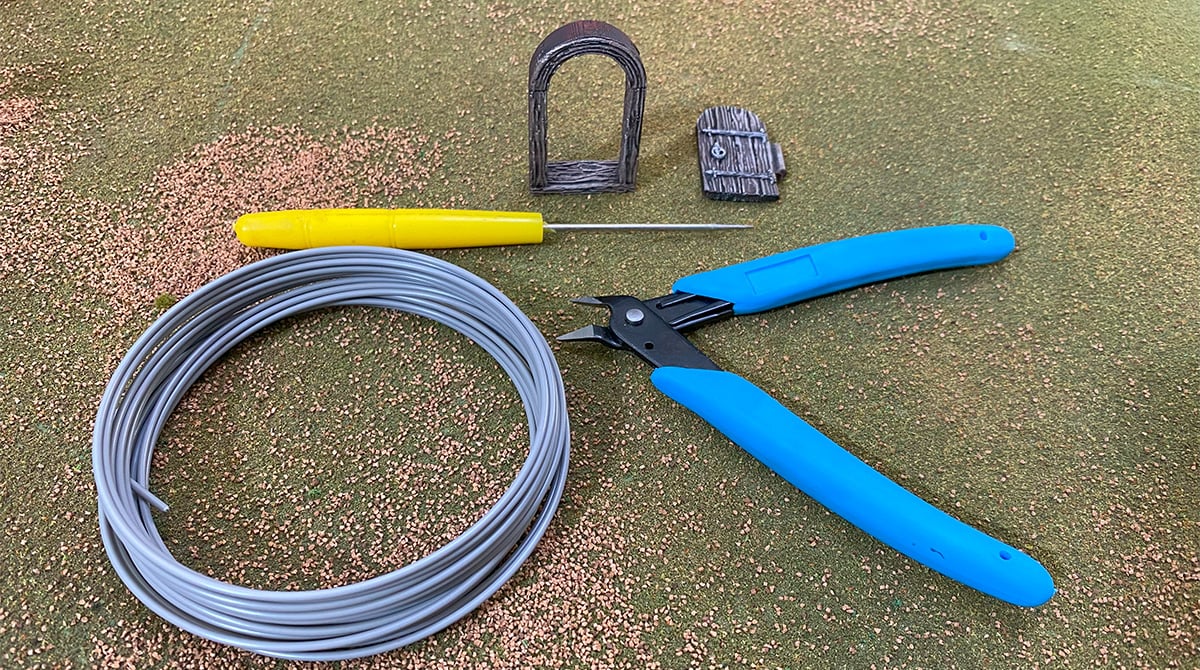
You’ll need the following:
- Archway printed
- Door printed
- Filament from a 3D printer
- Clippers
- Metal spike/drill bit
Clean up the 3D printed parts
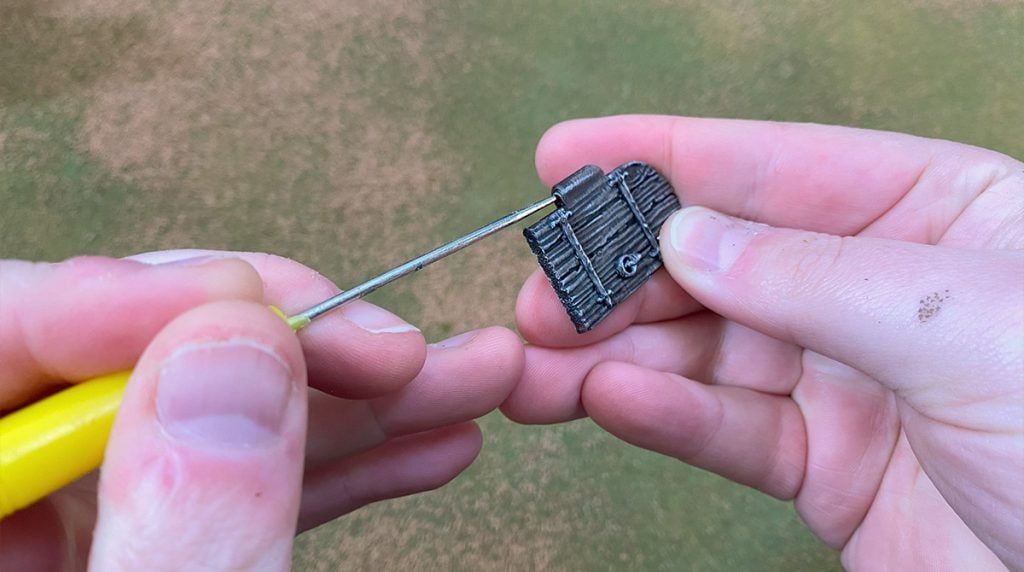

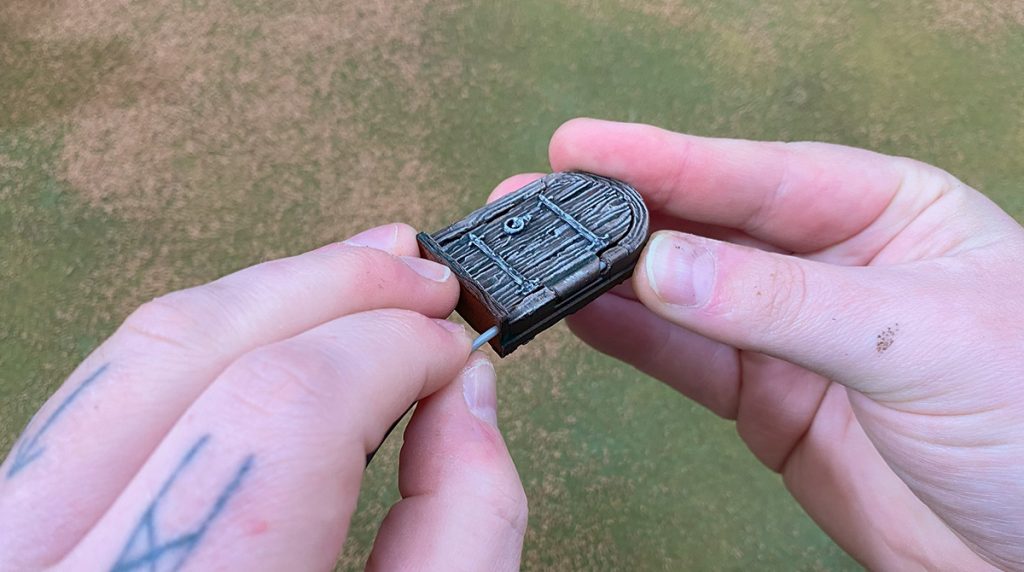
Using your spike or drill bit, clear out the hole so the filament can run through it easily. You don’t want to over-drill this hole, however, as if it’s too large, the filament won’t be tight enough, and you’ll get a wobbly door.
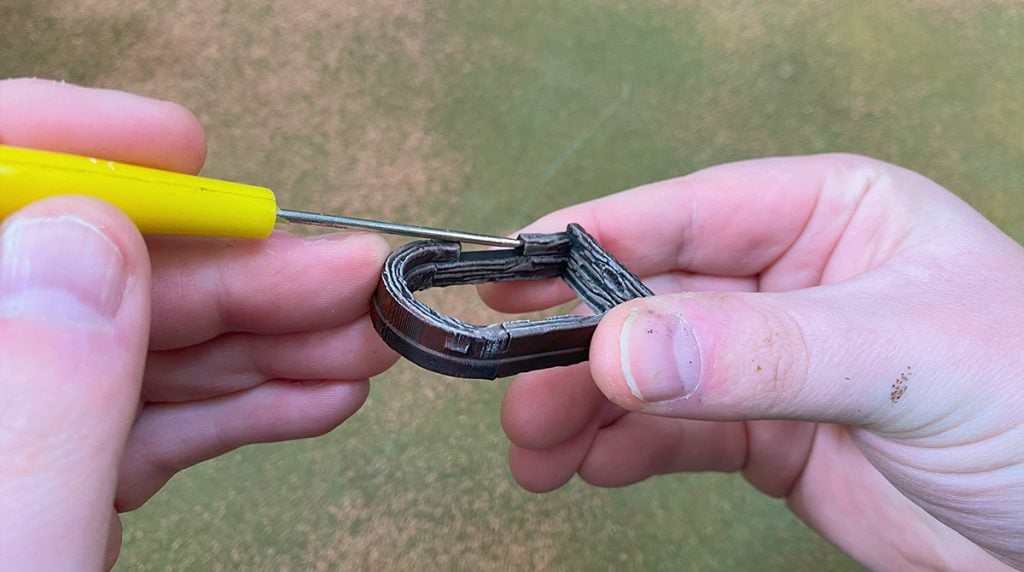
Check the 3D printer filament
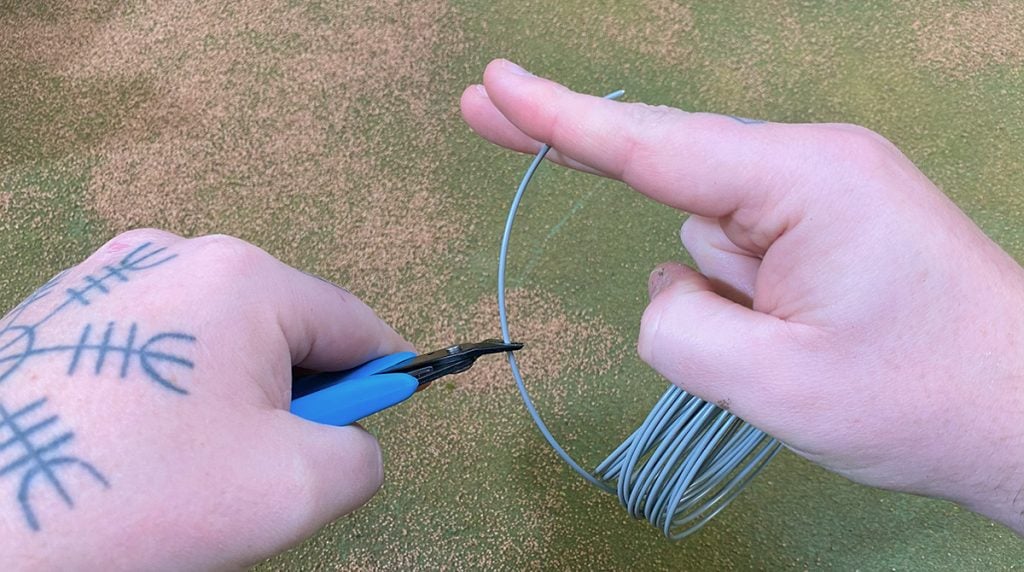

Cut a piece of your spare filament roughly to size with your snips. You can also use the snips to cut the tip of the filament into a sharp point to help it find the holes in the doorway.
It’s good to do a quick push fit here to ensure your drilling and sharpening worked to get the filament through the holes. This will save you headaches in the next step when you’re lining up holes.
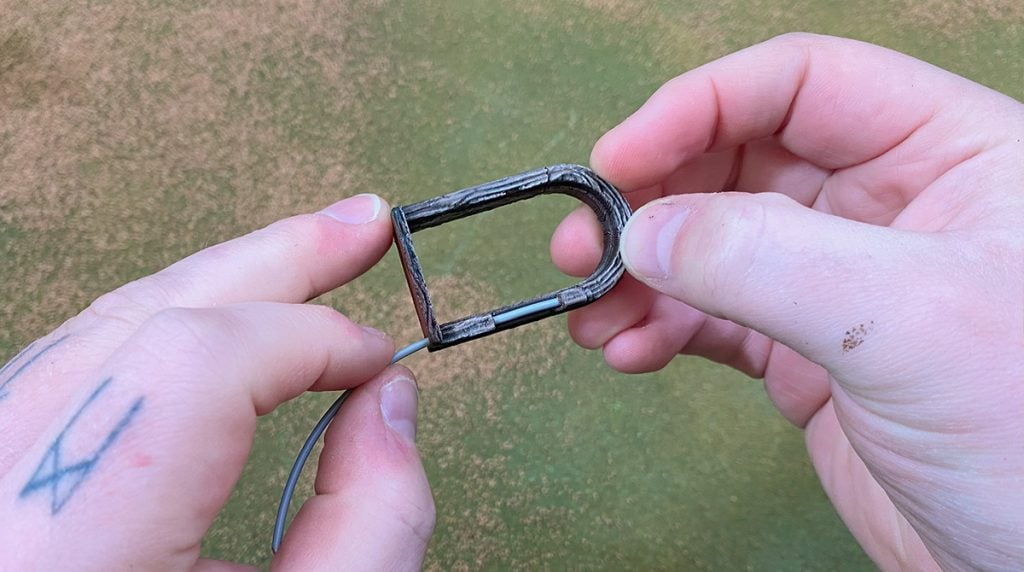
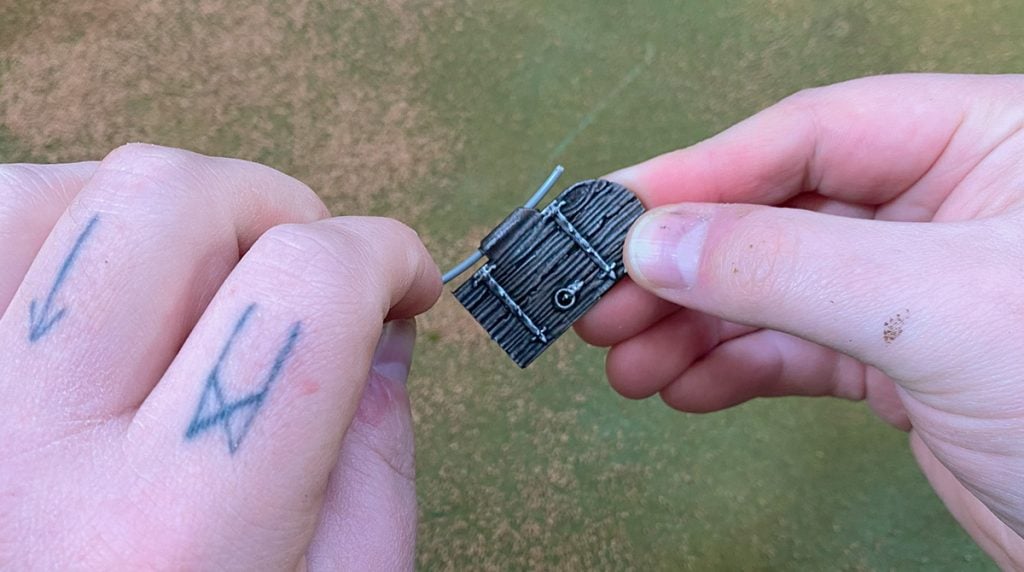
Putting together the 3D-printed door
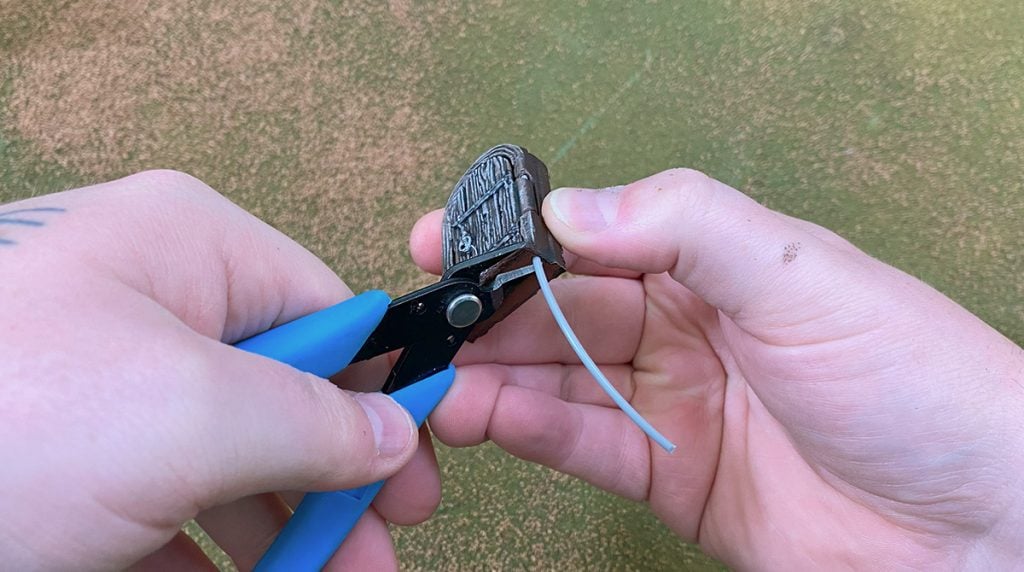
Now you can line up the door and the archway and insert the filament. Sometimes a bit of brute force and twisting is involved, but this should be an easy step with the drilling and testing we did earlier. When you have the filament inserted as far as it will go, you can trim it as flush with the base of the door as you can.
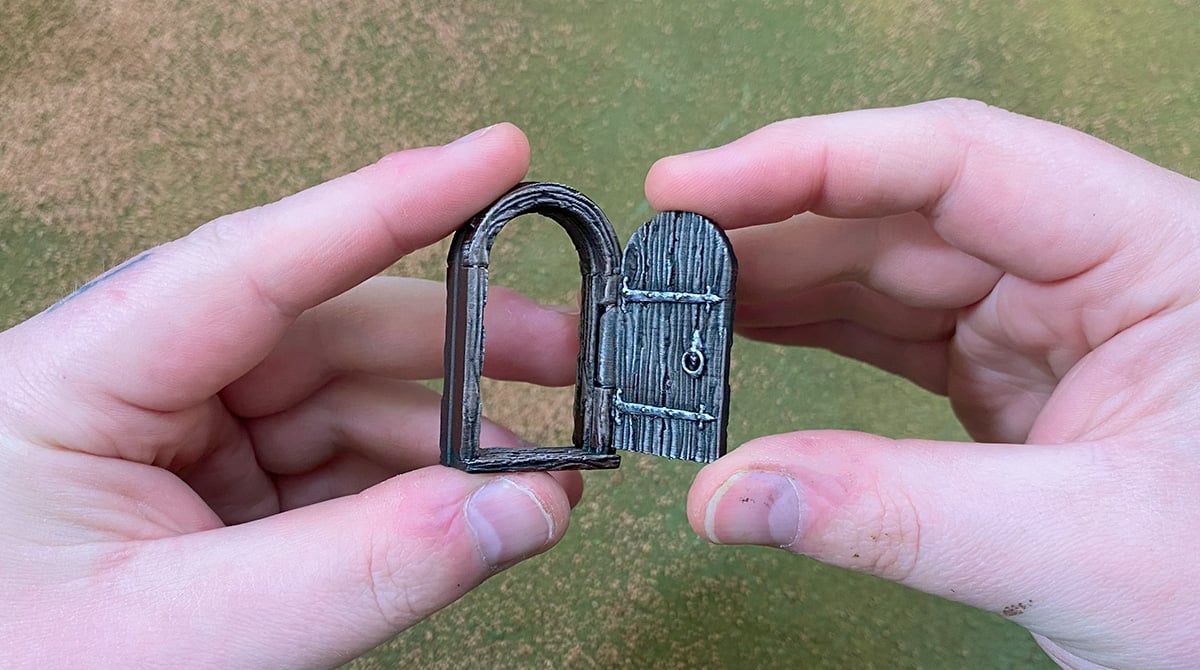
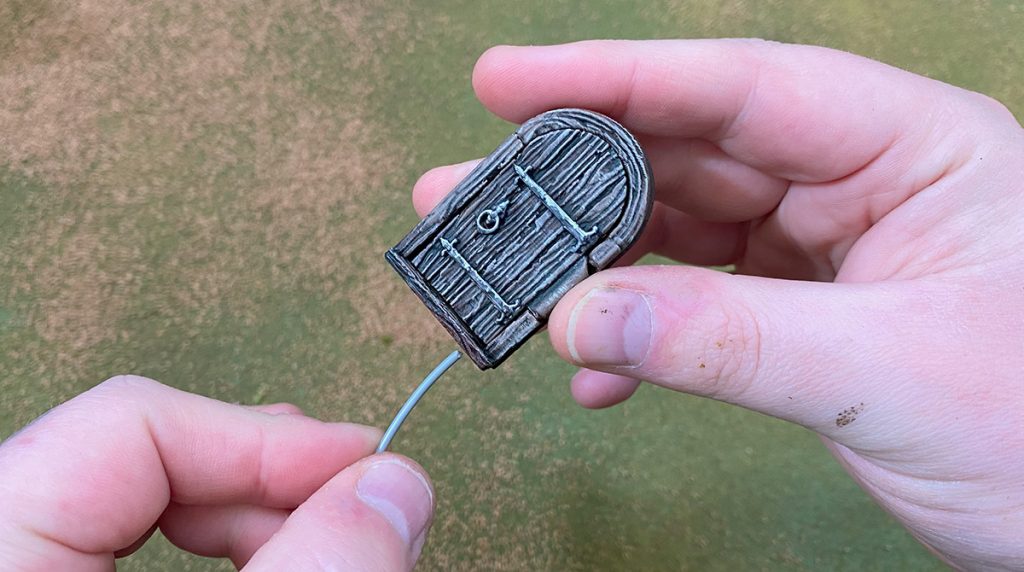
You now have a doorway with a functional hinge. This is pretty simple to execute in large numbers, which, if you’ve been 3D printing buildings like the King’s Keep, you’ll have plenty of doorways to build. Hope it helps!
Thanks there’s a reason why i saved all my left over filament!
That spike tool looks ideal. I have been looking for something the right size. Do you have a link for it?
Not a link exactly, but what you’re looking for is an awl tool, used in textiles and in woodworking.
Hello
Do you put anything on the bottom, so the filament doesn’t fall out?
Can you use some hot glue?
Hi, no, we’ve found it isn’t necessary to put anything at the bottom, as once they’re slotted into the building, the filament can’t fall out. We use 1.75mm filament, which should be a snug fit in the holes. Cheers