
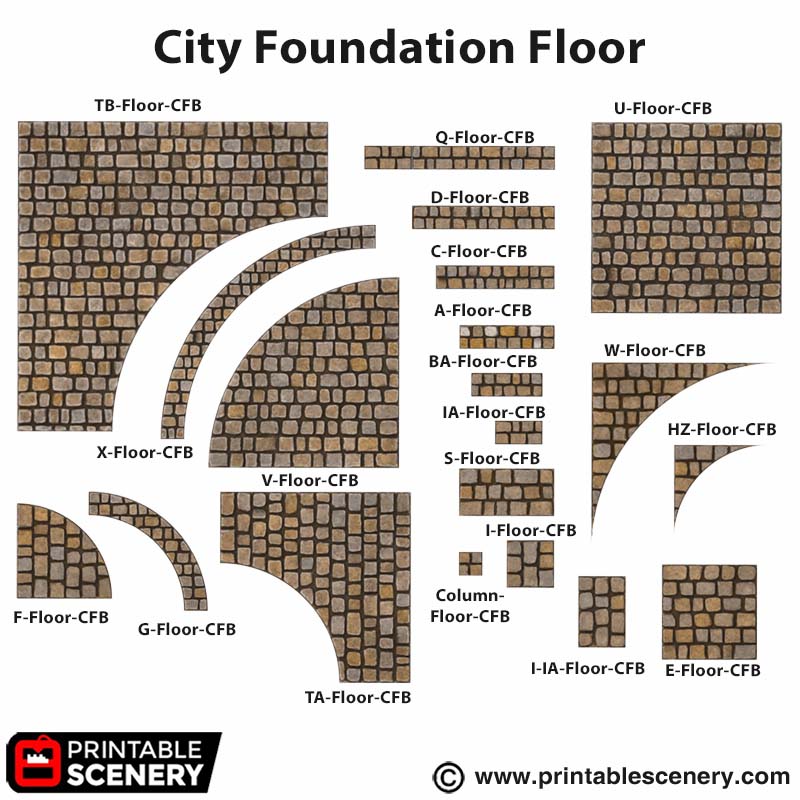
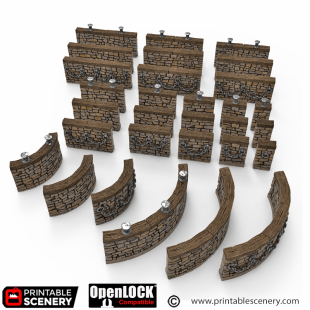
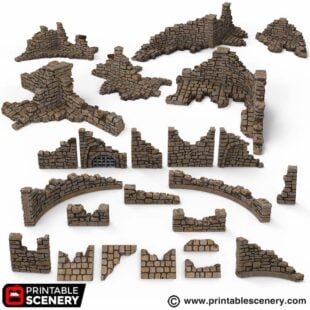
Description
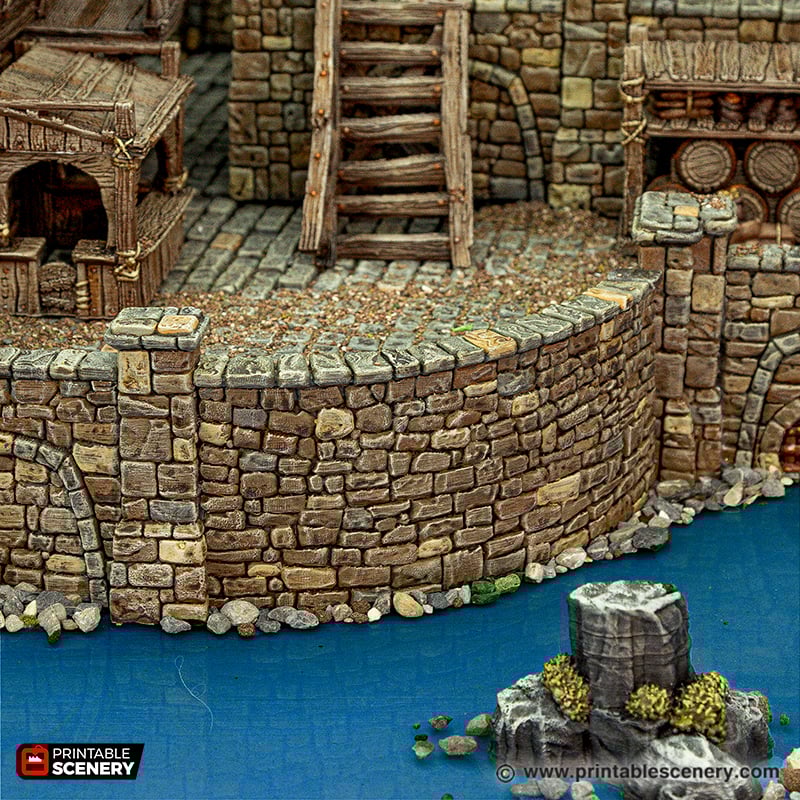
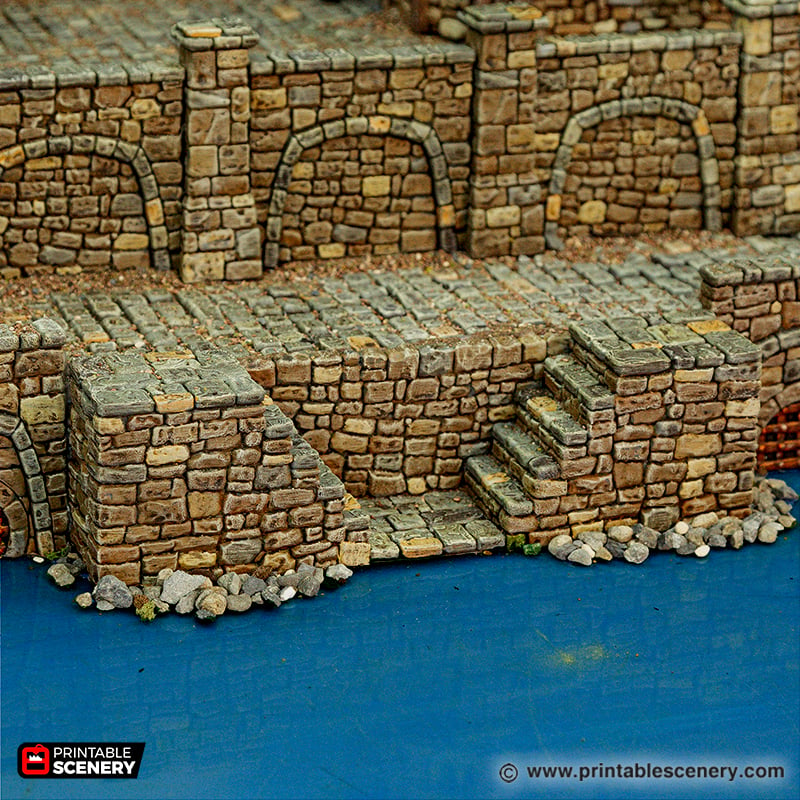
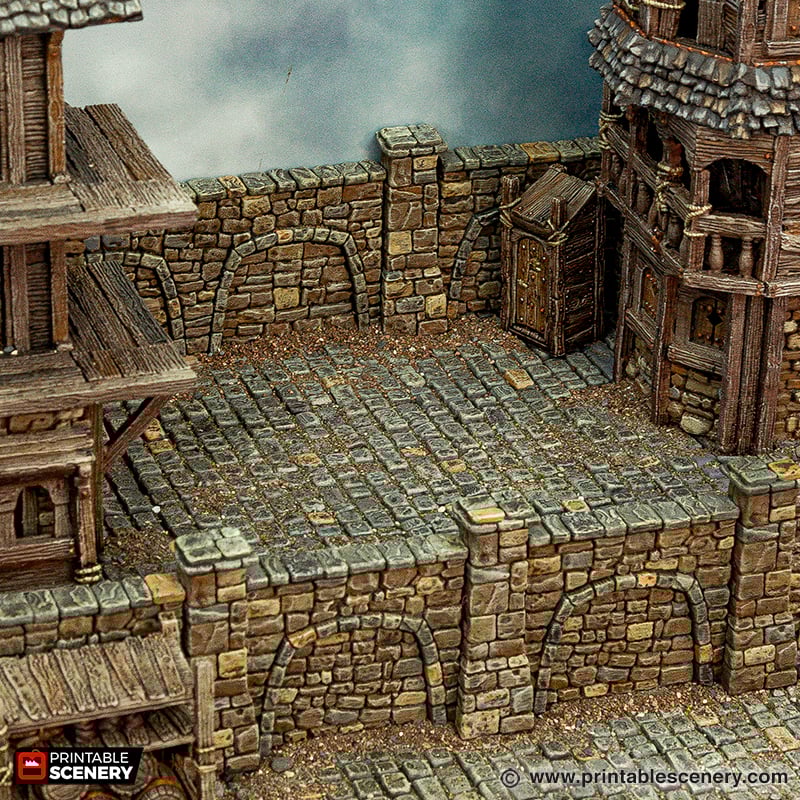
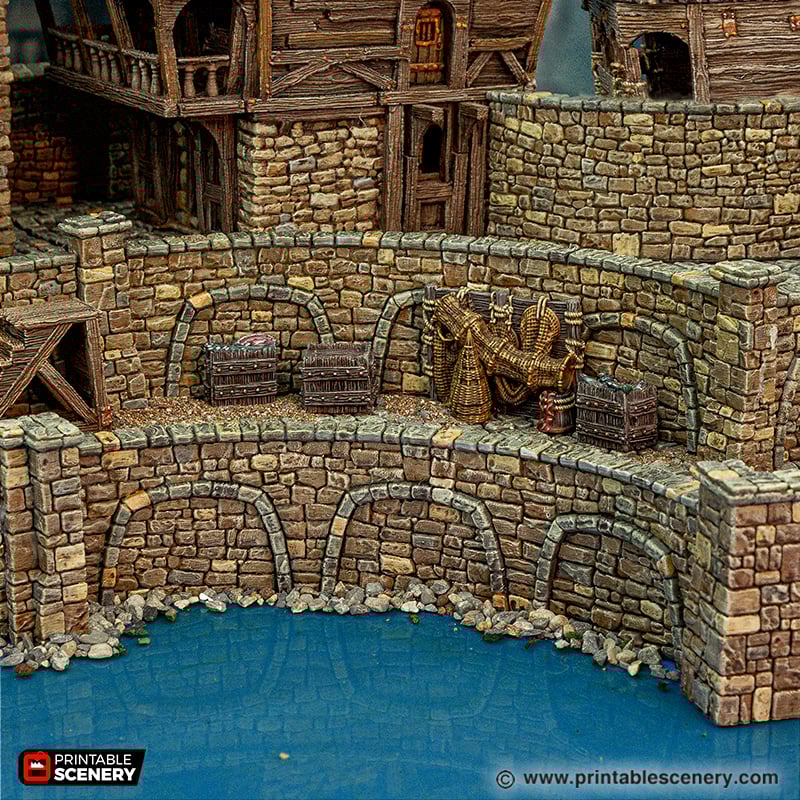
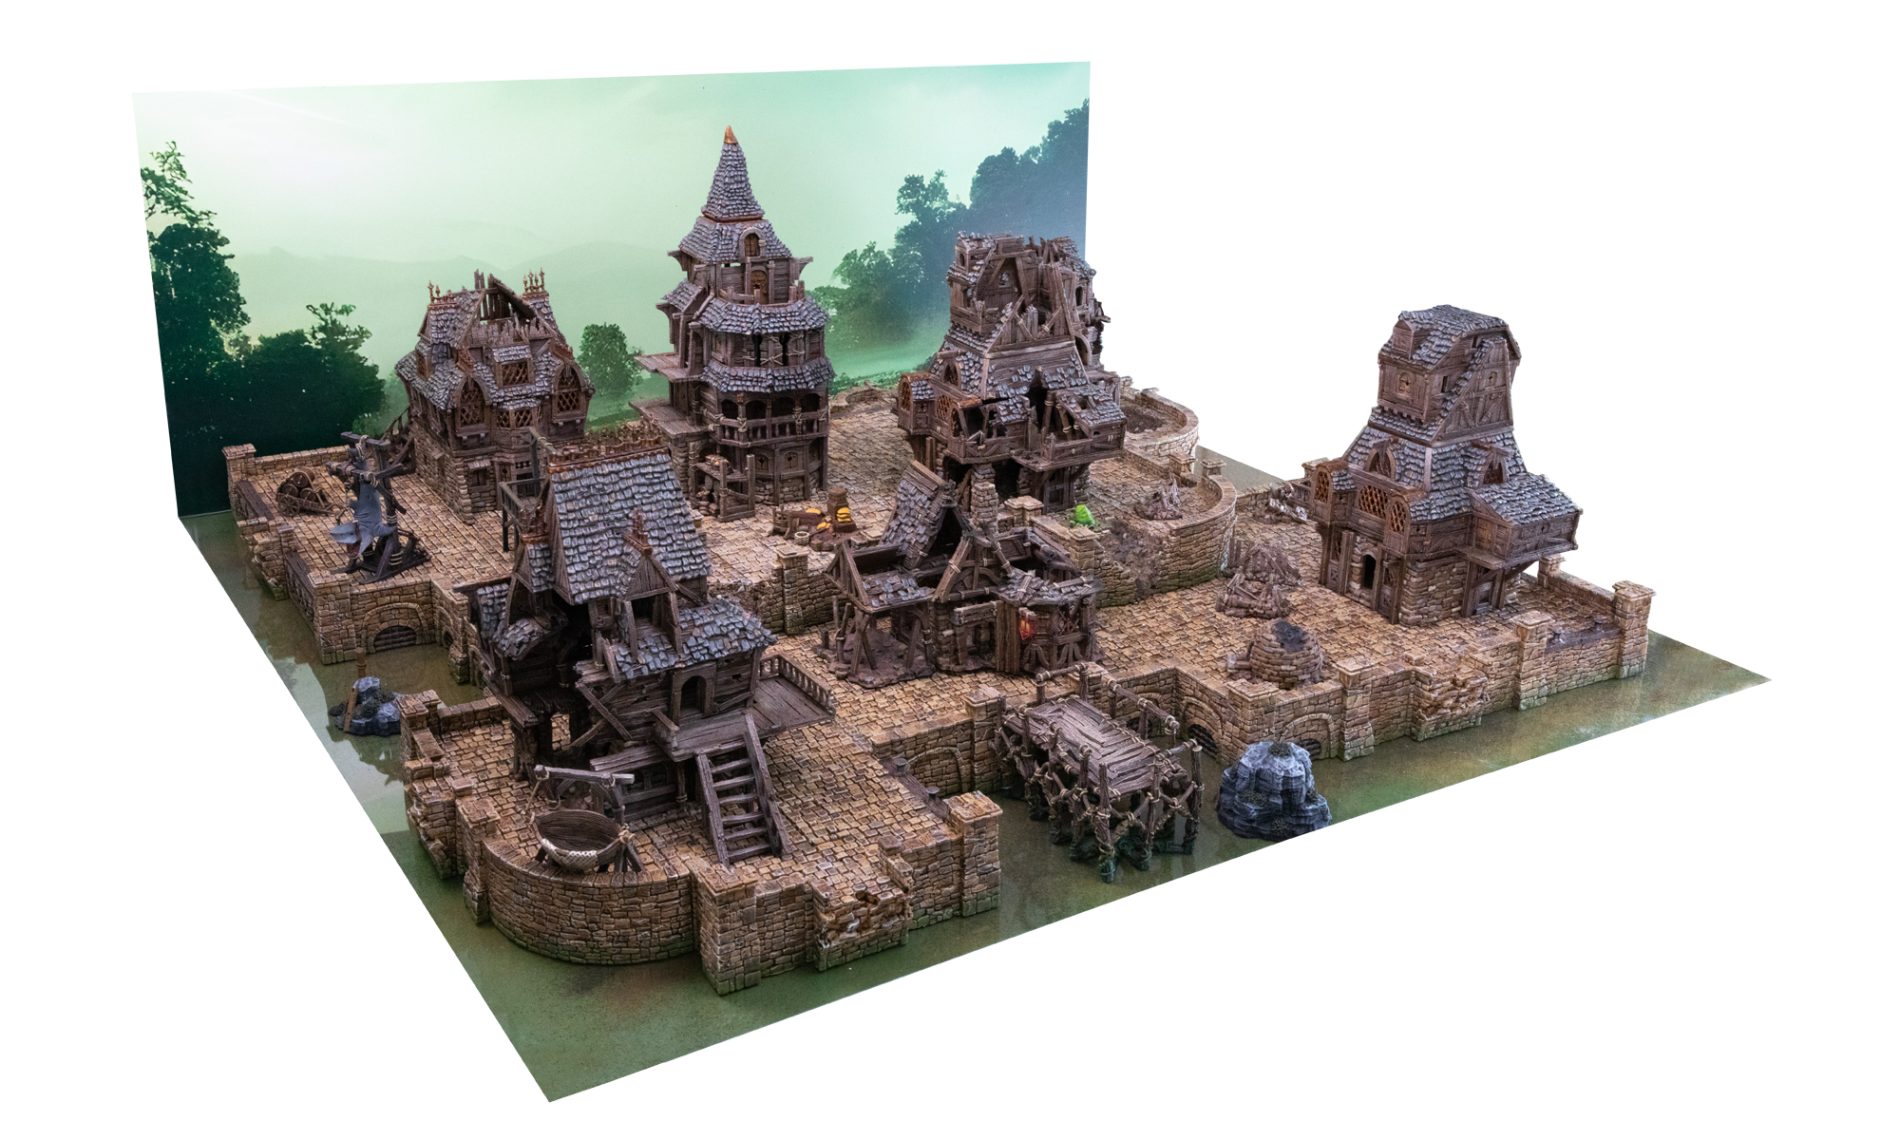
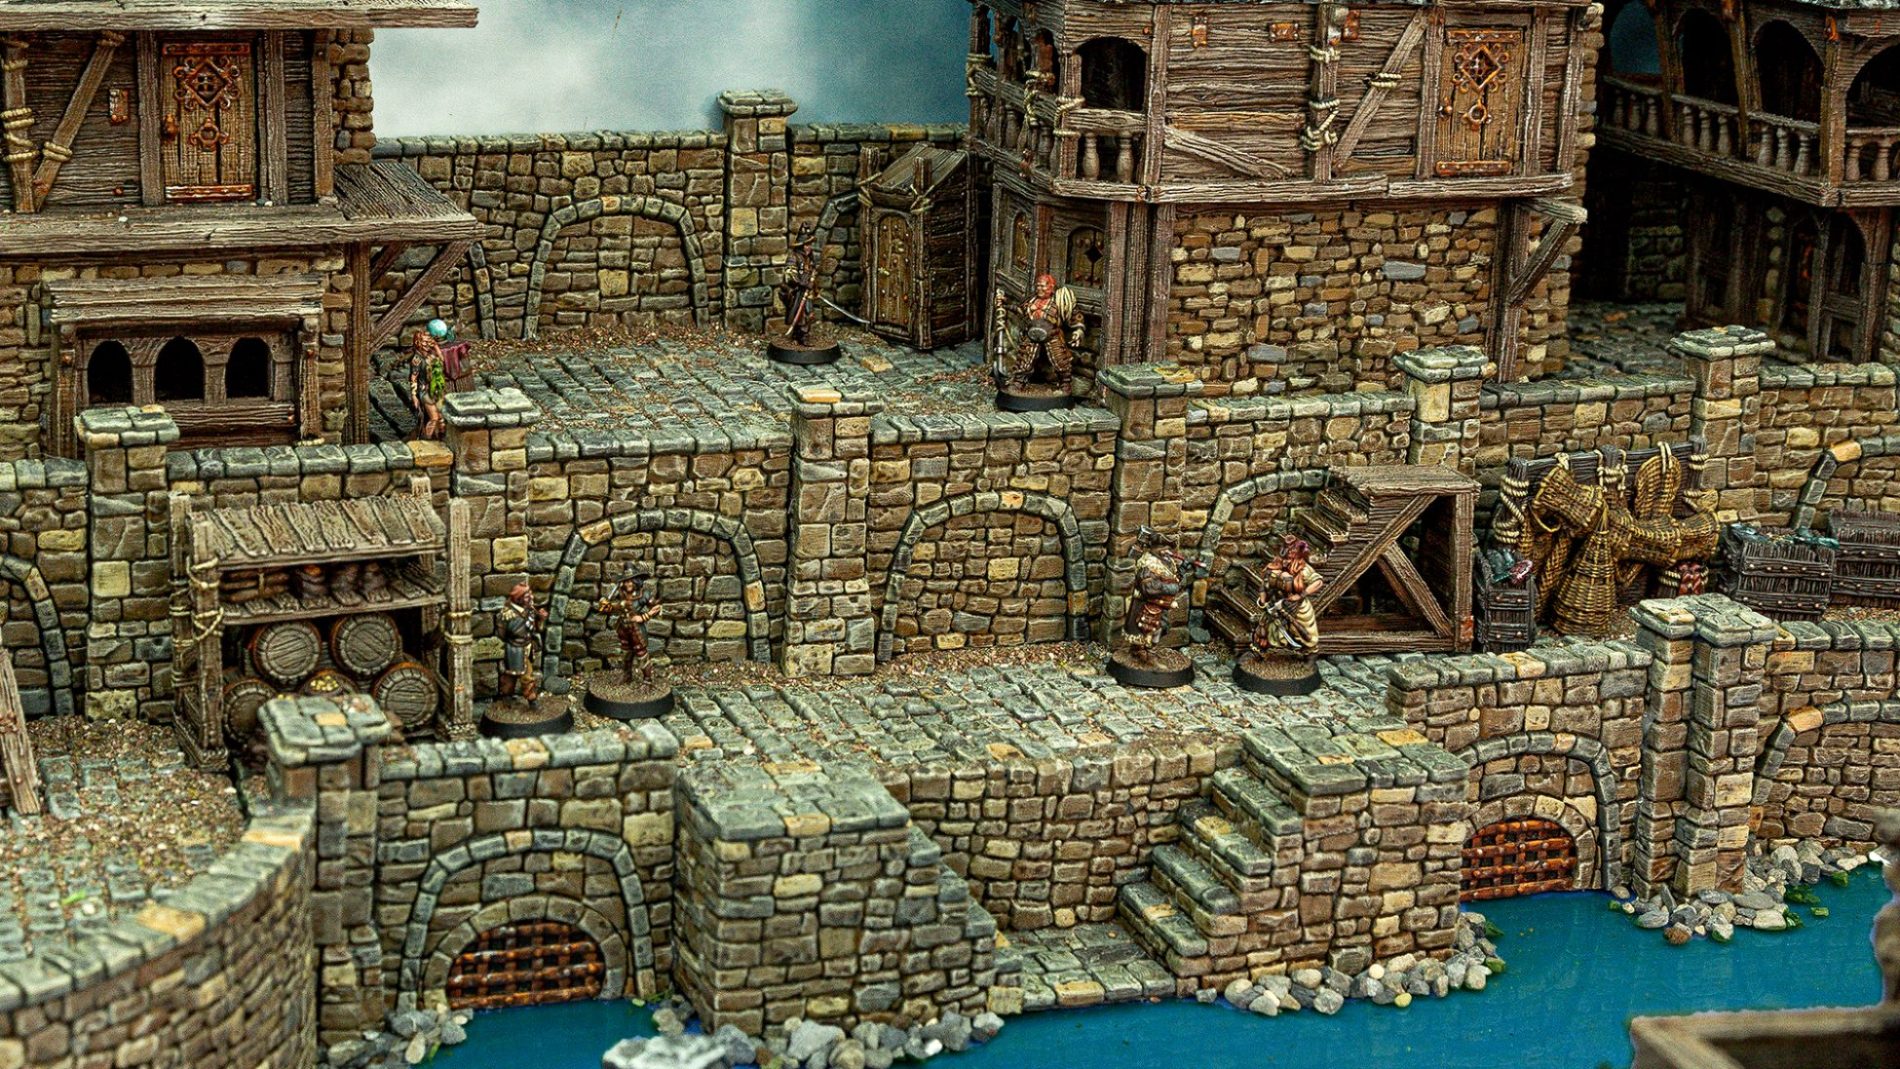
The City Foundations Pack offers an extensive collection of OpenLOCK tiles, perfect for constructing the base layer of various cities and ports. With OpenLOCK clips, you can easily combine and connect these tiles in numerous ways to create elevated floors behind walls. For a simple and cost-effective elevation solution, use a lightweight polystyrene block and place the floors on top and the walls around the side. You can choose to glue everything together for a permanent setup or use the OpenLOCK clips for a modular, reconfigurable design.
Updates:
- 12 June 2024 (version 1.1) I-Column-Buttress-CFB now sits flat on the build plate.
- 25 October 2024 (version 1.2) Cut floors have been added for users of 50mm foam board.
- 17 January 2025 (version 1.3) New tiles added and Floor Risers.
- 5 August 2025 (version 1.4): TB-Floor-CFB, which fits around the outside edge of the X walls, has been added.
Notes for OpenLOCK City Foundation Pack STL:
- Right-click on the image below and “Save As” to download the reference sheet for this pack.
- For set creation, use 40mm foam board with OpenLOCK floors or 50mm foam board with cut floors.
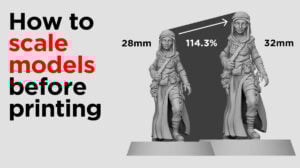
- This is a standard dungeon tile scale, each square being one inch (25mm base). To scale for a 32mm base, you must scale up to 126%
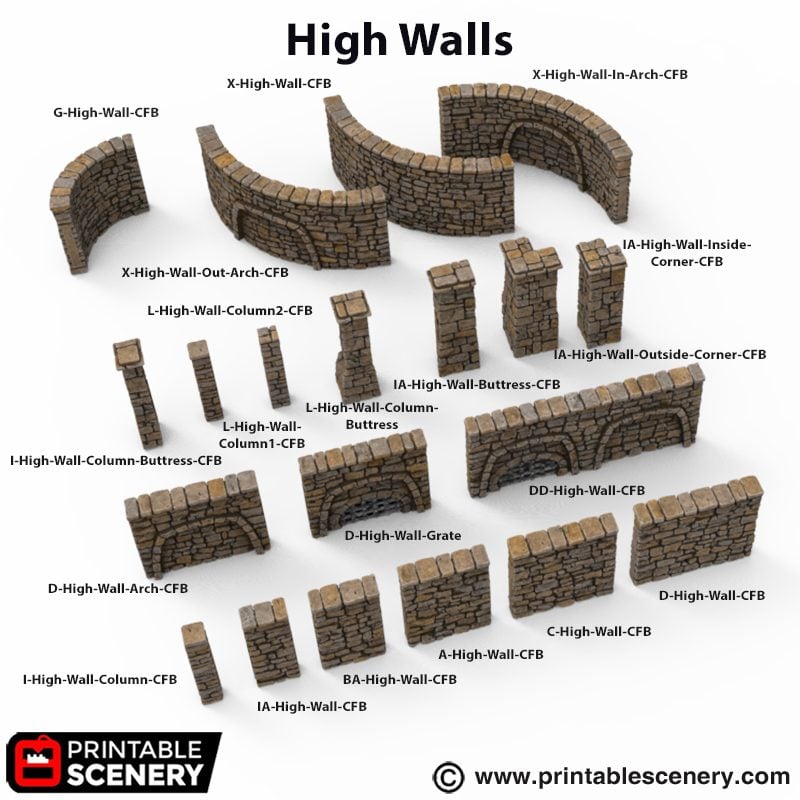
- Included with the High Walls is a flat back option to help glue it to your set.
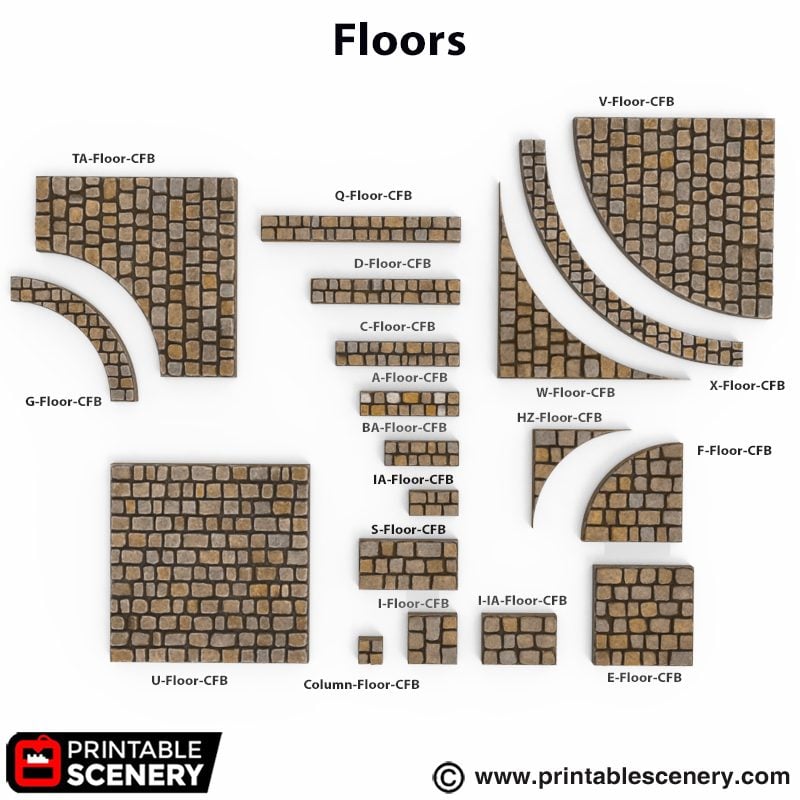
- Product measurements can be found in the image gallery.
- First Published version 1.0


Alexander Breaux (verified owner) –
This may be a silly question but is the intent for these to stack the floor on top of some other risers behind each wall? I thought there would be a set of riser pieces in the set but I don’t see them. What did you all do for this in the photos?
Joanne Boorer (verified owner) –
Hi. Thanks for your query. We used Styrofoam to build the set to the height we required and then place them on that.
Luke Everall (verified owner) –
I had a similar question as well – how do the raised floors connect to the wall tops? I can only think the intention is to glue them.
Like the above poster, some form of scaffold structure is required to keep everything in place, or are we using foamboard or other means to build our own structure?
Joanne Boorer (verified owner) –
Hi.
Thanks for your query.
We used Styrofoam to build the set to the height we required and then place them on that.
differentarthur (verified owner) –
Currently printing some of these pieces for a set up of a city. Loving the design and how they work. Only had a few things I was wondering about.
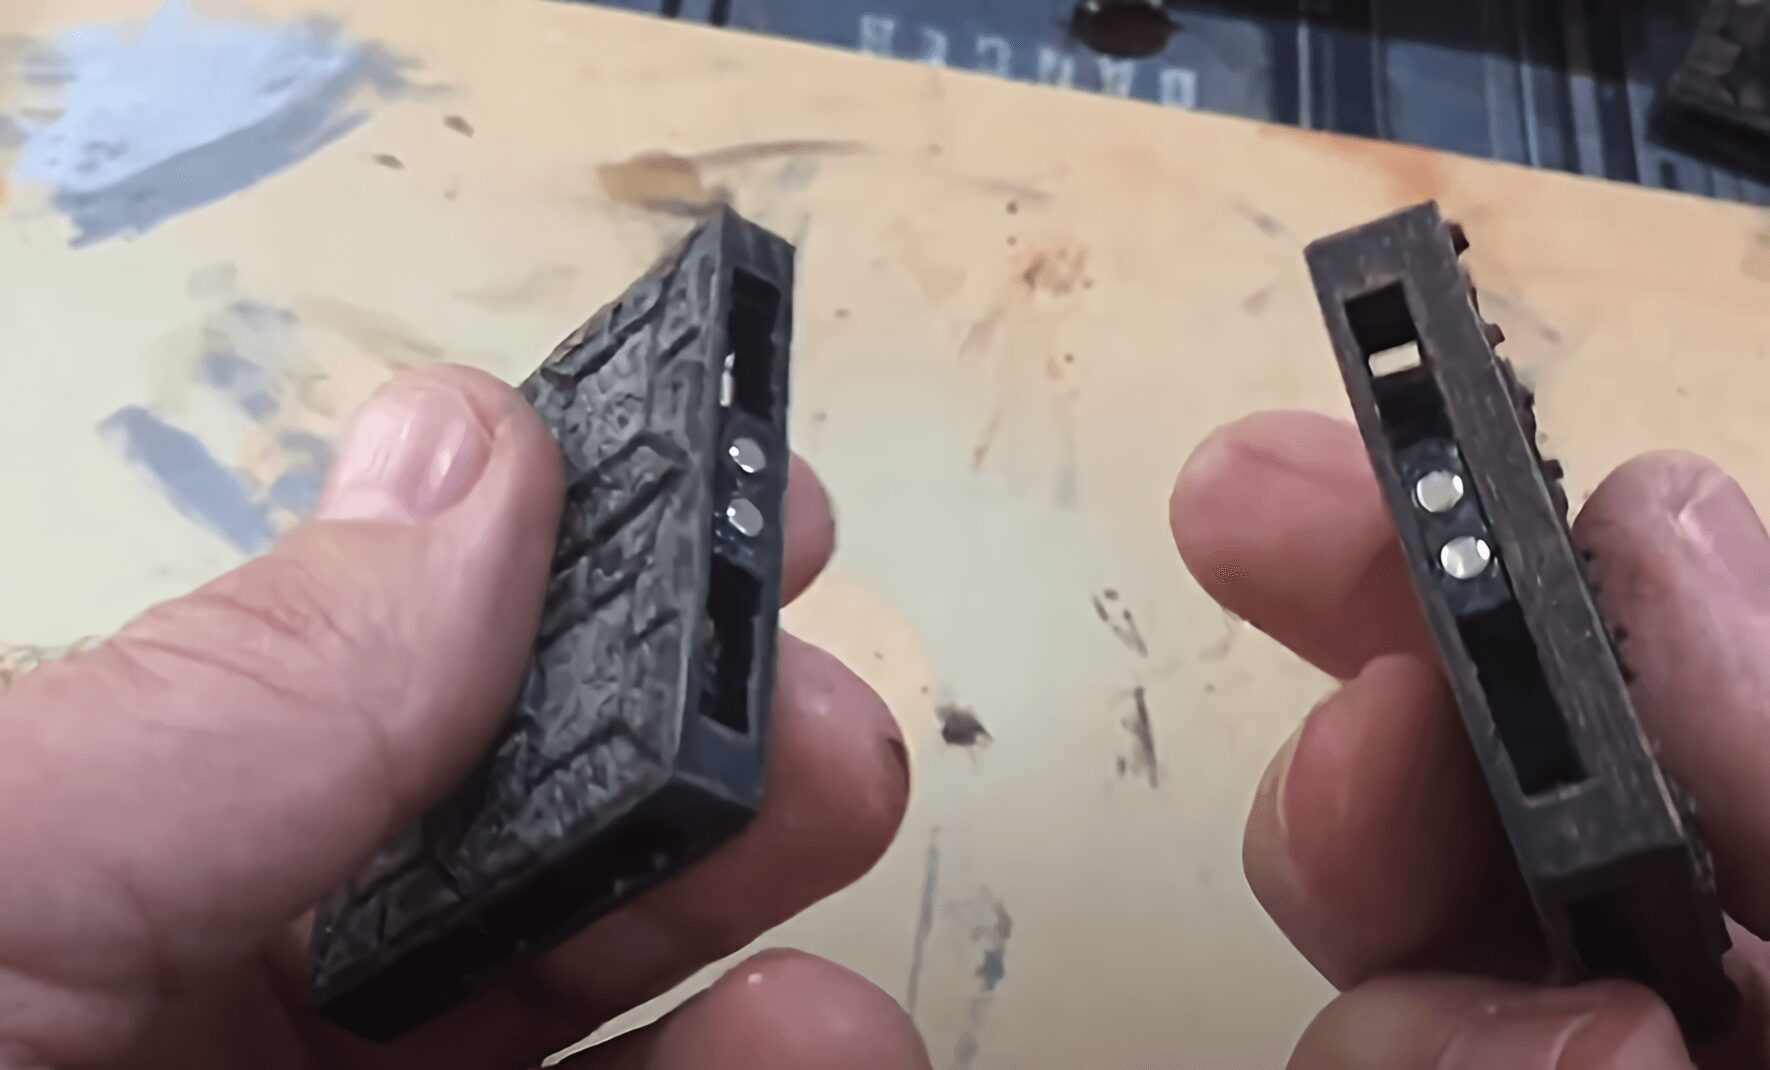
For I-Column-Buttress-CFB : the bottom of this that is connecting to the base print plate is not flat like the rest but curbs in, Is there a reason for this?
Also love that you included the Flat designs for the High walls, only problem I had is that they are to high for the hight differences I had. Any chance you also plan to release a flat version of the 2inch high walls ? And perhaps a 2 inch version of the foundation Grate and Arch? could help a lot with modular building plans.
I`ll upload some images once i`m done with planning with my printed test pieces 😀
Great Job!
Matt Barker –
Yes, we can do this, it will be a good update.
johnjackwalsh (verified owner) –
I’ve also found a problem with I-Column-Buttress-CFB, it doesn’t sit flush to the build plate, it takes about 8 layers for the “base” to appear
Matt Barker –
Ok thanks for pointing that out, I’ll fix that right away.
dmangrum0528 (verified owner) –
Are the castle doors from the rampage set compatible with this set? Specifically, the curved wall door (I think labeled x)?
Thank you.
Joanne Boorer (verified owner) –
Yes, these walls are compatible with the Rampage castle walls.
To get a better look at how they fit you can view them at https://www.terraintinker.com/
Jeremy (verified owner) –
Can I just confirm – are the foam boards you use under the floor tiles 40mm thick? This seems to be the correct height when taking the thickness of the floor tiles into account and to align with the bridge and other wall tiles on the outside, but just wanted to check. Thanks.
Joanne Boorer (verified owner) –
Hi Jeremy
Thanks for reaching out.
Yes you are correct we did use a 40mm foam board for this set.
Jeremy (verified owner) –
Hi again, thanks for confirming above foam board height. Unfortunately, my XPS foam supplier only stocks 30mm and 50mm, so having to do a bit of slicing. All part of the fun though.
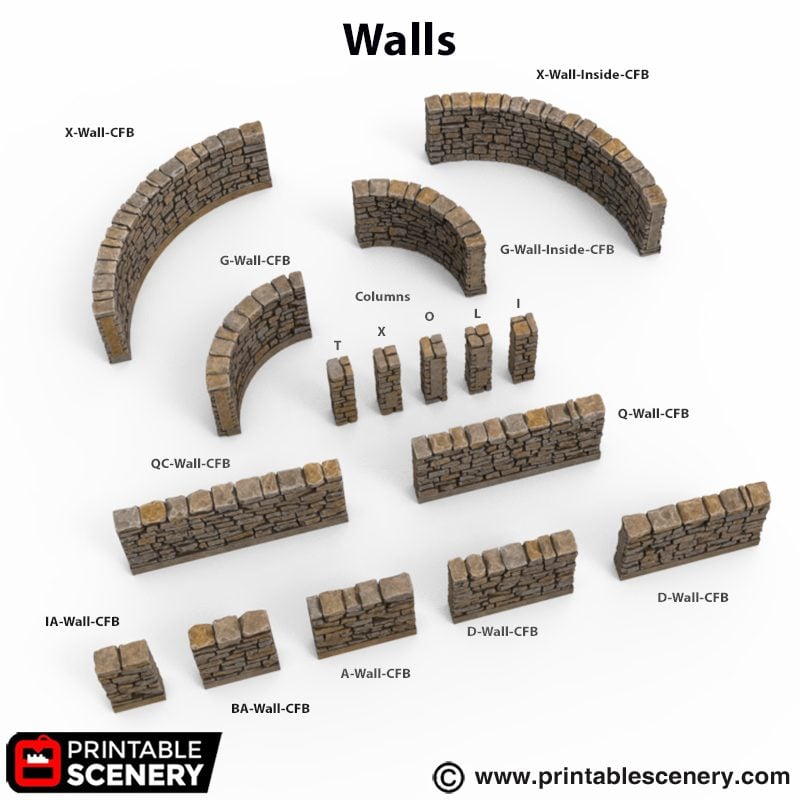
Also, trying to fit the floor parts together and can’t seem to fit the W floor with the X-High Walls. The V-Floor fits fine, but it’s inverse doesn’t wrap around the X-High-Wall snugly, leaving a gap. Looks like you haven’t factored the width of the X-High-Wall (if this is what it was designed for). I can send screenshots if required. Can we get a W-Floor that fits with the X-High-Wall? Thanks Joanne.
Joanne Boorer (verified owner) –
Hi Jeremy
If you were to get the 50mm thick foam, we could slice the floors so you would just have the top layer to glue onto it.
Let me know if you wish to have that option.
The W Floor was made to go with the V floor and not the X-wall.
Joanne Boorer (verified owner) –
Hi Jeremy.
I have now added cut floors to this pack.
Jeremy (verified owner) –
Thank you Joanne. I understand now about the W-Floors. Thanks. Will probably use the G-Floor option instead. Re: the cut floors, will certainly give this a go. Might be a good workaround. Thanks for that.
chadlanning (verified owner) –
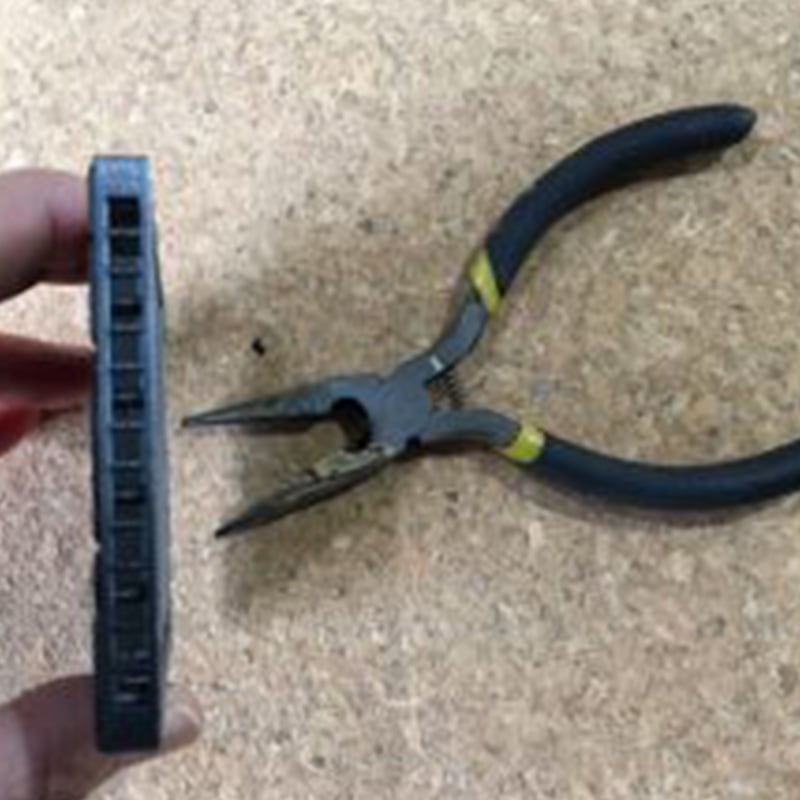
Hello, This is my first OpenLock set – where do I find the clips to connect the pieces?
Joanne Boorer (verified owner) –
Thanks for pointing this out to me. The link is now included on the product page.
Matt Barker –
You can check out the guide here about how to use the city foundations https://www.printablescenery.com/2025/01/17/how-to-build-and-connect-city-foundations
Timothy Reese (verified owner) –
Thanks for including the cut edition of the floors. I’d like to scale the riser up to fit underneath the cut floors, do you have a standard subtraction you used for the cut, so I can scale the riser correctly?
Joanne Boorer (verified owner) –
When using the cut floors increase the height of the riser by 16%.
The reluctant expert (verified owner) –
the picture City Foundation5 shows a large curved wall with 3 arches but I can’t find that included in the set. was this a specialized piece?
Joanne Boorer (verified owner) –
Thanks for pointing this out. I have removed this photo to avoid confusion.
This arch wall did not fit the OpenLOCK templates so become unusable.
Jack Appleton (verified owner) –
Is there a floor or floor edge piece which fits flush with the outside edge of the X walls like how the G wall fits with the XG floor edge so I can have big concave corners in that direction? There’s an X high wall marked with an arch on the inside which implies something fits on the other side but I couldn’t find anything.
Sloane Dougherty –
Hi, thanks for bringing this to our attention. We’re going to add this to our queue of updates and will get this sorted soon. Thank you
Shannon Moyers (verified owner) –
Is it feasible to provide your floor files to have a variant version to have finished edges Intergrated into the model so that they keep their original dimension? Something like that can lend itself to constructing a modular and customizable dais.
Joanne Boorer (verified owner) –
Hi Shannon, You are able to achieve this be using using these tiles in Terrain Tinker. https://www.terraintinker.com/
Shannon Moyers (verified owner) –
It was a great call for the finished edges to be included in this pack. Are there any plans to retrofit your older floor sets with the same finished edge models?
Joanne Boorer (verified owner) –
Hi Shannon, we don’t have any immediate plans to do this at this stage but will add your request to the customer wish list.
Entreaken (verified owner) –
Hello. I just purchased this set as part of the Port Bundle, and I’m printing out the parts to create the “Ramshackle” modular game board. It appears that “I-Column-Buttress-CFB”, still does not sit flush to the build plate as noted previously. In order to print it so that the base starts flush, I had to lower the part by about 1 mm or so which will create a gap that will need to be corrected once assembled to other parts. Latest version I have is 1.4. Thanks!
Joanne Boorer (verified owner) –
Hi, Thanks for reaching out. Can you please send a pic to [email protected] the I-High-Wall-Column-Buttress-CFB-v1.1 is sitting flat on buildplate my end.
Ken Morris (verified owner) –
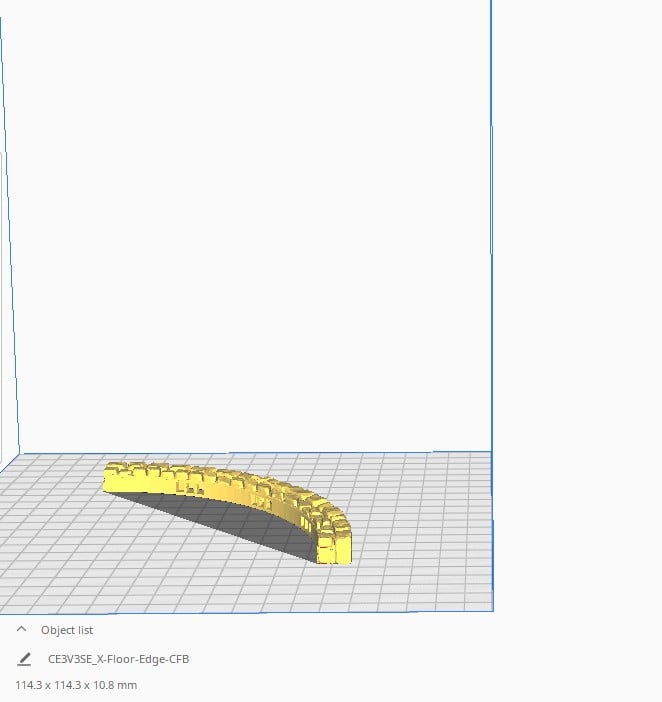
What is floor HZ- CFB for? the curve doesnt match the size of any other curved wall or floor piece…
Joanne Boorer (verified owner) –
Hi Ken, It can be used to go Floor piece F or FN. Example is if you put the FN floor and HZ floor together 4 times it creates a round well like area.
If you pre-build in Terrain Tinker before printing it helps to know what items to print.