How to build and connect city foundations
The City Foundations from the Ramshackle and Ruins set is a modular system of 3D-printed walls and floor pieces designed in a way that lets you build a huge variety of layouts and terrain boards. They use OpenLOCK to connect and use a consistent mathematical 4×4 grid, so you never get caught up with random misaligned spaces.
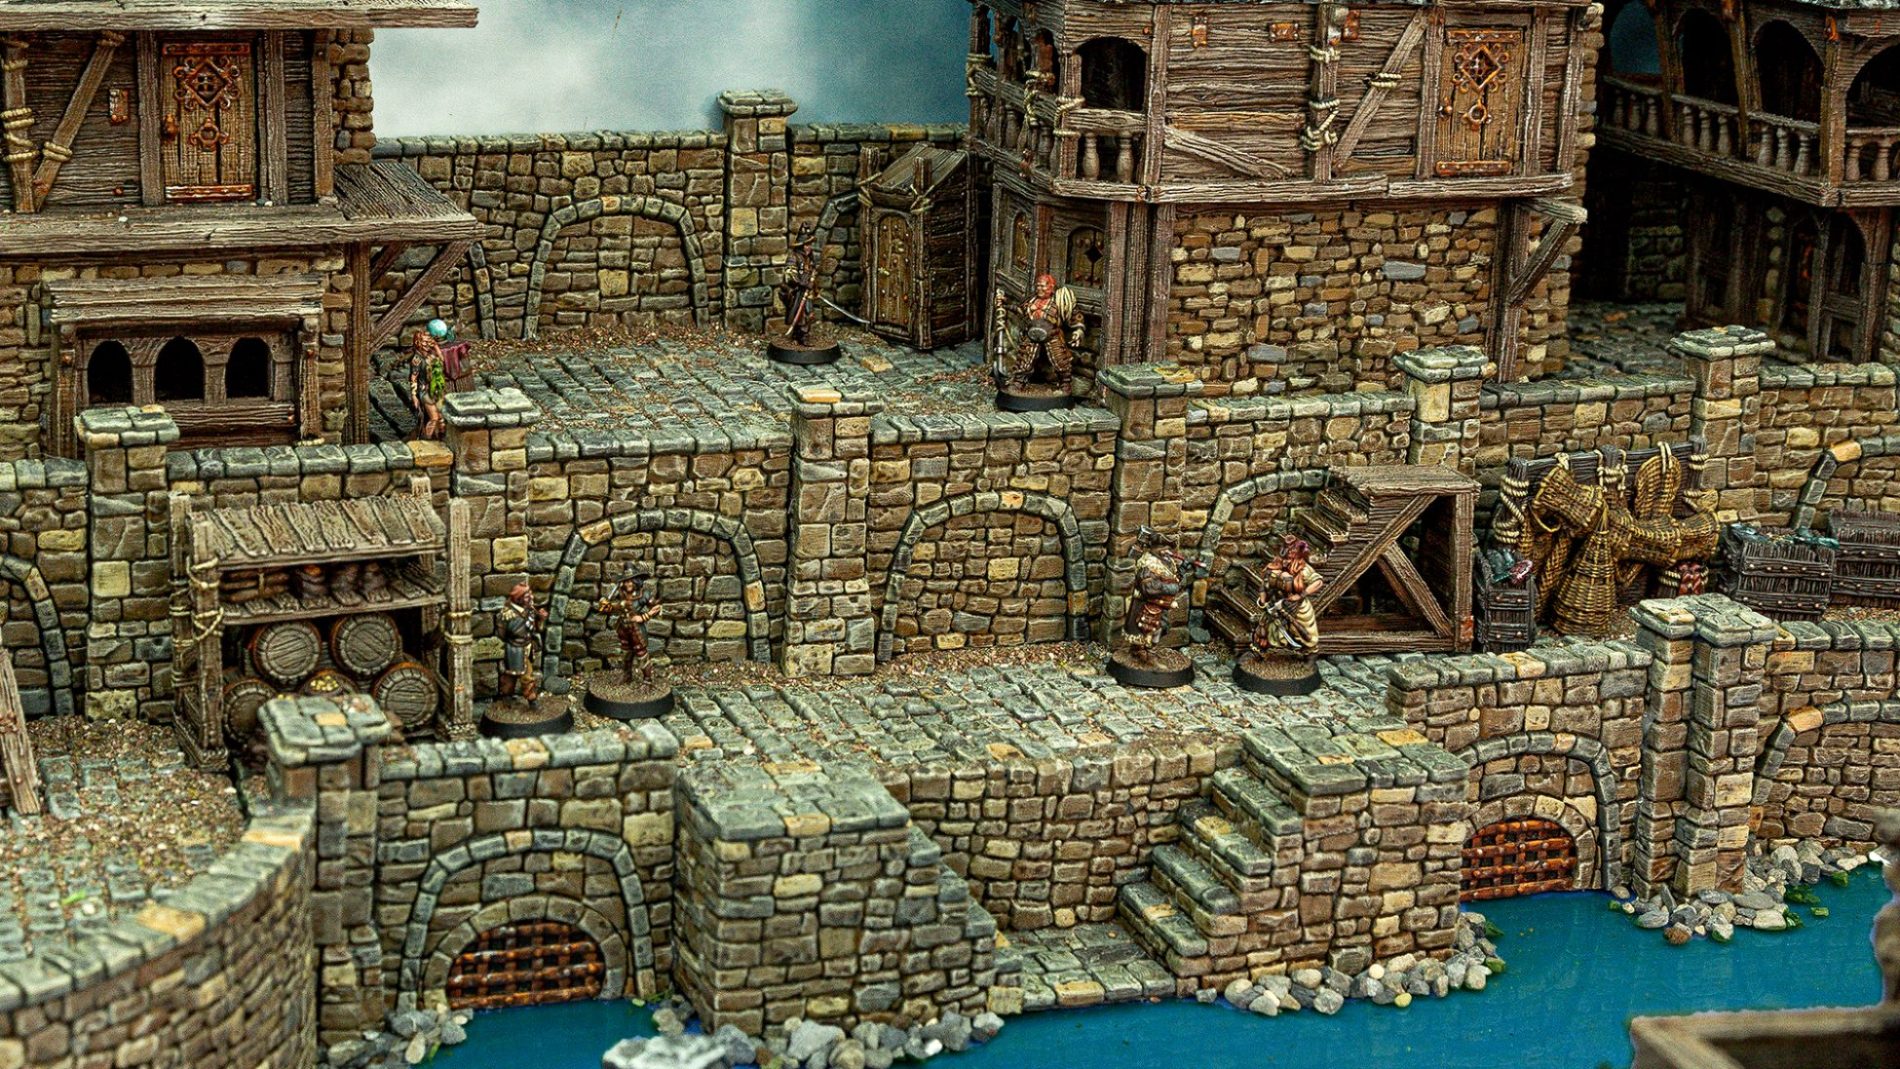
The city foundations make up the bulk of your wargaming or roleplaying boards and will probably be reused more than anything else as you add pieces and reconfigure the layouts. So, you’ll want to be fluent in city foundations and how they come together.
In this guide, we’ll show you how to easily put together your own city foundations, starting with some basics. From there, we’ll move on to a more complex, albeit unrealistic, example that showcases a wide array of components and how you can fit them all together.
We’ll also show you how we lift our floor tiles in real life to achieve the look of an elevated city foundation with multiple levels. Finally, we’ll show you some example layouts and give you tips on creating your own.
Contents
- How it works
- Getting set up
- Putting it all together
- Elevating the floor
- Some examples of City Foundation layouts
How it works
The City Foundations set is built on a 4×4 inch grid, with increments of 0.5. This means you can have blocks 1×4, 2×2, or 2×0.5, for example. You can combine them to make any grid you want. I will explain some basics on Terrain Tinker with the grid to help explain, but you don’t need Terrain Tinker to do this. All you need is the OpenLOCK parts from the City Foundations
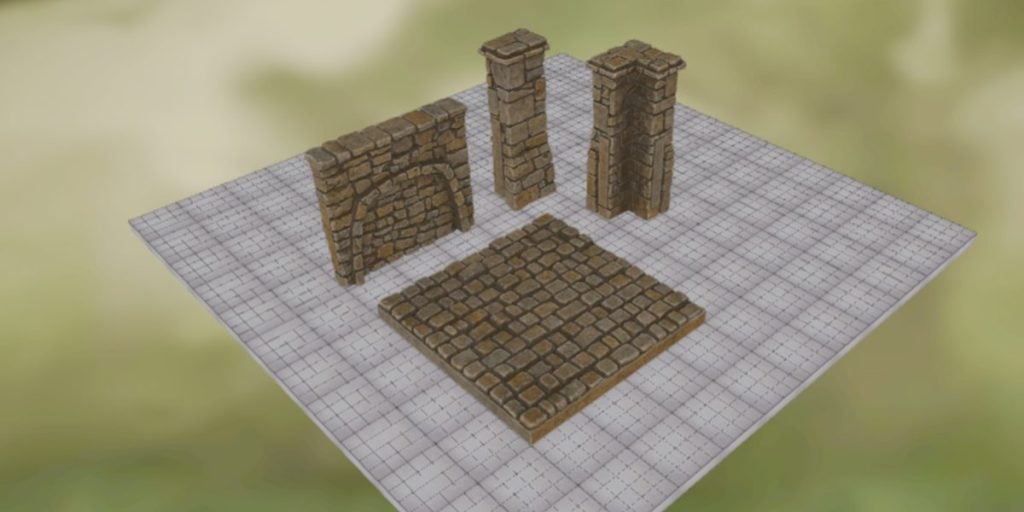
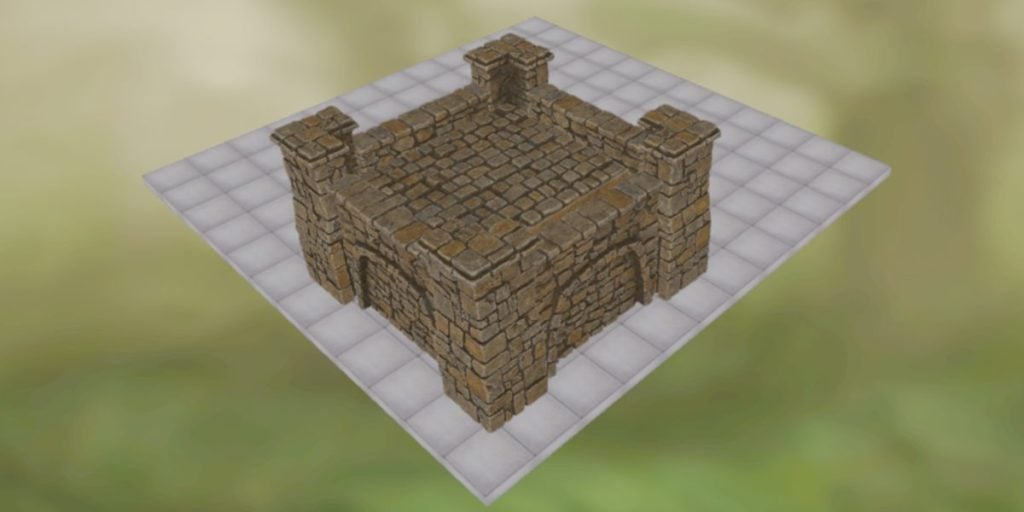
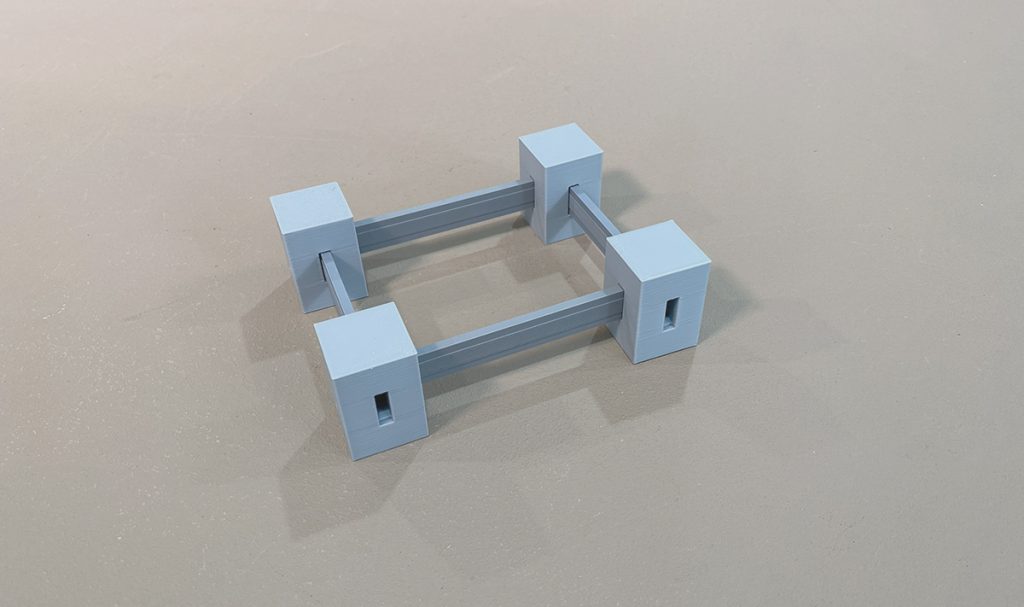
This is the bare essentials of creating a simple city foundation using a 4×4 floor tile, 3-wide high walls, corner pieces, and buttresses. You can make a square foundation of any size with these four pieces.
It’s not a foundation for a city, but maybe a small market stall for now. This is the perfect starting block, though. You can think of all foundations comprising x number of these blocks joined together. On Terrain Tinker, I’ve lowered the floor tile on level 2 so it sits flush where I want it. Later in this post, I will show you how we raise the floor tiles in real life.
You can add to it by extending out to one side any number of times to make a longer foundation, using the buttress piece to join each 4×4 section.
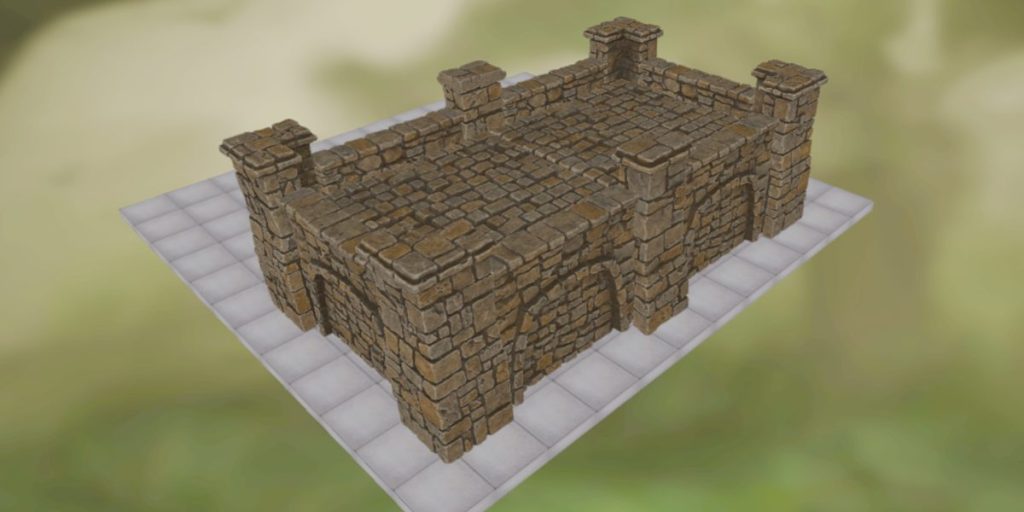
You can use this same technique to make it an 8×8 foundation. This is also about the footprint of most Ramshackle buildings, so keep that in mind when building your city foundations. It’s easy to continue doing this until you have the foundation size you want.
You can consider adding some flare and detail to the foundation from this point. Maybe you’ll play around with the shape, swap some walls for walls with sewers, or add the curved pieces.
Getting set up
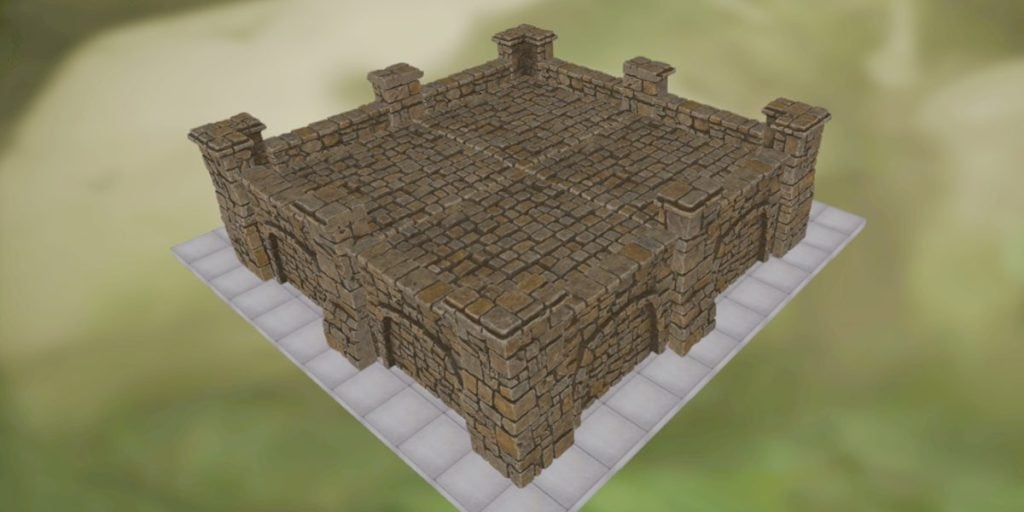
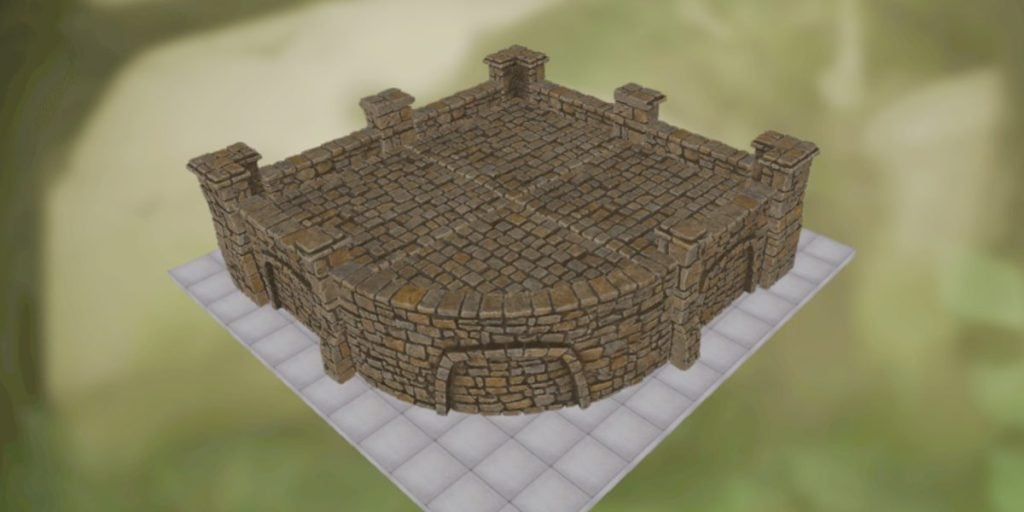
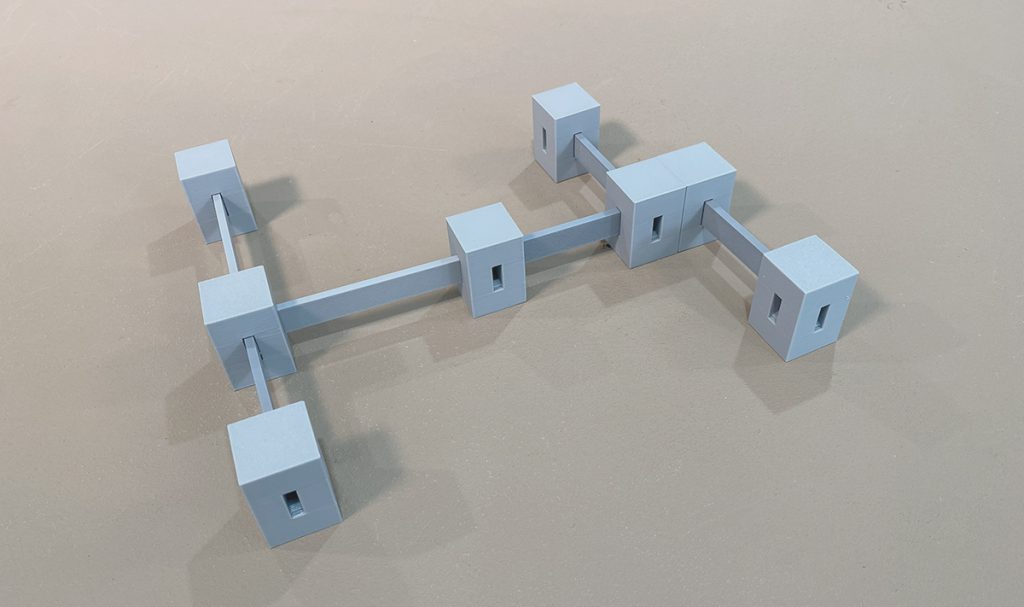
Now that we’ve got the basics sorted, we can look at adding some more variety to the city foundations. Below is an example of a small foundation set up, mocked up to intentionally show a diverse range of the city foundation pieces and how they all work together. It’s not exactly realistic, but you get the idea. Once again, we’re using Terrain Tinker to design our foundation; it’s especially useful for getting a complex plan going.
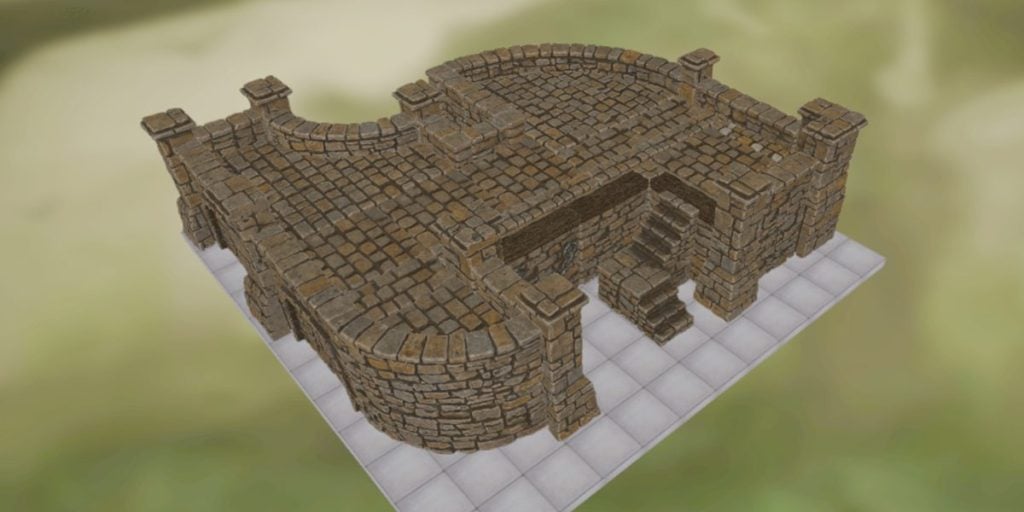
Below is a diagram showing all the parts we used to make this. If you notice some pieces you might not have, ensure you have the latest download. This is where you’ll find them.
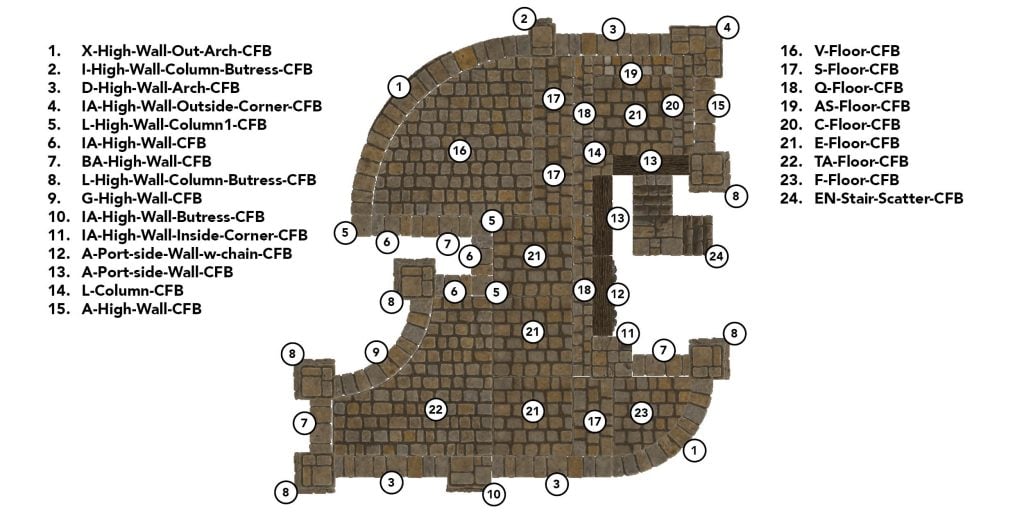
You can select these parts from your City Foundations Download or get this module from Terrain Tinker here if you want to follow along with our tutorial. From there, you can export all the parts for printing. Here are some tips on printing out the city foundations:
- When printing multiple floors, you can stand them up to fit more on the printer, give them a 5-6mm gap
- We recommend using 1.75mm PLA filament
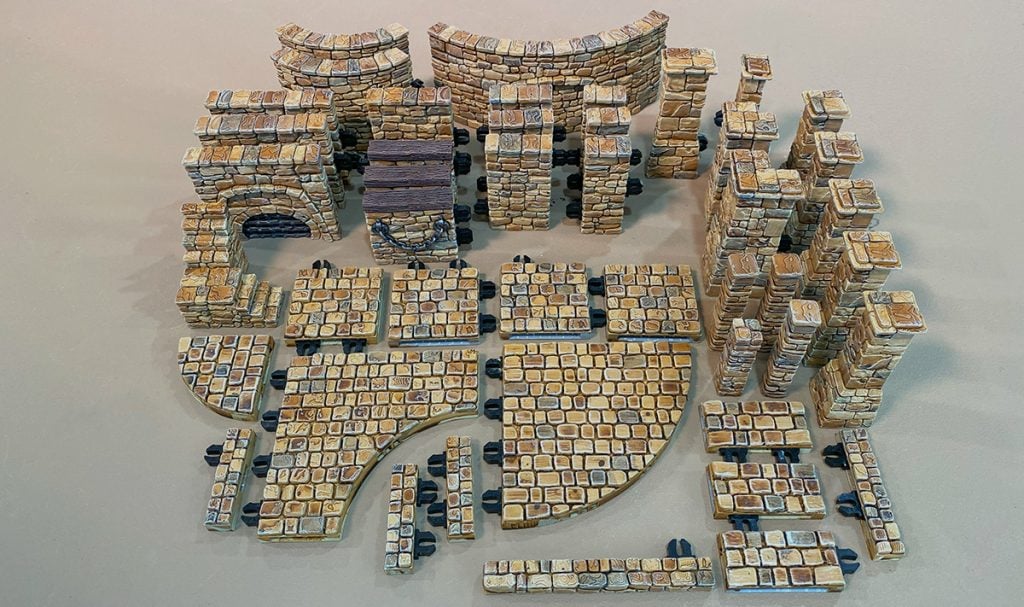
Here, we have all our printed components, which are painted and ready to go. We also have a generous helping of OpenLOCK clips. A tutorial on how we painted this set of Ramshackle will be released soon.
Putting it all together
When putting together my City Foundations, we like to start by clipping the floor together to get my floor plan. For this, we recommend using two OpenLOCK clips per join if possible. If you accidentally lean on it, this will give you a good, sturdy foundation that doesn’t entirely upend your city. You can also, of course, glue everything together for a permanent gaming board
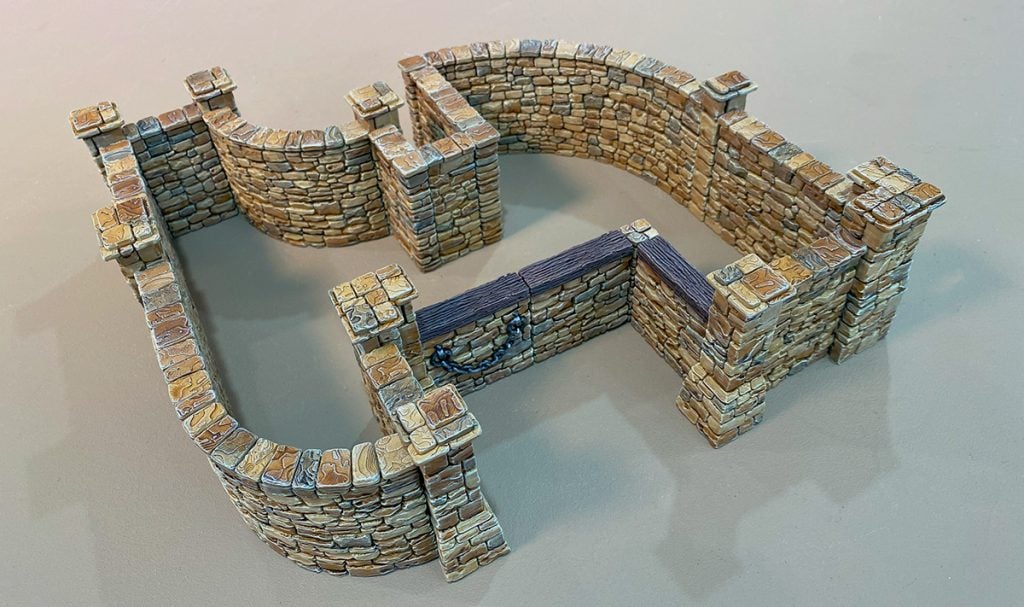
Then, you can basically wrap your walls around the floor plan. We like to start at a corner and work around from there. For some corners, you’ll need a high and low clip, so not all walls will be double clips. This is where having Terrain Tinker really helps, as we can refer back to the plan whenever we get lost as to which part to do next.
Now that we have our floor and walls assembled, we have a great enclosed space with an inescapable high wall, which could be perfect if your party falls into a pit with some nasty beast. But we want elevated City Foundations! So there’s just one thing left to do: Lift it up!
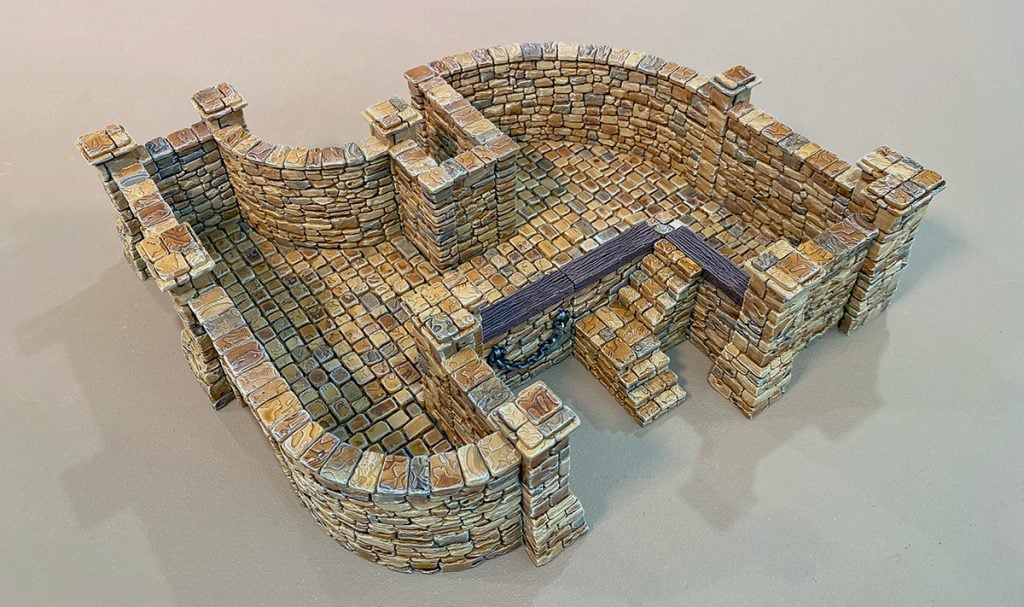
Elevating the floor
For our Campaign, we showed the City Foundations with tiers and levels. We used standard polystyrene boards cut to size beneath the floor tiles attached with hot glue to achieve this. For some of you, that could be fine. But since then, we’ve had some time to rethink what will be easiest for elevating the foundations in a simple and uniform way.
So, we’ve designed some new OpenLOCK platforms to elevate the floor pieces. These easy-to-assemble supports come as blocks with varying-length connectors. They work as a scaffold beneath the floor tiles and are the right height to match the lower walls, staircases, bridges, etc. You can find these in the updated City Foundations pack.
So, by putting the parts together, we can match the layout of our floor plan. Then, it’s as simple as placing it under our floor and finally placing our walls over the floor.
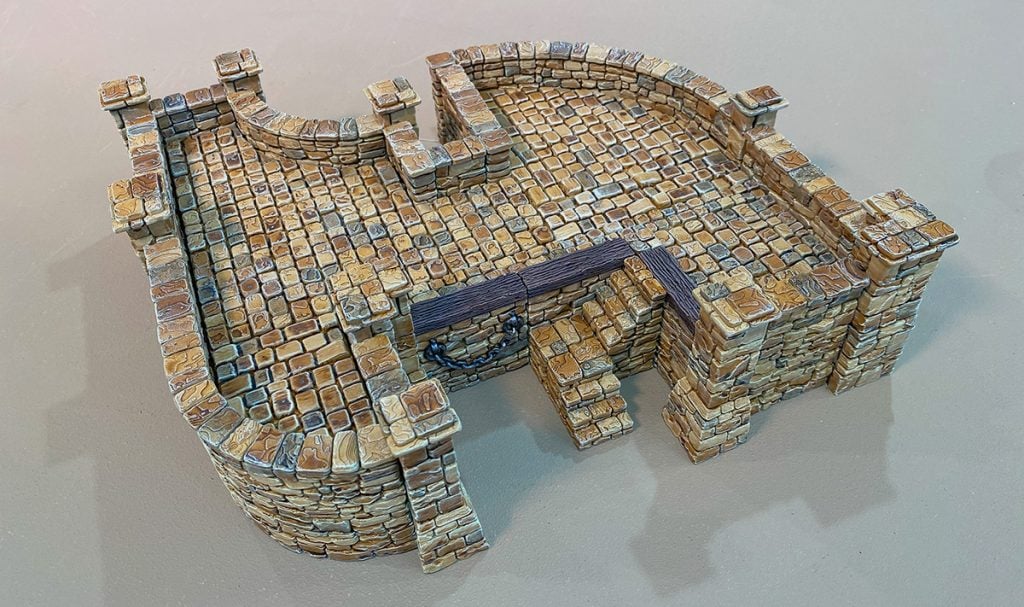
And hey presto, we have an elevated City Foundation! This system is easily scalable to any size board and easy to layer on top of other foundations to get those tiers in the city. The Ramshackle aristocrats will be laughing at the peasants at the dock below in no time.
Some example city foundation layouts
We can easily mock up some foundation floor plans to any scale using Terrain Tinker. Once you’ve gotten used to the 4×4 system, the only limit is your imagination. Here are some examples of 2×2 foot blocks utilizing the foundations and leaving space for the dockside. Of course, you can add, combine, or mix them up. Once you have the pieces, it’s easy.
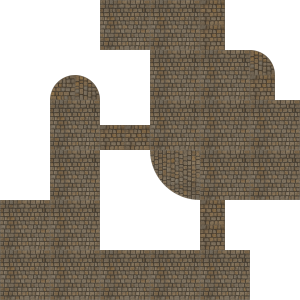
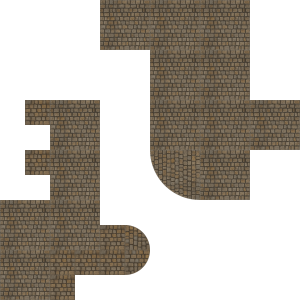
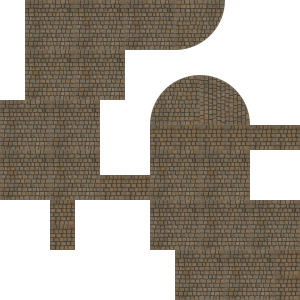
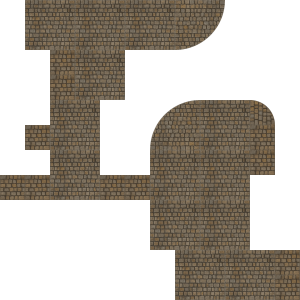
Some things to consider when doing your own layouts are:
- Leaving 8×8 blocks to add buildings so you have options on mixing your layouts up
- Leaving room to add tiers and access to those tiers so players aren’t left with climb tests
- Balancing the amount of water and the city floor for an immersible experience
- Also, the technical feasibility of the layout is too complex, and it will take all day to make, too simple, and it might be a bit dull to play on
But really, it all comes down to your own tastes and preferences. The City Foundations are just that, a beautiful building block for you.
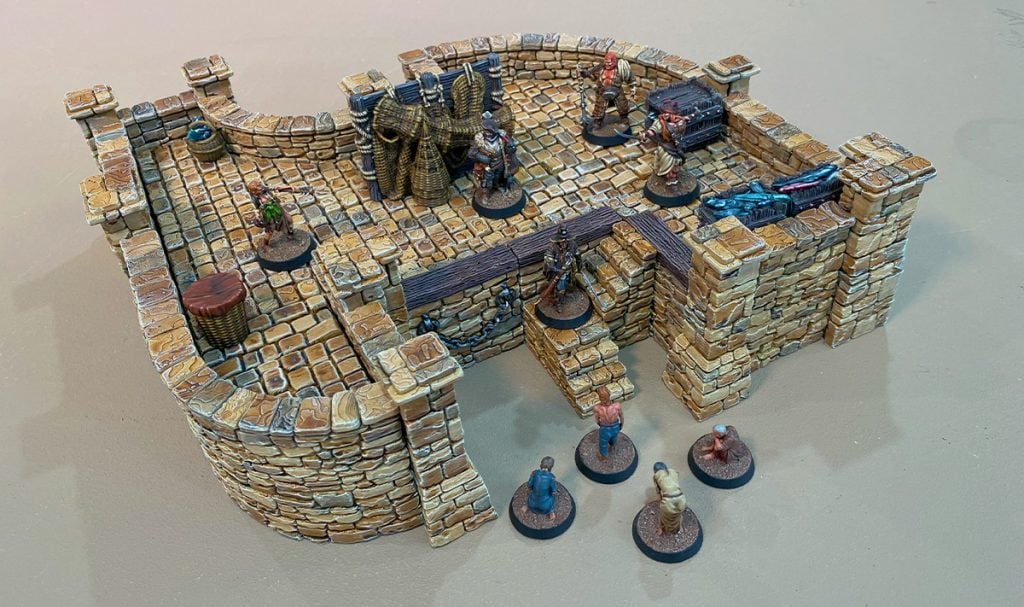
The City Foundations tiles make the perfect terrain board for your next DND campaign or wargaming addiction. Now that the foundations look good, how about adding some sweet, ruined, Ramshackle buildings on top? Explore the full range here.
hello i love the bundle and Thanks for the help can we get a pdf emailed out of this to have for future reference Matt?
Yes for sure, I’ll do an update next week to include PDF references.
hey Matt i know your busy and just wondering about the pdf and how it’s going? Cheers
Hi, we’ve added the PDF download link at the bottom of the page. Cheers
i have terrain tinkerer as well.
Is the Ramshackle & Ruin bundle still being offered?
We only have them as separate bundles after the campaign closes.
Can you please show how the bridges attach to wall/foundation tiles?
Thanks for reaching out. We are currently making an update to the bridge and a blog on how to connect it.