Building a modular Ramshackle board for gaming
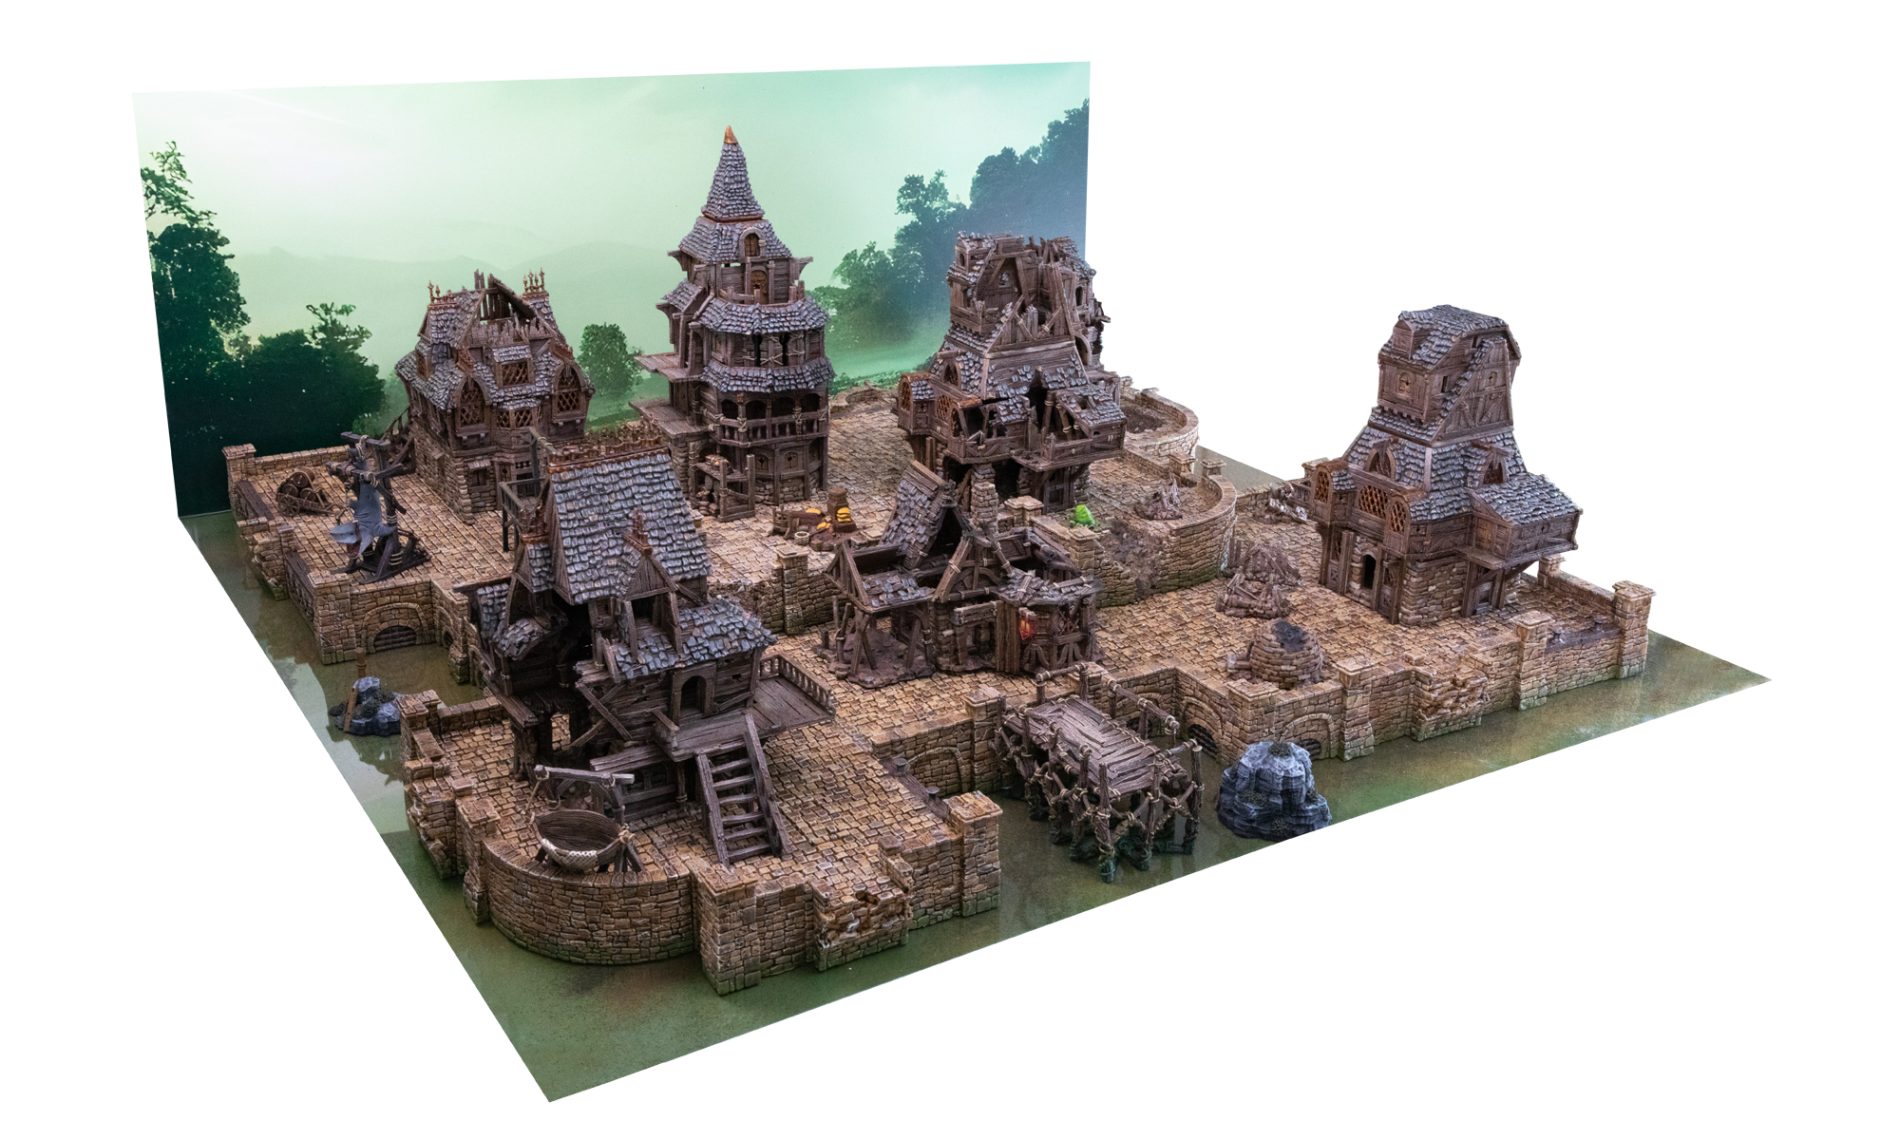
Warbands fight on cobblestone streets, ruins filled with danger and loot, and tall buildings for dramatic leaps of faith. These are all dream scenarios for fantasy wargamers and role-players. But having the right kind of board that enables this and gives you a different experience each time you play on it can take some work. The Cities of Ramshackle & Ruin terrain set is perfect for creating these environments, so we built a modular board for gaming with it.
Why modular
Going with a modular game board gives us many advantages. We can transport and store it more easily, design it more easily, and adjust it for the size or type of game we want to play. Using the same board multiple times doesn’t have to get stale when you can rotate, flip, swap buildings in and out, and change scatter terrain each time you play.
Here you can see the four islands we’ve created. These are designed on 2×2 templates (links to the Terrain Tinker files below) that can combine to create a number of configurations. You can play very small on a 2×2, a longer 4×4, or a standard 4×4. The use of docks means we can have a large water area in the center or edge of a 6×4.
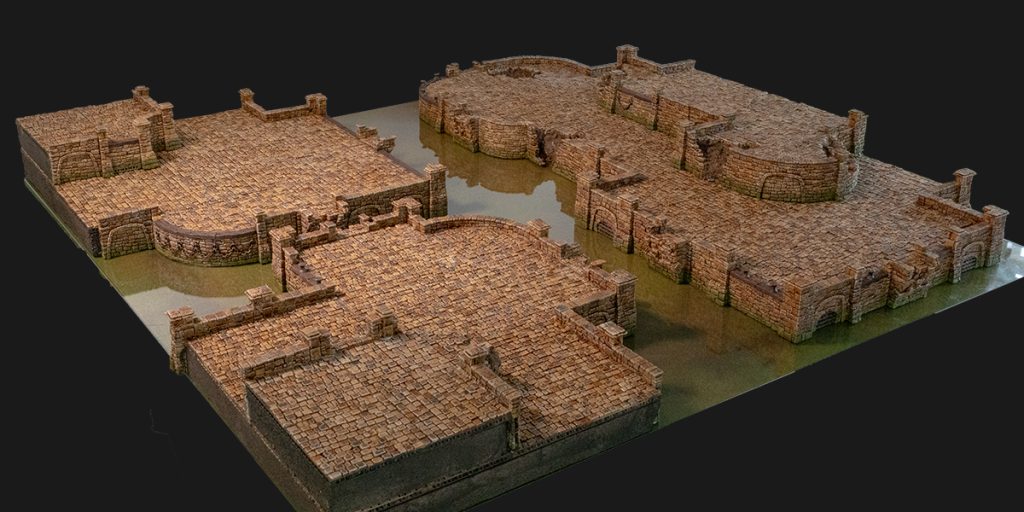
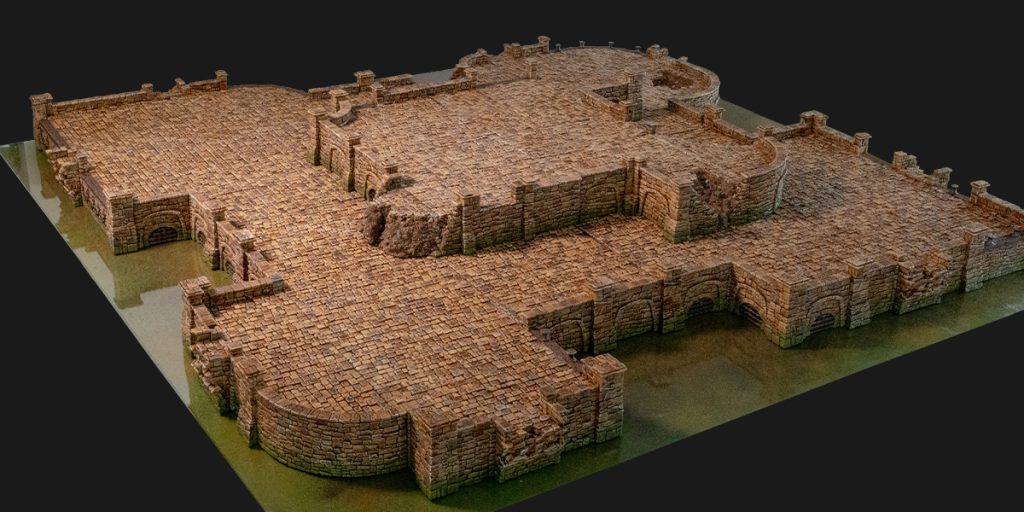
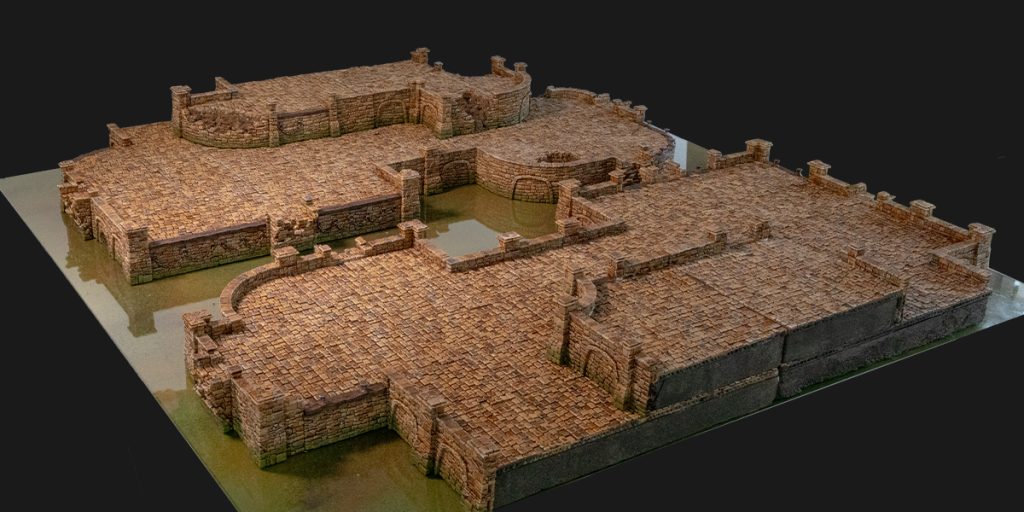
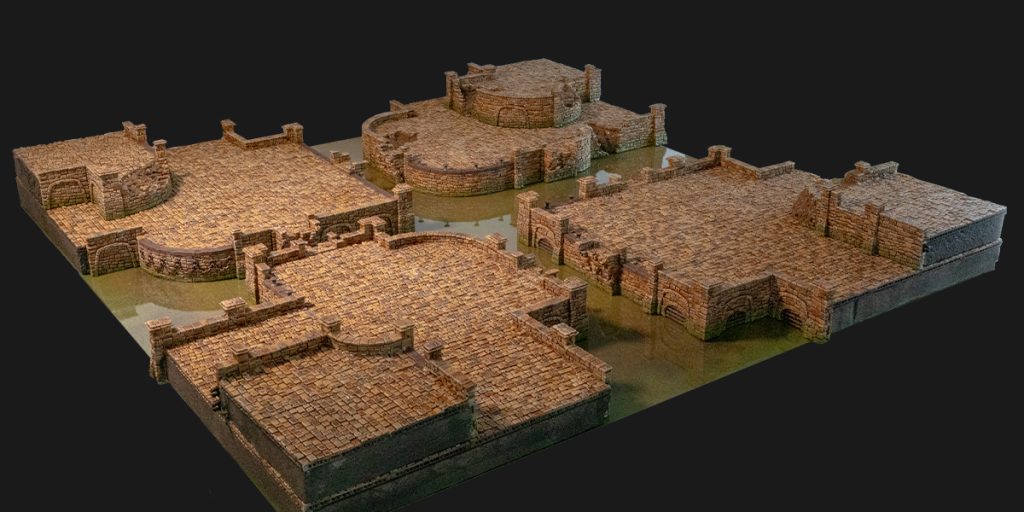
It’s also designed so that all the edges and bridges line up in any configuration. This means we can flip, combine, or rotate them, and it will always work. The platform on top is separate, too, so we can further customize how we arrange the modular platform pieces. Read on to see some examples of how we configured it.
How to build it
From here, we’ll go in-depth on how we designed and assembled it. We will cover the painting in a future post. If you want to follow along, you’ll need:
- The Cities of Ramshackle and Ruin City Foundations pack
- The Ruined City Foundations
- A design (you can use ours or make your own), we recommend Terrain Tinker (Links Below) for designing your foundations
- A 3D printer
- The printed parts and OpenLOCK clips
- Some polystyrene (or the new supports from the updated City Foundations pack if you want yours to be more modular)
- Hot glue and PVA (again, only if you don’t want yours to be modular otherwise, OpenLOCK clips will be fine)
- Paints and Brushes
- Box-cutter
- A 4×4 board, we recommend 4x MDF in 2×2, or a vinyl gaming mat
- Some Ramshackle buildings to dress the top (take your pick; these can be switched out whenever)
Planning
Like any big project, it pays to have a plan. As mentioned, we set ourselves some guidelines for the project to inform our design decisions. We wanted it to be 4×4 for use with various skirmish games. We wanted it to be modular in the way it was assembled but not require a full re-outfit anytime we wanted to game. We wanted the ability to build on it later. Most of all, we wanted it to be fun and exciting to play on.
We used Terrain Tinker to design our city foundations. It has all the necessary components and is easy to assemble our terrain. If you’d to see how we built it or to use it yourself, you can access the designs here.
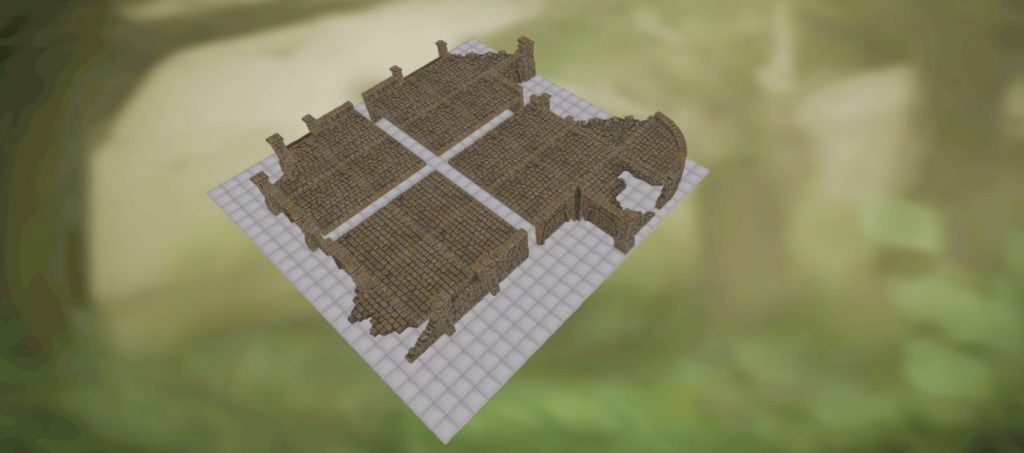
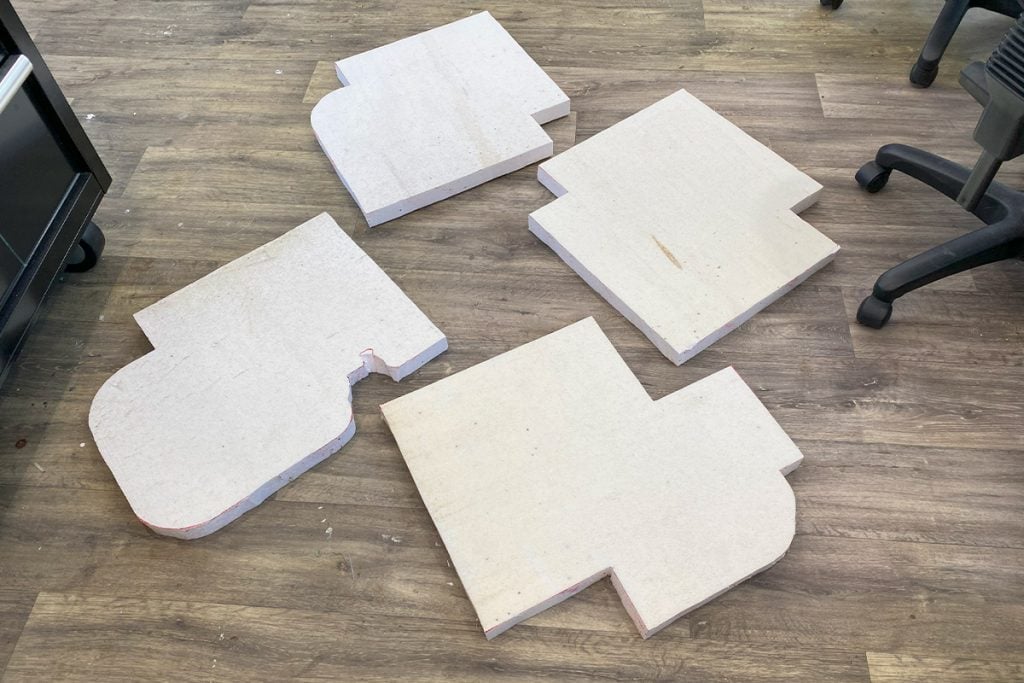
This was a long process of back-and-forth, and math was even involved. This design allows us to rotate the boards and swap them around so we have four islands, one large island, or a large canal, and the raised platform can be moved and rotated, too. There is a good balance of land and sea for adding wooden platforms and bridges later and enough land mass to place the Ramshackle buildings with room for figures to maneuver around.
Assembly
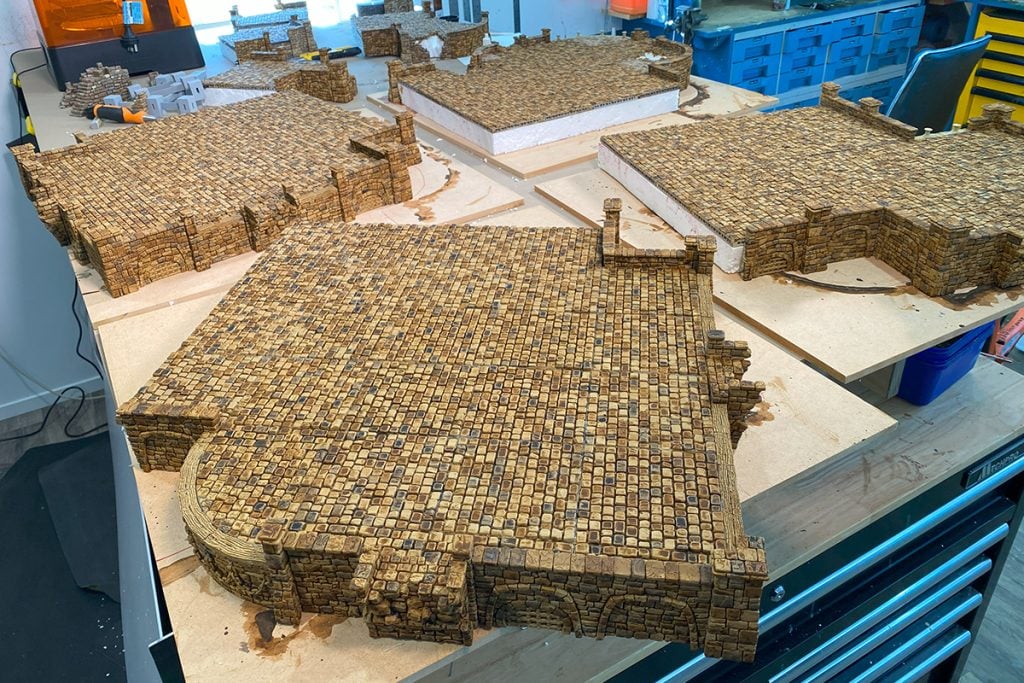
From here, we could export all the components needed for printing, which was a long list. Several days later, we had roughly 350 bits to clean, prime, and assemble.
We did some push fits to ensure it all fit together as intended, and luckily, the design checked out for us. We wanted to get as much of the painting done all in one go, so instead of painting it bit by bit like we started to, we pushed ahead with assembly.
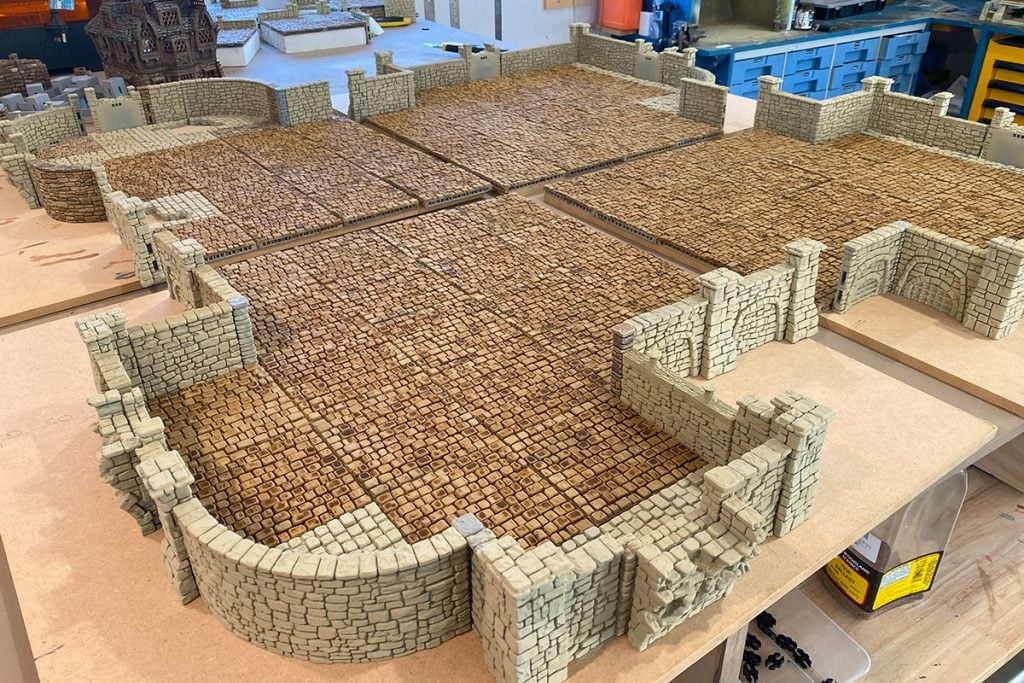
We hot-glued our floors together into their 2×2 blocks. We did this because we knew having separate floor pieces wasn’t part of our intention. We knew we wanted to lock in these shapes, so the hot glue kept them firmly together. We did this in sections of the 2×2 on a flat surface to keep the floors flat, adding piece by piece with the hot glue until it was all one large “plate.”
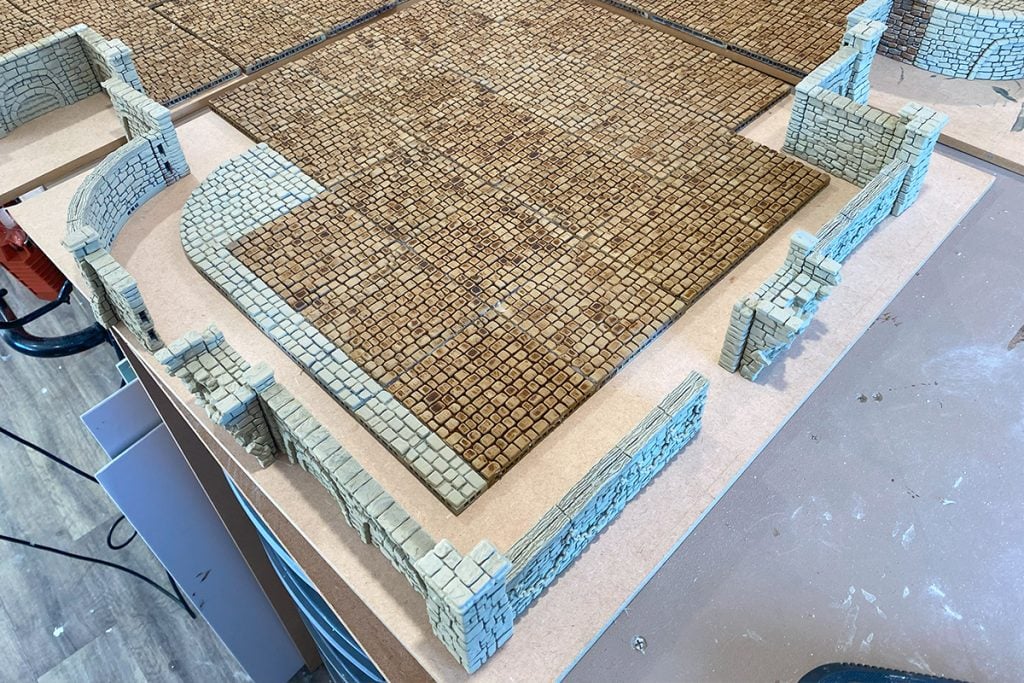
We did something similar with the walls, using clips here and there for extra stability. To avoid assembly complications, we glued these in corner sections so they could be placed after the floor was raised.
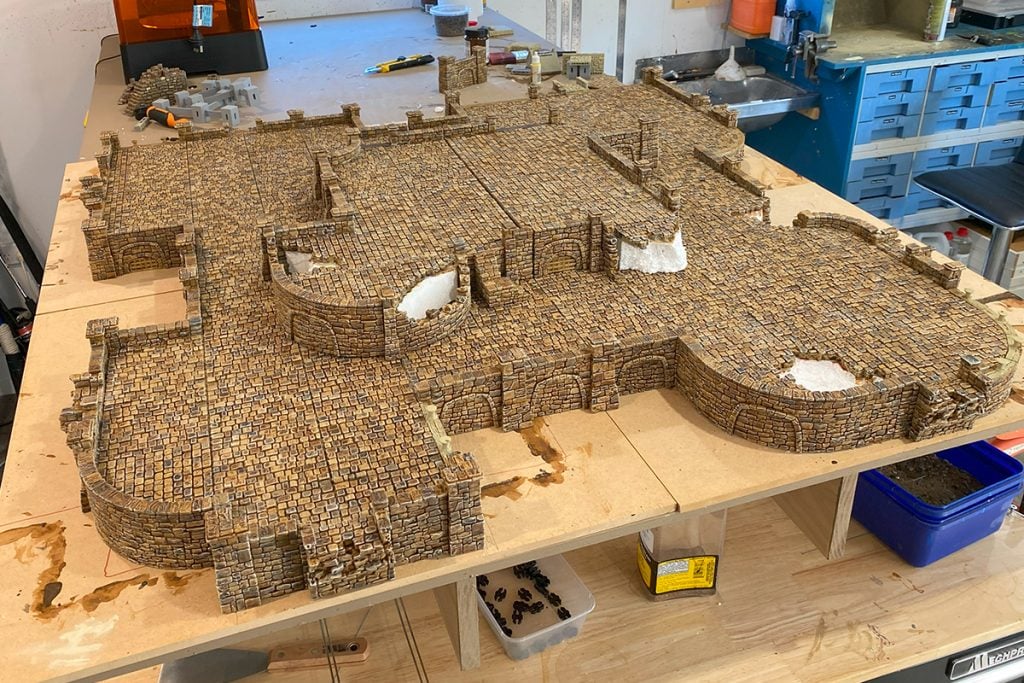
Speaking of this build, we decided to use polystyrene for raising our floors because we knew it was going to be a permanent fixture. If you’re looking to make your board fully modular, we recommend the new supports from the updated City Foundations pack.
We glued these down using hot glue for time reasons, but PVA would have been better here and left overnight. After trimming the polystyrene down, these weirdly large jigsaw pieces are ready for walls.
Painting
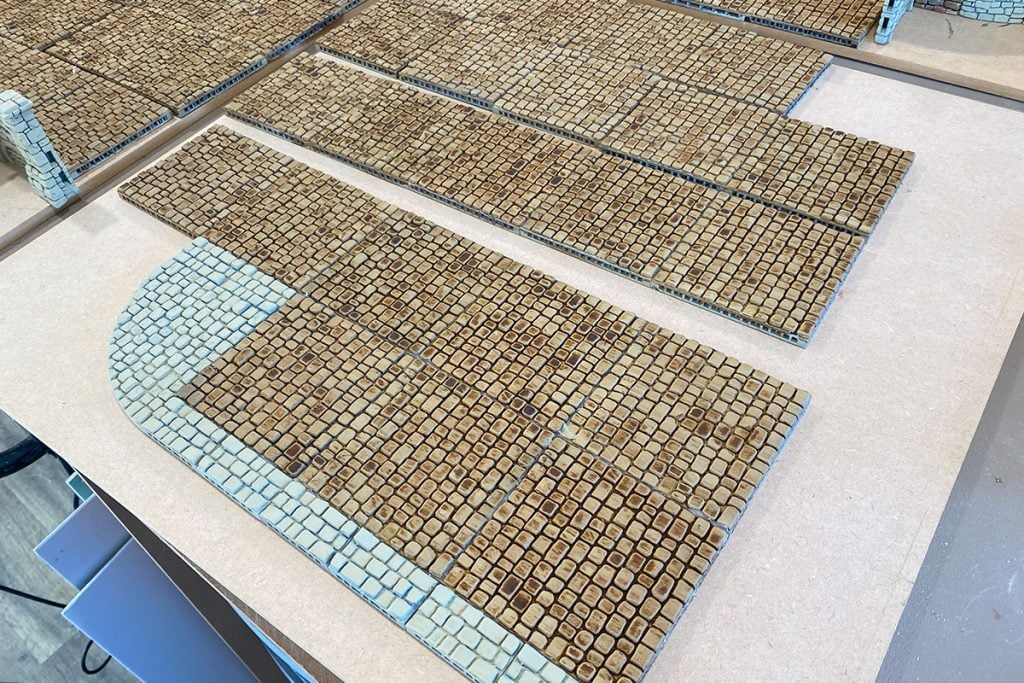
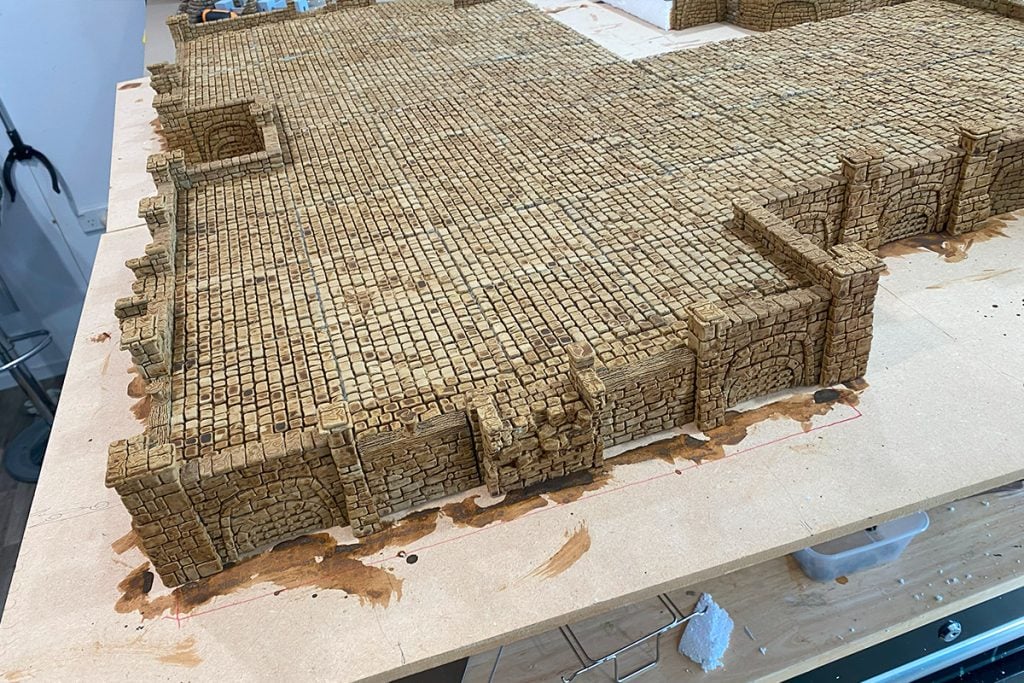
We then placed the walls around our shapes and stuck them in place with some hot glue around the floor edges. We also started the process of painting them, starting with the extensive use of Sepia wash.
We then picked out some bricks in a black wash and some in another coat of sepia. This took a while, but it was totally worth it. The trick here is to be as random as possible and not overthink it. As soon as you start thinking about your bricks, you start making patterns.
And then it was time for some dry brushing. We went with a high-contrast bone colour for this scheme, and the trick with bricks like these when you want realism is to keep your brush strokes always going down. This simulates highlights, looks awesome with the texture, and works well as you normally look down at terrain.
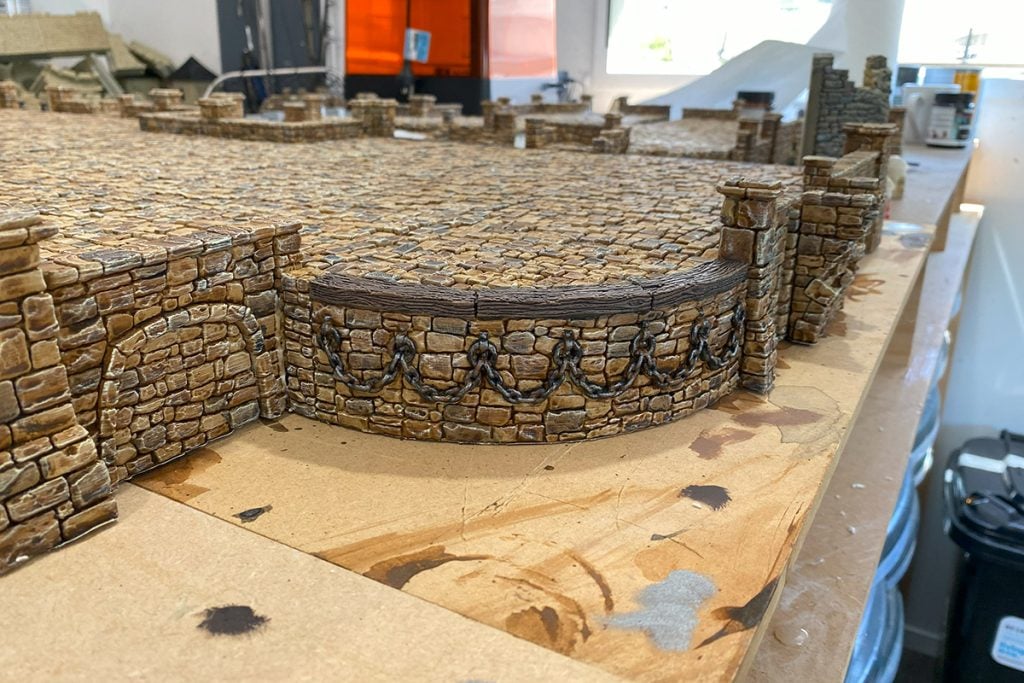
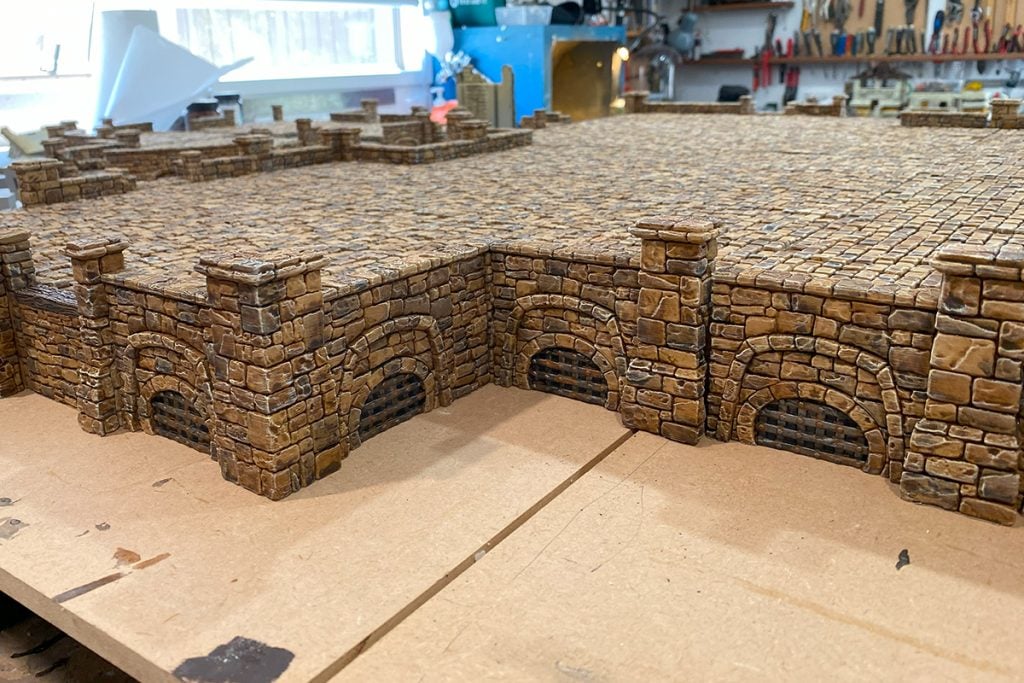
And then on to picking out details. Fortunately, for this set, the details are minimal: some chains, sewage grates, wood edges, and bollards.
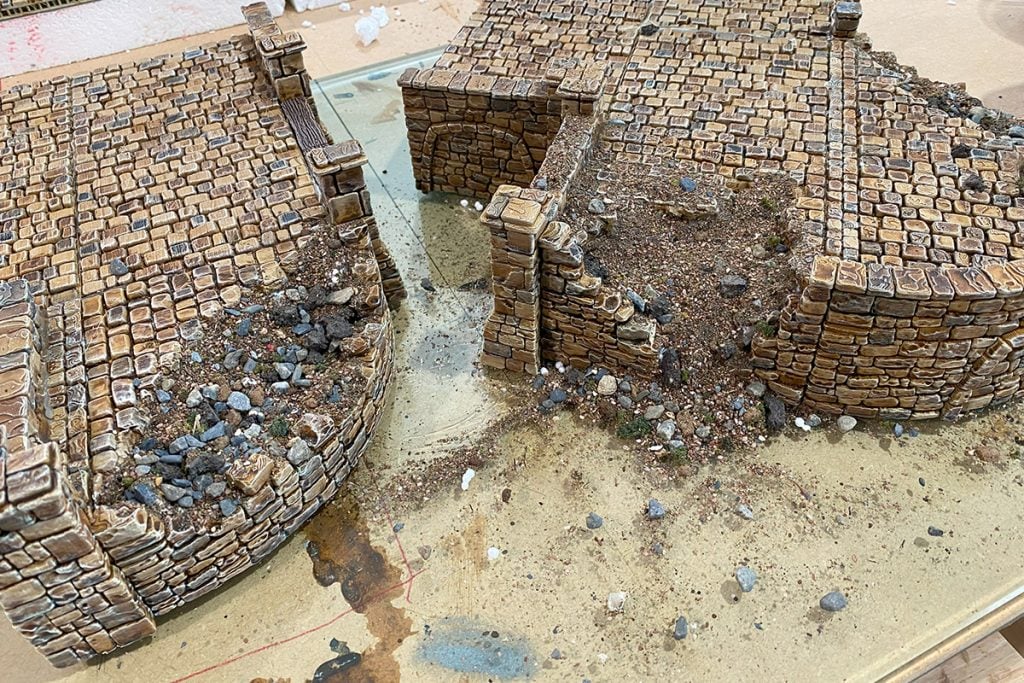
For the ruined elements of the foundations, we plugged the gaps with leftover polystyrene and covered them in PVA and a mix of sand and rocks. We did our best to match the colour and tone of the terrain. The idea here is that it looks like the dirt and rock holding up the foundations are crumbling away.
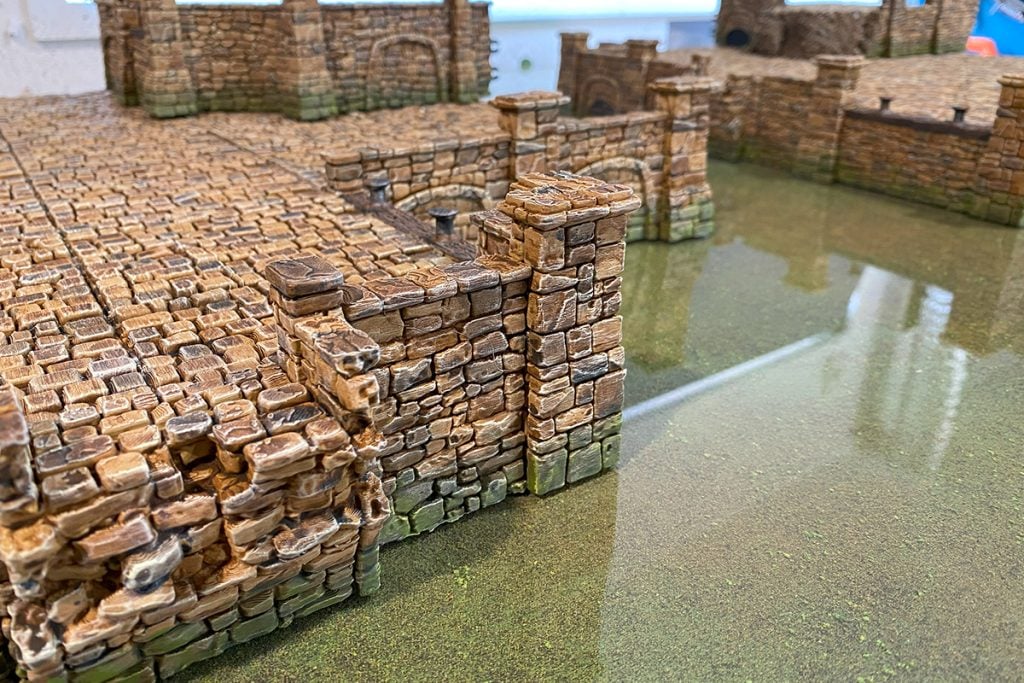
We wanted a murky green water environment for our board, so we used green enamel paints from AK Interactive to add some moss to the bottom portion of the walls. This helps blend it into the board.
Final touches
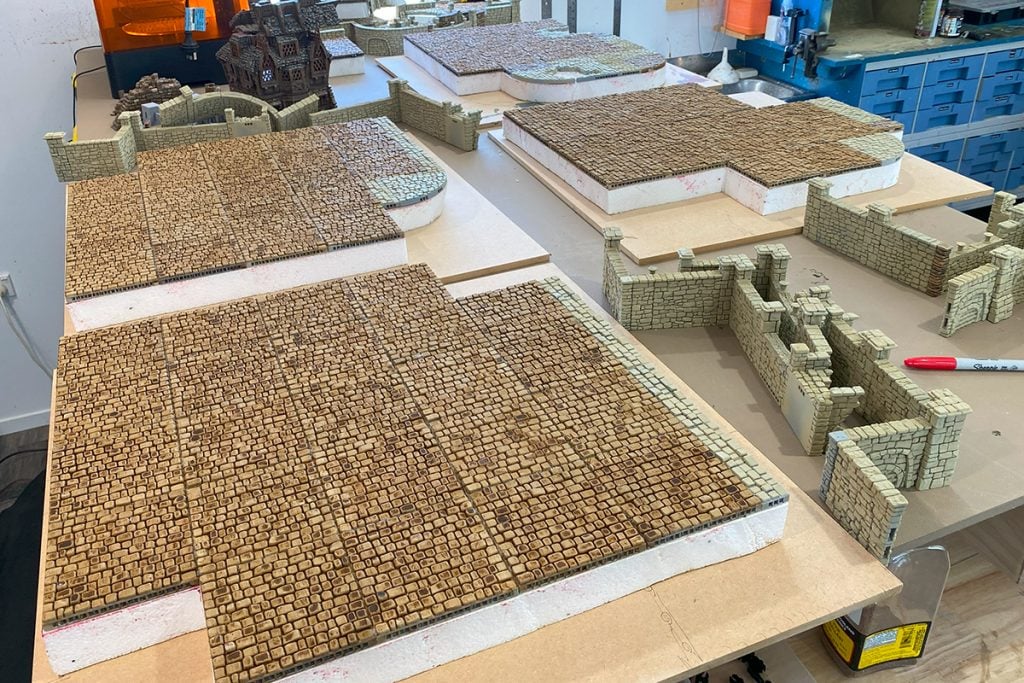
We’re now ready to lay out our boards. Keeping them in blocks makes them really versatile. Here, you can see how we can rotate them, flip them, make islands of them, and make a canal between them.
And finally, we can dress our board and begin gaming! We had some Ramshackle buildings ready to go and a bunch of scatter terrain to dress it for a game. The backdrop is just for flair.
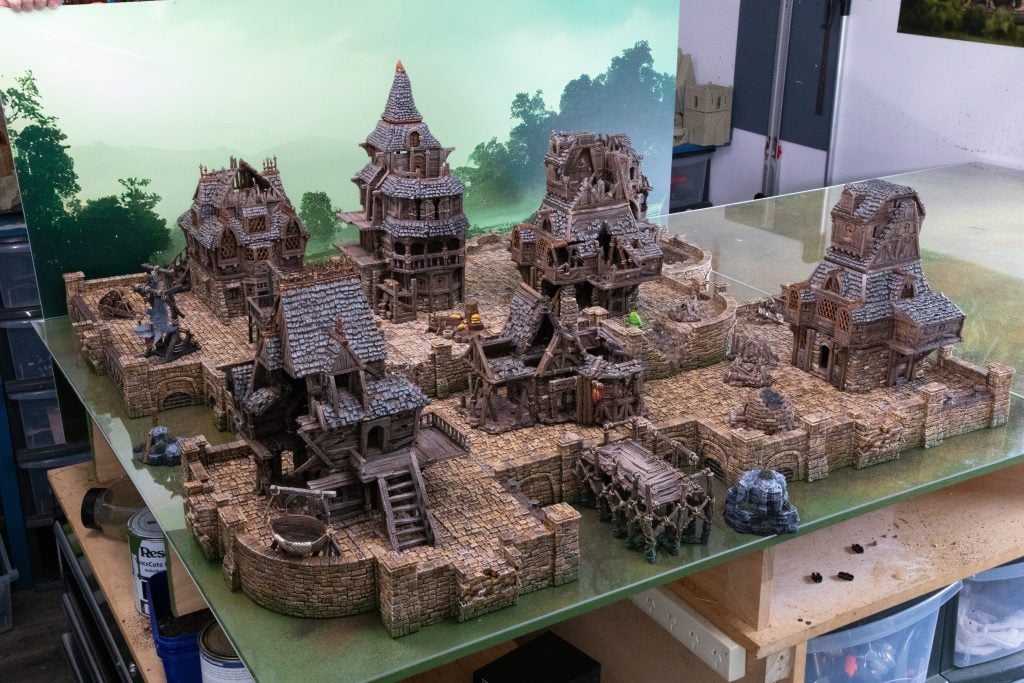
This board was easy and fun to assemble and ticked all the criteria we set out to achieve. It’s also easy to transport and works just fine on a vinyl mat, ideal for taking to your LGS or a friend’s house. If you want to create something like this, you can find all the STL files for the Cities of Ramshackle and Ruin here. Happy building!
This is very helpful. Thank you Sloane. Really appreciate the TT layouts also. Is that just a glass table-top you have the boards on? I have all the parts printed already, mostly. So this will be a fun project to create playable boards. Thank you for this. I can see a lot of work went in to it’s creation.
Thanks Jeremy! It was a lot of fun. Its not glass, we got some perspex sheets from our local hardware store, but glass will be better if you have as the perspex scratches easily. Have fun with yours!
Brilliant. Spectacular execution.
Never underestimate the power of a simple backdrop to really sell a glamor shot too 😀 It really gives the model some great contrast (vs. blurred shop background)
Thanks for sharing!
It’s great to see build guides like this (and hopefully there will be more in the future) as sometimes looking at the photographs it is hard to understand what objects have been used.
Thanks! Glad you like it. Totally understand it can be a bit difficult to pinpoint each part, that’s why we linked to the Terrain Tinker build as well so you can get in and set it all piece by piece
Any paint guides for this?
We’re working on some, so watch this space 🙂
Awesome, thanks!
Just started printing some of these tiles to make a city board! Eagerly awaiting the paint guide!
Hey, here’s the paint guide, we had to hold off as we ended up using the scheme for Throne & Ash https://www.printablescenery.com/2025/04/29/how-to-paint-castle-bricks
Most of the individual buildings in Ramshackle have detailed paint guides – follow through the linked images till you find it – i think there may be enough info to help us paint this diorama.
Sorry to clarify for the Ramshackle buildings and beige ground/stone work? Thanks and looks great!
What width is your polystyrene here? And I assume you could use this same approach with say the clorehaven pack substituting the schist walls and cobblestone floors? (I currently use the Clorehaven set for the “nice” part of town 🙂 )
Also wish to know this!
Seeking this info as well. What thickness of polystyrene (etc) is needed to raise the grounds to the level shown?
Just found the OL-Riser-v1.0 recommended above and it is 1.5″ high. I guess that answers this question.
Is there a printing list of the different corners / platform? As I do not have access to a paid Terrain Tinker account.
Hi, by my count it should be:
A-High-Wall-CFB – 7
A-Port-Side-Wall-CFB – 1
A-Port-Side-Wall-w-bollard-CFB – 1
A-Wall-CFB – 1
AS-Floor-CFB – 1
BA-High-Wall-CFB – 3
BA-High-Wall-CFB-Ruins-Opt2 – 2
C-Port-Side-Wall-CFB – 1
C-Port-Side-Wall-w-bollard-CFB – 1
C-Wall-CFB-Ruins-Opt3 – 1
D-High-Wall-Arch-CFB – 14
D-High-Wall-CFB – 2
D-High-Wall-Grate-CFB – 10
D-High-Wall1-CFB-Ruins-Opt2 – 1
D-Port-Side-Wall-w-chain-CFB – 1
DD-High-Wall-CFB – 1
E-Floor-CFB – 15
F-Floor-CFB – 1
G-High-Wall-CFB – 1
G-Wall-Inside-CFB – 1
I-Column-CFB – 1
I-High-Wall-Column-Buttress-CFB – 12
I-High-Wall-Column-CFB – 3
IA-High-Wall-Buttress-CFB – 9
IA-High-Wall-CFB – 6
IA-High-Wall-CFB-Ruins-Opt1 – 1
IA-High-Wall-CFB-Ruins-Opt2 – 1
IA-High-Wall-Inside-Corner-CFB – 1
IA-High-Wall-Outside-Corner-CFB – 9
IA-Port-Side-Wall-w-chain-CFB – 1
L-High-Wall-Column-Buttress-CFB – 3
L-High-Wall-Column2-CFB – 11
Q-Floor-CFB – 3
Q-Port-Side-Wall-w-bollard-CFB – 2
Q-Port-Side-Wall-w-chain-CFB – 2
QA-Port-Side-Wall-w-chain-CFB – 1
Ramshackle-Bridge-D-End-Wall-Opt2-CFB – 1
Ramshackle-Ruin-Bridge-Arch1-Part-1-CFB – 6
Ramshackle-Ruin-Bridge-Arch2-Part-1-CFB – 2
Ramshackle-Ruin-Bridge-D-Wall-Mid-Opt1-CFB – 8
S-Floor-CFB – 17
TA-Floor-CFB – 1
U-Floor-CFB – 95
U-Floor-Ruin-CFB – 2
U-Floor2-Ruin-CFB – 3
U-Floor3-Ruin-CFB – 1
V-Floor-CFB – 4
V-Floor-Ruin-CFB – 1
X-High-Wall-CFB – 1
X-High-Wall-Out-Arch-CFB – 2
X-Port-Side-Wall-w-bollard-CFB – 1
X-Port-Side-Wall-w-chain-CFB – 1
X-Wall1-CFB-Ruins-Opt2 – 2
I have discovered that following the links, above, for any of the sections (under Planning, select “Section A” for example) will open the entire quadrant in Terrain Tinker. Then select REMIX (you’ll have to log in) and Tinker will load the original design. Then, you may select any individual component and Tinker will (very slowly) display the actual part number for the item selected.
By the way, i also use this method to identify, select and GROUP several components together for printing. (export “3D print”!?) as a single piece) – (truly horrible interface, menus and mechanics).
Absolutely giddy about these designs, this article and the Ramshackle campaign overall! Well done!
What is that murky water board made of? I’ve been wanting to make something like that for a while and it’s perfect! Epoxy pour? I wonder if an acrylic sheet over a water battlemat would produce a similar result without having to deal with a resin pour?
Hi Levi, that’s exactly what we used as well, saves a lot of time for sure