Building a 3D Printed Island Castle Diorama
In this article, we’re going to cover building an Island Diorama for a 3D printed castle using our Throne & Ash models. We’ll show how to build the castle board, paint it, and finish it ready for setting up your castle encounter or wargame. We built our castle on a 6×4-foot table, but you can scale this down to any size you wish; the techniques will be the same.
This tutorial covers some techniques and materials that are potentially dangerous & hazardous, so as always, use protective hand and facewear and do this in a room with plenty of airflow.
To build this Island Castle Diorama, you’ll need the following:
- 6×4-foot sheet of 40mm Polystyrene
- Paint brushes
- Box cutter knife
- Expanding foam
- Skeleton Bone paint (we used house paint you’d find at a hardware store)
- Sepia and Black washes (we used Vallejo dipping formula, watered down)
- Blue paint (for the water)
- Brown paint (for the Earth)
- PVA
- Mixture of green flocks
- White paint (for waves)
- Throne & Ash Models for building your castle
Planning the Island Castle Build
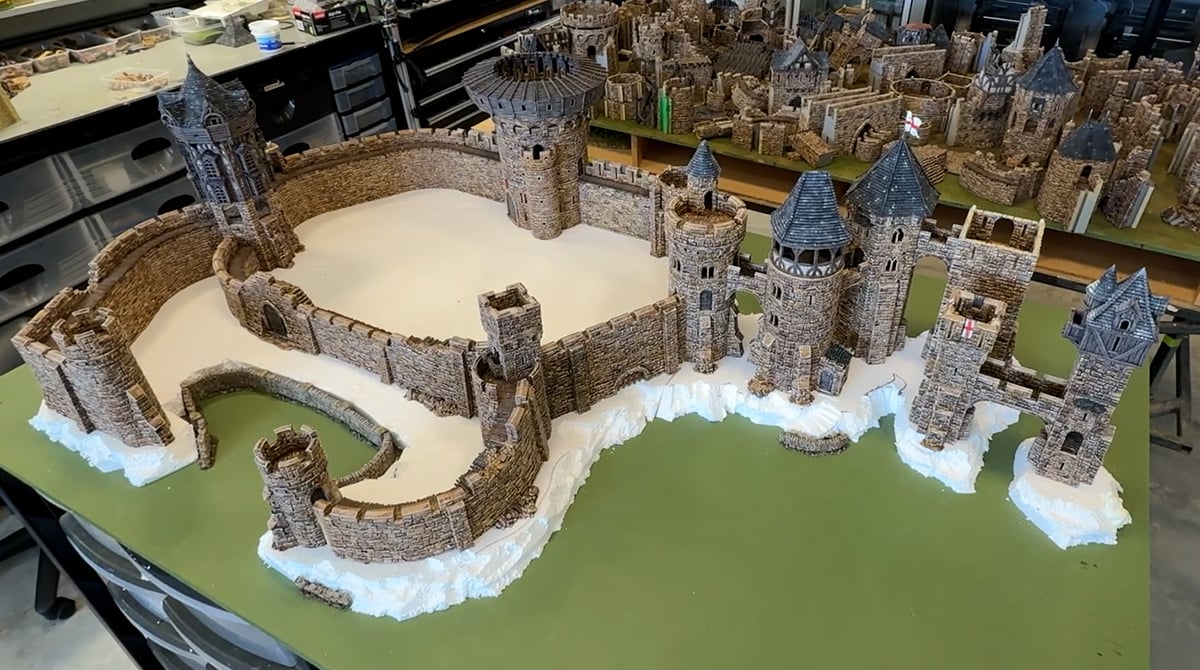
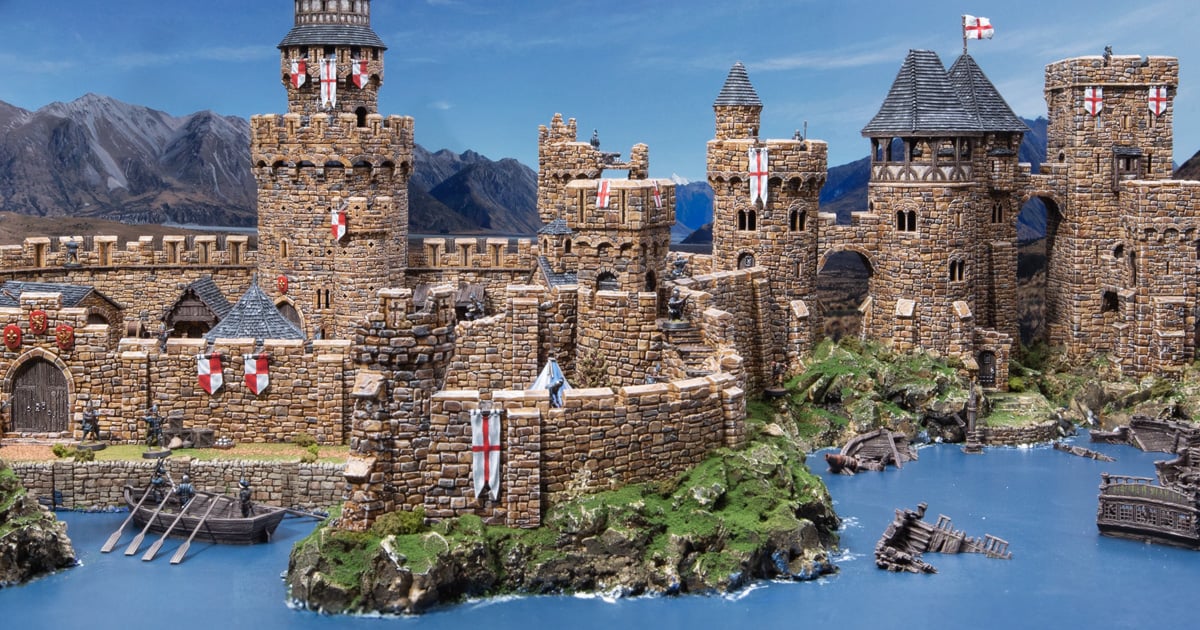
The first step is to plan your castle layout, as this will dictate everything else. We wanted our layout to utilise the new Tower Bridges, so we arranged a selection of round, hex, and square towers across a rocky outcropping. Using our Throne & Ash models, we built our castle on the polystyrene sheet, then we used a marker pen to draw out the shape to cut and roughly hacked it into shape.
The main part of the castle is arranged around the Round Keep and a port area, with Small Round Towers serving as watchtowers. We used some fences from the King & Country range along the port side edge, but Low Castle Walls from Throne & Ash would work here too, with a step up to them.
Building the Island Castle
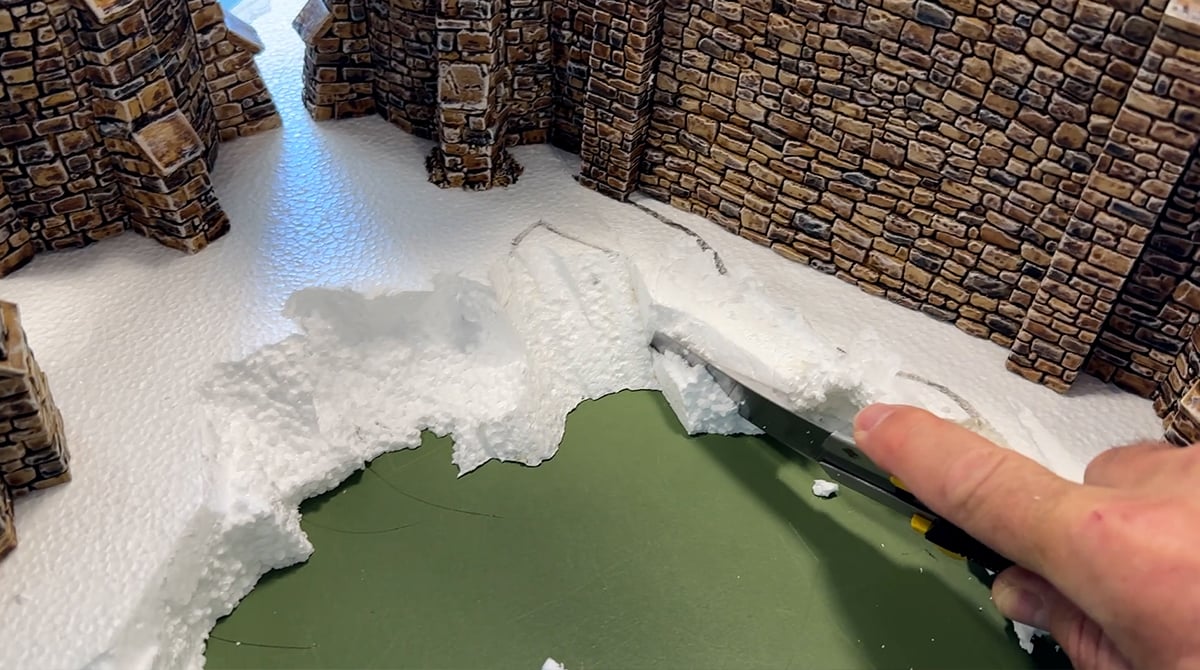
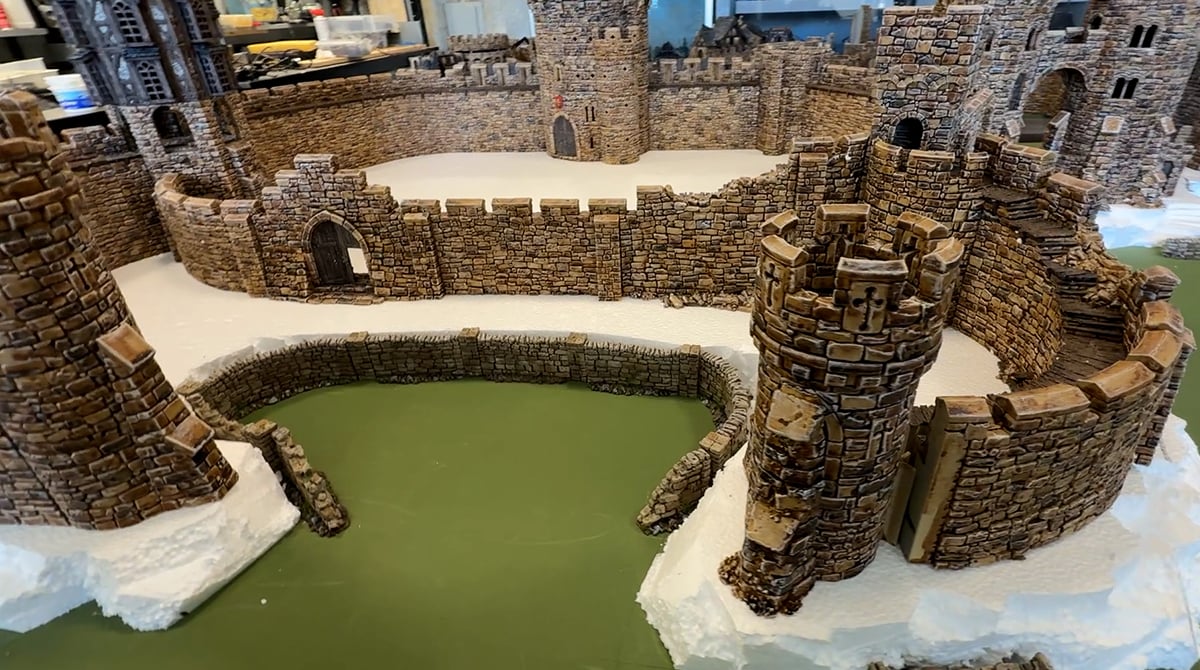
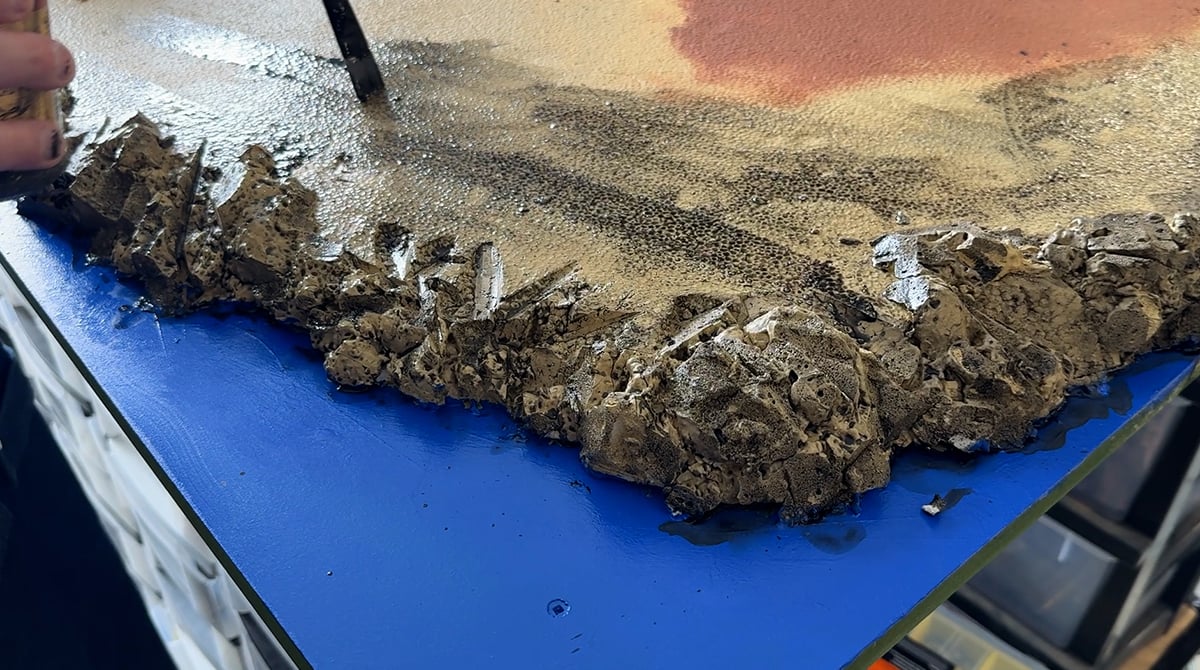
Once you have the layout roughly cut, you can refine the edge of your cliff. We used our box cutter to trim and shave the edges into a more natural shape.

We then used a can of expanding foam with a long nozzle to bulk out and create some variation in areas. This step is great for blending your rocky cliffs into the castle walls, but be aware it sticks to anything it touches, so you’d better commit to your castle layout after this step.
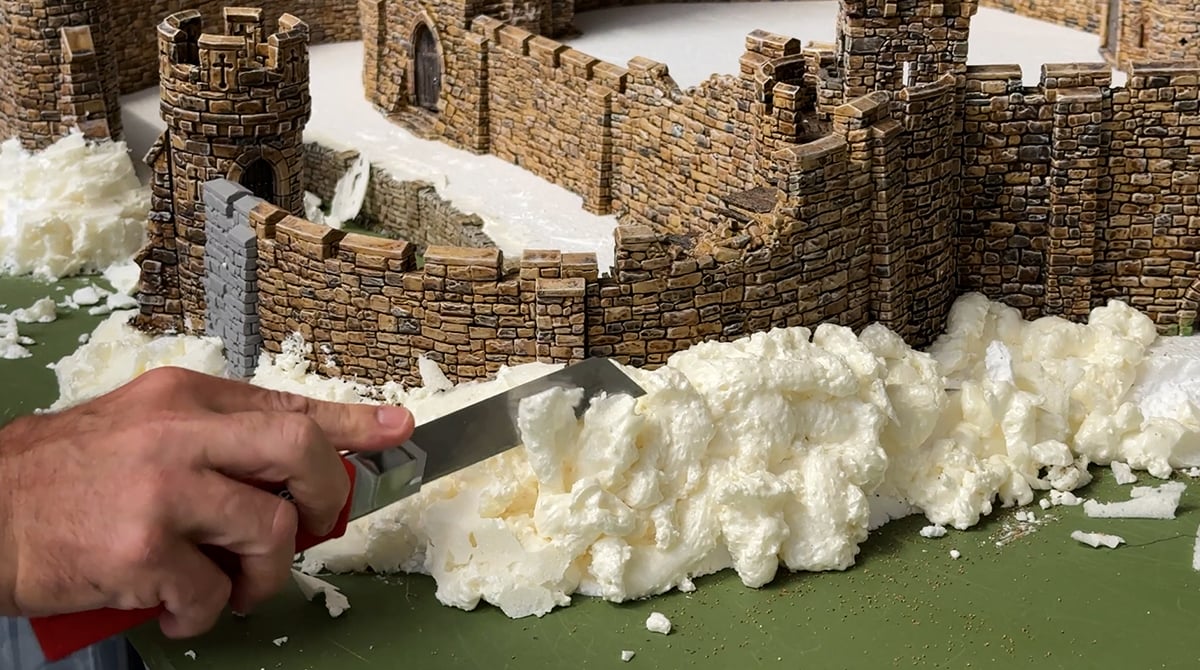
And like we did with trimming the poly, we also trimmed down the expanding foam to remove the bulbous shape left behind by it. The texture left behind is very porous and looks quite naturally rocky.
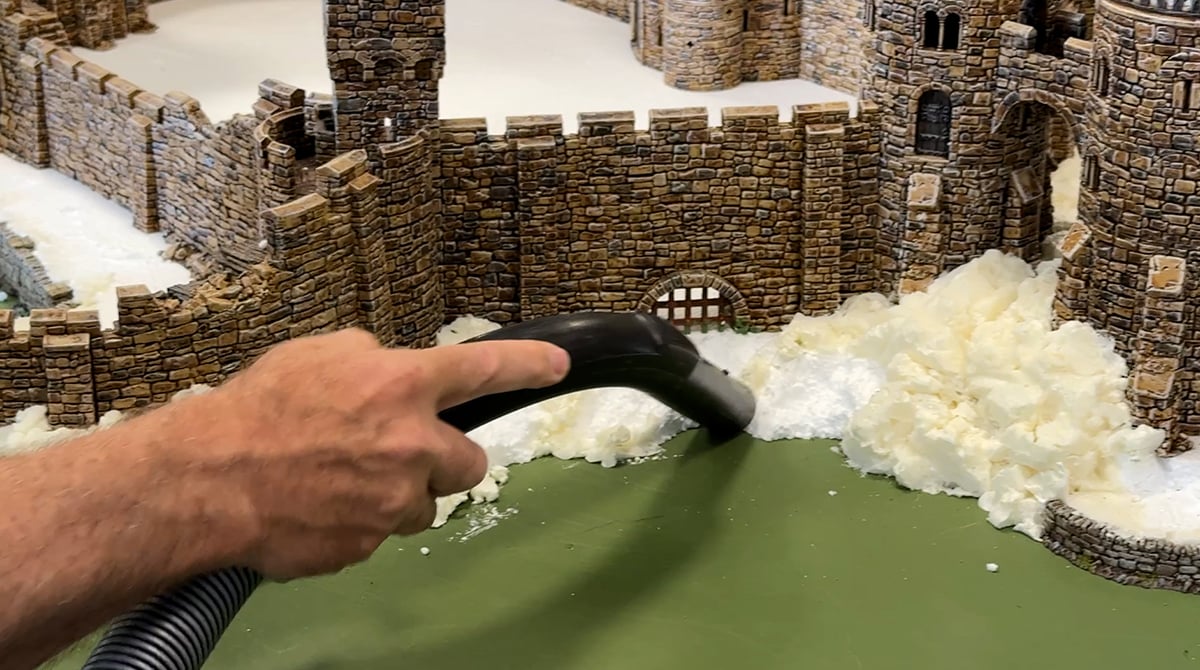
The final step before painting is to clean up with a vacuum. Cutting polystyrene and foam leaves behind hundreds of little balls and shavings that can be a nightmare to find during or after painting.
Painting the Island Castle
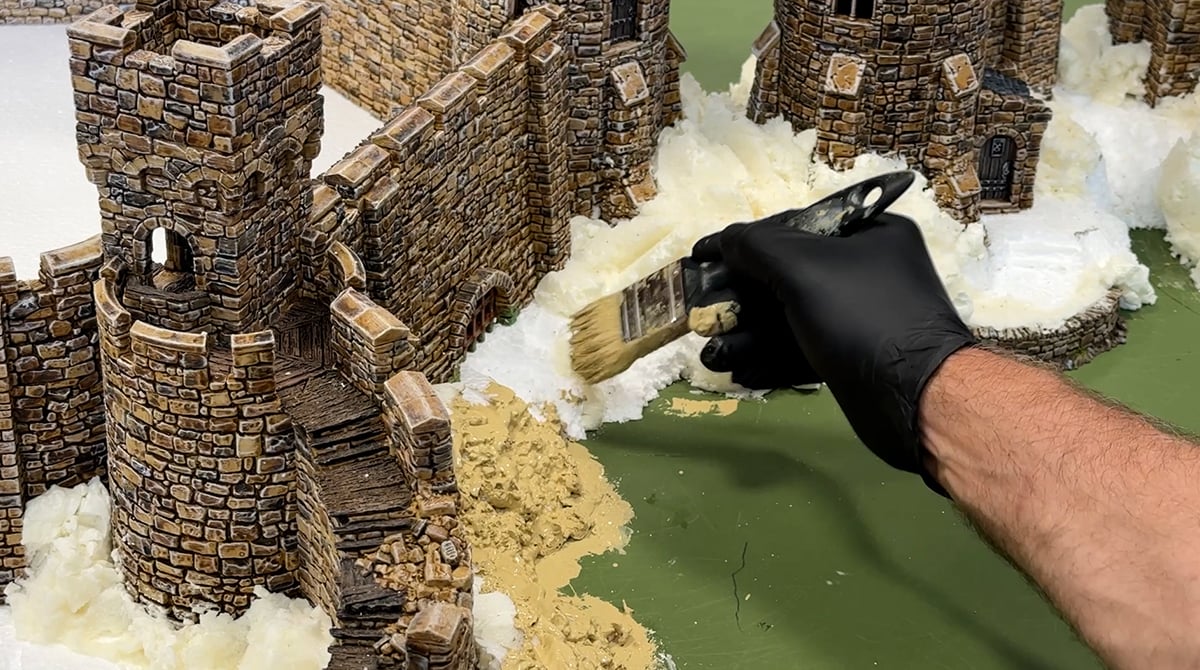
The next step is to paint all of the polystyrene and foam with skeleton bone. This is a delicate balance of getting a lot of paint on your brush to work it into all the cracks and crevasses and the absorbent foam, while not getting any paint on your castle walls (if you were like us and painted those first).
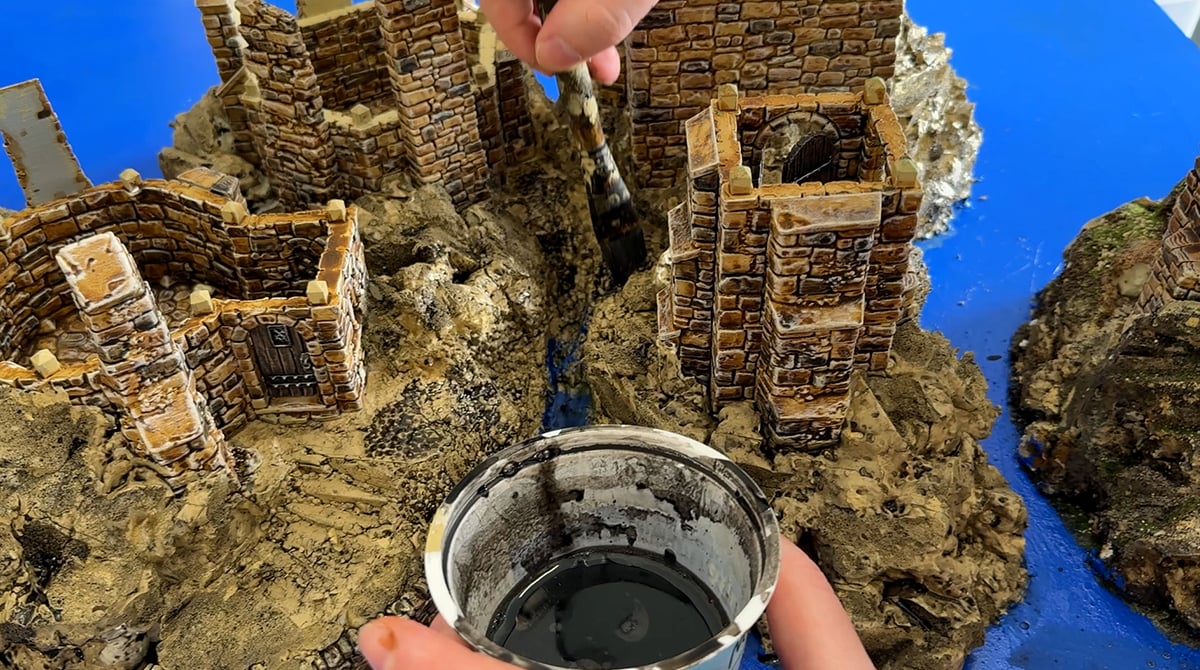
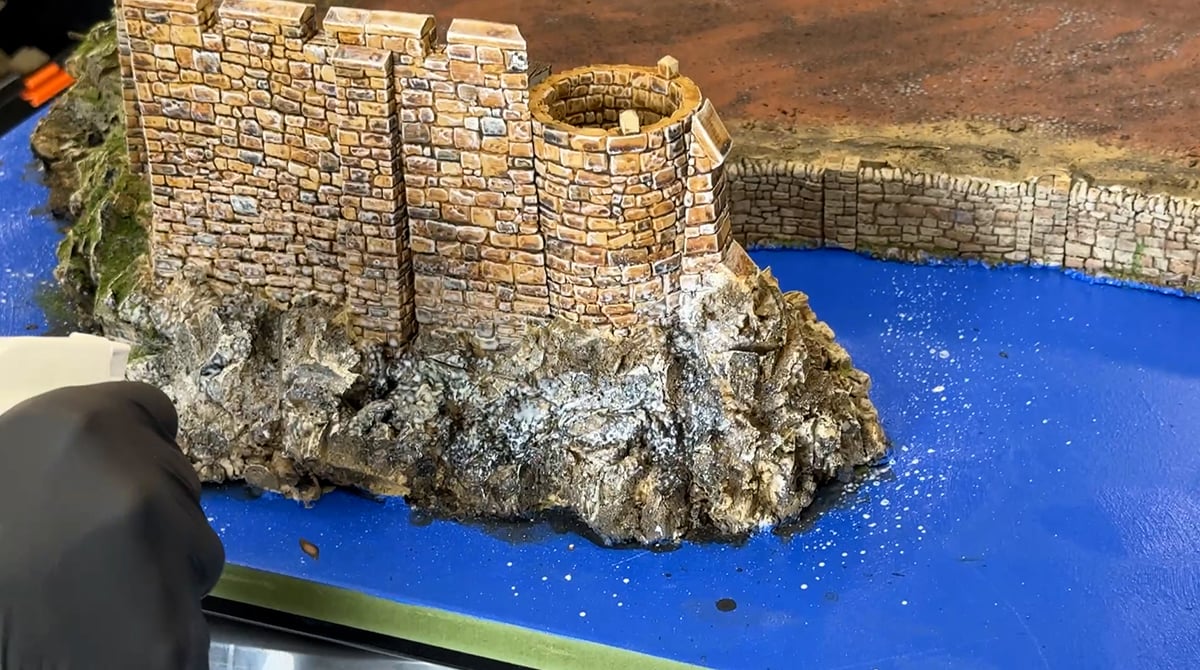
Once that is dry, you can begin washing the entire area in the watered-down black wash. Be quite generous here to make sure it gets into all the cracks. It was also at this point that we did our first coat of blue for the water base. Our first blue was a bit too vivid, so we came back and tweaked it later.
For the flat areas of the island, we painted them our warm brown colour, then gave everything the same black wash. This is just a base for what will eventually be covered in green flock.
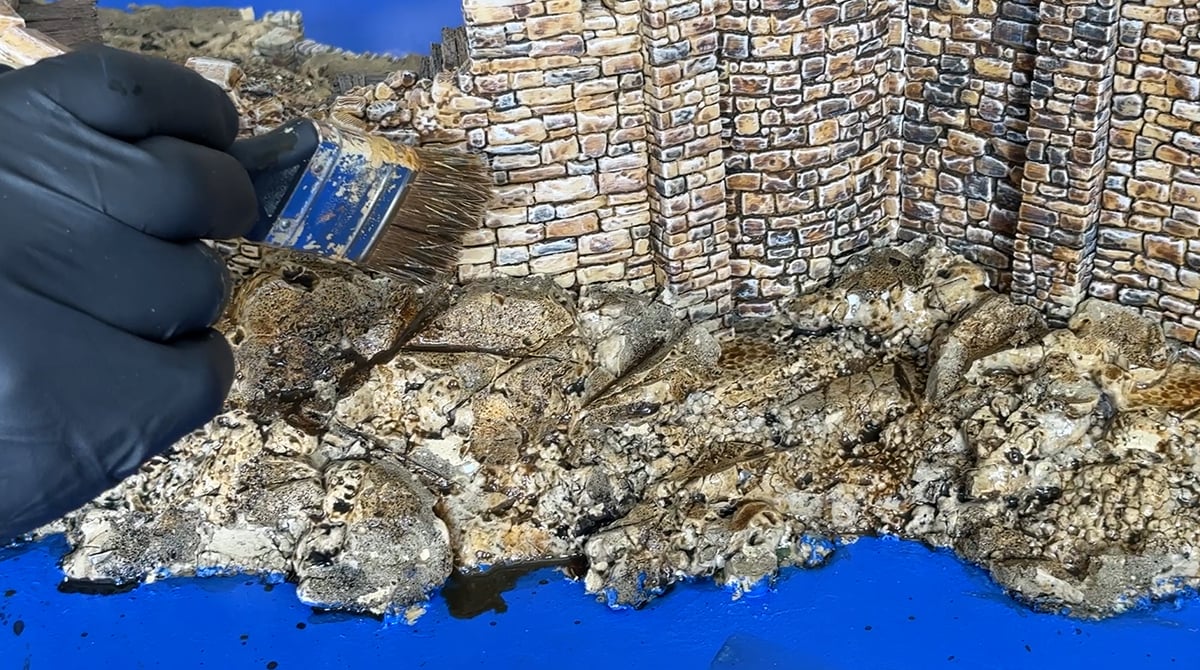
To get some variation in the rocky cliffs, we used some watered-down sepia, the same sepia we use in the castle brick recipe. We don’t cover the rocks with this; instead, just drop some wash on areas and let it run down the surface. This helps with the castle walls into the rocky cliffs and makes them look as if they were built using bricks from this island.
We use this same technique of letting it drip down the rocks with the black wash mix. We focus this on the recess areas to add definition to the rocky surface.
Once your washes are dry, you can go over the whole board with a drybrush using the skeleton bone paint. You can be very generous here, loading the brushing more than you normally would for a drybrush, as the added contrast from a heavy drybrush really pays off.
Finishing the Island Castle
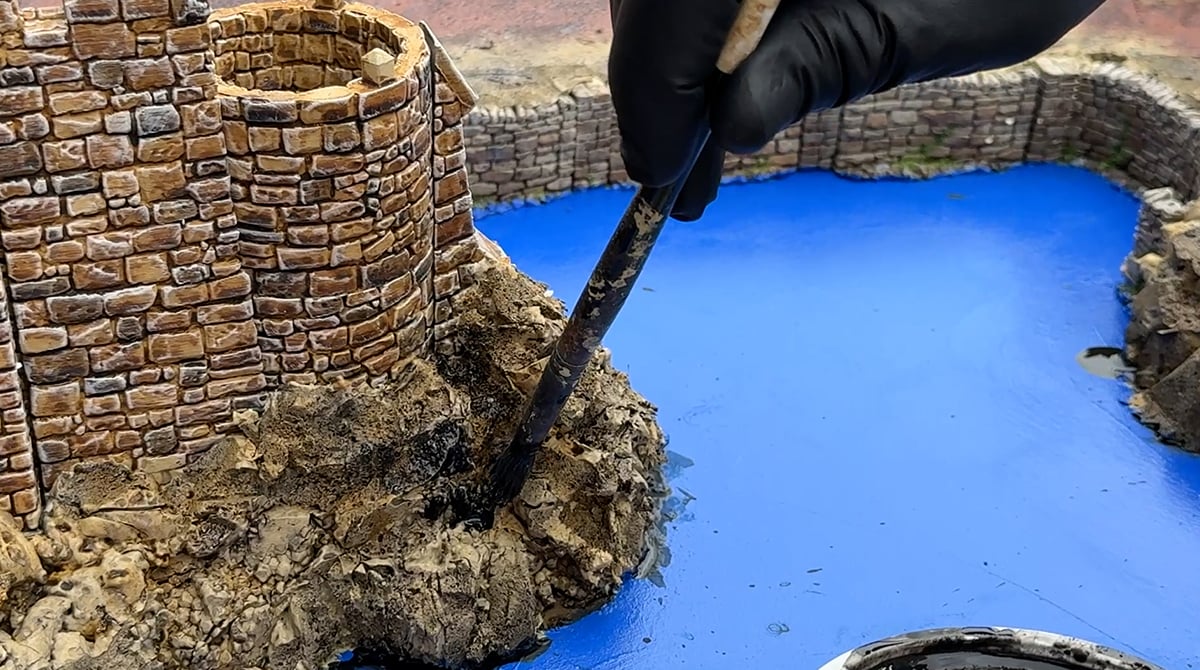
After your drybrush, you can spray watered-down PVA (or brush it) over the top surfaces of your rocks and on the flat area of the island. You want to get a heavy layer of the PVA here for the next stage of flocking to soak into.
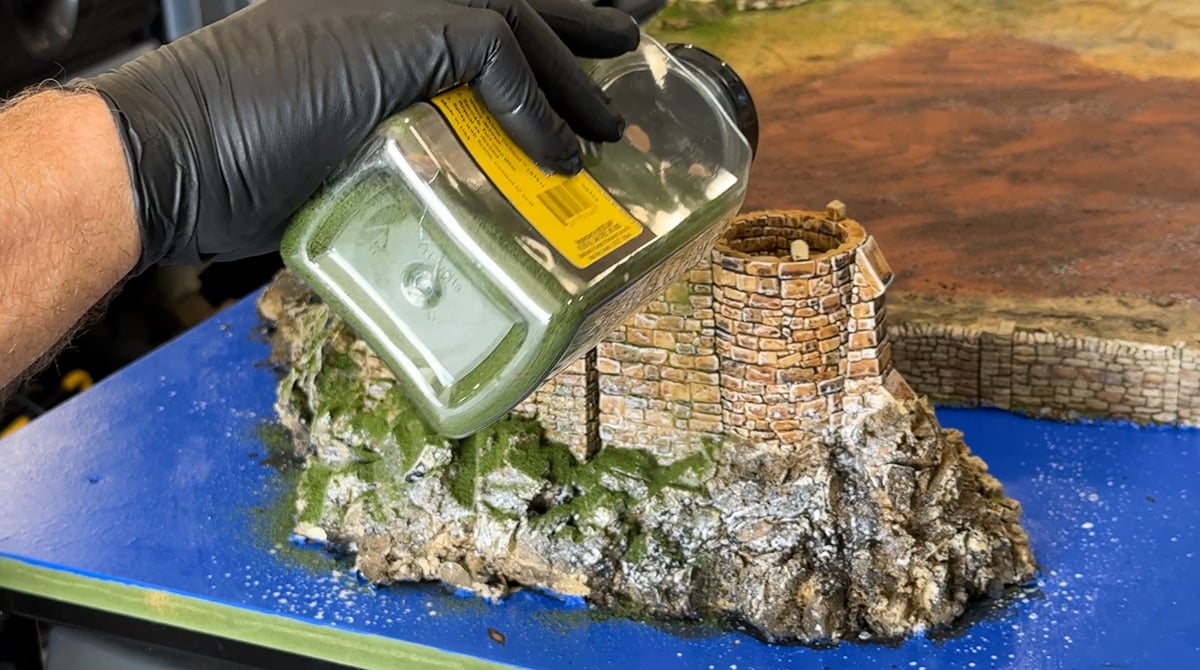
Next, sprinkle some natural green flocks over the rocky areas and the flat part of the island. The technique here is sprinkle from 10-15cm above and let it land on the top surfaces to simulate grass and moss growing on the light-catching surfaces of the rock. We don’t want to completely cover the rocks in the green flock.
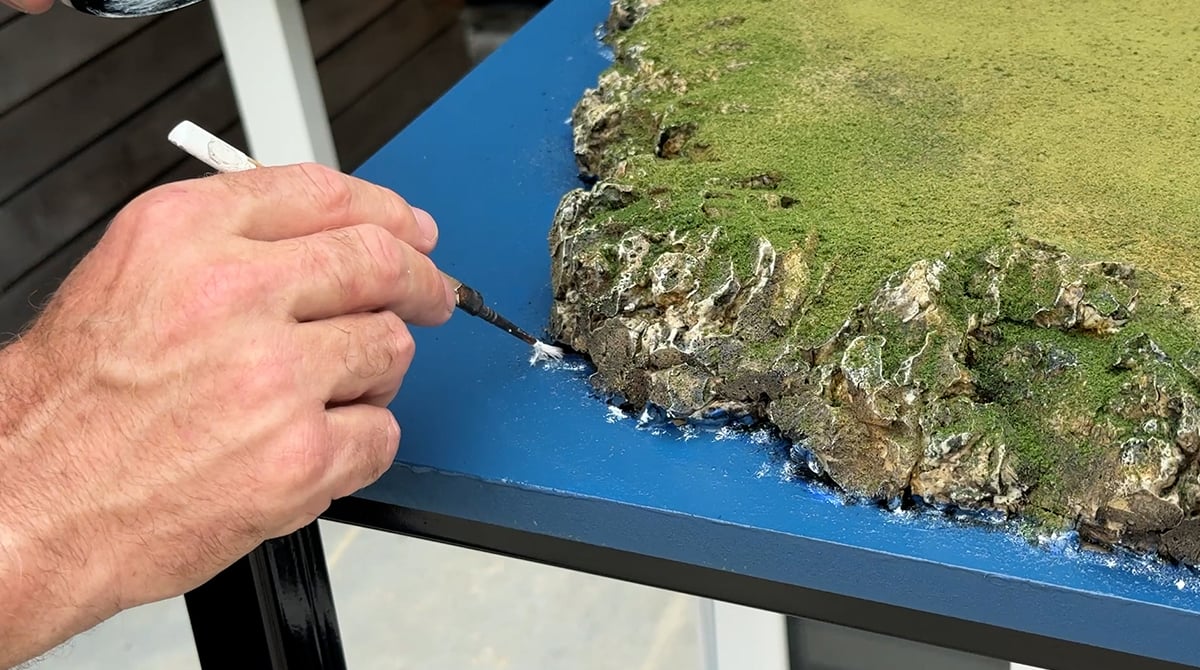
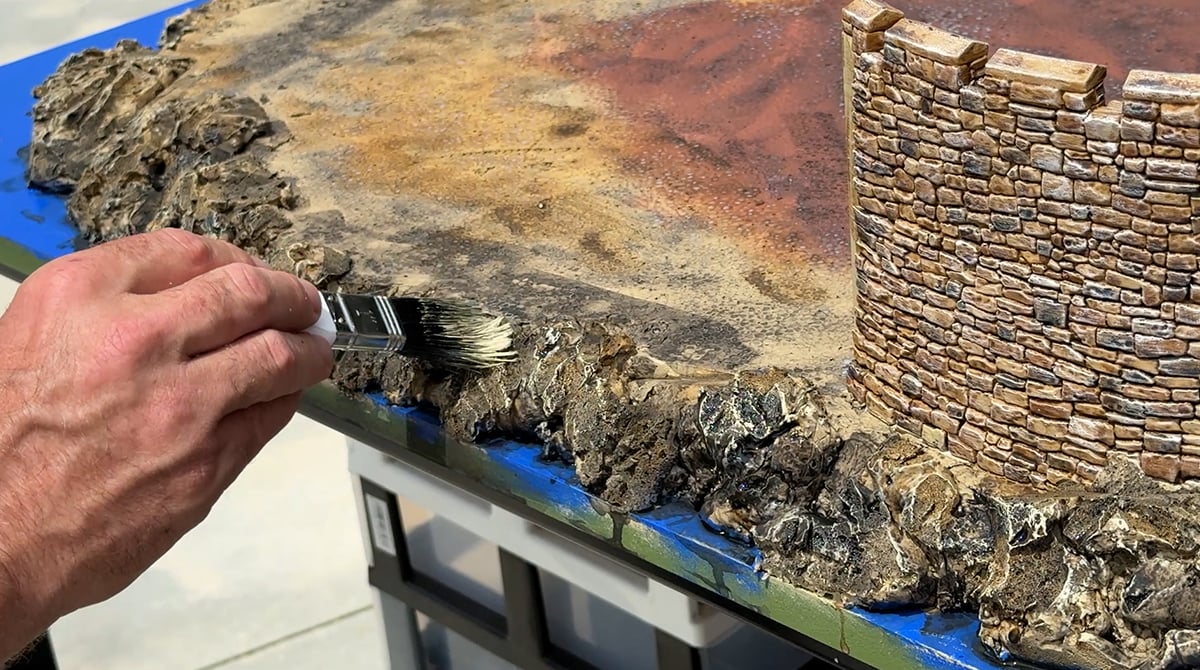
The last step of painting and finishing was to re-paint the blue water areas with a blue we mixed with a grey to get a slightly more desaturated blue. This cleaned up all the areas where wash or flock had spilled onto the blue as well. And then using an old brush where the bristles were very splayed out, dabbing on some white around the rocky shore to simulate waves crashing against the rocks.
To really take this board to the next level, you could look at doing a resin pour for the water areas, but because we wanted to be able to swap our water-based models, like ships and docks, we decided to keep it flat blue.
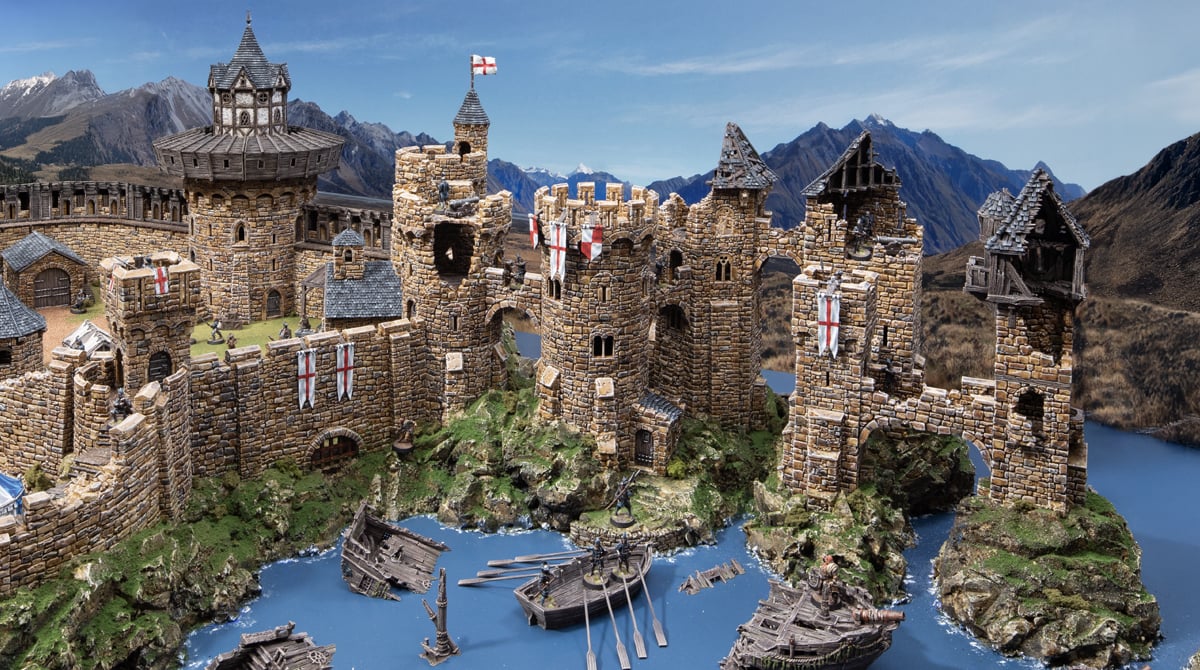
And there you have it, a complete 3D printed Island Castle Diorama build. We finished the assembly of the castle and placed the models to finalise the diorama. The bases of the towers are locked into place, but the other levels remain fully modular, so you can swap out the tower tops for other towers or ruined versions.
If you want to build a castle like this, check out our Throne & Ash range for a fully modular medieval castle set you can 3d print yourself at home.
the small foundation wall that separate water to land near the boat from where i can have please which bundle ?
Hi, these are the high walls from this set: https://www.printablescenery.com/product/country-high-walls/
I want to know how to print the foundations on a PRINTER not with FOAM BOARD!!!
This is so cool! I am so happy i can see how you did it so i can attempt something similar.
Are the castle pieces locked in place now? i assume so
Thank you, glad you like it. Yes some of them are, like the towers off to the side and some of the walls and towers. But we left a good chunk of the castle as swappable. And you can easily change the tower tops as only the base level is stuck in.