
Tips for 3D printing Throne & Ash models
In this article, we’ll cover a few basics and tips for 3D printing Throne & Ash models. We’ll cover the printer and settings we’re using, give some tips on smaller models, and give some tips for laying out models on your printer bed.
Basic 3D printer settings tips
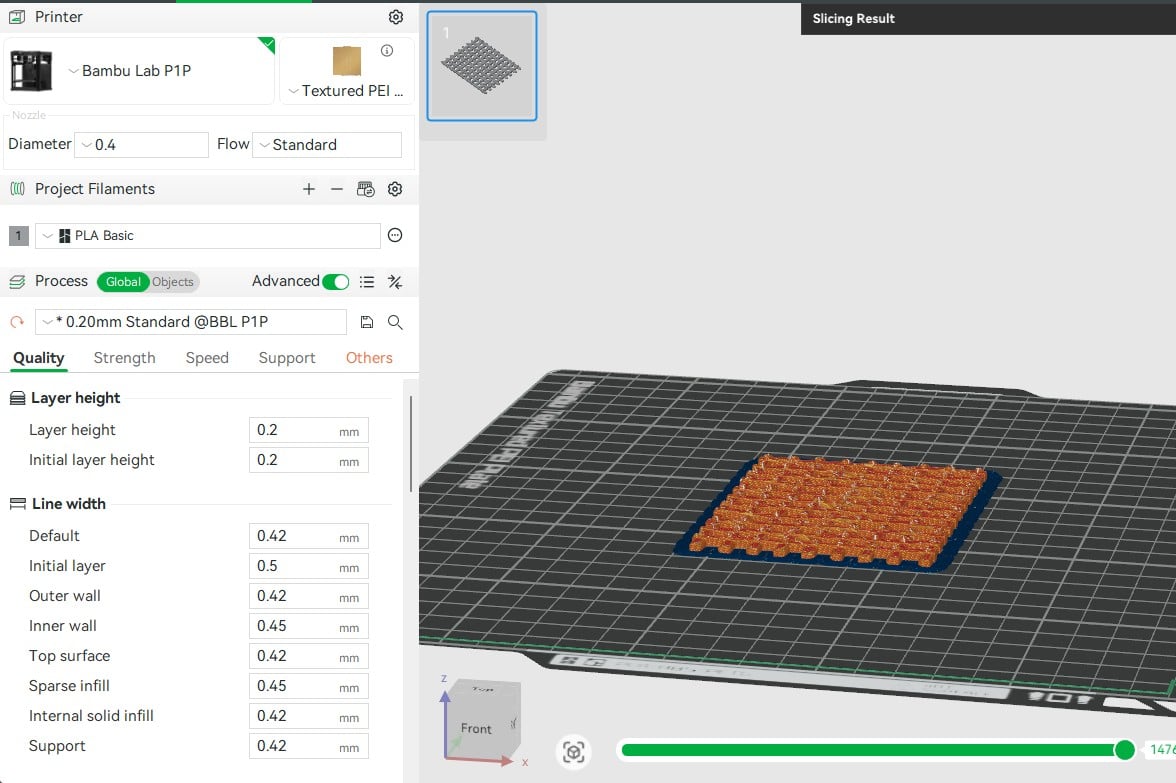
We’re using Bambu Labs P1P 3D printers, which have been excellent. We’re mostly using standard settings out of the box. Here’s a look at the printer settings while we set up:
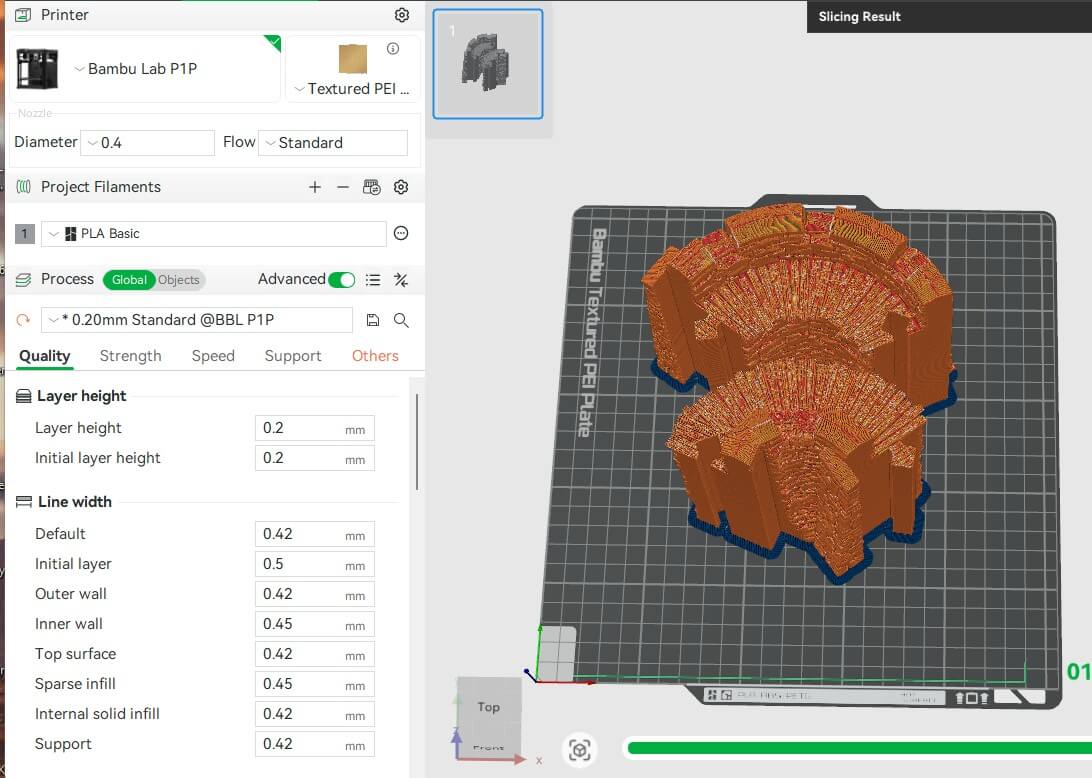
Here you can see the 3D printer settings we’re using. You’ll also notice we’re combining two wall pieces on one build plate. This is more of an efficiency tip, as we have several printers, which keeps things moving along, allowing us to print a different model simultaneously.
The other key tip for most of the Throne & Ash models is to set the printer to print outside first, which will make your prints more accurate. Normally, this is a default setting.
Time-saving tips for 3D printing
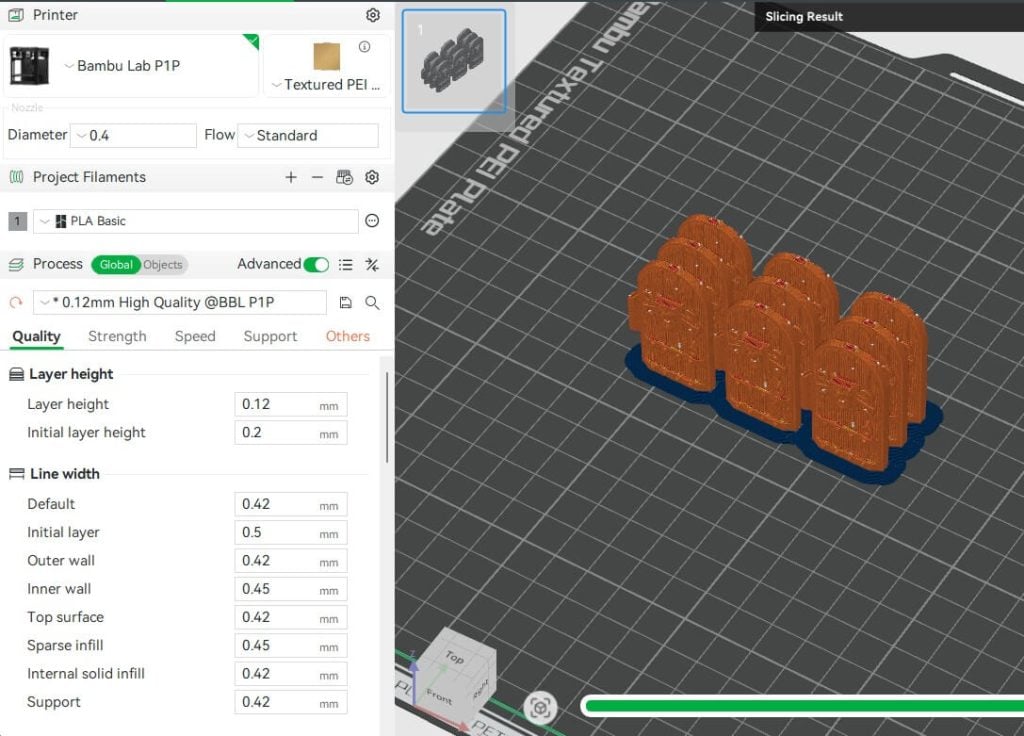
Here you can see similar time/printer saving tips, by duplicating and stacking up the smaller objects you need in quantity, like doors, corbels, and wall plugs.
Adding brim to models
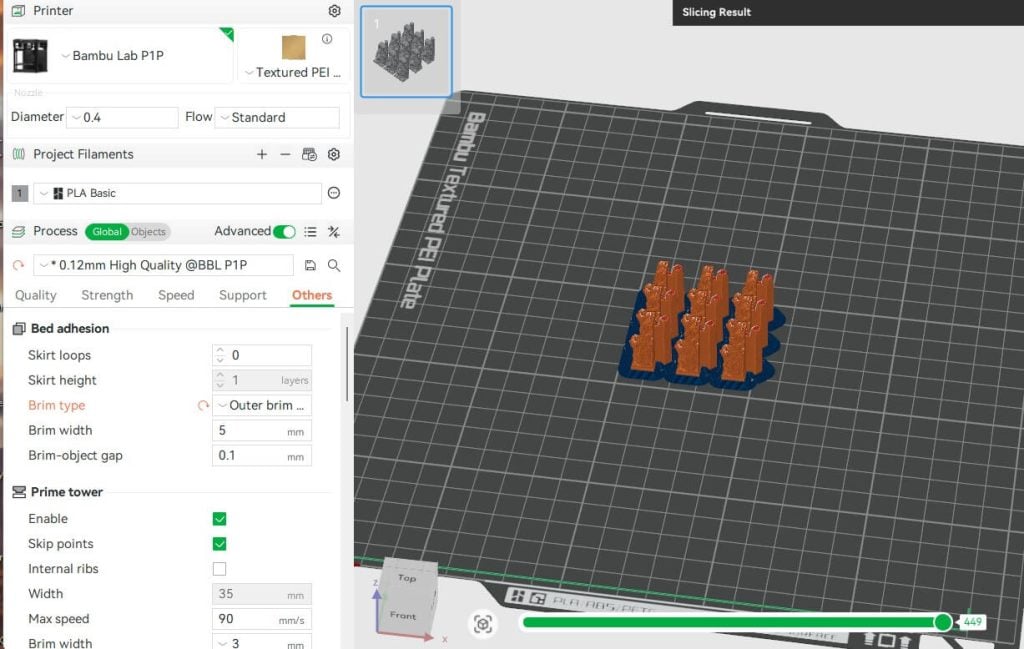
For the bowman’s battlements tilting shields, we recommend the brim because this model has the raft and supports already built in. It will have a small support touching the round nodes on each side, but it is far easier to clean up this way and preserves the wood texture on both sides. Adding the brim can help on a lot of the models to reduce corners from lifting as well.
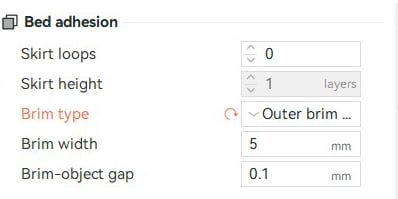
Here, you can see the settings for the brim we also add to most models. This is a good tip if you find that your models are tipping over during prints or if the model is exceptionally tall or slim. However, things like the Iron Bars Gate on the Throne & Ash Gatehouse won’t work well as they are too tall.
For the Iron Bars, we recommend printing them flat when printing without supports with FDM. This results in having one side flat of course. To print them upright, you can add supports to make it possible to have both sides detailed.
Adding supports
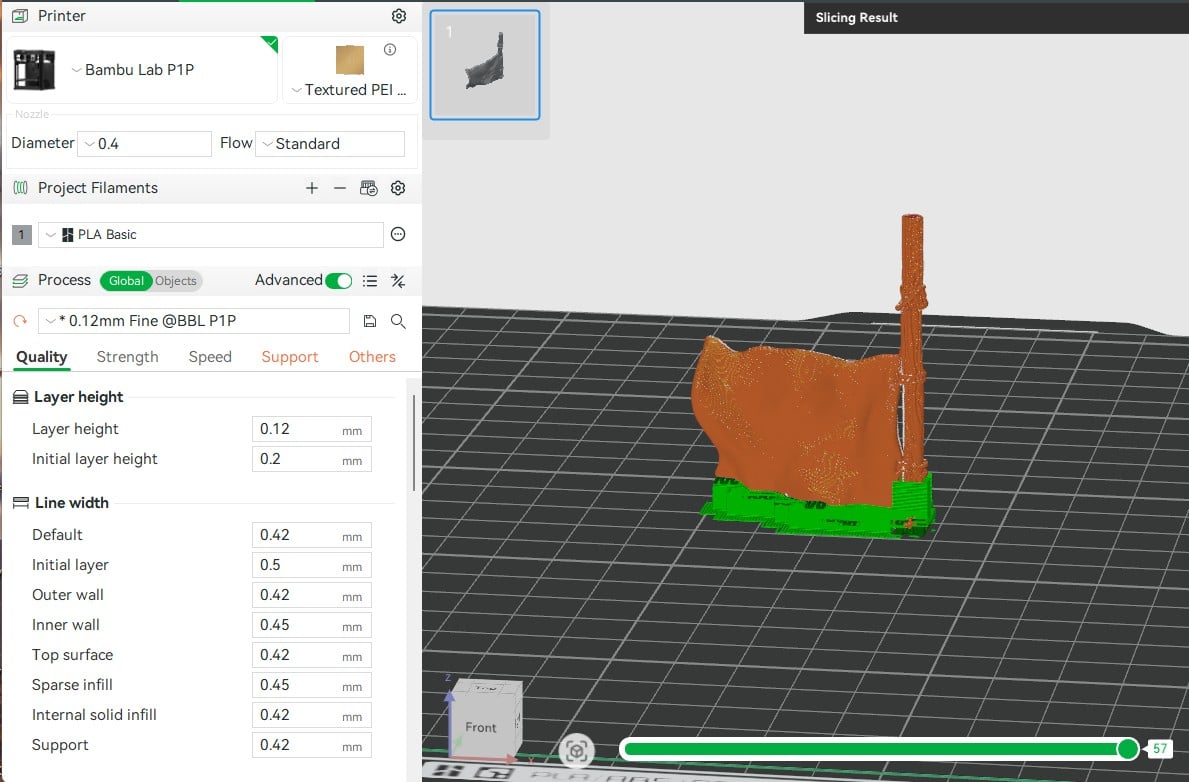
The Castle Flag is one of the models that will need supports added for FDM printing. Our tip is to flip it upside down, as pictured above, and add your supports that way. The spike on top of the Wattle & Daub Tower is another that has supports added for the same reason.
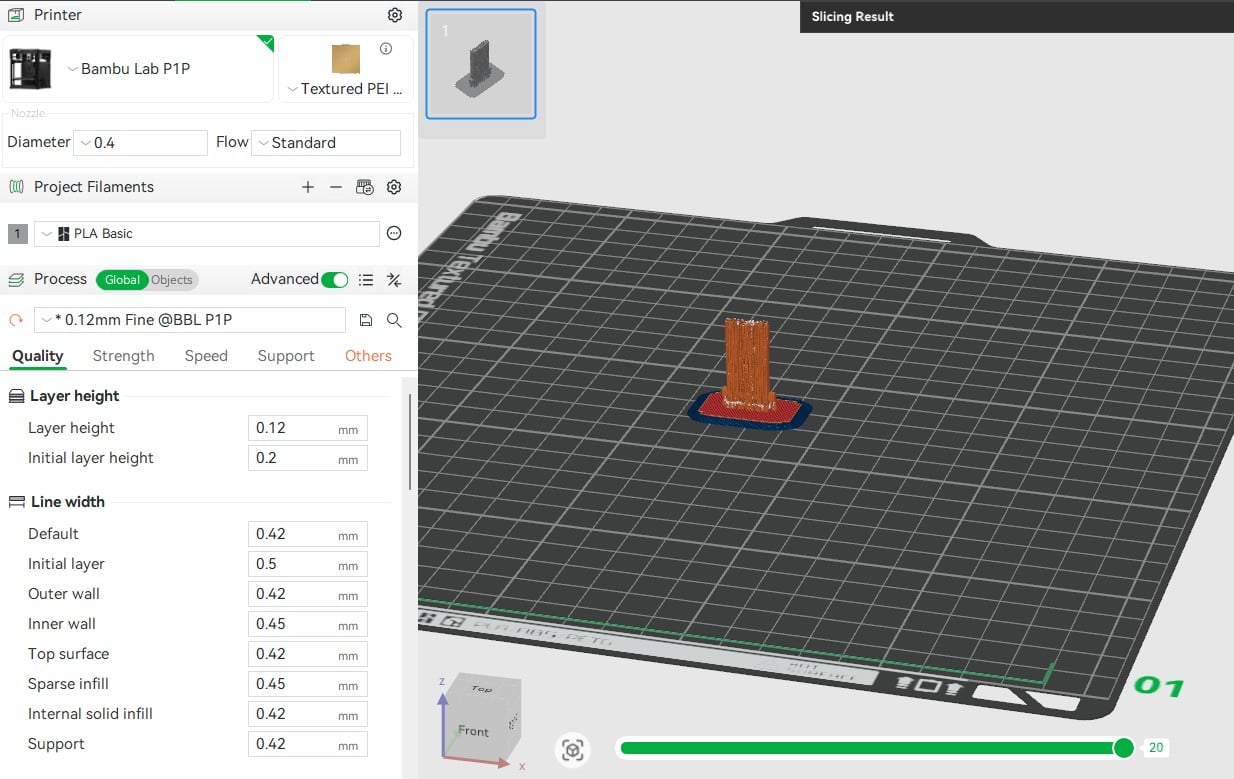
3D printing fine details
Some models in Throne & Ash are more detailed than others. For those more detailed models, we recommend the 0.12 mm fine 3D printer settings. This will achieve a better result when FDM printing these models.
These are the main 3D printing tips for Throne & Ash we have so far, but as we add more models to the range, we’ll add more tips as we find them. If there is anything else you’d like to know or get help with be sure to let us know by leaving a comment.
Thanks for this, I’m working on some university Bambus, and this helps when the student employees are dubious about printing this project.
Hello
I printed out a few sections of wall and they are VERY difficult to slide into together. I was able to do it (there’s no way my kids can do which I was hoping they could play with), but pulling them apart felt like I was going to break it.
Is there a setting to tweak for this? Or what I can do to make them slide in more easily. I’m afraid after I paint, it won’t work at all.
Hi Gary, thanks for letting us know. Are you using the “print outside first” setting in your slicer? It will make your prints more accurate. We’ve found that this solves the issue for most people having this trouble
Thanks for the reply.
Just wanted to follow up with more info. The setting was for inside/outside on Bambu A1.
I printed out the Bowman 180 and it had problems with the male connector. I also printed out the Bowman 240 and this was ok. Also printed the Turret 180 and 240 and these were also fine. These also had the same setting.
Only the Bowman 180 had the issue. I was able to file the male slot between the hex connector and the inside part of the outside wall. There was a little lip (on all 4 printed) about 1″ from the top that I filed down and that seemed to fix it.
So it may have been the setting (will adjust in the future) but you may want to re-check that one piece.
Note these were rescaled to 87.5% forr 28mm.
No problem, thanks for letting us know, we’ll check those models on our end too. Cheers
So I have been trying to print the window trinity plug for the Castle Keep Tower, but have yet to figure out how to print them. I have a Bambulab A1 and have tried standard profiles. Do you use supports or use specific settings to get the middle of the window to print proper?
Hi Casper, would you be able to send through pictures of your result on the window to [email protected] so we can help you solve the issue?
Sure will do.
Hey I printed Dukes Fort it is so nice. Can’t wait to hobby it up. Working on the arrow slit plugs to fill the door holes. Having trouble getting them to pop in flush. The bottom goes in fine, but the top seems to stick out 1 mm or so, which makes it have an edge and is not flush. I’ve tried forcing it but actually cracked one of the tower pieces doing that. I noticed there is one little notch on the top of the arrow slit plug. Is there a special way to fit these in there that I am not doing properly? Because of the 13 I printed, not one sits flush with the overall wall.
Hi, glad you’re like it all, but sorry the plugs are being a pain. We haven’t found any issues ourselves, but they are a snug fit and do need a bit of push to get them in sometimes. Is there any stringing going on at the top of the arch gap where the plugs go, or any residue from your printer? Sometimes there can be a minor obstruction like that. The plugs also have little nubs on them that lock them in place, so filing them down a little bit can also help with the fit if they are too tight. Hope this helps!
Ok that helped, knowing that it is SUPPOSED to fit even if its really snug gave me more confidence to force it lol. So I tapped them with a hammer and it just snapped into place. Flush and smooth, looks great. Appreciate the quick follow up. Once I have this beast hobbied up I’ll get you some pics.