-
AuthorPosts
-
-
February 28, 2020 at 10:52 am #192388MattParticipant
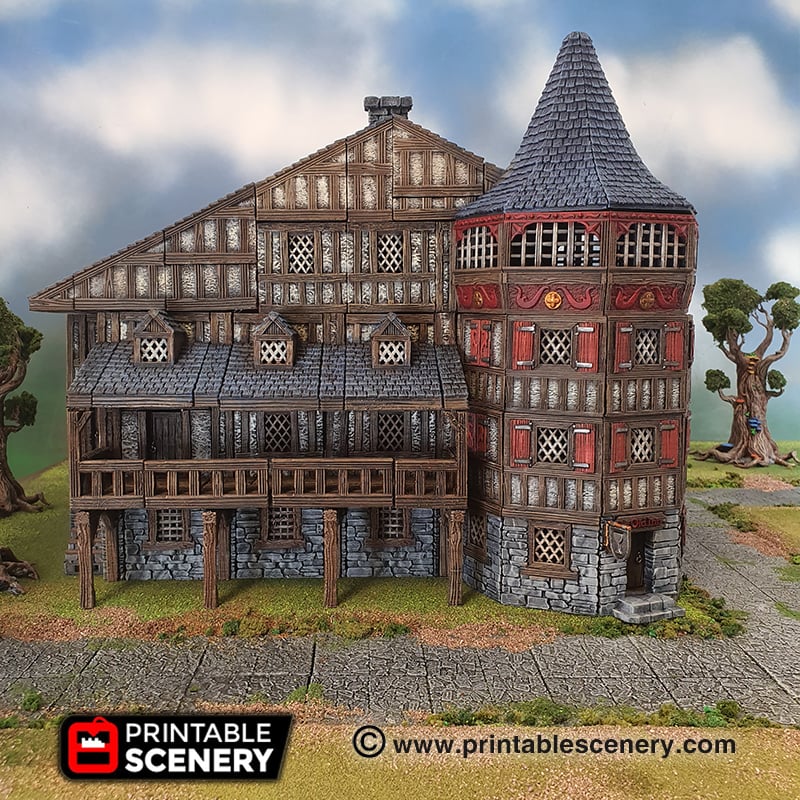
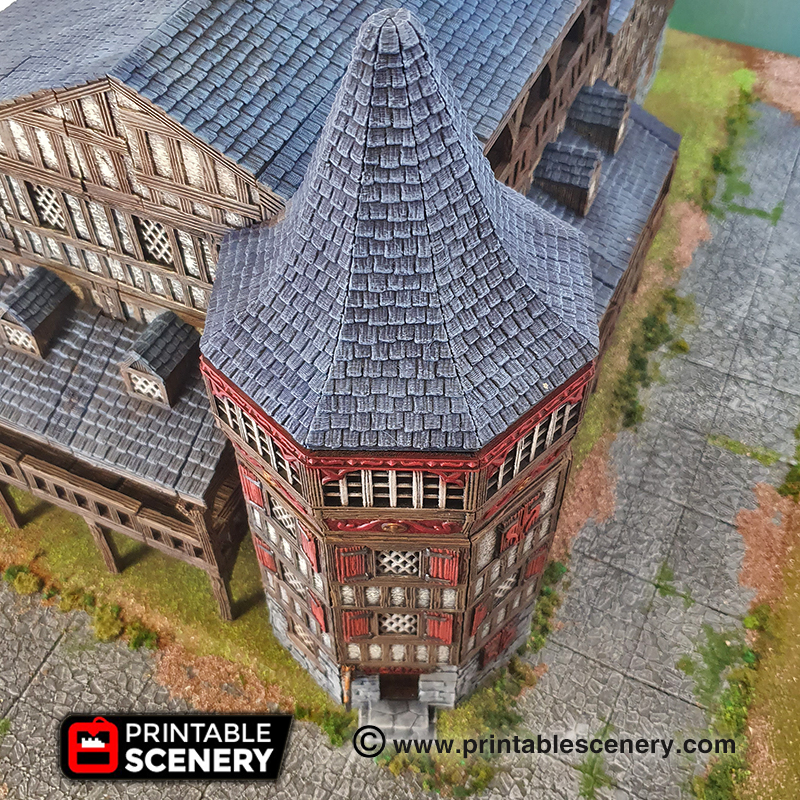
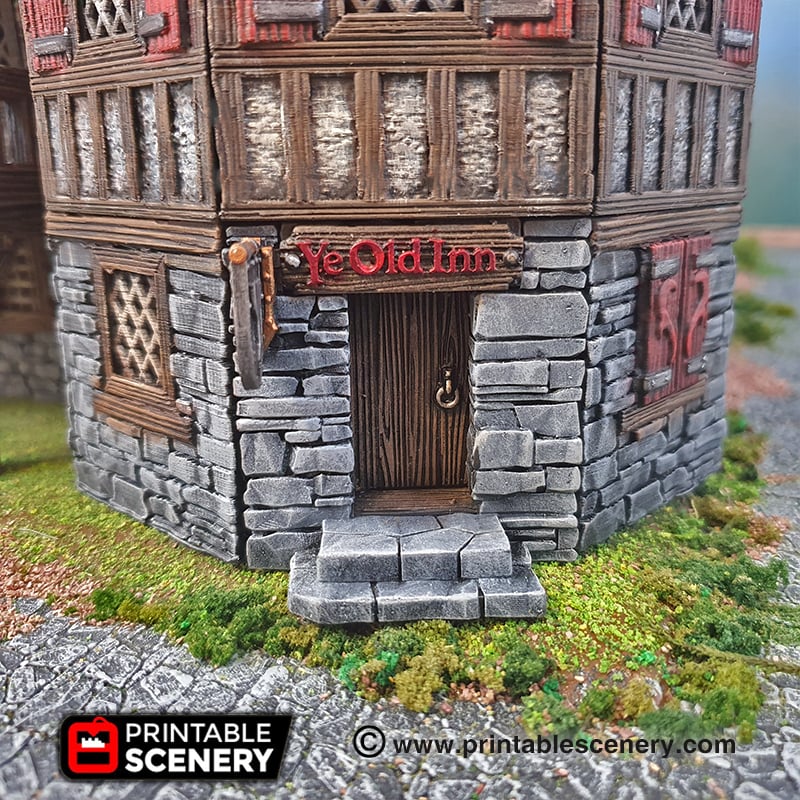
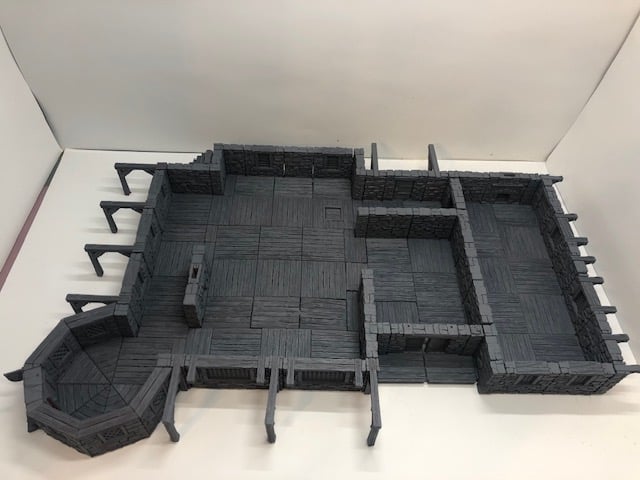
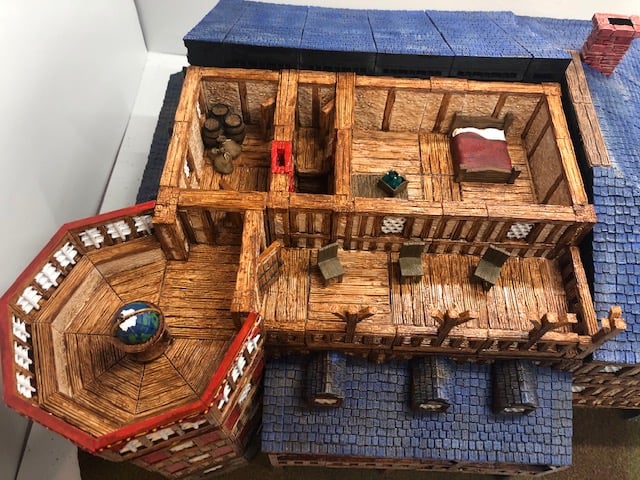
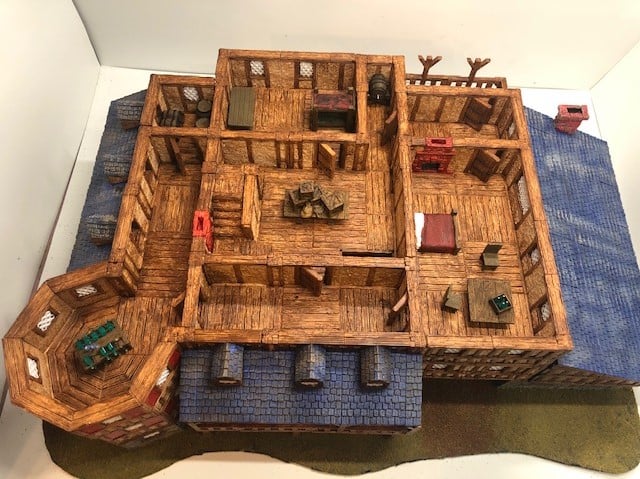
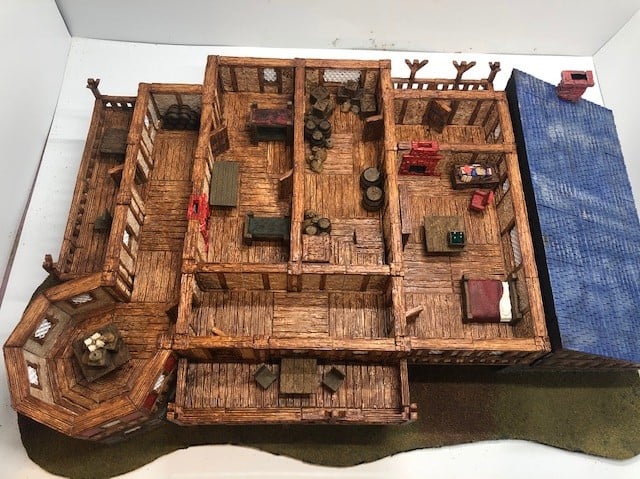
This was an epic build and the assembly guide alone took 4 days to assemble. I’m creating this thread for a whole bunch more photos.
-
February 28, 2020 at 4:31 pm #192432mowskillerParticipant
I just saw this post . I was just getting on to say that this is exactly what i have waiting for to finish my Troll Skull Inn. I have been working on it for a while now and have been waiting for the tower parts and these are going to do very nicely.
Thank You so much for this set! -
March 12, 2020 at 10:22 am #194294MattParticipant
I would love to see another Trollskull Manor & Inn out there. It’s taken me a very long time to build it.
-
March 13, 2020 at 1:35 am #194346Madalyn MillerParticipant
In the assembly diagram manor inn level 4 numbers 19 and 20 it lists the product name but not the file name.
Also, is the YA-Floor-RusticWooden-v1.0 attached with the openlock clips? -
March 15, 2020 at 9:26 am #194559Stephen LewisParticipant
Came here to mention this. Already beat me to it!
-
March 16, 2020 at 10:56 am #194670MattParticipant
This has been updated.
-
March 28, 2020 at 8:59 am #195681Cody DearthParticipant
Floor 1 Part 1 doesn’t include the D-Beam-SchistDoubleDoorway
-
May 13, 2020 at 3:50 am #201468mrsethhansonParticipant
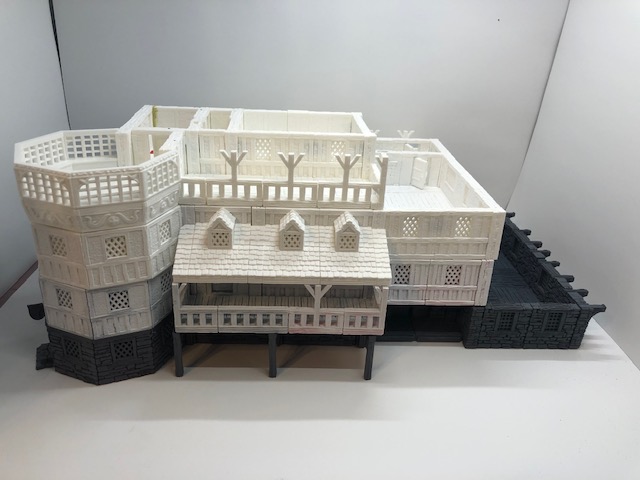
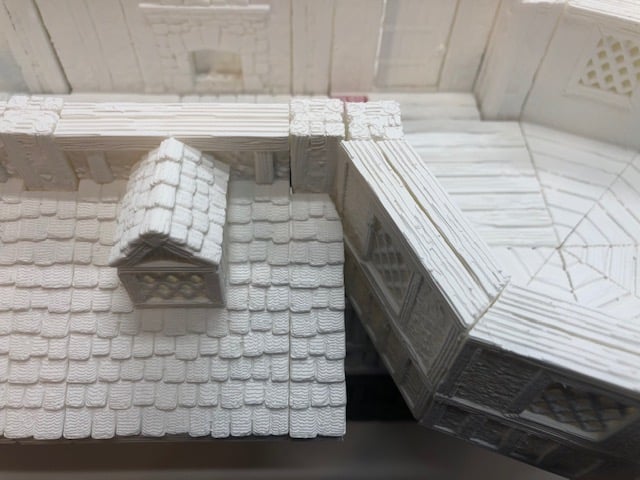
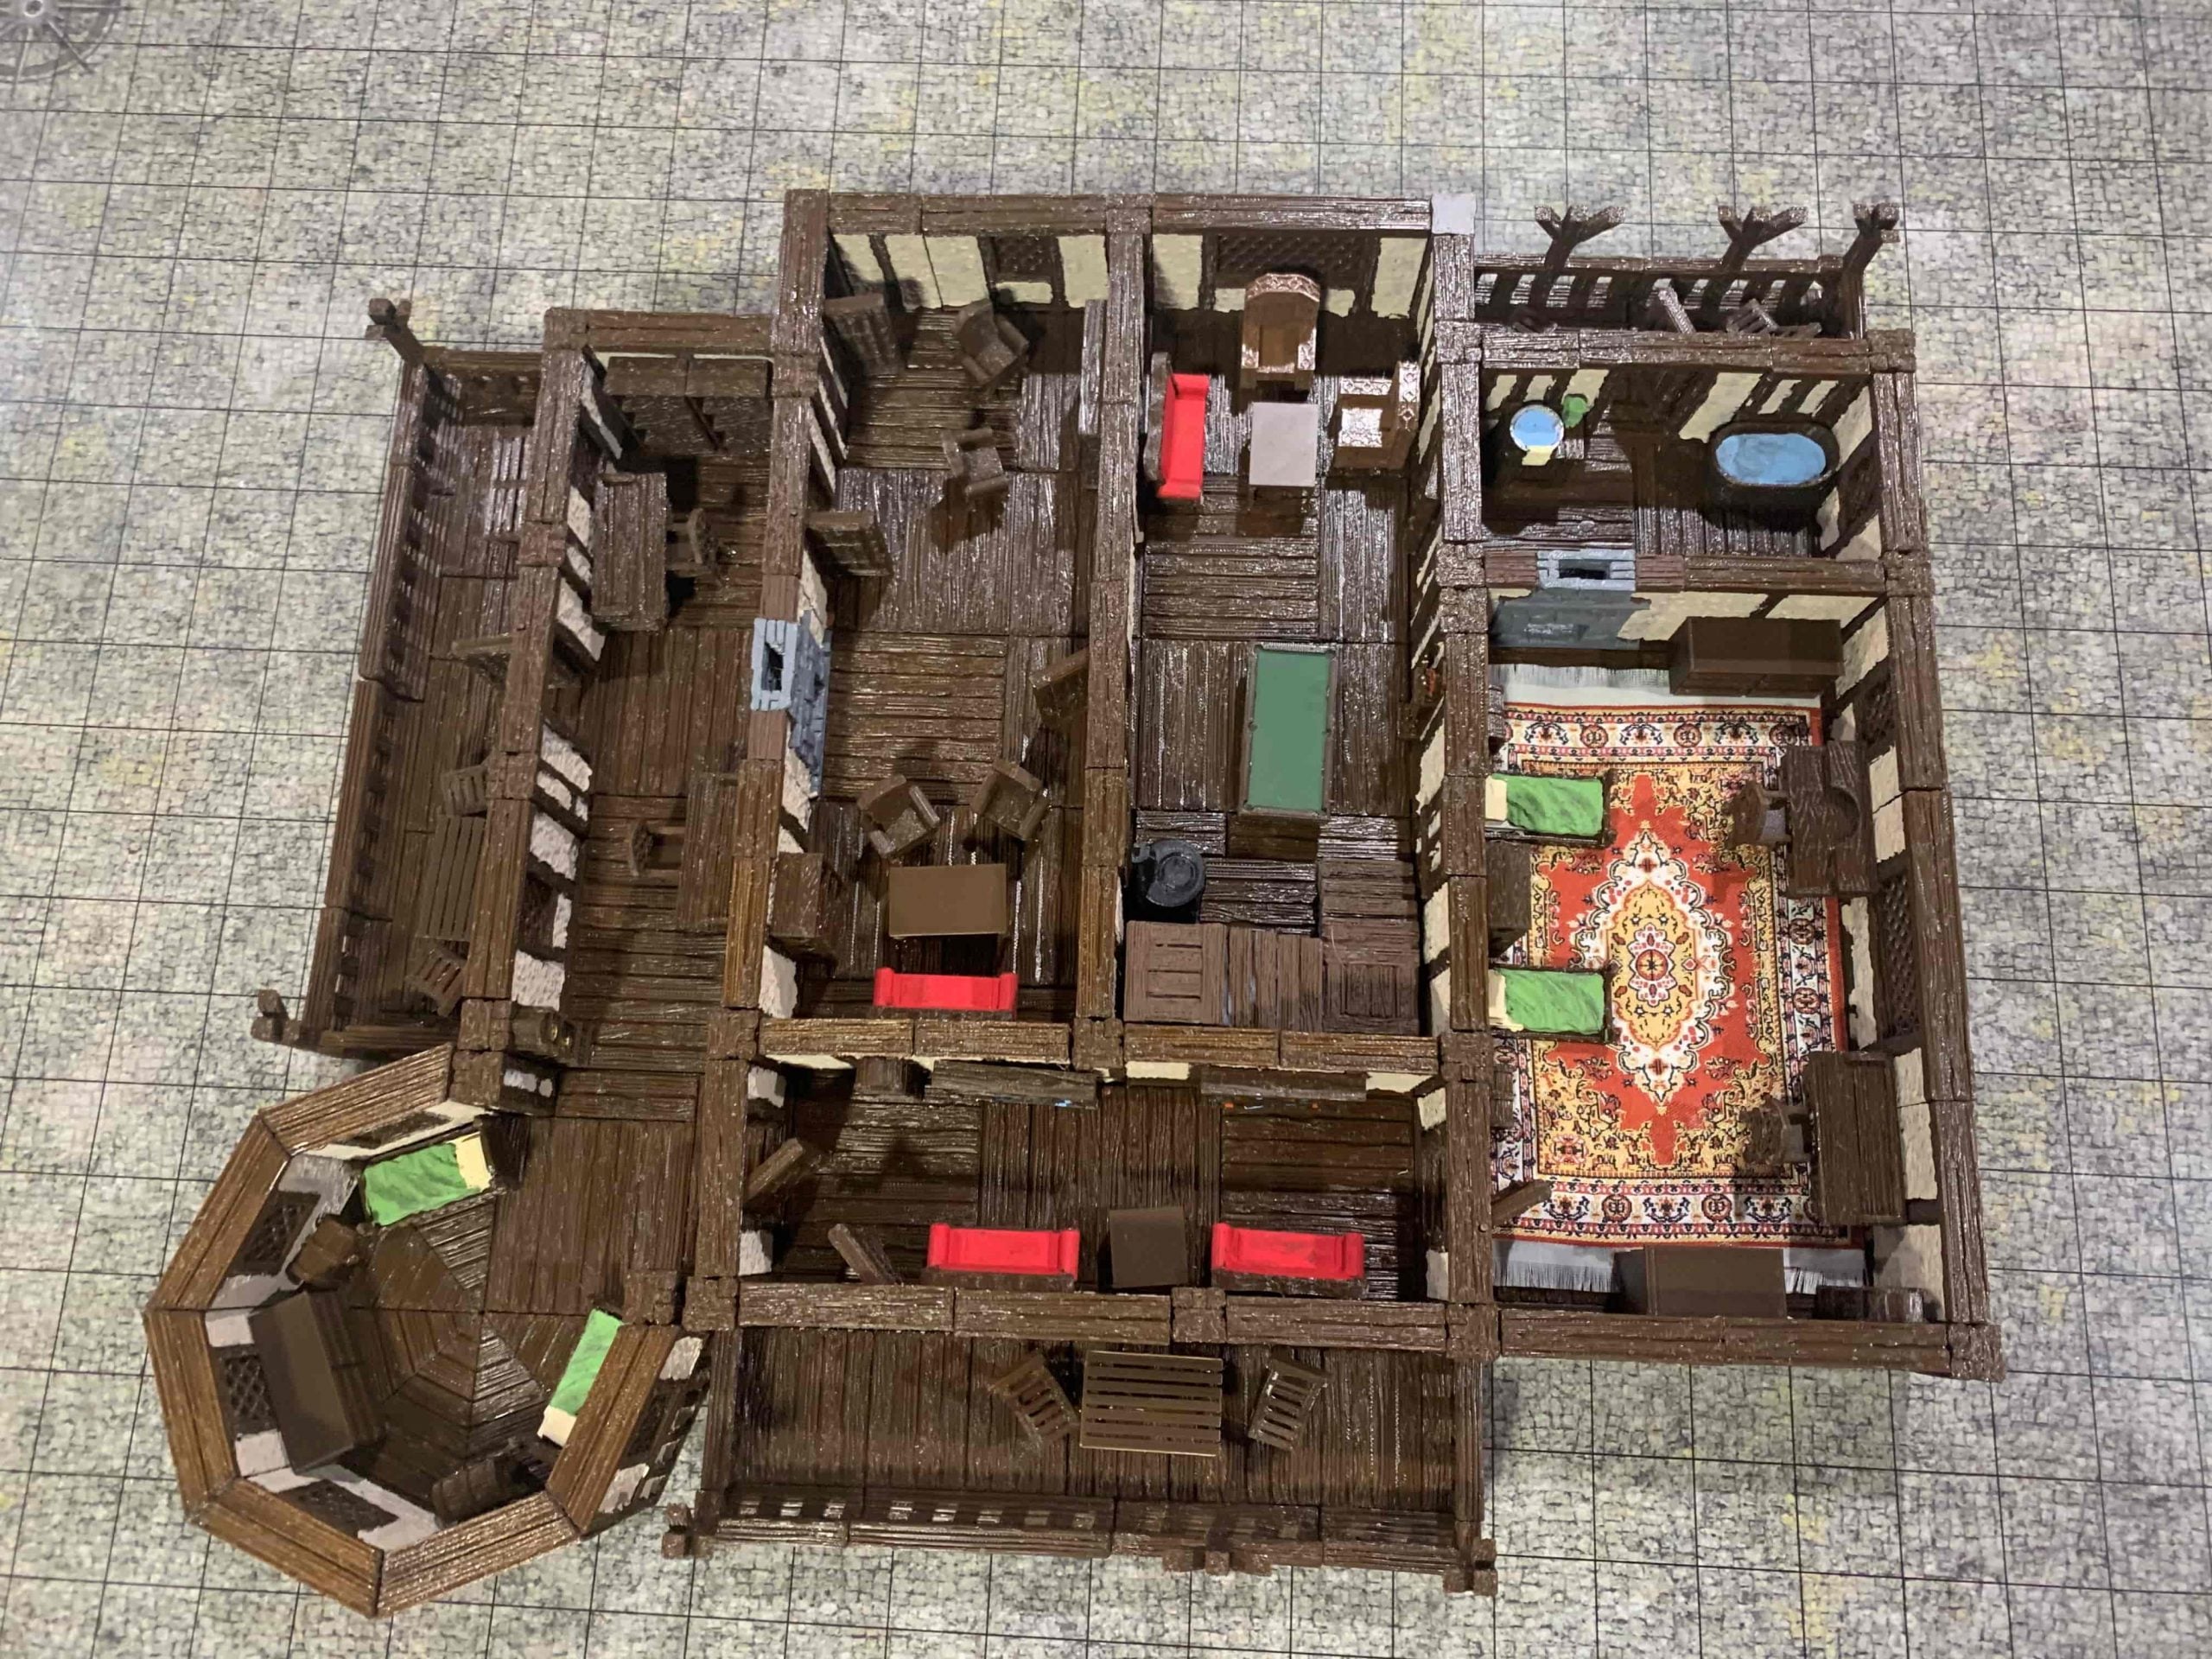
So I am currently building this now. I have levels 1 – 4 completed and just started on the roof. I can say I found discrepancies in the instructions I had to work around but I couldn’t have made it with out them so thank you! For level 3 I removed one door as I didn’t feel it was needed, I had to mirror two #25 roof end caps and for two I had to sand a bevel for them to join up tightly against the spire.
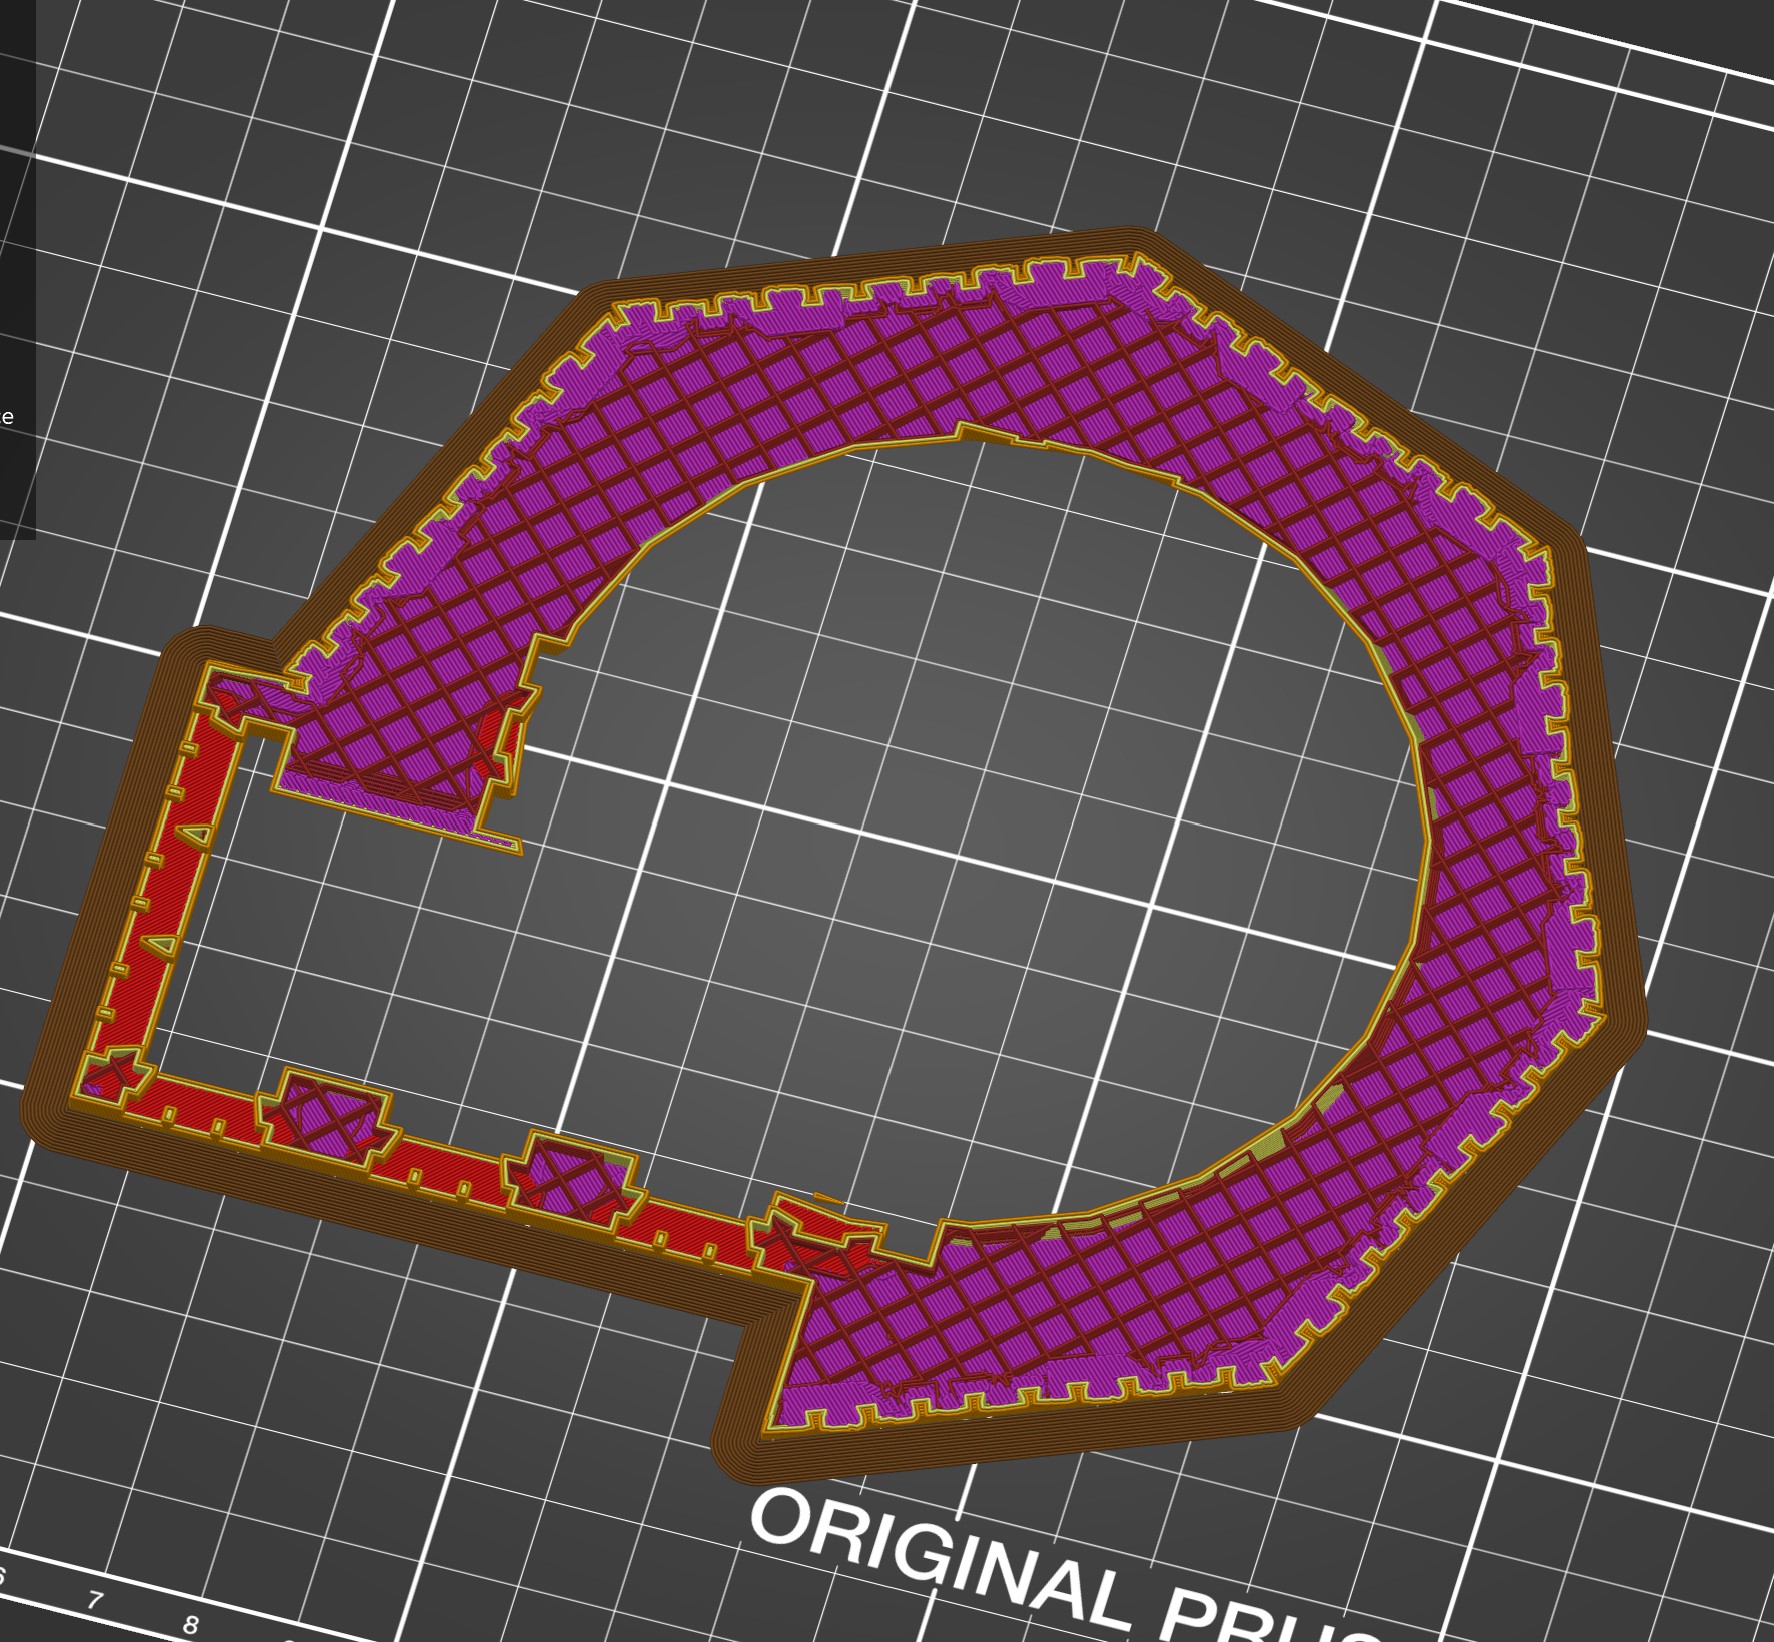
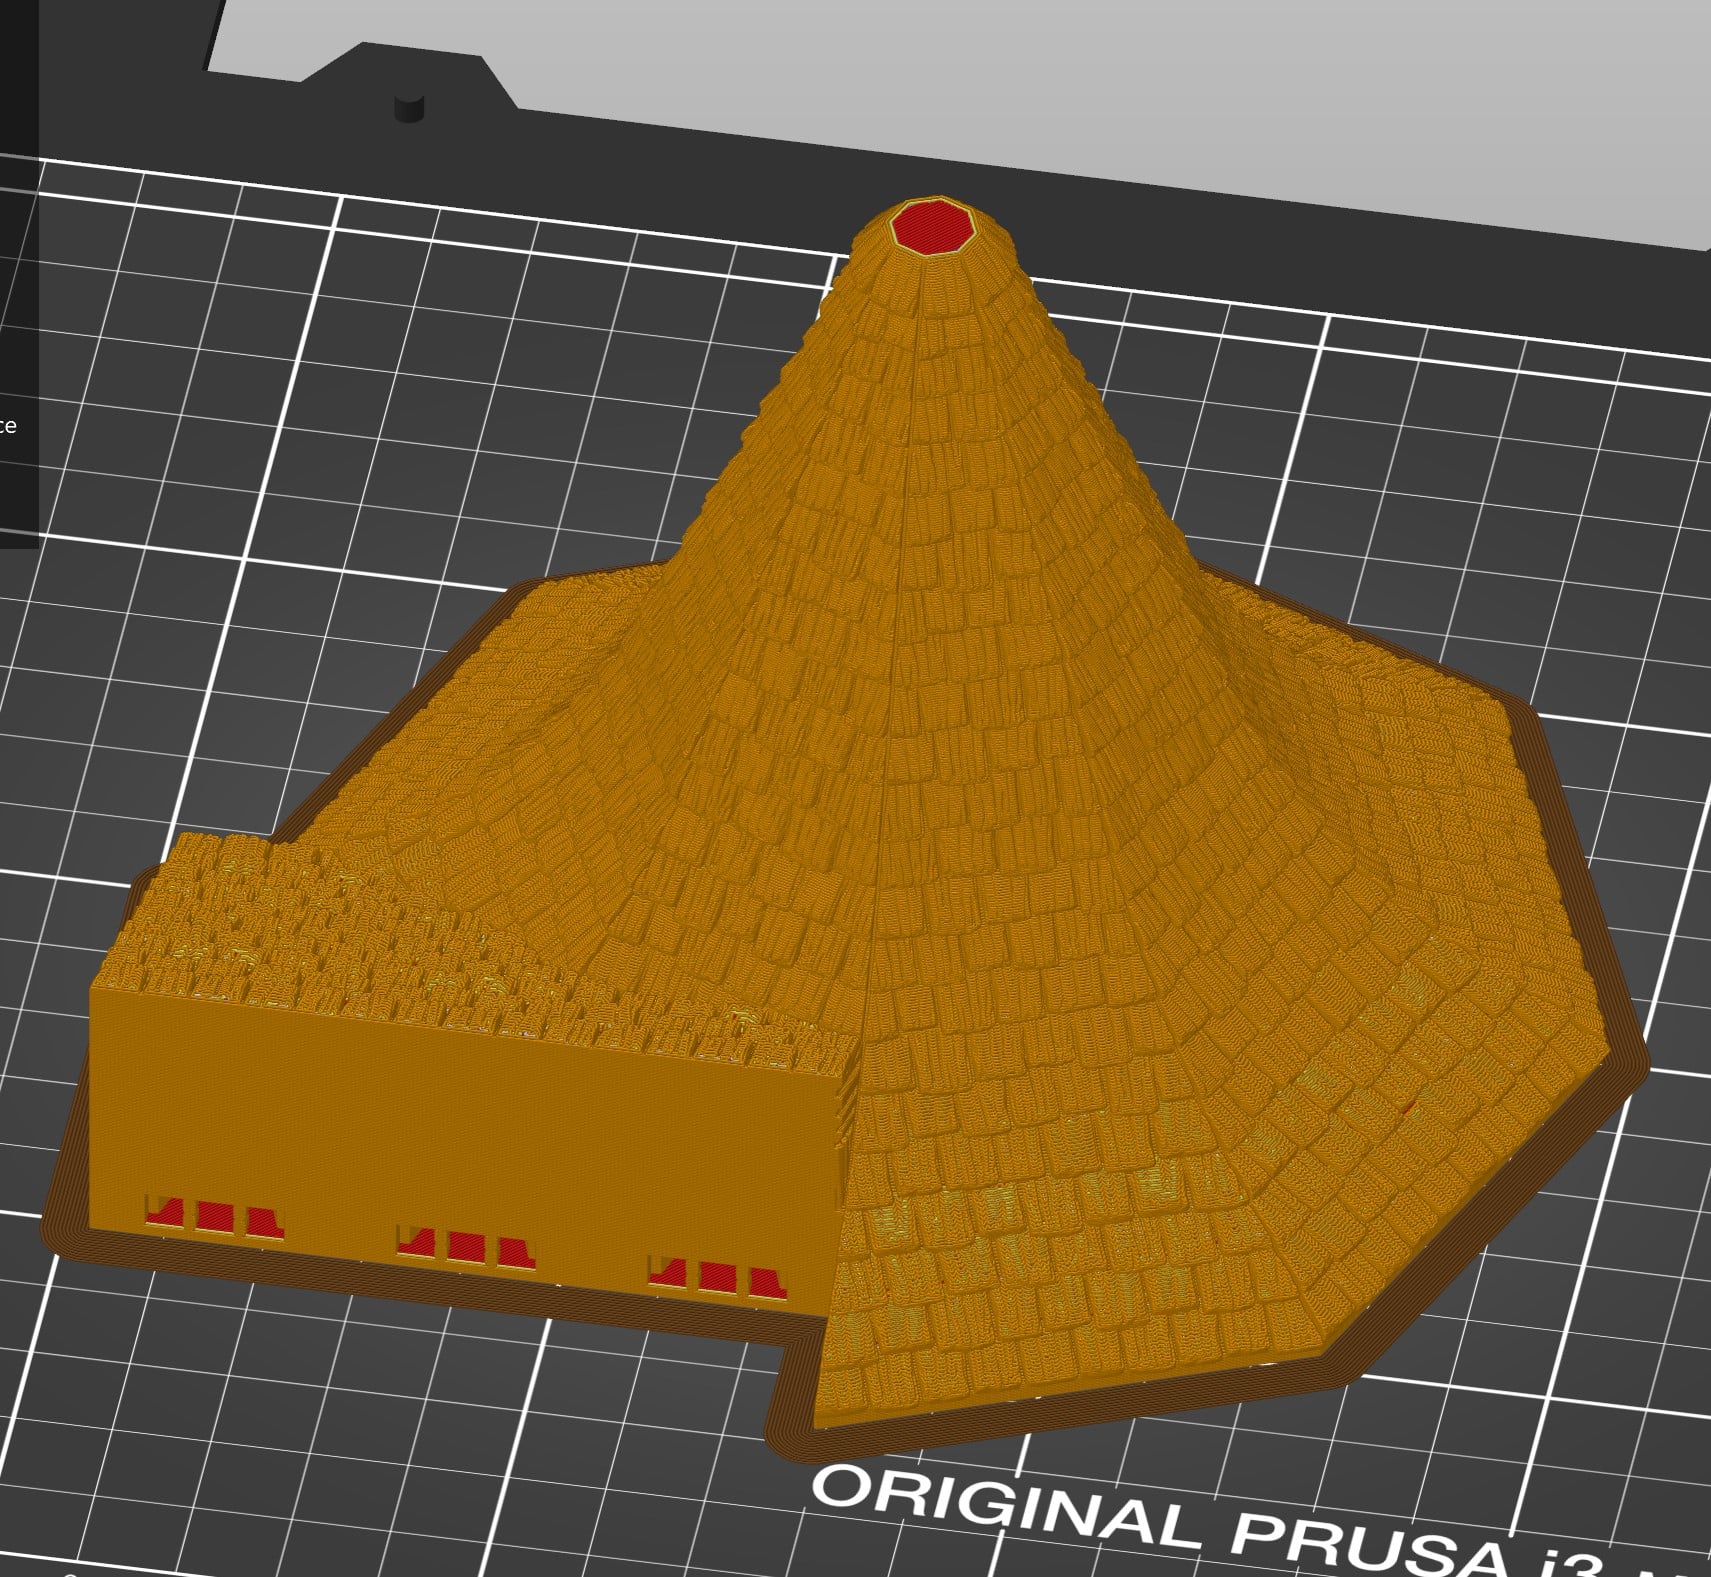
I just started on the roof and I do wish there was a mashup in the Manor Inn for the roof. There is a lot of extra material by just using the modular pieces will get added. I’m not sure for how many parts I will do this for but the cap of the spire I joined the 4 pieces in tinkercad and hollowed. I’ll add images for it. I’ll update the post as I progress. It is really massive. It has a footprint of 22″ by 18″ and a height (without roof) of 8 1/4 in. I really want to make a DnD type Clue game to run instead it when done 🙂
I can only add 4 images per post (based on size) , so there will be a follow up post with 4 more images to show levels.
- This reply was modified 6 years, 2 months ago by mrsethhanson.
Attachments:
-
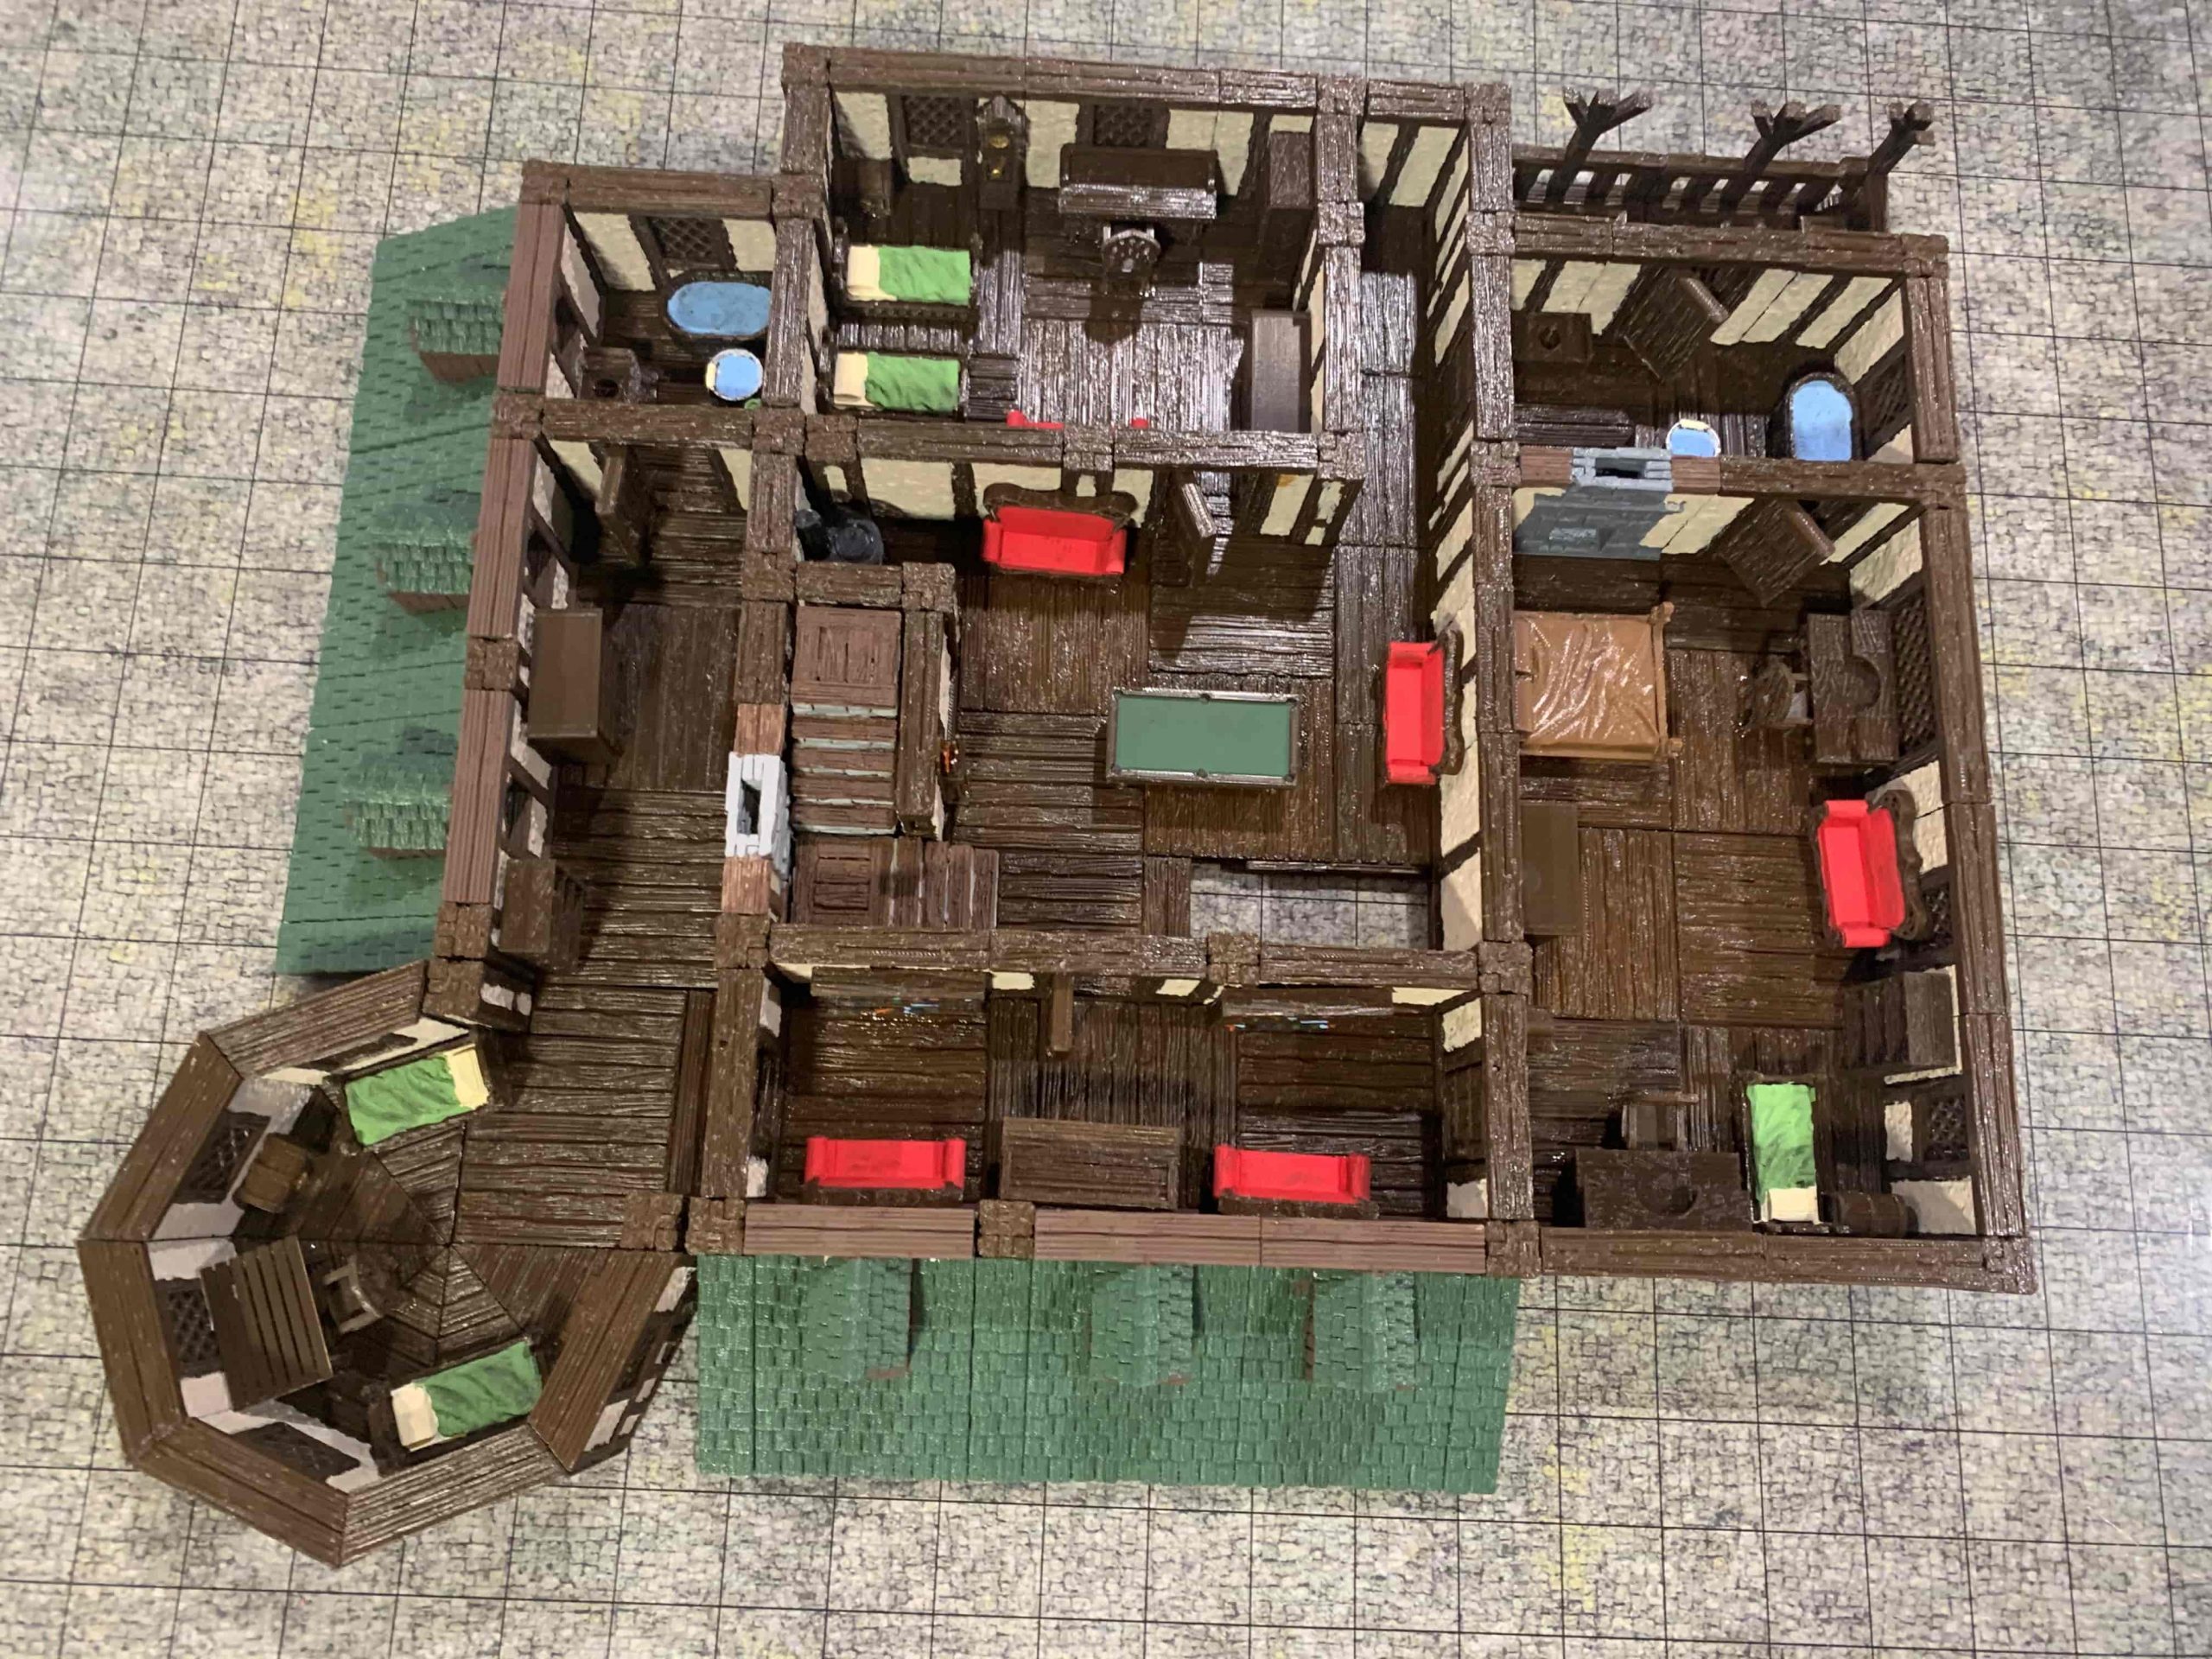
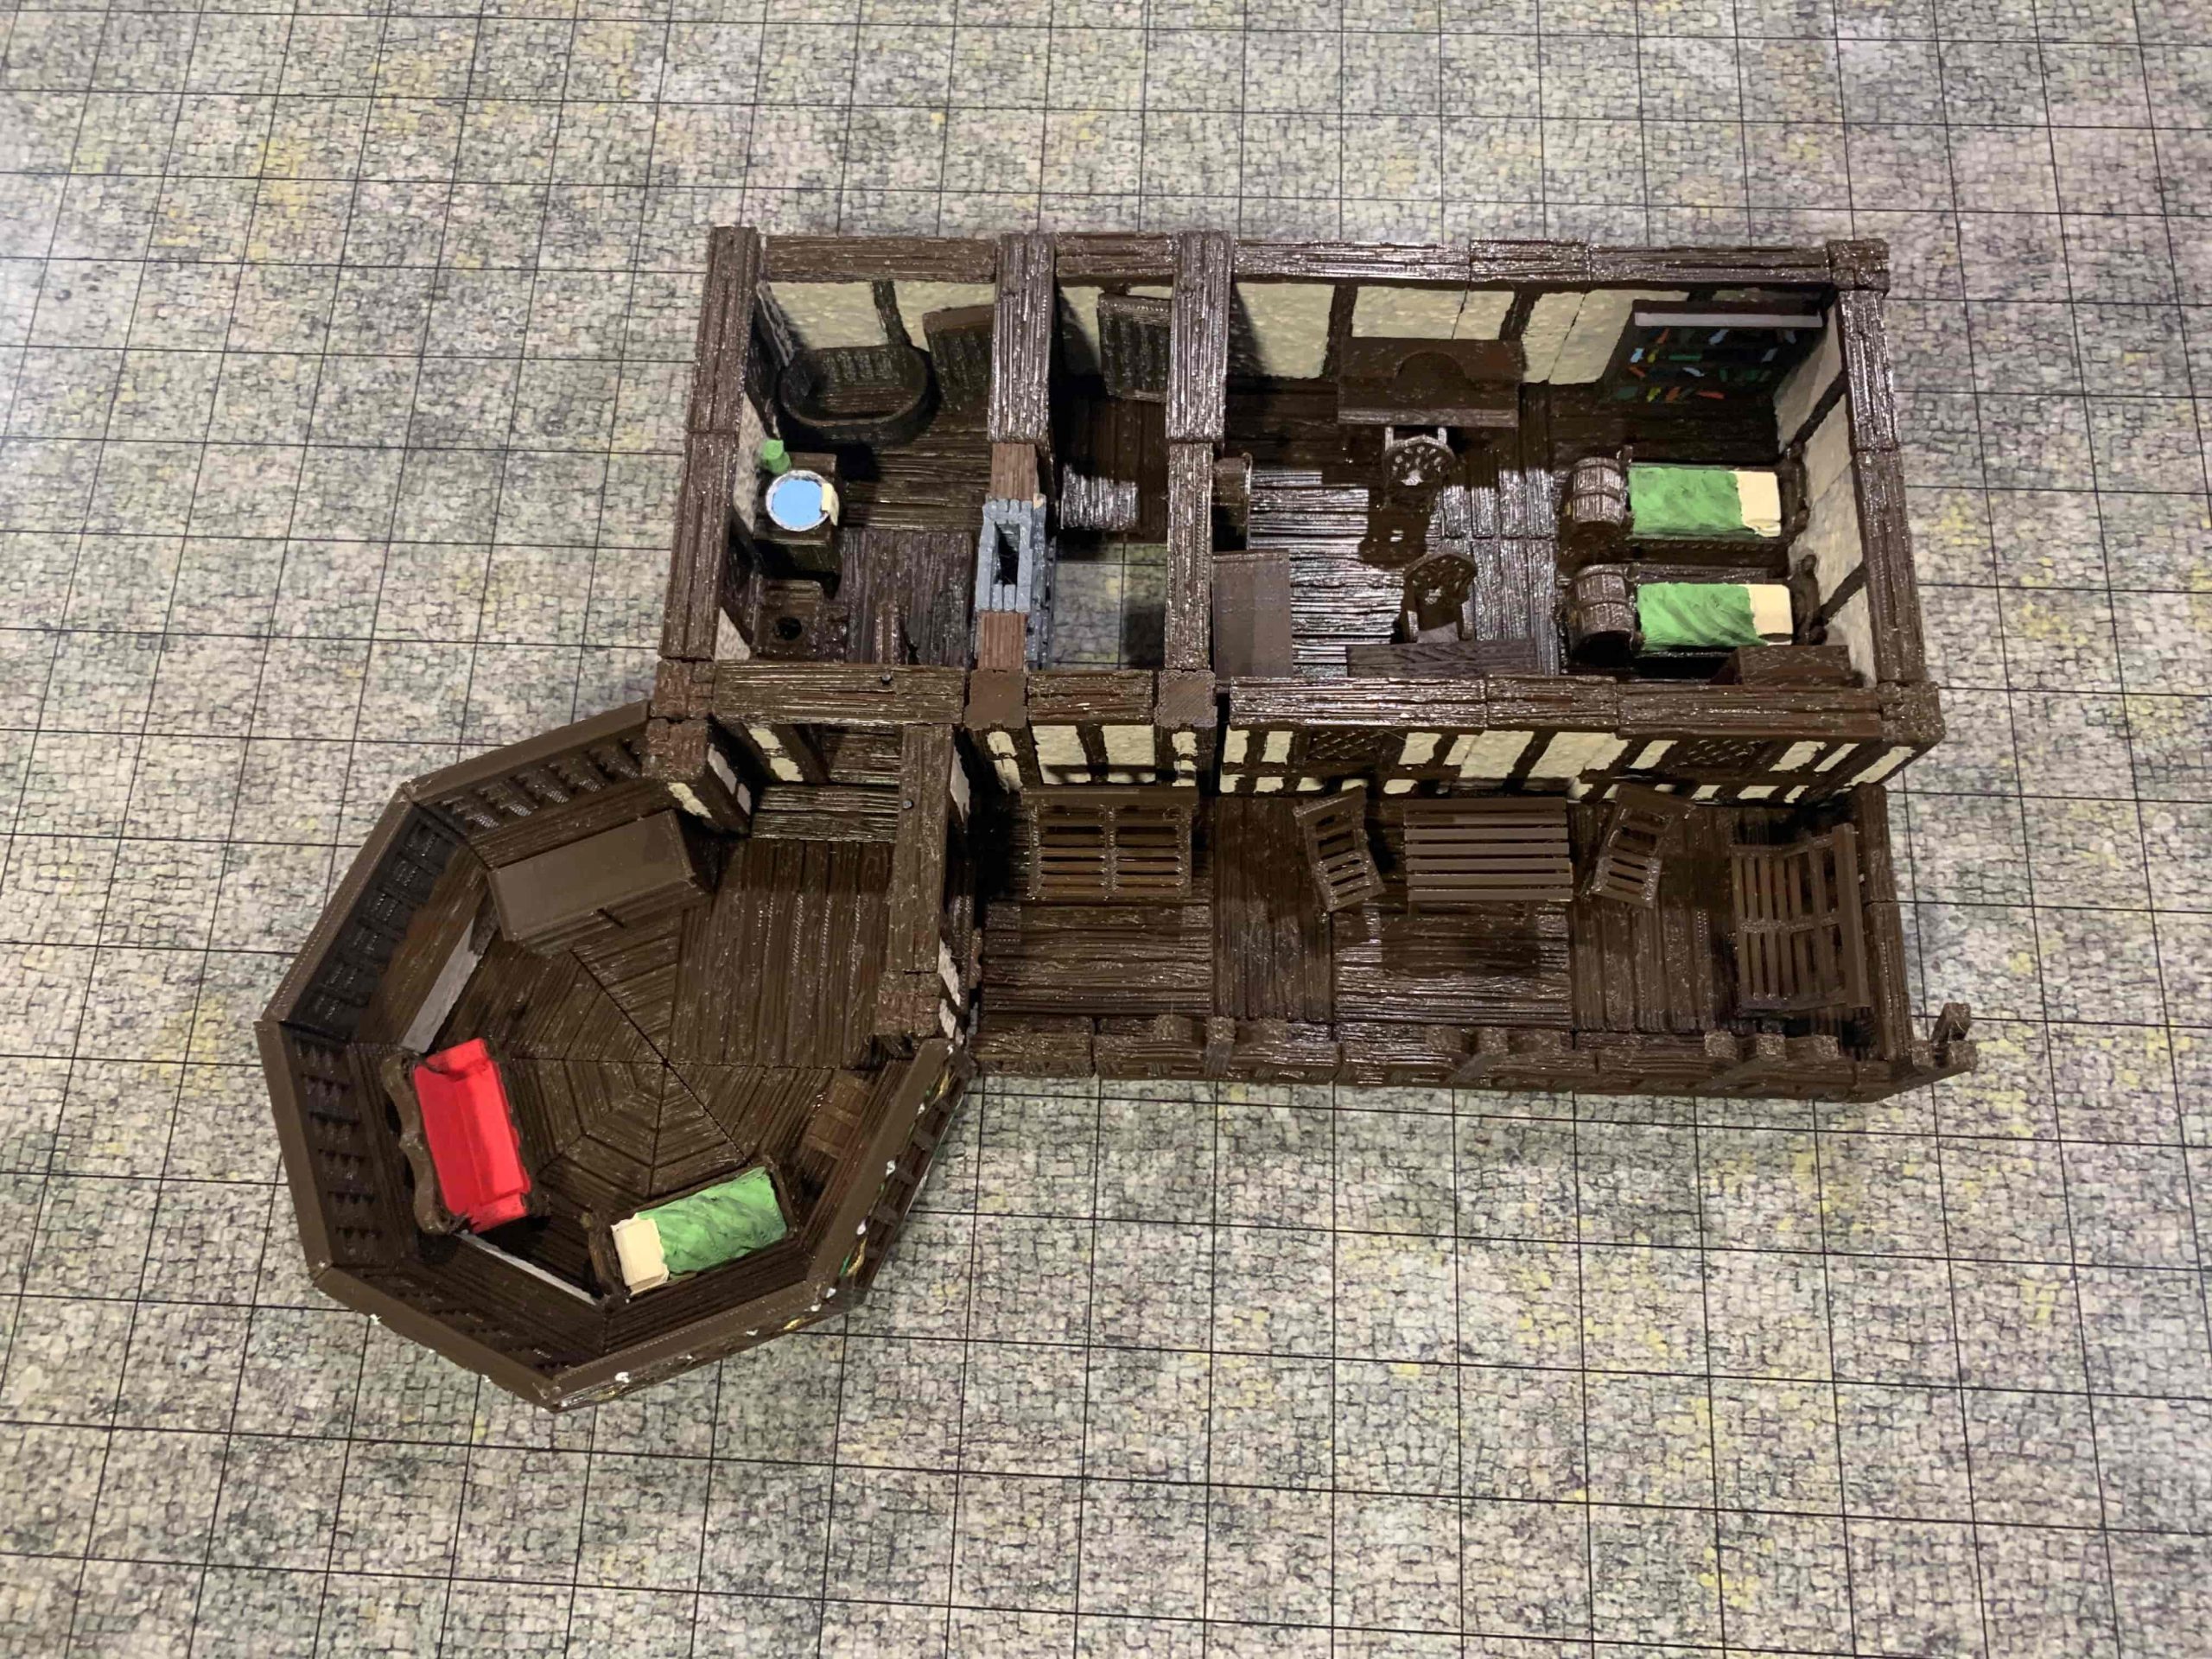
May 13, 2020 at 3:51 am #201473mrsethhansonParticipant
Follow up post – Level 4 thru Level 1 images
- This reply was modified 6 years, 2 months ago by mrsethhanson.
Attachments:
-
May 13, 2020 at 10:53 am #201504MattParticipant
Your build is looking awesome.
-
May 14, 2020 at 10:18 am #201622mrsethhansonParticipant
Thanks Sam.
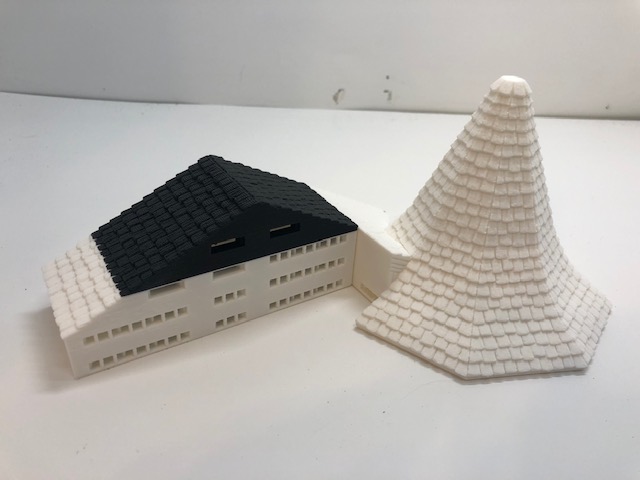
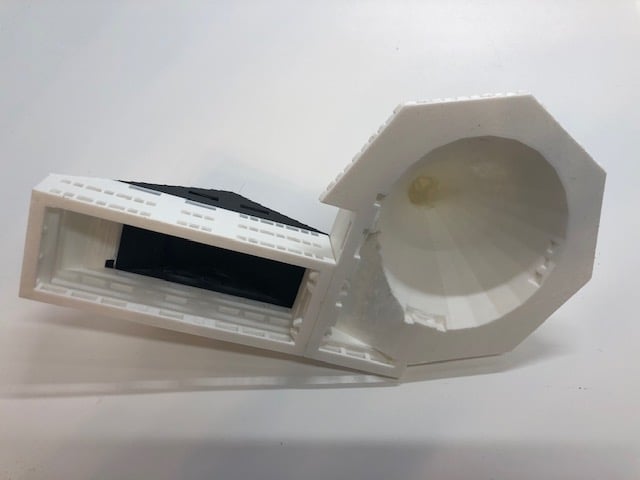
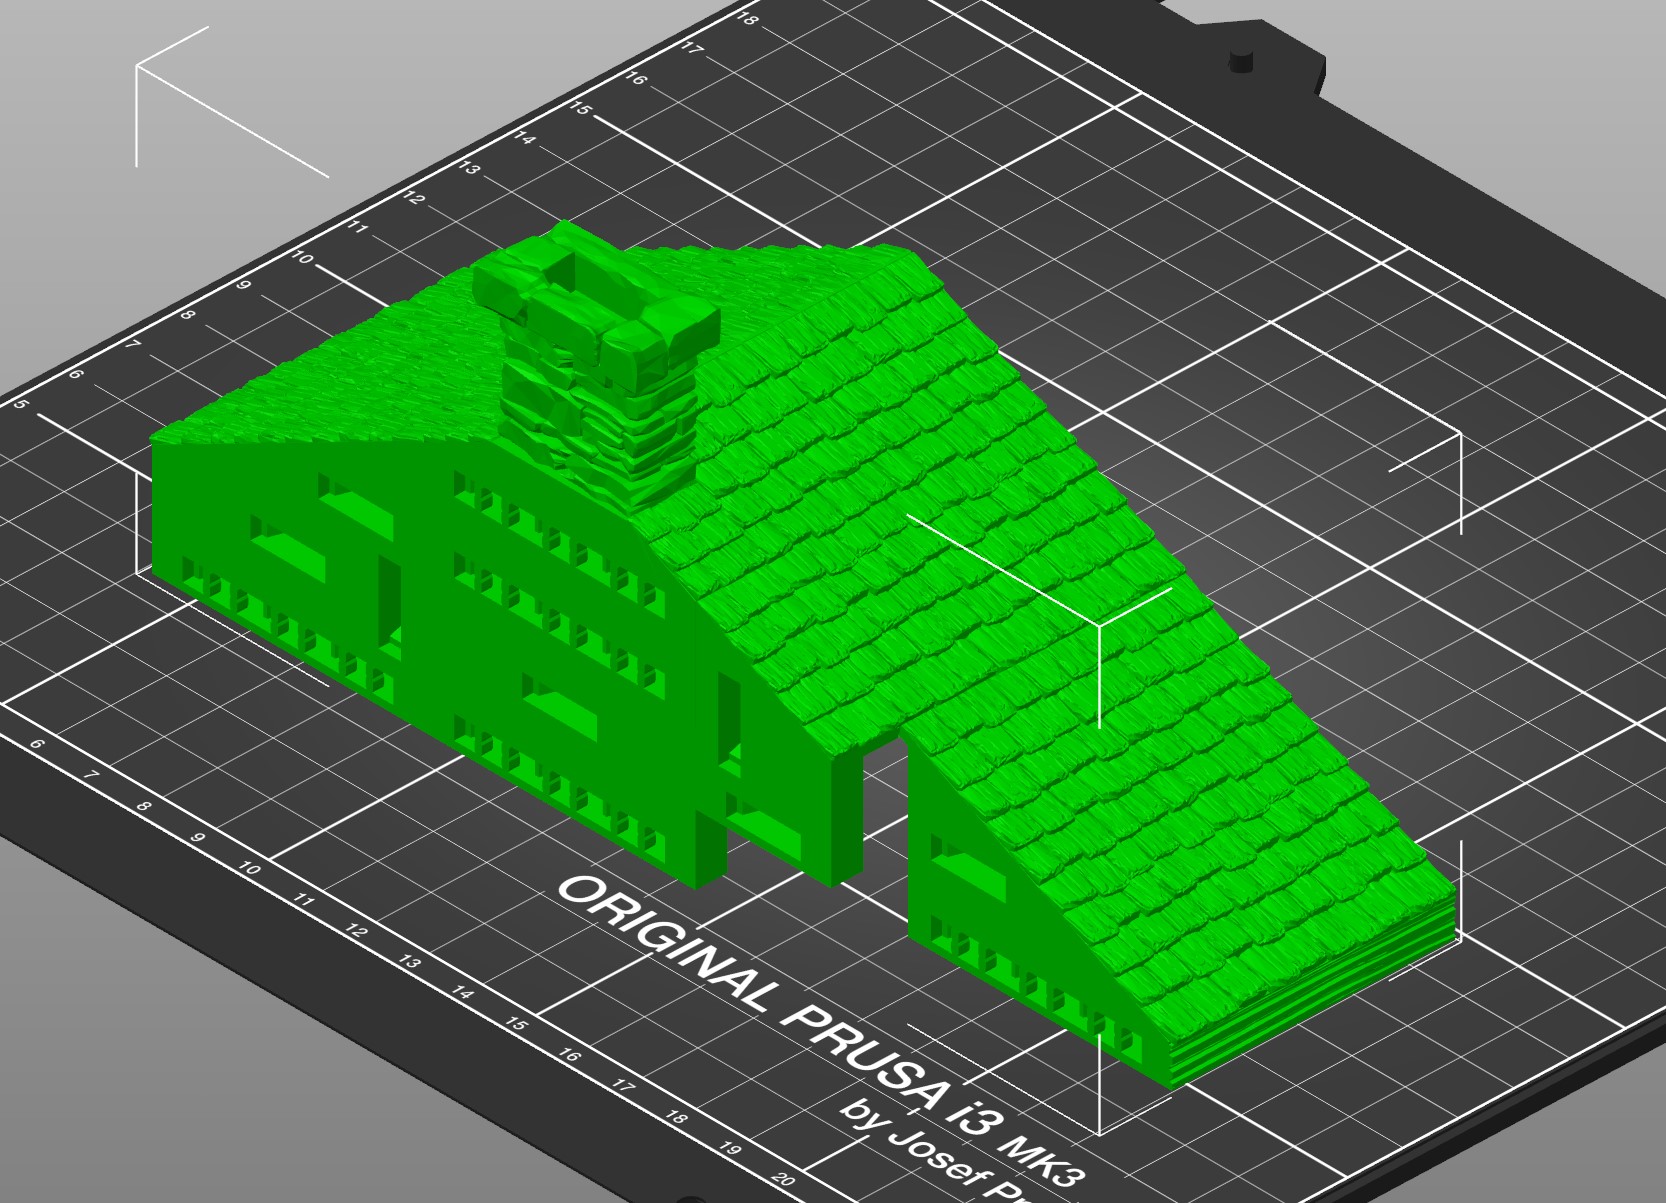
I attached some proof of concept images of the spire/tower cap and another small section where I combined and hollowed. So just two pieces to print instead of 9. Also shown is my next print piece which includes the chimney. I have to say I’m pretty happy with how these larger pieces are turning out and the amount of saved material. I know you guys are busy but I think creating special roof pieces for building you’ve gone through the trouble of putting together guides for would be super helpful!
So I’ll refrain from posting again until everything is printed 🙂
Attachments:
-
May 14, 2020 at 12:18 pm #201644MattParticipant
Thanks Seth, It looks great.
When building some of the larger buildings I tried to stay away from set roof pieces. Scaleability and modularity where the key things I wanted to work with in this setup.
-
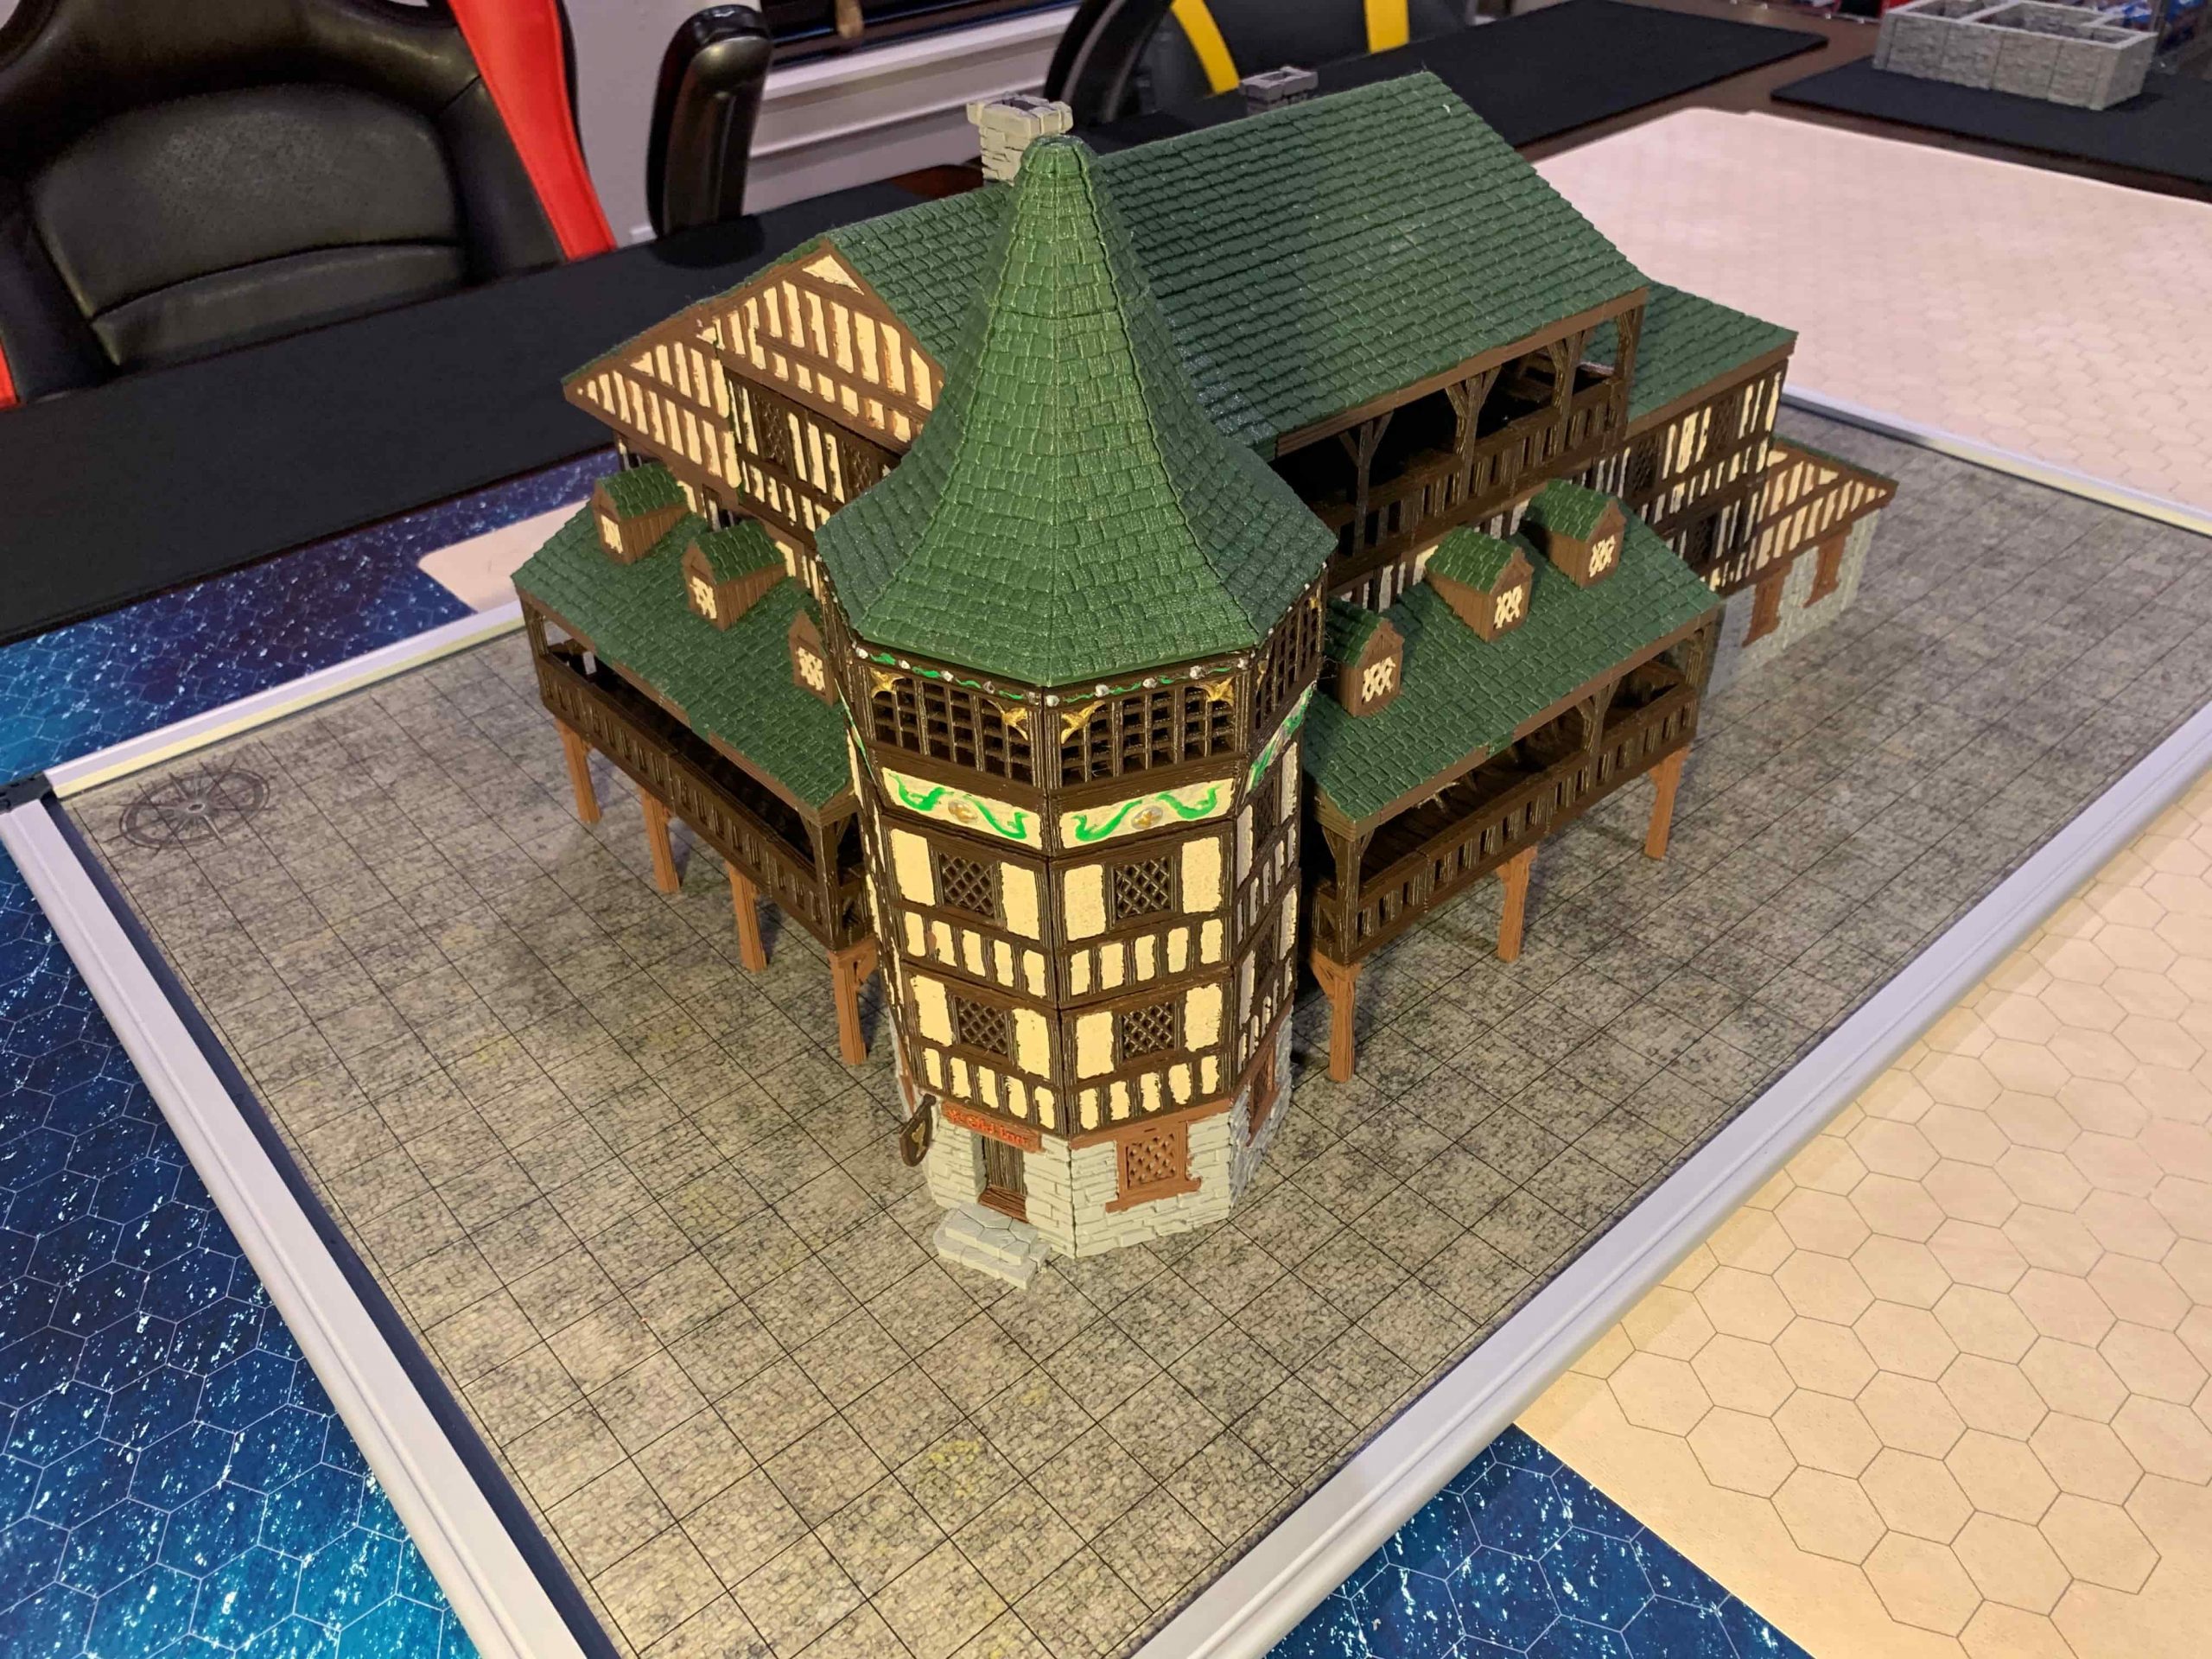
May 27, 2020 at 10:20 am #204654mrsethhansonParticipant
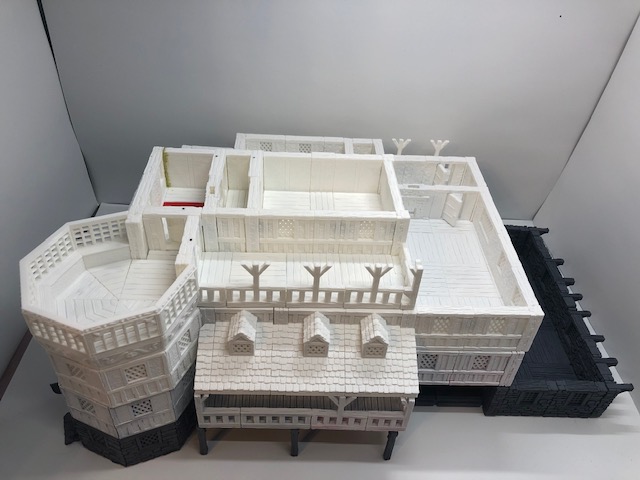
Finally finished! Here it is
Attachments:
-
May 27, 2020 at 10:20 am #204660mrsethhansonParticipant
Continued …
Attachments:
-
May 28, 2020 at 11:08 am #209470Nicholas JebsonParticipant
That has painted up so well! did you use the staining method to get the different stone colours?
-
May 28, 2020 at 11:12 am #209471Nicholas JebsonParticipant
Also you should definitly show this off on the OpenLOCK group if you havent already, you can find it here: https://www.facebook.com/groups/Openlock/
-
May 28, 2020 at 12:02 pm #209501mrsethhansonParticipant
I’m not sure what the staining method you speak of is? I use a pretty simple process, paint the stones like most BMC or Fat Dragon – Prime gray, paint random stones brown and others a lighter brown. Light gray dry brush and then stain with Minwax Polyshades Antique Walnut 😉
I’m not a member of the openlock group but I’ll attempt to join and post!
-
April 16, 2022 at 4:23 pm #331329Doc WebbParticipant
At the risk of nearly two-year-old thread necromancy, thanks for sharing your painting process! Do you thin the Minwax at all? Also, do you ming my asking about your process for the wood and plaster sections?
Thanks so much!
-
-
June 2, 2020 at 10:45 am #210595Nicholas JebsonParticipant
Staining is litterally just going through with inks and washes over particular stones to change their tone
-
June 2, 2020 at 10:54 am #210600mrsethhansonParticipant
Sure I understand what staining is, from your previous post though you said, “did you use the staining method” which to me by adding “the” it makes it sound like there was some specific method in which you were referring.
Previous post
“That has painted up so well! did you use the staining method to get the different stone colours?” -
June 5, 2020 at 9:20 am #211320Nicholas JebsonParticipant
My bad, didn’t mean to confuse at all
-
July 14, 2020 at 1:48 pm #223803sdollinsParticipant
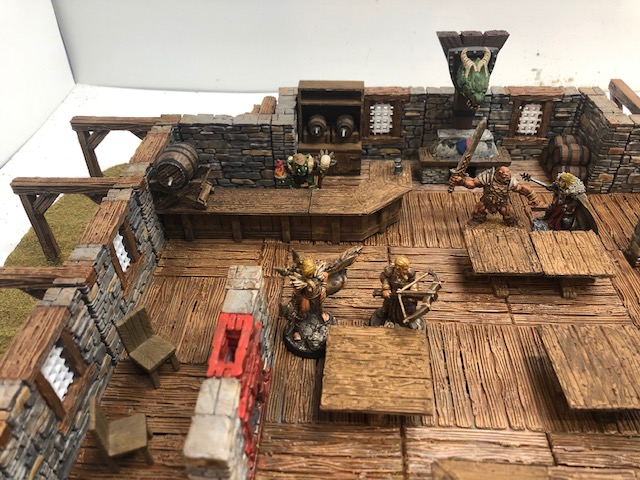
With all the extra time I have since our in-person D&D campaign is suspended for coronavirus I had time to work on this project – looking forward to some epic bar brawls or inn room intrigue once we resume play.
-
July 14, 2020 at 1:49 pm #223807sdollinsParticipant
The rest of the print
-
July 14, 2020 at 9:55 pm #223860Nicholas JebsonParticipant
What combo did you use for the green roof? has a great verdigris’ed look to it
-
March 7, 2021 at 10:38 am #263077MJJEPPERParticipant
Sdollins, those beers… how? Clear resin 3d printing? They look great!
-
March 11, 2021 at 9:21 am #263537Nicholas JebsonParticipant
I too would like to know the secret of those amazing steins!
-
April 9, 2021 at 7:26 pm #270009Nikole CourtneyParticipant
So glad you guys have shared photos. I have just started printing my manor and am starting from the basement up. My players’ characters bought an old inn to use as their home base so I am going to print this and paint it up and furnish it for them!
-
April 16, 2021 at 4:43 pm #271177Nicholas JebsonParticipant
Is it going to be haunted? all the best old Inn’s purchased have something wrong with them that the previous owner did not disclose.
-
October 6, 2021 at 3:11 pm #307420Michael PotterParticipant
The build guide (I finished the first level, all printed and painted and assembled) does not match the maps for Trollskull Manor. The players are encouraged to customize the interior, but it is about 5 feet less deep and 10 feet less wide than the maps show, so shrinking the entire building does not make sense. I am adding the pieces that make level 1 deeper now (the pantry is 10 feet wide in the map in the module). Need to figure out the best way to balance making it 5 feet to 10 feet wider as well as this is all in the main bar area.
Will add pictures and a parts list once I am done.
-
October 8, 2021 at 4:59 am #307783Michael PotterParticipant
I fixed the “deep” issue to make the pantry the 10 feet wide it is on the map (the kitchen and entryway are off the same). The Pantry/entryway are also not wide enough by 5 feet, that is the next thing I will fix. The result will be the pantry will be 10 feet by 15 feet.
From the doorway to the kitchen to the far wall in the tap room, the map has that at 50 feet. The build plan here is at 32.5 feet, so close to 20 feet missing. Making the pantry/entry 5 feet bigger leaves 15 feet for the taproom. 5 feet goes along the back (the notch with the stairs is 10 feet in the map). I am thinking the other 10 feet will be right in the middle.
“Fixing” the bottom floor obviously means all the floors above need to be fixed as well. The original build is great and looks stunning, I am just trying to be closer to the original map. The build has a few other differences (turret is smaller and missing a ground floor door. This is partially because I assum that Matt wanted to show off using the pie slice floors. That I will not fix as I am only doing the first floor and maybe the balconies. The build has windows where there are only walls, but the book also encourages players to completely remodel the place and the places where Matt added windows makes sense for light.
I am having fun with this and will post pictures and describe what extra pieces I used.
-
November 28, 2021 at 4:19 pm #313072LazerkiltParticipant
Maybe I’m an idiot, but I can’t find the assembly guide anywhere…
-
April 11, 2022 at 2:31 pm #330841kyle johnsonParticipant
I bought this pack and am trying to find a print list. Is there a print list to create Troll Skull Manor?
-
April 19, 2022 at 9:19 am #331528Nicholas JebsonParticipant
Hey Kyle, this should have what you need, its our Knowledgebase building guide for the “manor Inn”
https://www.printablescenery.com/wp-content/uploads/2021/10/The-Manor-Inn-v1.3.pdf
-
-
AuthorPosts


- The forum ‘3D printed terrain for Dungeon Masters’ is closed to new topics and replies.