Tagged: gloomwood prusa
-
AuthorPosts
-
-
June 1, 2021 at 8:02 pm #277298spielebude.comParticipant
Hello,
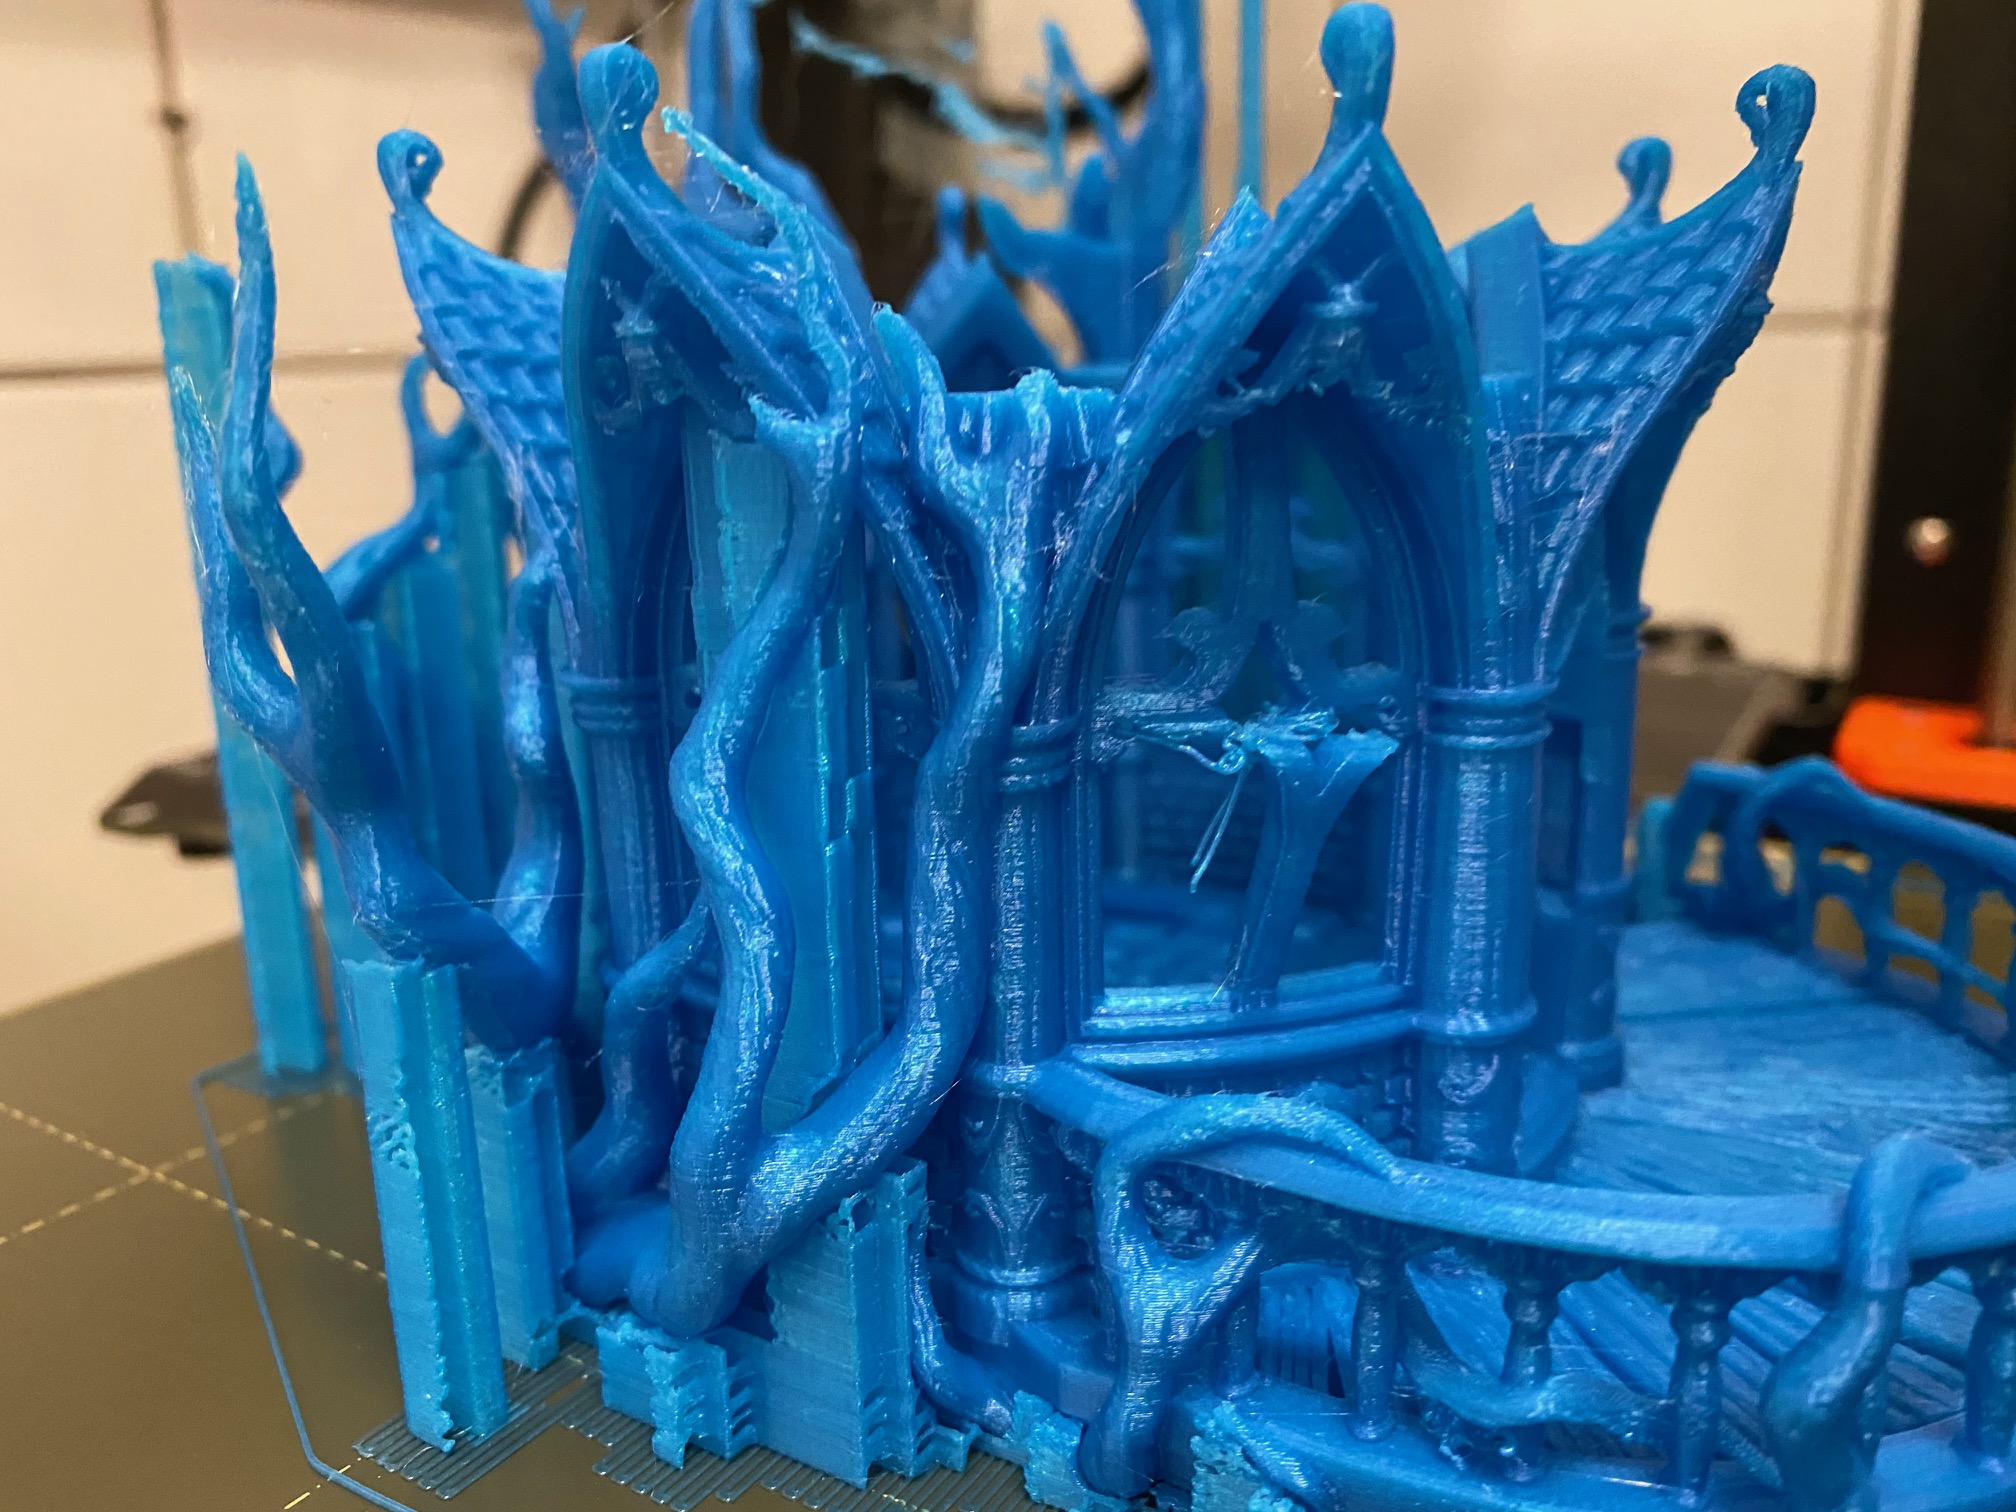
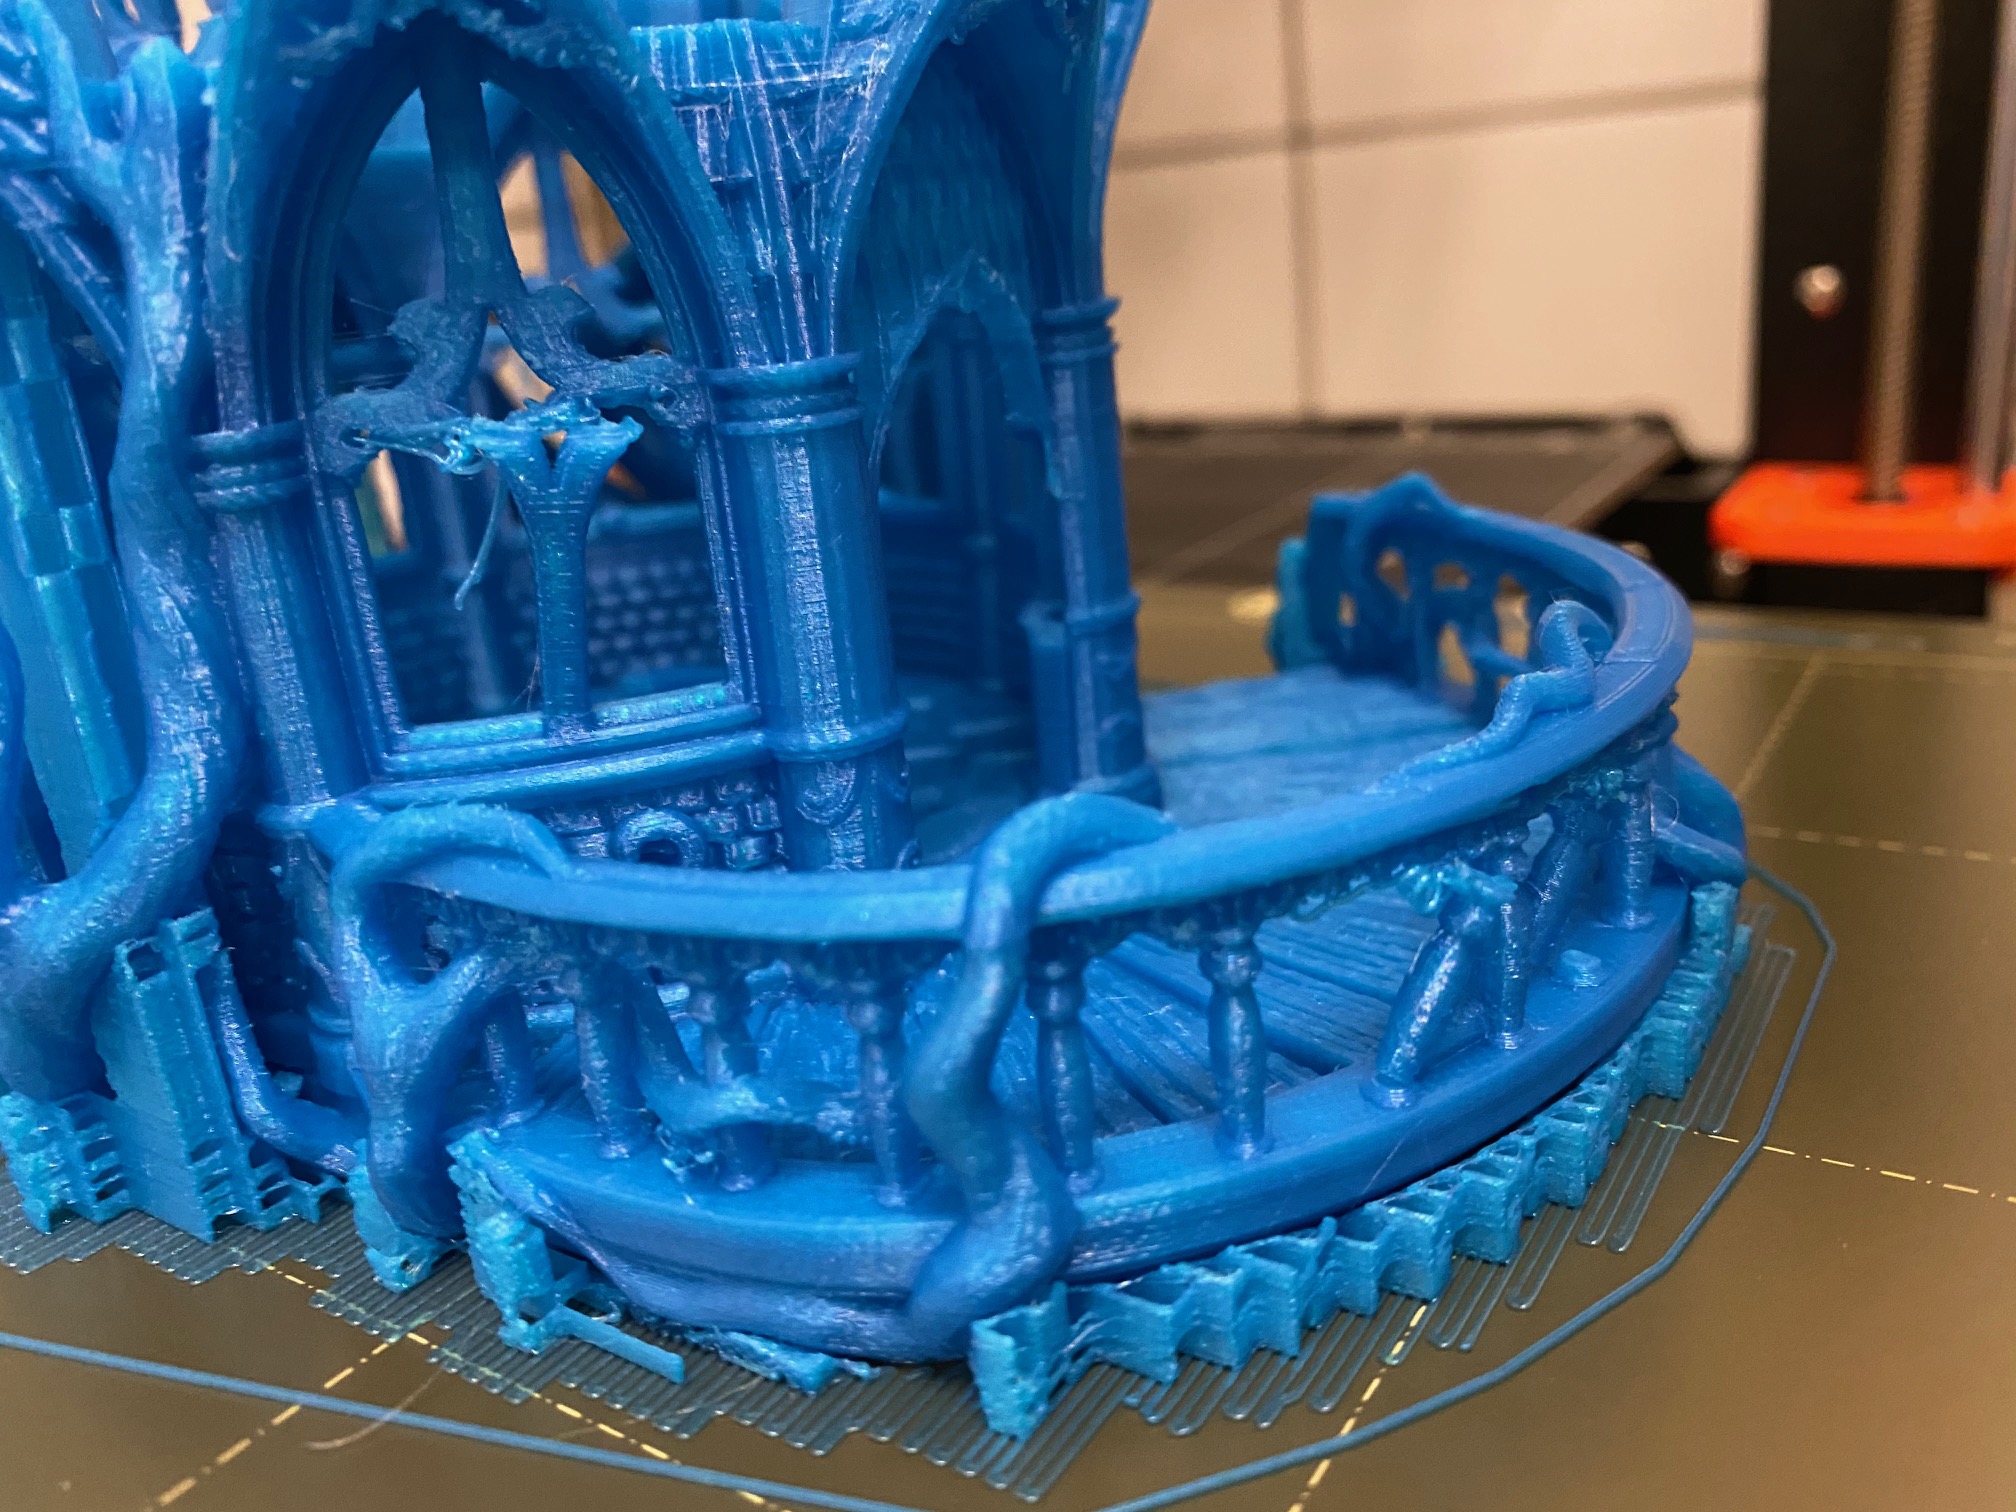
I can´t print the gloomwood treehouse on my prusas. Esspecially Lvl1 and Lvl2 only come out with serious Problems like broken windows an railings. The failiures are alway at the same same windows and the same railingparts. I tried differnt settings, layerheights and filaments. Has anyone a clue, or is the file maybe broken?
Regards,
DennisAttachments:
-
June 4, 2021 at 9:44 am #277539Mike LosParticipant
Hi Dennis,
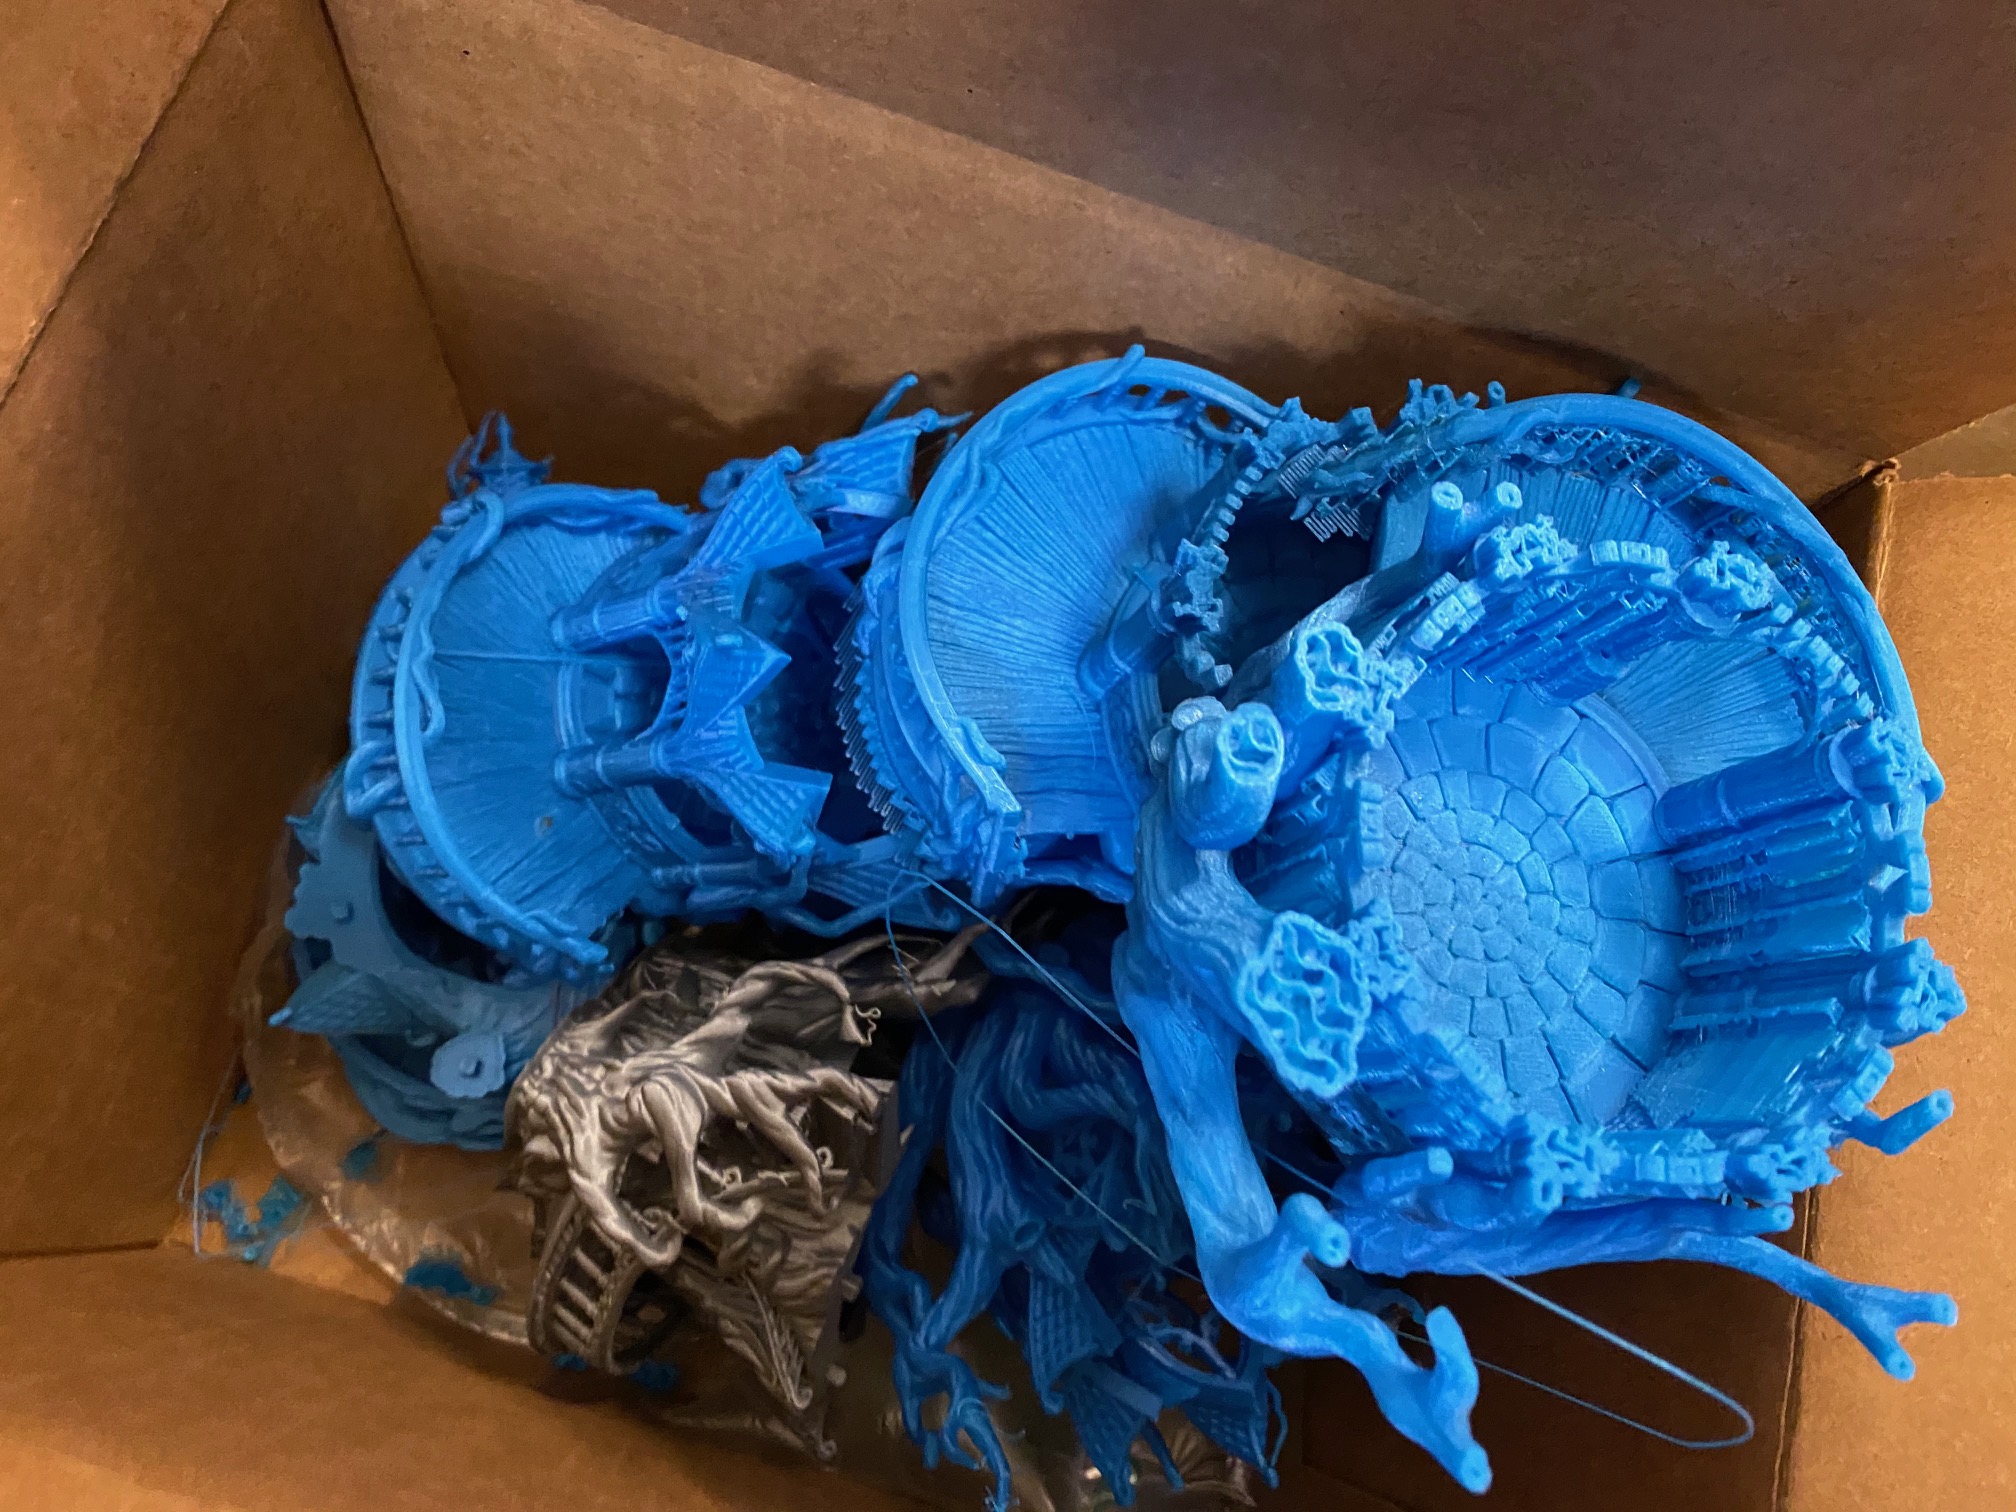
Thanks for reaching out, the photo of the failed prints is hard to look at for any 3d printing enthusiast but we’ve all been there!
My immediate thought would be to look at the stability of your printer and the printer head speed. If the printer is on a wobbly surface then movement whilst printing might break those thin parts of the model. On a similar note if the printer head is moving too fast it could knock some of those smaller pieces when printing.
To get down to the bottom of it would mind sharing a screenshot of your printer settings? Maybe it will reveal a clue to help to solve this issue -
June 10, 2021 at 11:39 pm #278268spielebude.comParticipant
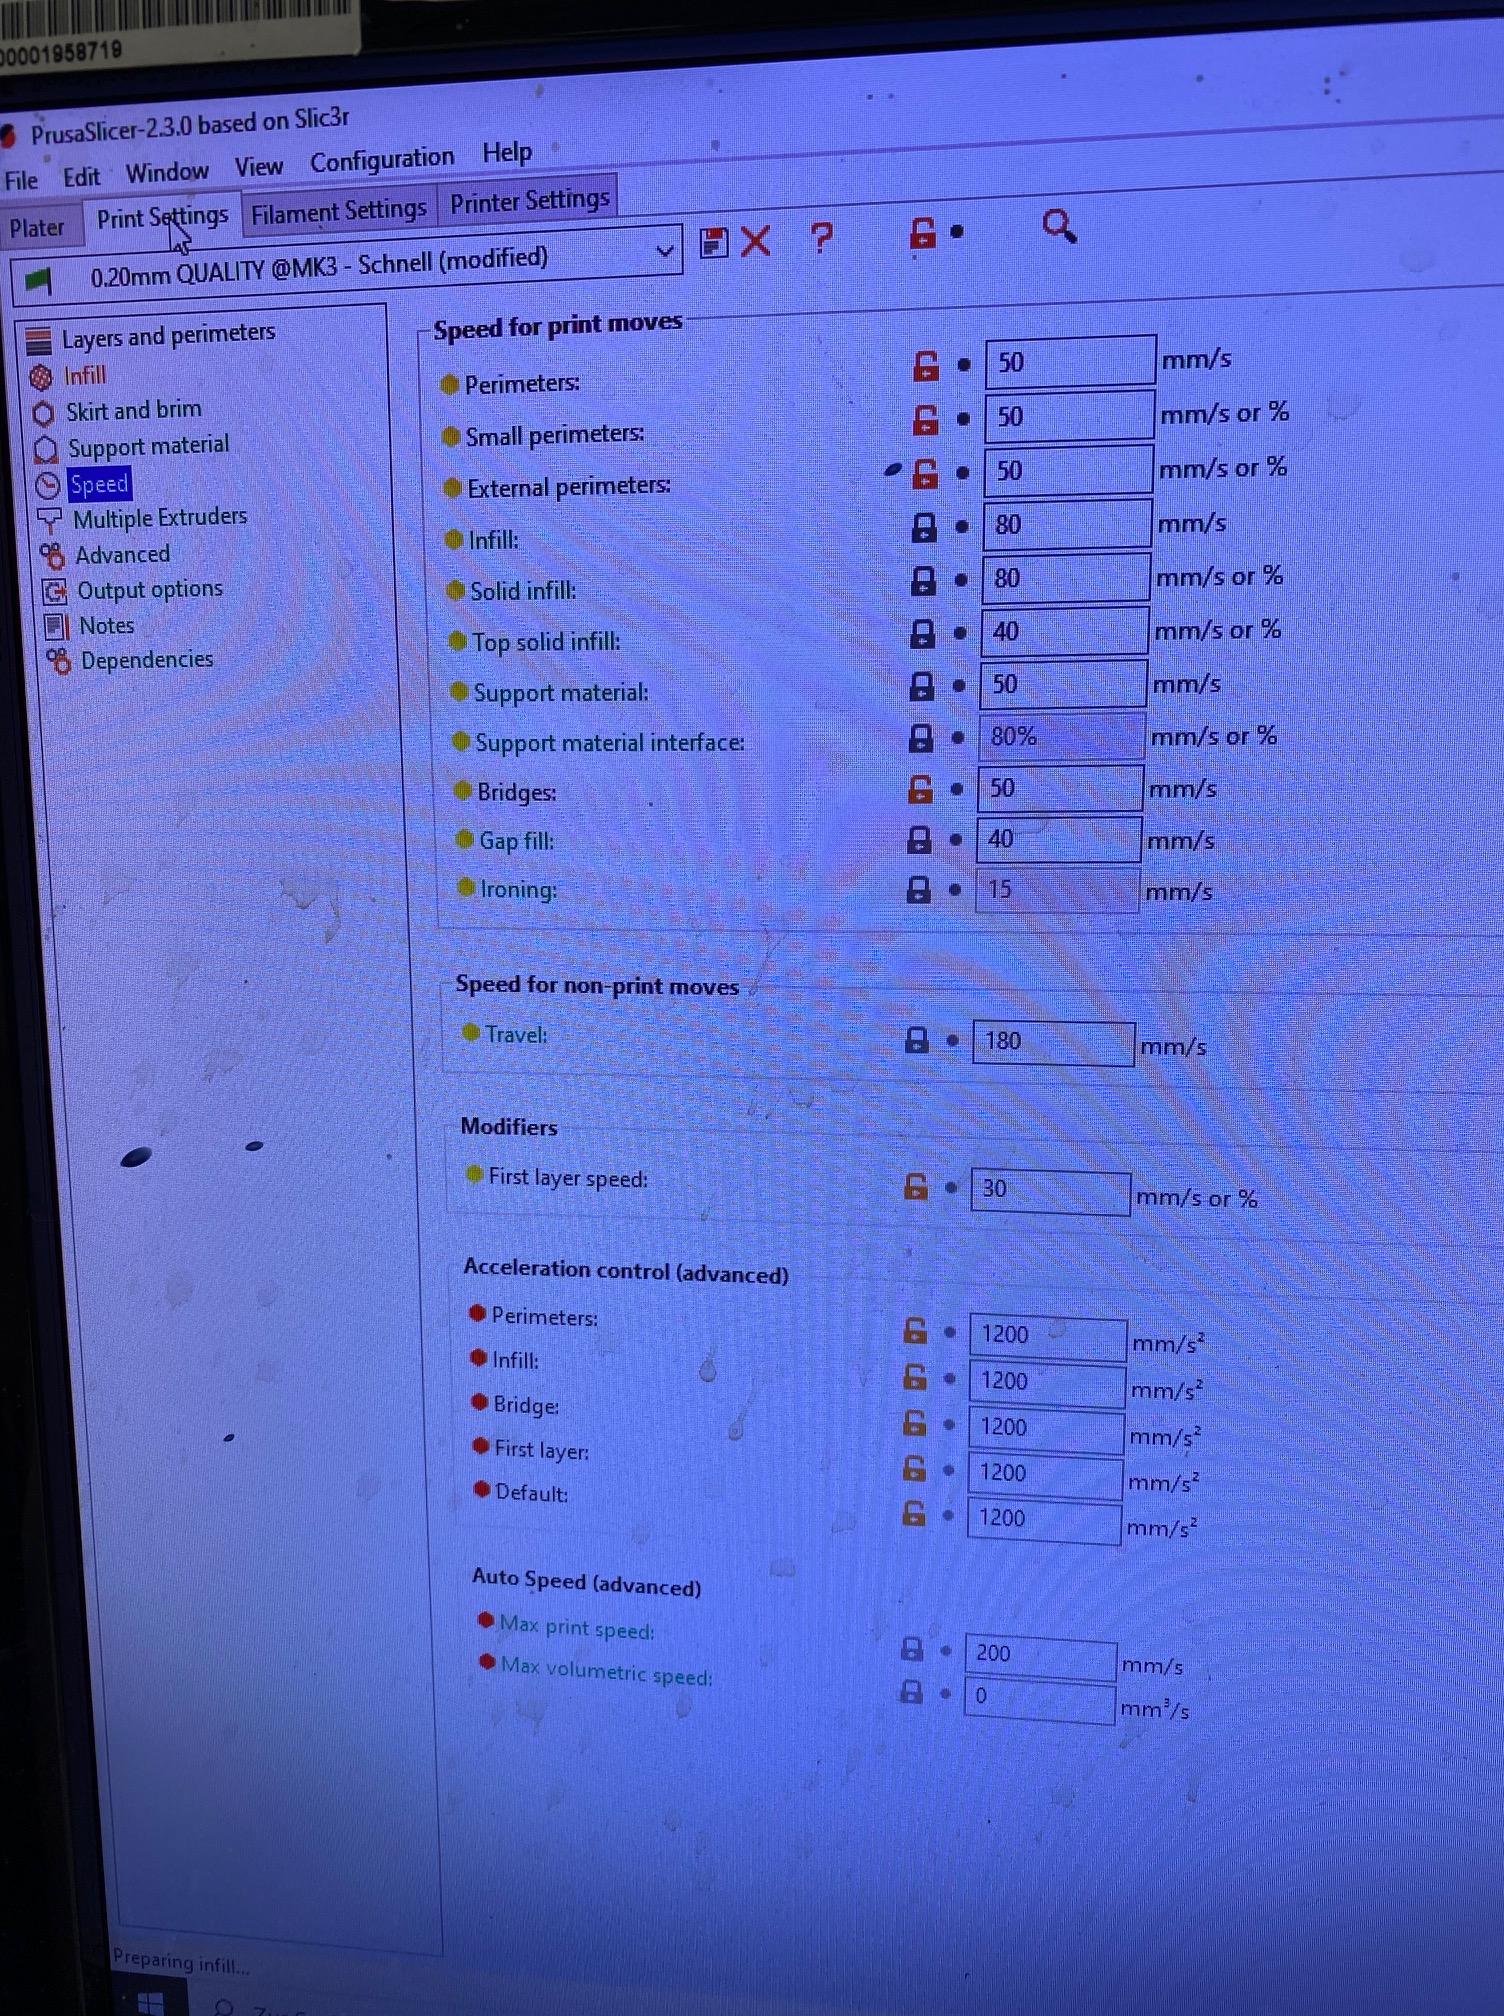
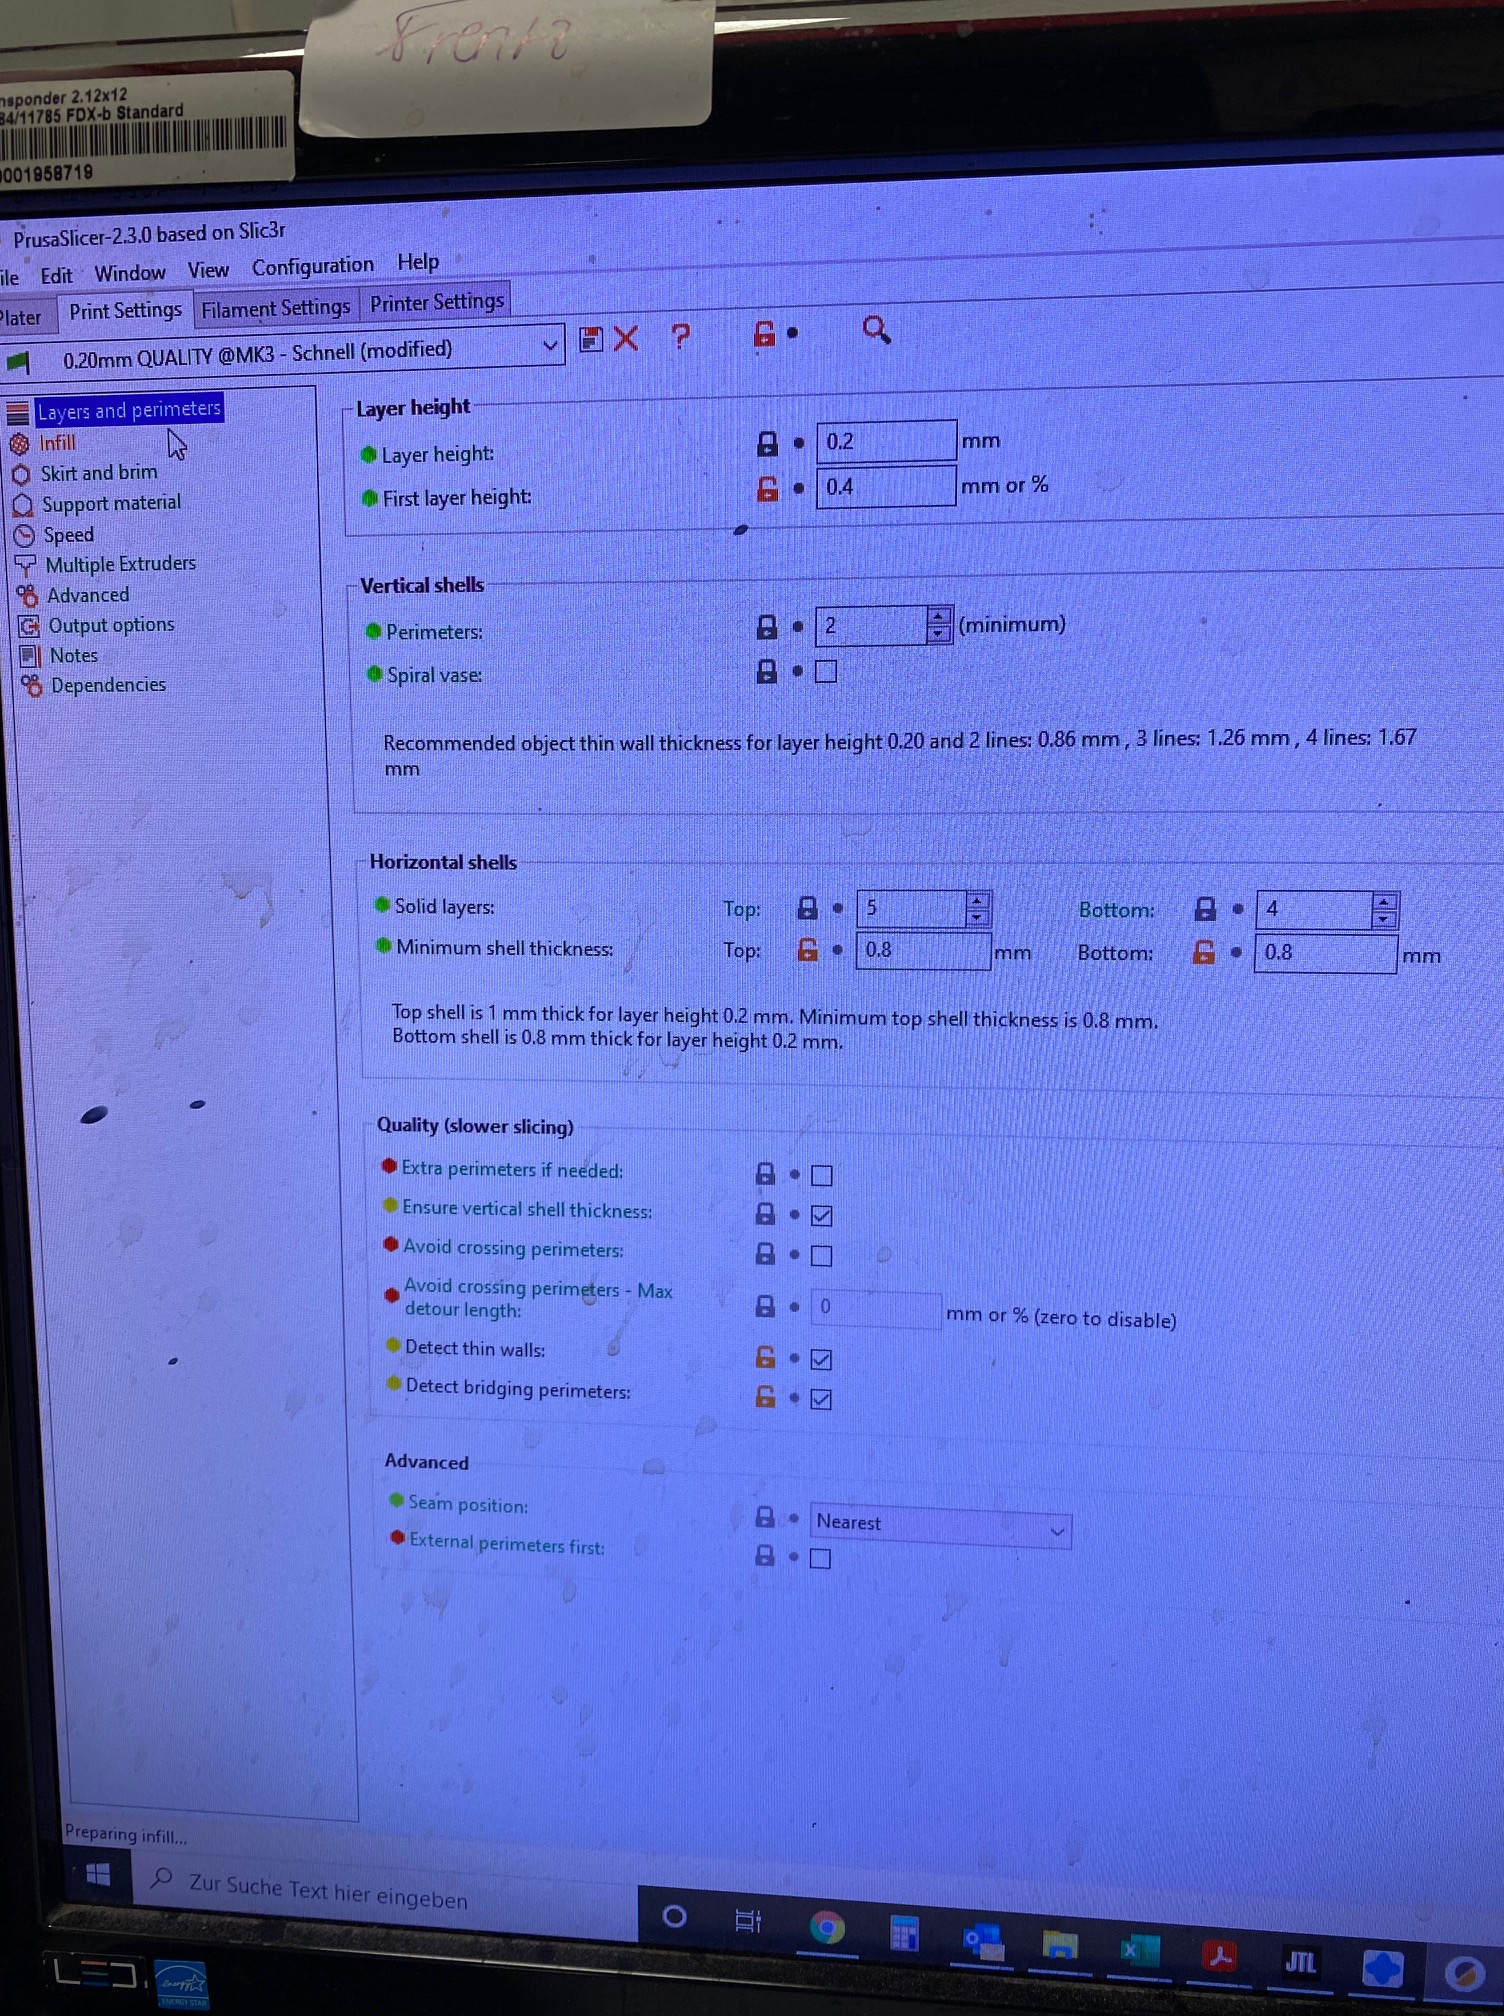
This are my 0.2mm Settings
Attachments:
-
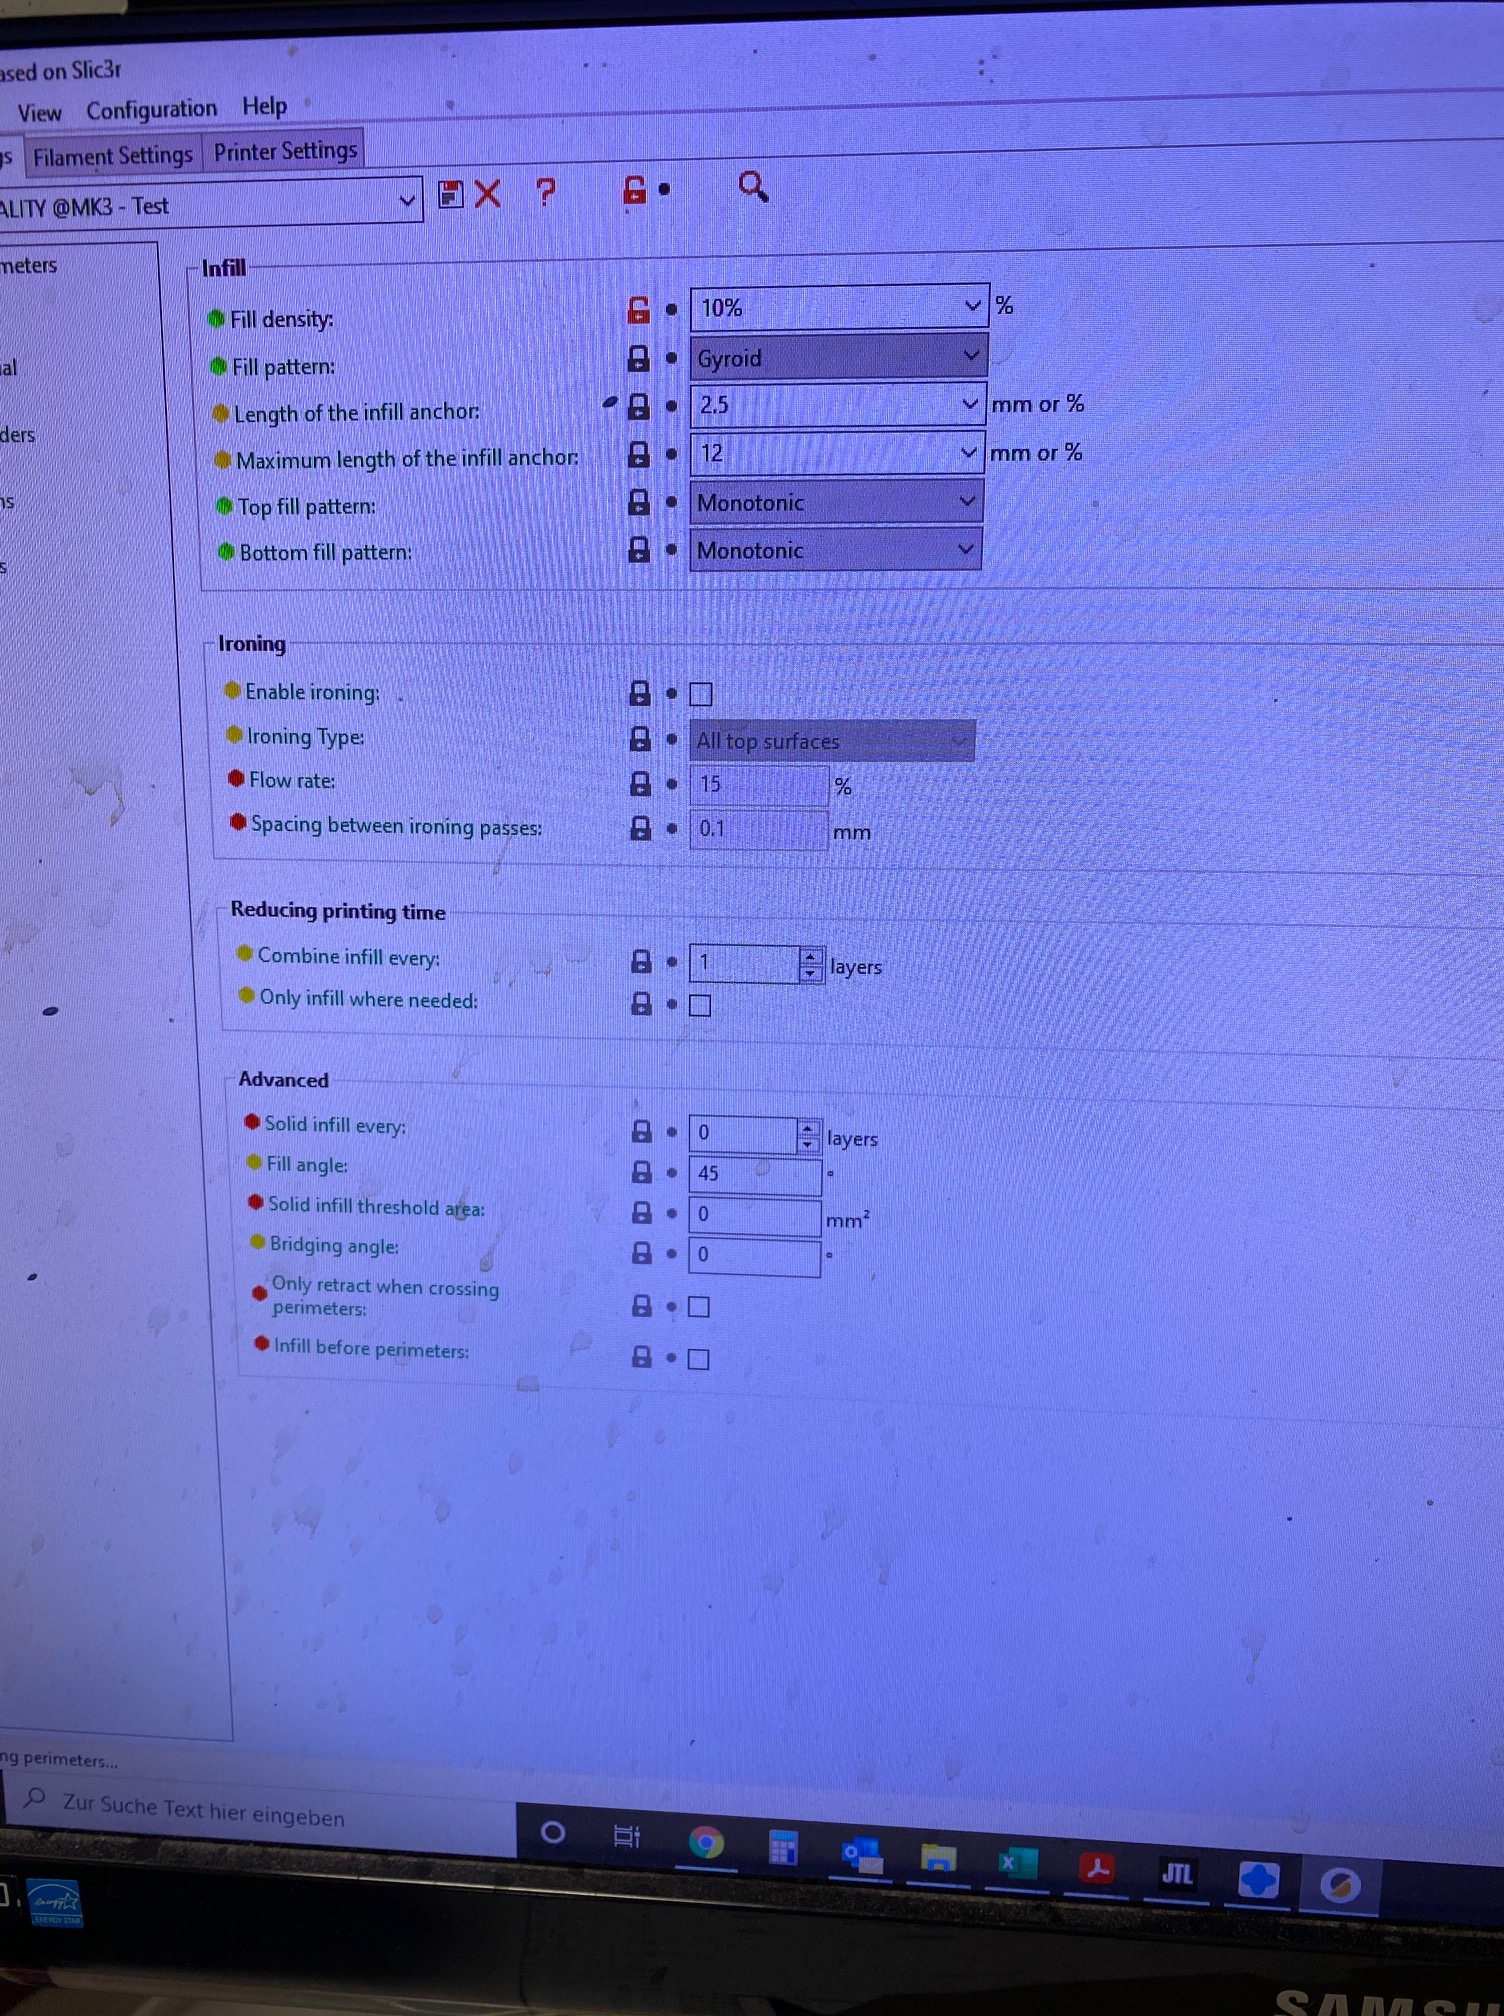
June 10, 2021 at 11:41 pm #278272spielebude.comParticipant
This are my 0.14mm settings I use for most of our prints.
Attachments:
-
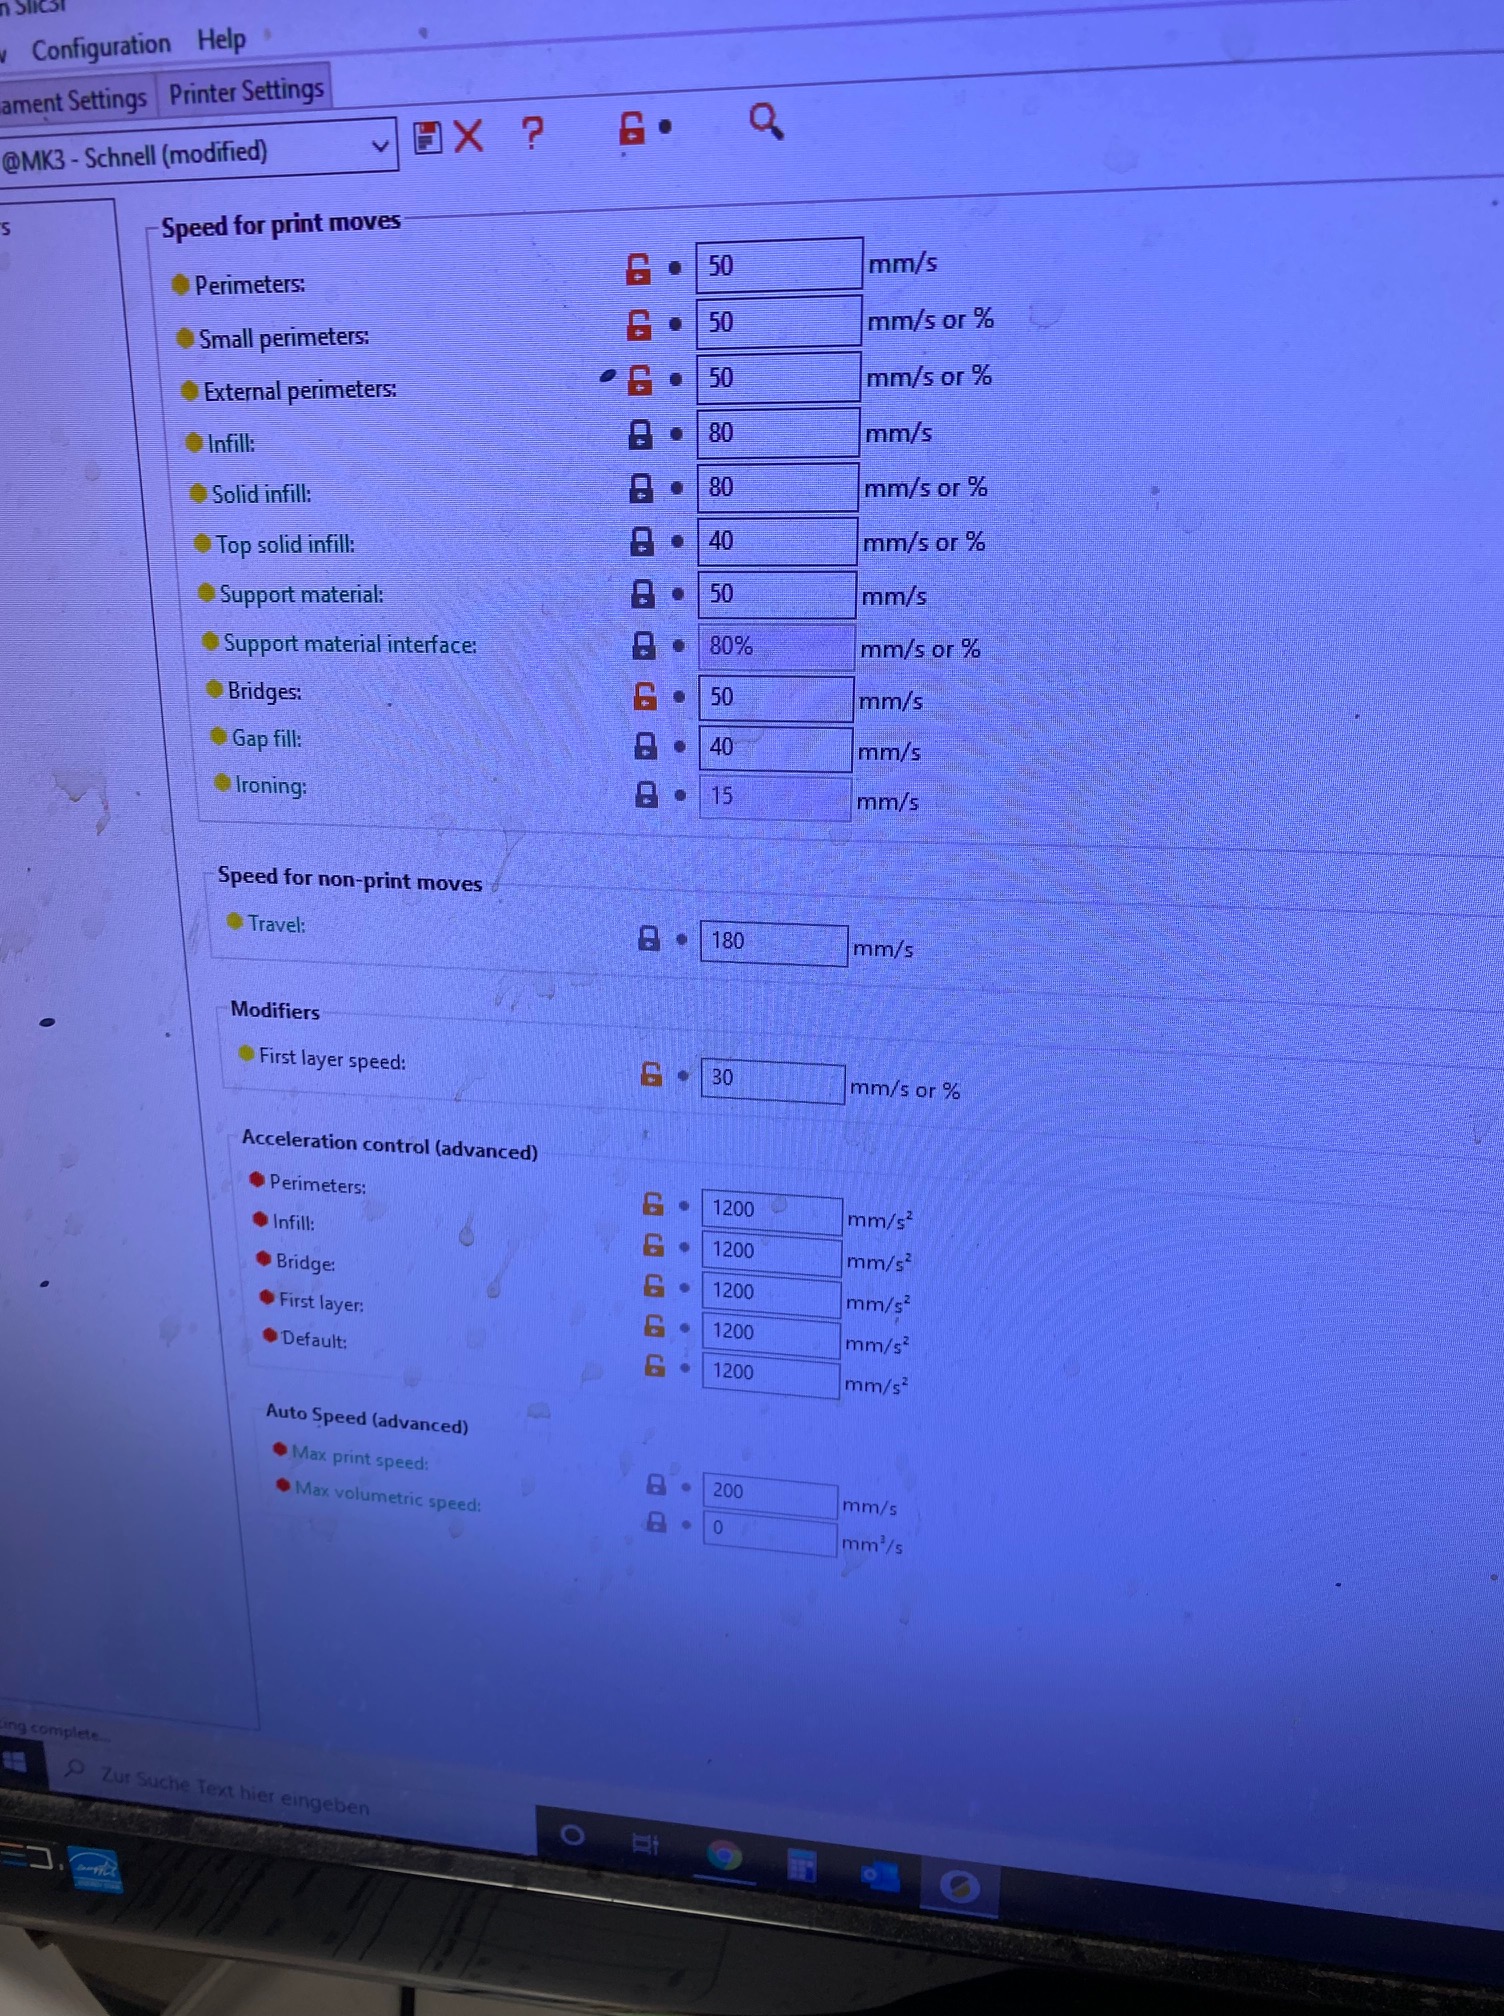
June 10, 2021 at 11:57 pm #278276spielebude.comParticipant
Here are standardsettings from Prusa
Attachments:
-
June 10, 2021 at 11:58 pm #278279spielebude.comParticipant
This is a problem that I have often with the Treehouse and the Feywild roof files.
Attachments:
-
July 1, 2021 at 10:25 pm #280301spielebude.comParticipant
Hey Mike, did you had the chance to look over the setting? Or maybe do you have good setting from your own testruns?
-
January 10, 2022 at 9:39 am #279731Alex MaddysonParticipant
The peculiarity of 3D printing is that the previous layer becomes the foundation for the next one. To obtain a quality model, it is necessary to correctly adjust the amount of extruded plastic.
If the substrate is too fragile, gaps will appear between the layers. When changing the nozzle from a large part to a smaller one, it is necessary to have a sufficiently strong foundation. There are a number of reasons that can lead to holes and gaps between layers. I think that you have something like that
Look, I also had this problem when printing on a project for Engre.co, and here are the main problems and solutions that I can advise you.
The menu of the Simplify3D slicer is used as an example. Menu items, their names, and locations in your software may vary.
You need to look at first if the solid top layers are not enough, either Infill percentage is too low, or Under-Extrusion.
Please read this article where you can find all information. https://www.simplify3d.com/support/print-quality-troubleshooting/gaps-in-top-layers/
In addition, I noticed in your photos that you have a stringing or oozing effect. I can also advise you to pay attention to the retraction distance, the retraction speed, it is also possible that your temperature is too high. The most common setting that combats this problem is usually called Retraction. If it is on, the extruder, having finished printing a certain area of the model, draws the filament into the nozzle, which is a good way to get rid of a stringing. Also, I find it right here: https://www.simplify3d.com/support/print-quality-troubleshooting/stringing-or-oozing/
-
-
AuthorPosts


- The forum ‘Resolving 3D Printing Problems’ is closed to new topics and replies.