Tagged: DnD, multilevel setups, Risers, securing tiles
-
AuthorPosts
-
-
March 12, 2022 at 10:25 pm #327904Johnathan EnslinParticipant
Hi there,
Hope you are all well 🙂
I am busy trying to build the “dungeon of the dead three” which features many areas that are higher/lower connected by steps.
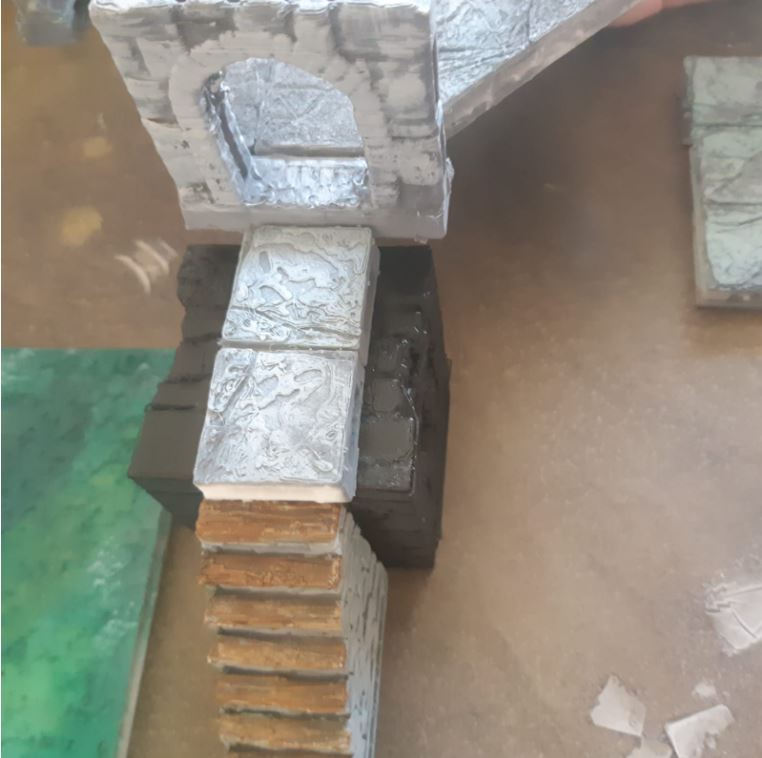
How am I supposed to use the risers?It appears that they are the exact height of a wall and that they offer no way of clipping/being secured to tiles placed on top?
so I need to place my tiles and walls on top?I was going to buy the heavy stone walls but now I’m not sure how to get this to work and whether I need to get something else?
What is the difference between quarry pools and tepid pools? I actually resorted to using the tessellation templates in order to fill in 5ft gaps
Is it possible to secure the tepid pools as they also need to be higher/lower in a similar manner?Thank you in advance,
Attachments:
-
March 14, 2022 at 8:48 am #328026Mike LosParticipant
Hi Jonathan,
The risers are thicker pieces that you use instead of, rather than in addition to, the normal pieces. So you have the low risers which give a halfway step and full risers that are the height of a wall. The texture on top of the full risers is the floor for that level.
They arent desgined to have another piece sit on top like in your photo. As you identified you could use the tesselation templates to fill in a slight height difference.A great way you could test it out is on TerrainTinker.com if you havent been on there already. You can put together the whole dungeon on it and itll give you want to print. Even if youve already got the pieces printed it can make planning out large dungeons way easier
-
April 5, 2022 at 8:10 pm #330290AnonymousInactive
essay
-
-
AuthorPosts
- The forum ‘Getting Started’ is closed to new topics and replies.