 My Account


Description
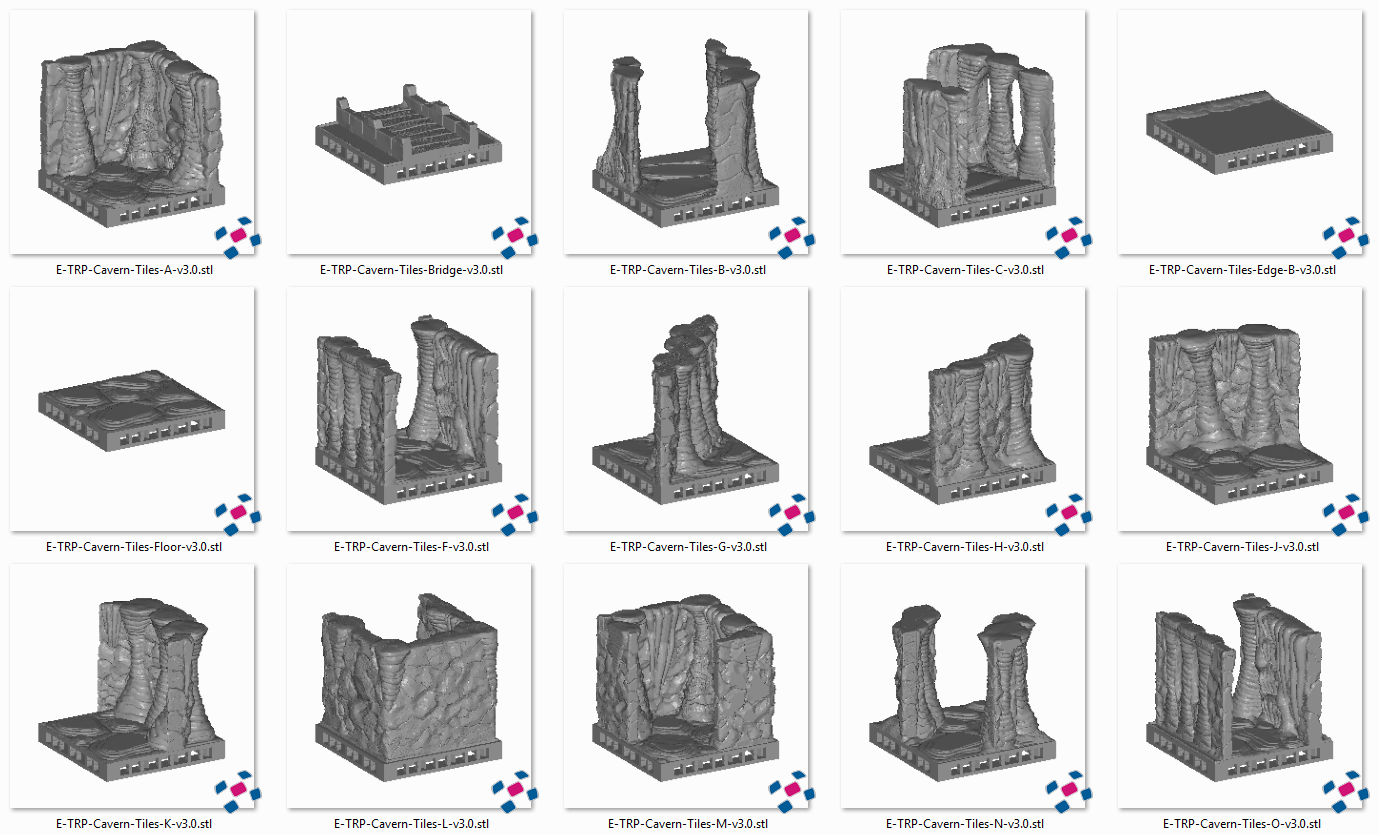
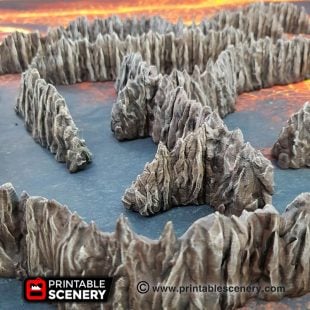
Breathing in the cool dampness, you step slowly between the rock pillars. Keeping your footing on the slick floors was hard enough when the chambers were wide and spacious. But in these narrower parts, a trip or stumble could leave you trapped in the narrow confines of this cavern forever.

Update:
- 16 April 2018 (version 3.0) Updated to Triplex
- 27 July 2018 (version 3.1) Removed duplicate tile.
Notes:
- Product measurements can be found in the image gallery.
- Right-click on the image below and “Save As” to download the reference sheet for this pack.


Richard (verified owner) –
Matt,
For the tiles that are adapted from the non-square predecessors, did you intend for the slight lip around the edges? I envision using these to create underground rivers/lakes, but the lip would kind of break that illusion, and it isn’t on any of the Rampage Original stuff like the Thermae or Sewers. Thanks!
Matt Barker –
The lip is so that you can paint it and pour in translucent paint, like liquid water by woodland scenics. Its easy to cut off if you don’t want it.
Richard (verified owner) –
Cool (vis-a-vis the lip question). Of note, I was loading up the watery tiles, trying to decide which and how many to print, and I noticed that the U and V are the same stl (when in the pictures they look different, they both look to be the V tile, which is the watery K).
Thanks!
Matt Barker –
Ill render out an index with some examples so you can see the difference
andy (verified owner) –
Is there any difference in the A and ZB tiles? I can’t seem to find any difference between the two of them in CURA.
Sam Campbell (verified owner) –
The A and ZB files are exactly the same. We will adjust the set.
andrewhall252 (verified owner) –
Any chance you could add an open water tile to this set like you did for the non open lock cavern set. Also edges for the tiles would be awesome just and inside corner edge and a straight edge one tile in length to simulate large holes in the floor. Love your tiles sets! Cant wait to see what you do with Hagglethorn Hollow!
Sam Campbell (verified owner) –
You can download the open water tile from https://www.printablescenery.com/product/open-lock/ for free and there are other sizes as well. It’s called “E-TRP-v7.5.stl”. The R and U files would be really useful as well.
We’ll add the edges idea to our ideas queue to check if/when we can develop those.
Joel Rees (verified owner) –
Hello. I realize all machines are different, but I’m curious what settings you’re using in the photos that show a print time of around 2 to 2 1/2 hours for those pieces. The standard 0.2mm profile in Cura 4.x and my two other terrain profiles that print at 0.2mm layer height, all with 5% to 10 % infill, they take about 4 and a half hours per piece on my Ender 3. Just wondering if I’m missing something, since that’s a pretty big difference in how long it’s going to take to print. Thanks.
Sam Campbell (verified owner) –
The profile on the gallery picture is for an older version of Cura and not specified for an Ender 3 so is not indicative of the actual time to print. This is the profile we use currently https://www.printablescenery.com/2020/01/21/creality-ender-3-cura-4-4-1-settings/ but it’s set for detail and not speed.
David Aleshire (verified owner) –
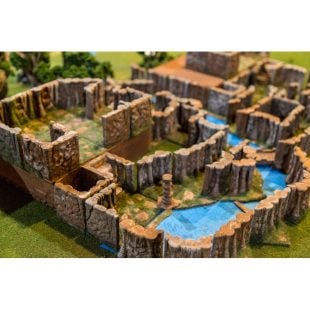
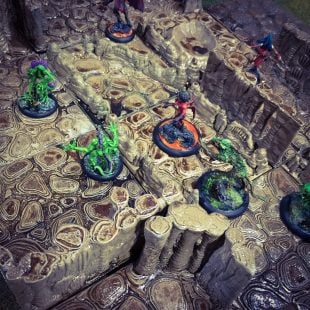
Any chance we could get some tips on how you made/painted/created the water effect in the picture here? it actually looks like painted stones covered with epoxy. ALso, for cavern tiles, is there something that can be attached to the outside of openlock tiles so the outside of a set does not have big gaping holes showing? (if that makes sense)
Nicholas Jebson –
Hey David. With these we made a series of 1ft x 1ft tiles by laying out and gluing down the cavern tiles onto cork boards, making sure that some of the passages on each facing lined up with each other. We then primed in black and dry brushed using the following colors, starting heavy and progressing to lighter layers of dry brushing (all army painter paints) Oak Brown > Leather Brown > Khaki > arid earth. Where we wanted the water we stopped at Leather Brown. We then poured some Epoxy water-effects resin where we wanted pools of water. In the end, we had 6 modular tiles that we could put in whichever combination next to each other we wanted.
As for the OpenLOCK openings, we do have clip-caps in the Clorehaven range but none in the grotto-style. We can add it to the updates and look to get one made.
Benjamin Wallace (verified owner) –
I’m having a hard time visualizing what I need to print in order to make a basic cavern setup. Do you have any tips to help plan out what pieces are needed for a particular build? Currently, I’m just printing 1 or 2 of each wall and a bunch of the floor tiles, but if there is am easier way to translate a map from an adventure to a list of tiles needed, that would be amazing.
Mike –
Hi Benjamin,
I think you’re on the right track to build up a basic set that you can customize your layout with. In the future we hope to have this set loaded into Terraintinker- our partner company that is browser-based software where you can put together OpenLOCK pieces for printing.
Until that is loaded into it (they just finished loading in ALL of Clorehaven) you could try fitting together the cavern pieces in meshmixer (which is free) so you have an idea of how many of each piece to print. Its an easy program to use for sizing up different STL files that we use frequently.
Hope that helps!
Foesmiter (verified owner) –
I purchased this set and downloaded the free Rampage Base Pack. The clip in the base pack does not fit. I printed them at 0.1mm without adjusting the percentage/size. What clip should I be using for this set?
Nicholas Jebson –
Hey Foesmitter, there are some supports at the entrances to the ports that need to be removed before the clip can go in, they are there to help prevent sagging on the top of the mouth of the port while printing. We recommend using some needle-nosed pliers to remove them, then just checking that there isn’t too big a nub leftover (might need to be cleaned up with a knife) before inserting the clip. If the clip is still too tight in the socket then I would recommend scaling it down by 10% and seeing how it does then.
Foesmiter (verified owner) –
Looking for a piece that you can snap into the side of the base to cover the openlock holes of the tiles. Something for aesthetics for the sections that would be on the outside of what you build.